
Client Center: Client Center Accounts (Users) - Add, Edit, and Delete
- Product: 360 Core Client Center
How do I add, view, edit, or delete Client Center accounts?
Every staff person at your institution who will be managing your Ex Libris services will need to have an account in the Client Center. Permissions need be set for areas that the staff person will manage. All account administration is performed in the Account List.
In order to change or even see the account permissions for your Client Center account or for any other account, your account must have the Library Accounts option set to View or View/Edit. Therefore, if you are unable to see the pages in the Client Center that are shown below, or if you can see them but you can't change any of the permissions for your Client Center account nor any other accounts, you will need to find someone at your institution who does have the Library Accounts option set to View/Edit and ask them to change your Library Accounts option to View/Edit also. It is likely that the person who is the Primary Contact will be able to do this.
Alternately, if nobody at your institution can grant permissions, please contact us via the Support Portal.
-
Go to the Client Center.
-
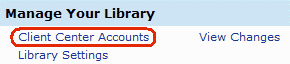
Select the Client Center Accounts link under Manage Your Library:
Example of a Account List:
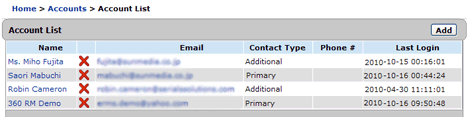
From the Account List, you can add, view, edit, and delete Client Center accounts (Client Center users).
For more information, see:
Add an Account
-
From the Account List, click the Add button.
-
Enter the account information in the fields provided. First Name, Last Name, and Email are required fields. All other fields are optional:
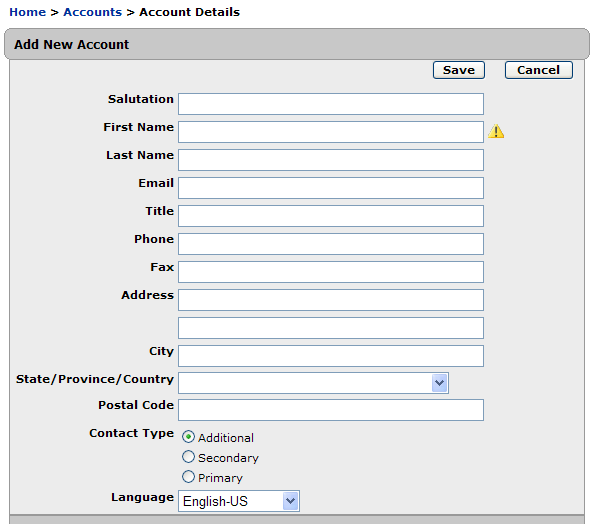
The library staff person who is the Primary contact is contacted by Ex Libris when general issues arise. Each library must designate someone as the Primary contact.
-
A Secondary contact is contacted by Ex Libris when the Primary contact is not available for general issues. We recommend that each library have at least one Secondary contact.
Any other account holder who is not designated the Primary or Secondary contact is registered as an Additional contact.
The Language drop-down selects which interface language this person (account) will used in the Client Center.
-
Click Save to save your changes.
-
An email will be sent to the email address you entered. The email will contain a temporary, system-generated password. When the staff person logs in to the Client Center for the first time (using their email address and temporary password), they will be required to change the temporary password to one they create themselves.
If the staff person doesn't receive this email, have them check their email spam folder. If they still can't find it, then contact us using the Support Portal option near the top of this page.
When you first add an account, all permissions are set to None (even for Primary and Secondary accounts). In other words, the new account (staff person) will not be able to make any changes to Ex Libris services until you set some permissions to View or View/Edit.
View an Account
On the Account List, click the name of the account you want to view. You will then see the Account Details page:
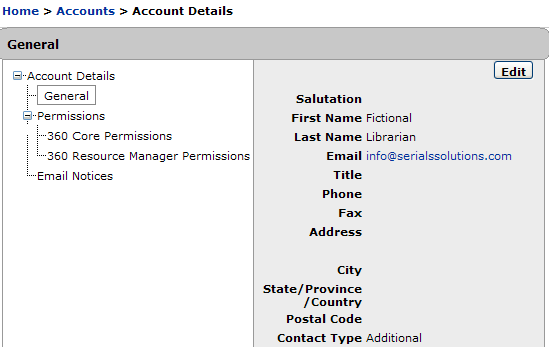
Click 360 Core Permissions in the left-side. The section to the right will display your account permissions: the tools your library may use and the type of access you have to the tools. The image below is an example of what the page will look like. Your particular permissions will likely look different depending on which products and services your library uses:
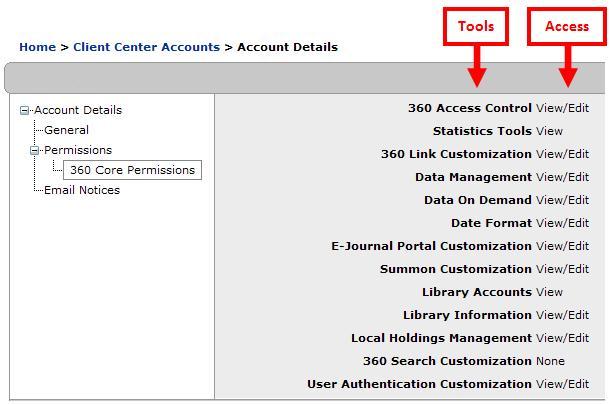
See also: Definitions for each tool and term
If your library subscribes to 360 Resource Manager, you can also see which tools and permissions you have for that service.
Set/Edit Account Permissions
Account permissions affect what a Client Center user (for example, a library staff person) can view in the Client Center and what actions they can perform.
-
From the Account List, click on the name of the account you want to edit.
-
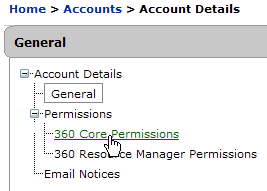
Under Permissions in the left-side navigation tree, click on either 360 Core Permissions or 360 Resource Manager Permissions:
-
Click Edit on the upper-right side.
-
You may see the different permission options, depending on what services your library subscribes to. For definitions of specific types and levels of account permissions, see Account Management Terms and Permissions:
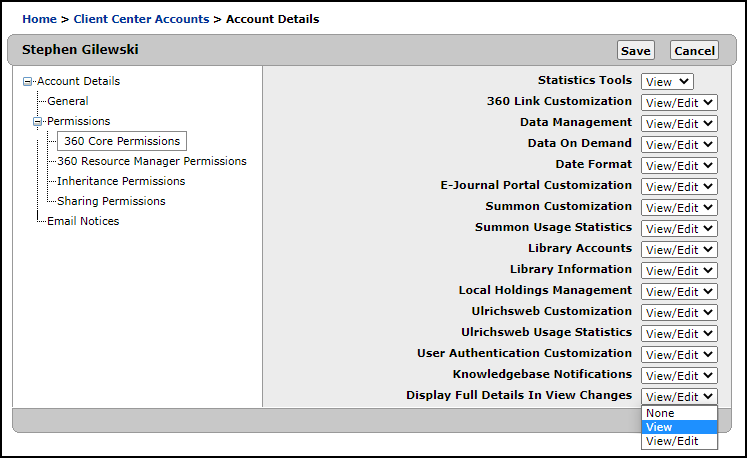 Edit Permissions Page
Make your changes using the drop-down menus:
-
None: Account is not able to view or edit information regarding the permission area.
-
View: Account is only able to view, not edit, information regarding the permission area.
-
View/Edit: Account is able to both view and edit information regarding the permission area.
-
-
Click Save to save your changes.
Edit Account Details
Account details are personal information about the account (client), such as email address, title, phone, etc.
-
On the Account List, click on the name of the account you want to edit.
-
On the Account Details page, click Edit on the upper-right side.
-
Enter your edits in the fields provided.
You cannot change the First Name, Last Name, or Email address using this Account Details screen. You must contact us using the Support Portal option near the top of this page to have these changed.
-
Click Save to save your changes.
Edit Email Notices Permissions
E-mail notices are messages automatically sent to your library's e-mail accounts from Ex Libris.
Currently, as of January 2013, the Email Notices function (Home> Accounts> Account Details) in the Client Center has been disabled for all areas of the application except for 360 MARC Updates. Please select options in the Subscription Preferences page to choose the types of e-mail messages you want to receive for all other product services.
How to Edit Email Notices for 360 MARC Updates
-
From the Account List, click on the name of the account you want to edit.
-
Click Email Notices in the left-side navigation tree.
-
Click the Edit button in the upper-right side of the window.
-
Choose the type of e-mail notification you want to receive from the 360 MARC Updates drop-down list box.
Libraries with 360 Resource Manager can create custom e-mail alert messages for internal library communications. Refer to Resource Manager Alerts for more information.
Delete an Account
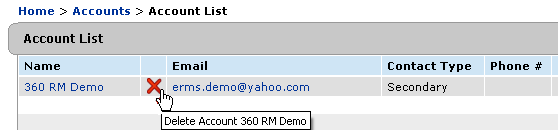
From the Accounts List, click on the red X next to the name of the account you wish to delete:
Beginning with the 2018 Q2 release all personal identifying information is removed when the user account is deleted, leaving only a system-generated identifier. If the deleted user account is associated with an entry on the View Recent Changes page, you will see "Personal Data Removed" rather than the account holder's name.
This change was made to support the European Union's enactment of GDPR. To make the change retroactive and safeguard the personal information of all our clients, we did a one-time clean-up of inactive accounts. If an account was inactive for 60 days or longer, the personal information was deleted, leaving only the anonymous account identifier for audit trail purposes. If your account was deleted, you will need to have an administrator at your library create a new one to restore your access.
-
Date Created: 9-Feb-2014
-
Last Edited Date: 15-Dec-2020
-
Old Article Number: 7513