
Community Folder Structure
While institutions are able to create folders, reports and other entities in the Community, the overall structure is maintained by Ex Libris with input from the community. This overall structure is described below.
To add a new folder to the Community Folder, select the Community folder from the pane, select the New icon ![]() in the top left corner, and select Folder:
in the top left corner, and select Folder:
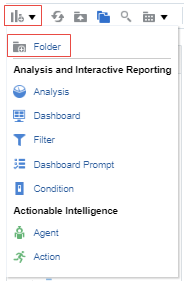
Adding a New Folder
The following is an example of the organizational structure and usage methodology for the reports in the community folder. There are several sub-folders under Shared Folders > Community > Reports:
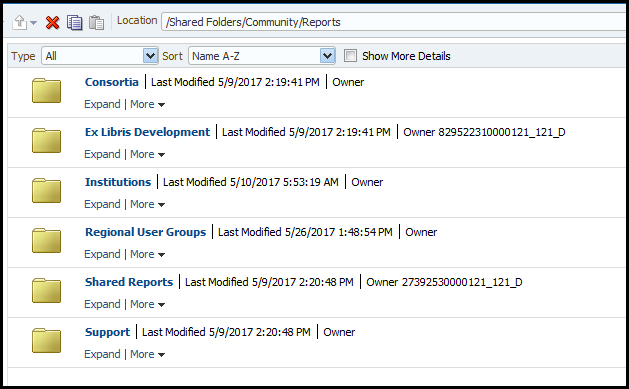
Community > Reports
The following table describes these sub-folders:
| Sub-Folder | Description |
|---|---|
| Consortia | A folder for consortia to open sub-folders as desired and share reports, dashboards, etc. The consortia can agree that all separate institutions can create and access reports from this folder. |
| Ex Libris Development | A folder for Ex Libris |
| Institutions | A folder for institutions to open sub-folders as desired and share reports, dashboards, etc. One institution, for example, might tell another institution to look at the report it made in John Smith College under the Institutions folder of the community. |
| Regional User Groups | A folder for regional user groups to save reports. This may be useful, for example, when preparing for local conferences. |
| Shared Reports | Contains the Reports sub-folder and multiple sub-folders by subject and business area. Each institution can contribute their own reports, prefixing the report by the name of their institutions. For example:
|
| Support | A folder used by support. Each institution can place a report in the support folder and then notify Ex Libris support when sending the support case that the report is in the support folder. |
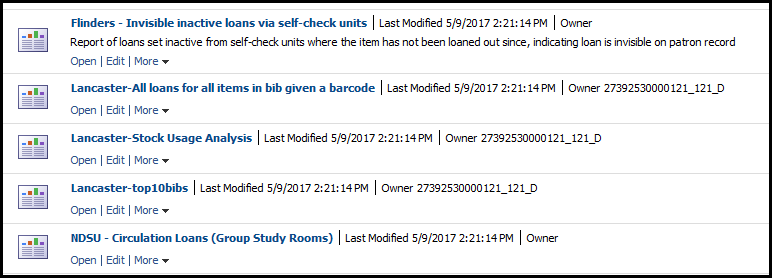
The folder is divided into sub-folders according to business area. Each institution can add its own reports to the relevant sub-folder to share with others. Each institution prefixes the name of the report with its institution name and a dash so that each report is identifiable by the institution that contributed it. For example:
- Flinders - Invisible inactive loans via self-check units
- Lancaster - All loans for all items in bib given a barcode
- NDSU - Circulation Loans (Group Study Rooms)
Reports
Reports that are contributed by Ex Libris are prefixed with ‘Ex Libris’. For example:
- Ex Libris - All active courses (end date later than today and start day earlier than today)
- Ex Libris - All active courses (end date later than today and start day earlier than today) with prompt filter by reading list status
- Ex Libris - All active courses which will end within the next three months
Each institution can browse the folders for reports pertaining to a specific area or perform a search for reports from a specific institution.
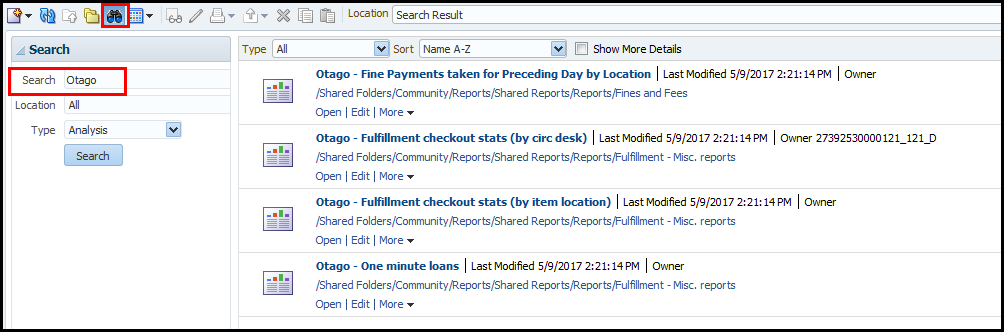
Search Reports
Synchronization of Reports in the Community Folder
All reports placed in the community folder are immediately accessible to all other institutions in the same region. Every Friday each region is synchronized with all other regions, which makes all reports accessible to all institutions in the world.
For example, if on Wednesday institution A in the European data center places a report in the community folder, immediately all other institutions in the European data center are able to access the report. By Friday night, all other institutions in all other data centers in the world are also able to access the report that was added by institution A in the European data center.
Deleting a Folder, File, or other Object from the Community Folder
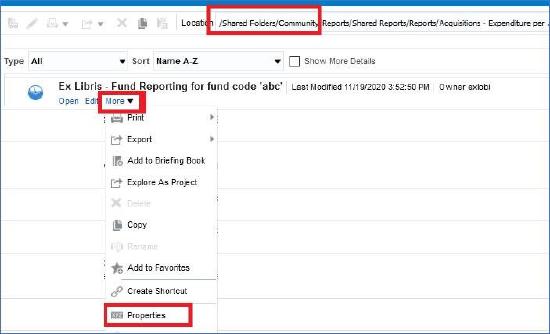
To permanently delete a file, prompt, filter, shortcut, report, or dashboard from the community zone, enter the word DeleteObject in the Description field in the Properties of the object (accessed from the More menu).
- The deletion occurs on Friday when all Data Center community folders are synchronized.
- A folder can be deleted only if it has DeleteObject in the description, and it is empty or all entities under it are also marked for deletion. If the folder is not empty, put DeleteObject in the Properties of all reports in the folder as well as in the Properties of the folder.
- Deleting a folder or report from the community folder is not possible from the More > Delete option. It should be done as described above.
- To move a folder or report in the community folder, first copy it to the new desired location and then delete the folder or report (as described above) from the original location.
For example:
- Select More > Properties:
 Properties
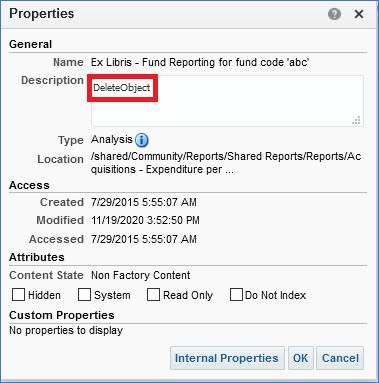
 - Enter DeleteObject in the Description field.
 Description Field
 - Click OK.
The words DeleteObject appear next to the name of the object you want to delete, for example:

Delete Object