
Creating Digital Content in Bulk
To manage digital resources, you must have the following roles:
- Digital Inventory Operator
- Digital Inventory Operator Extended (required for delete operations)
- Collection Inventory Operator (required when adding a new digital representation)
Creating Digital Content in Bulk
The workflow for bulk uploads in Alma consists of the following steps:
- Configuring a digital import profile that tells Alma how to handle digital resources when you perform a bulk upload into Alma. For more information, see Managing Import Profiles.
- Preparing a metadata file of the bibliographic records that the import profile uses when importing the files. For more information, see Preparing the XML Metadata File and Preparing the CSV Metadata File.
- Uploading the files with their metadata to Alma using the Digital Uploader. For more information, see Uploading the Files to Alma.
Uploading the Files to Alma
You use Alma’s Digital Uploader to perform a bulk upload of files into Alma. The titles (bibliographic records) are placed in the collection you select when uploading. For more information on collections, see Managing Collections.
Each group of files that you prepare in Alma for uploading is called an ingest.
Preparing the ingest is performed in four steps:
- Creating an ingest
- Adding files to the ingest (including MD files)
- Uploading the files
- Submitting the ingest
Ingest folder information is stored in your browser's local storage. Therefore, if you access the Uploader from another browser (or from the same browser, but logged on as another user), or if you clear your browser’s local storage, you will not see previously created ingest folders. This does not affect data already submitted.
To upload and submit files to Alma:
- Open the Digital Uploader page (Resources > Digital Uploader).
- From the Insert into drop-down list, select the collection in which to place the files and the digital import profile that defines the way in which the files are imported into the collection.
- Add files to be submitted to Alma by doing any of the following:
- Drag and drop – Add an ingest by dragging and dropping a folder into the List of Ingests and add files to an existing ingest by dragging and dropping them into an ingest in the List of Ingests.
Folder drag and drop is currently supported for Chrome only. Files can be dragged and dropped using all supported browsers.
- With the Add New Ingest box:
- From the Digital Uploader page, select Add New Ingest. The following appears:
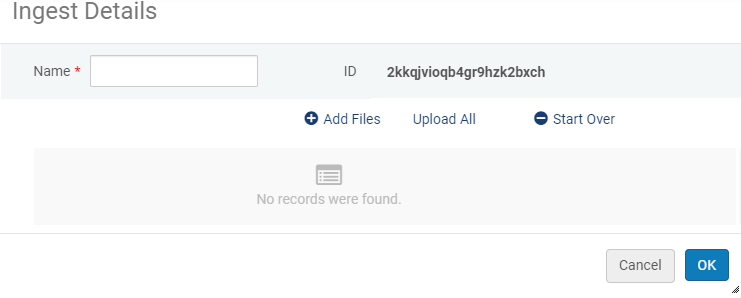 Add New Ingest
 - Enter a name for the ingest.
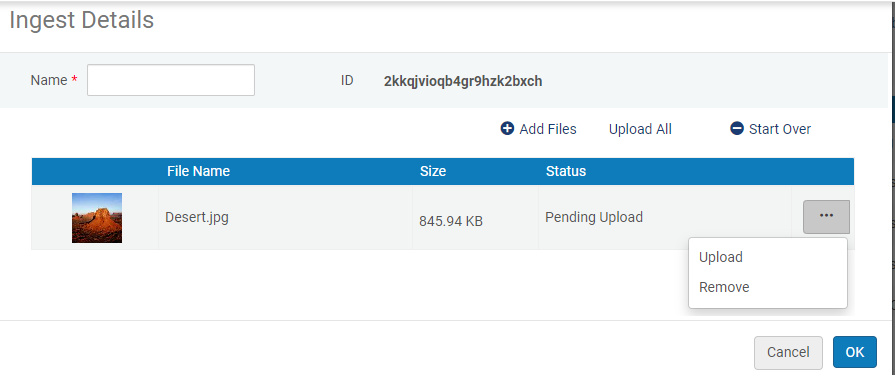
- Select Add Files and select the files that you want to upload. The name of the file, the file size, and, if possible, an auto-generated thumbnail for the following file formats appear in the Ingest dialog box.
- jpg
- png
- mp4
- wav
- m4v
- doc
- ppt
- docx
- pptx
- jpeg2000
- Each file can be a maximum of 1 GB.
- You can include a maximum of 1000 files in a single ingest.
- For ingests above these limits, you can upload directly to S3 storage. For more information, see the Developer's Network.
 Start Ingest
- You can include a thumbnail file in the ingest, which will appear in the repository search results and the Digital Viewer, for example. For more information, see Adding a Thumbnail File to the Ingest.
- You can include a captions file in .vtt format with the same name as the video file in the ingest to display captions when playing the video. For more information, see The New Digital Viewer.
- Add one or more metadata files for the ingest (see Preparing the XML Metadata File or Preparing the CSV Metadata File).
If you do not add a metadata file to the ingest, a warning icon
 appears in the list of ingests.
 - To upload one file in the ingest, select Upload. To upload all of the files in the ingest at one time, select Upload All. To remove the files and start over, click Start Over.
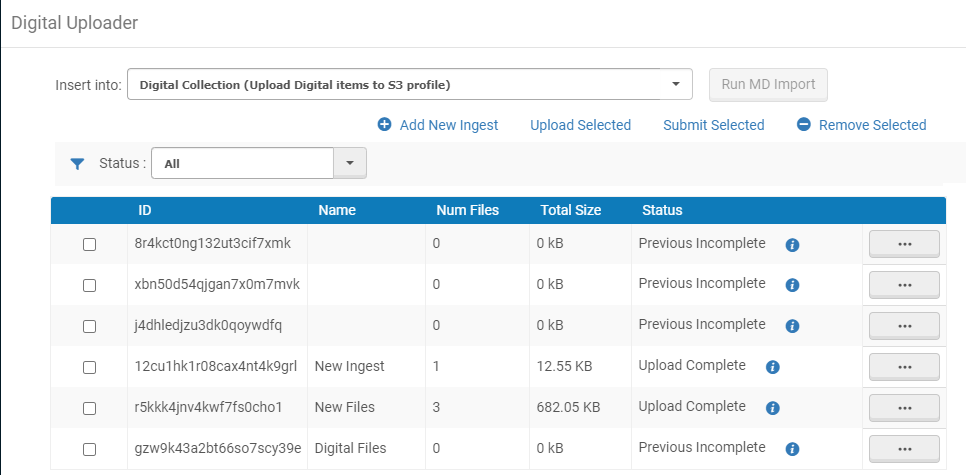
- Select OK to return to the Digital Uploader page. See Digital Uploader.
- From the Digital Uploader page, select Add New Ingest. The following appears:
- The ID of the ingest
- The name of the ingest
- The number of files in the ingest
- The total size of the ingest
- The status of the ingest. The following are possible statuses:
- New – The ingest does not contain any files.
- Pending Upload – The ingest has not been uploaded.
- Upload Completed – The ingest has not been submitted.
- Submitted – The ingest has been submitted.
- To remove a file from an ingest, select the action button from the row actions list for the ingest and then select Remove.
- To remove an ingest, select the ingest and select Remove Selected.
- Drag and drop – Add an ingest by dragging and dropping a folder into the List of Ingests and add files to an existing ingest by dragging and dropping them into an ingest in the List of Ingests.
- To upload ingests, select the ingests and select Upload Selected.
- To submit ingests for processing, select the ingests you want to submit and select Submit Selected.
- The submit step is required so that you can continue to safely add files to your ingest, which is not processed until you select Submit.
- The Metadata Filename field in the import profile associated with the ingest must contain the correct path and file name of the metadata file for the ingest to be submitted.
- Typically, the MD Import job runs on a schedule. To run the MD import job manually, select Run Import Job.
The MD Import job runs and the ingest is processed.
Files older than 30 days (with the exception of lock files) are deleted by the weekly maintenance job.
Preparing the XML Metadata File
In order to use the Digital Uploader to perform a bulk upload of files, you can prepare an XML file in either MARC or DC format with metadata for the bibliographic records. Each metadata file can contain information for multiple bibliographic records. Alma creates the bibliographic records and representations for the files with the information in this metadata file.
The record elements in the file should be nested in a single collection element.
The type of information that is required in the metadata file depends on how you configured the import profile. For example, if you configured the import profile to look for the file name in MARC field 856 subfield u, the metadata file must contain this information in this field.
If the bibliographic record contains collection information, the record will be assigned to the collection indicated in the record. Otherwise, the record will be assigned to the collection selected as the Default collection assignment in the digital import profile.
MARC XML Collection Assignment
For MARC records, if you activate a normalization process that contains the addBibToCollectionNormalizationTask, the import assigns the record to a collection according to the following rule priority:
- If the MARC 787$w contains a valid Alma collection ID, the record is assigned to this collection.
- If the MARC 787$o contains the values of the external system and external ID fields, as configured in an existing Alma collection, the record is assigned to this collection. The field must contain the system and ID in the following format: ({system}){ID},for example, (Rosetta)123454321 (similar to the 035 field structure).
- If the MARC 787$t contains the name of a top-level Alma collection, the record is assigned to this collection.
- If none of the above apply, the record is assigned to the Alma collection defined as the default for the import profile.
When uploading a metadata file with a single record, no 856 field is required. The created record includes all files that are in the ingest folder.
The following is an example of an XML metadata file:
<?xml version="1.0" encoding="UTF-8" ?>
<collection>
<record>
<leader>01139cam a2200277 a 4500</leader>
<controlfield tag="001">ocm27832725113 </controlfield>
<controlfield tag="003">OCoLC</controlfield>
<controlfield tag="005">20131108731707.4</controlfield>
<controlfield tag="008">970910r19451931pk b 000 0 eng </controlfield>
<datafield tag="035" ind1=" " ind2=" ">
<subfield code="a">(OCoLC)27832725113</subfield>
</datafield>
<datafield tag="100" ind1="1" ind2=" ">
<subfield code="a">Representation of rec 1</subfield>
<subfield code="b">jpg files</subfield>
</datafield>
<datafield tag="245" ind1="1" ind2="2">
<subfield code="a">Record 1 - Civil war</subfield>
</datafield>
<datafield tag="856" ind1=" " ind2=" ">
<subfield code="a">Soldier on a Horse</subfield>
<subfield code="u">civil war.jpg</subfield>
</datafield>
<datafield tag="856" ind1=" " ind2=" ">
<subfield code="a">North and South</subfield>
<subfield code="u">civil2.jpg</subfield>
</datafield>
<datafield tag="650" ind1=" " ind2="0">
<subfield code="a">Digital items loaded to Amazon</subfield>
</datafield>
</record>
</collection>
The following are examples of using the MARC 787 field to assign a record to a collection:
- The following record:
<datafield tag="245" ind1="1" ind2="4">
<subfield code="a">The politics of our lives :</subfield>
<subfield code="b">the Raising Her Voice in Pakistan experience /</subfield>
<subfield code="c">Jacky Repila.</subfield>
</datafield>
<datafield tag="787" ind1=" " ind2=" ">
<subfield code="w">8131549940000121</subfield>
</datafield>Will be added to this collection: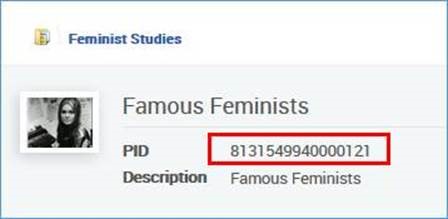 Example 1
 - The following record:
<datafield tag="245" ind1="0" ind2="0"><subfield code="a">New South Asian feminisms :</subfield><subfield code="b">paradoxes and possibilities /</subfield><subfield code="c">edited by Srila Roy.</subfield></datafield><datafield tag="787" ind1=" " ind2=" "><subfield code="w">8131549960000121</subfield></datafield>Will be added to this collection:
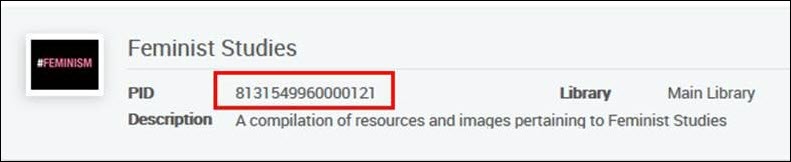 Example 2
DC XML Collection Assignment
For DC, if you activate a normalization process that contains the addBibToCollectionNormalizationTask, Alma looks at the dc:relation and dcterms:isPartOf fields. Alma checks each of these fields in the following order and assigns the imported records to that collection.
- By internal collection ID:
<dc:relation>alma:{INST_CODE}/bibs/collections/{COLLECTION_ID}</dc:relation>
- By external collection ID:
<dc:relation>any text</dc:relation>
- By collection name (top-level only):
<dc:relation>any text</dc:relation>
- By default collection (only if 1-3 do not match an existing collection).
MODS XML Collection Assignment
Create the Add Bib to Collection normalization rule for MODS. This works like it does for DC, allowing assignment by Collection ID, Collection External ID, and Collection Name:
- <relatedItem@type="host"><identifier>alma:{INST_CODE}/bibs/collections/{COLLECTION_ID}</identifier></relatedItem>
- <relatedItem@type="host"><identifier>{external_id}</identifier></relatedItem>
- <relatedItem@type="host"><identifier>{collection_name - top level only}</identifier></relatedItem>
Preparing the CSV Metadata File
To use the Digital Uploader to perform a bulk upload of files, you can prepare a CSV file with metadata for the bibliographic records. The CSV file is inventory-based, meaning each row represents one representation. Each row can have full bibliographic information (which generates a new bibliographic record) or may reference an existing bibliographic record, matched by match rules, and add digital inventory to the referenced bibliographic record. File-level content is included in the same row, containing the full file path (relative to the ingest folder) and an (optional) label. Multiple files per representation are supported. Multiple representations per bibliographic record are represented by two rows containing the full bibliographic record (with rules to prevent the creation of multiple records). In this case the group_id column must be used.
The CSV file must be in UTF-8 encoding (not UTF-8-BOM).
When importing metadata, you can provide CSV records with an external system and ID to assign them to a collection, in the collection_external column (with the same format as with MARC records). The field is repeatable.
The CSV can contain four types of fields:
- Collection – reserved for collection assignment. Contains the name or ID of a collection (collection_name is top-level collection only) to which the bibliographic record is assigned. This field is optional. (If collection fields do not exist, the bibliographic record is assigned to the default collection defined in the MD import profile). Repeatable.
If the target format is set to MARC in the import profile, the CSV heading names are mapped to the MARC fields as follows:
- collection_name – 787 t
- collection_id – 787 w
- collection_external – 787 o
If the target format is set to Dublin Core in the import profile, the CSV heading names are mapped to the dc:relation field.You must set the normalization rule Add BIB to Collection in the import profile for the import job to assign the collection according to these fields. Otherwise the default collection is used. - Bibliographic record-level fields – There are two sub-types:
- mms_id and originating_system_id – used for matching records to existing records. Both fields may exist, if you want to match on mms_id and add an originating_system_id (this is handled by rules). mms_id is non-repeatable.
- Other bibliographic record fields – map to target MD format according to the table on the developer's network (https://developers.exlibrisgroup.com/alma/integrations/digital/almadigital/ingest). See the table for repeatability details. (Non-repeatable fields are marked as NR.)
- Representation-level fields – maps to representation properties. Reserved fields are non-repeatable (except rep_note).
- File-level fields. Repeatable.
CSV content should be created and handled according to Excel parsing. For example, fields with commas must be surrounded by quotes:
War and Peace,“Tolstoy, Leo”,1862,...
All characters supported in MARC XML are supported in csv.
For an example of a CSV file, see Example CSV.
CSV to Dublin Core Mapping
When you select CSV as the physical source format and Dublin Core as the target format, Alma converts the information in the CSV record to Dublin Core format. Most of the matching is intuitive, for example: contributor maps to dc:contributor. However, note the following:
- MMS_ID should be used for matching an existing Alma MMS ID only. The syntax is: alma:{INST_CODE}/bibs/{MMS_ID}. This field is not stored as part of the imported record.
- ISBN and ISSN map to <dc:identifier xsi:type="dcterms:URI"> with the prefix urn.
- Originating_system_id maps to dc:identifier.
- For collections, collection_id is mapped to dc:relation in the following format: <Inst-code>/bibs/collections/<collection id>
- All fields are repeatable and none are mandatory.
- DCMI type vocabulary is recommended for type (with the exception of collection, which should not be used).
- Mapping multiple representations for a single bibliographic record is supported by assigning the representations the same group_id.
- Encoding schemas and languages are supported. The ISO 639-1 format is required for a 2 letter language code and ISO 639-2/3 for a 3 letter language code.
The syntax is the following:
- encoding only – property.schema (for example, dc:subject.dcterms:LCSH)
- languages only – property lang=\{2 or 3 letter code} (for example, dc:subject lang=en)
- both encoding and languages – property.schema lang=\{2 or 3 letter code} (for example, dc:subject.dcterms:LCSH lang=en)
Preparing the Excel Metadata File
For information on preparing the Excel metadata file, see Importing Records with CSV or Excel Files.
Adding a Thumbnail File to the Ingest
You can add a thumbnail file to the ingest (in jpg, png, gif formats only) with the same name as the digital file with the .thumb extension. For example:
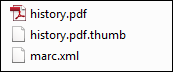
Thumbnail File
This allows Alma to store the .thumb image as a thumbnail for the respective file. The thumbnail will appear in the repository search results, in the Digital Viewer, and in Primo.
Adding a Full Text File to the Ingest
You can add a full text file to the ingest in either plain text or ALTO format with the same name as the digital file with a .text.plain or a .text.alto extension. This allows you to perform text searches for the image in the Book Reader Viewer.