
Working with Rules
- Cataloger
- Cataloger extended
- Catalog Manager
- Catalog Administrator
- Working with Normalization Rules
- Working with Merge Rules
- Working with Indication Rules
- Working with Brief Record Levels
- Working with Authority Headings Rules
- For more information on rules, see Presentations and Documents - Rules
Menu Bar of the Rule Area

| Action | Description |
|---|---|
| Save Record (Ctrl+S) |
Saves the changes in the repository.
|
|
New Menu The New menu presents a list of rules types that you may want to create.
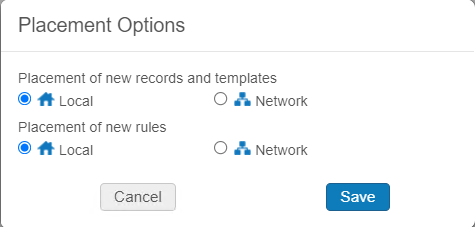
For Network Zone consortia members, users can control whether to save new rules locally or in a network institution. To make this selection, open the Records or Templates area, and go to New > Placement Options. Note that this selection is per user.
 |
|
| Normalization | Select to create a normalization rule. For more details, see Working with Normalization Rules. |
| Merge | Select to create a merge rule. For more details, see Working with Merge Rules. |
| Indication | Select to create an indication rule. For more details, see Working with Indication Rules. |
| Brief level | Select to create a brief level rule. For more details, see Working with Brief Record Levels. |
| Authority headings | Select to create an authority heading rule. For more details, see Working with Authority Headings Rules. |
| Normalization (Research) | Select to create normalization rules for Esploro. This option appears only when Exploro is enabled in the system. For more details, see Managing Asset Normalization Rules. |
| Normalization (Discovery) | Select to create normalization rules for Primo VE. This option appears only when Primo-VE is enabled in the system. For more details, see Working with Normalization Rules. |
| Rule Actions Menu | |
| Edit |
Select to edit the rule (not available for out-of-the-box (default) rules and Community Zone rules). Enabled for Private rules and Shared non-default rules. |
| View | Select to view the rule in cases when you cannot edit it. |
| Duplicate | Select to duplicate the rule, in order to modify and create another rule based on this rule. |
| Contribute to CZ | Select to contribute this rule to Community Zone (if you have this capability). The contributed rule appears both in the Shared folder and in the Community Zone folder. |
| Properties | Select to view and modify the rule properties, such as its name. |
| Delete |
Select to delete the rule. Enabled for local rules and CZ rules contributed by your institution |
| Test external records |
Select to save and test the rule in Primo-VE. For details, see Testing Normalization Rules for External Data Sources. Enabled for Institution rules. |
| Search & Browse menu | |
| Browse Shelf Listing (Alt+C) | Displays the following options in order for you to do a call number browse:
This functionality is also available by selecting Resources > Cataloging > Browse Shelf Listing. When you select the link in the Description column for a call number, the bibliographic record opens in the Metadata Editor for editing. When you select the Holdings link in the Level column for a call number, the holdings record opens in the Metadata Editor for editing. The way in which this browse works cannot be configured.
|
|
Browse Bibliographic Headings (Alt+H) |
Use this option to view bibliographic headings determined by the following search criteria that you select:
See Browsing Bibliographic Headings for more information. This capability can also be accessed from Resources > Cataloging > Browse Bibliographic Headings. |
| Search Resources (Alt+E) | Exclude the record from being searched by external systems. |
.