
Using Scan In
The Scan In feature in Alma Mobile enables you to enter barcode information in one of the following ways:
- Use the camera feature on your mobile device
- Use a bluetooth-enabled, hand-held scanner that you have paired with your mobile device
- Enter the barcode manually
After configuring your Scan In settings, you can:
- Automatically have the system generate print slips for the items in your Pick Up from Shelf list (see Using Pick Up from Shelf for more information)
- Identify items used in-house
- Display more information for scanned items
- Restore an item to its permanent location from a temporary location and check for requests
Your configuration settings can be easily changed to dynamically meet the requirements that you have for the items that you are processing.
Configuring Scan In Settings
Scan In Settings provide the following options:
-
Scan In Items
- Automatically print slip - When you scan the barcode, Alma creates a print slip automatically. This is commonly used with the Pick Up from Shelf capability on your mobile device.
- Register in-house use - Use this setting to identify items that have been browsed within the library when you scan the item's barcode.
- More Info - Select this setting to display the request information about the scanned items that appear in the Scan-In page list.
-
Restore
- Check Requests - Use this option to check for requests when you restore an item to its permanent location.
To configure Scan In settings:
- After you have logged in to the Alma Mobile app, tap the Scan In icon. The Scan In page appears.
-
Tap the gear icon. The Scan In Settings pane appears.
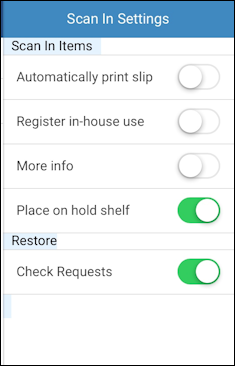 Scan In Settings Pane
 -
Slide to turn on one or more of the following:
- Automatically print slip
- Register in-house use
- More Info
-
Place on hold shelfSimilar to the Yes/No options for Place directly on hold shelf in the web-based version of Alma, turning on the Place on hold shelf option in Alma Mobile places the item on the hold shelf when scanned and a letter is sent to the patron indicating that the item is ready for pick up.Turning off the Place on hold shelf option in Alma Mobile identifies the item for on hold shelf processing. After the hold shelf processing is complete, the item needs to be scanned again to be placed on the hold shelf (with the appropriate options selected).The Place on hold shelf option in Alma Mobile is only presented when the circulation desk from which you are processing items is configured in the web-based version for Has hold shelf processing. The Place on hold shelf option applies to both the Scan In Items and the Restore functionality.
- Check Requests
- When you are finished, tap the gear icon or anywhere outside the Scan In Settings pane to return to the Scan In page.
Working with Scan In
With the Alma Mobile Scan In feature, you can scan (or enter) item barcodes and perform actions on the items that you have scanned into the Scan In list.
To work with the Scan In feature:
-
Select the Scan In tab.
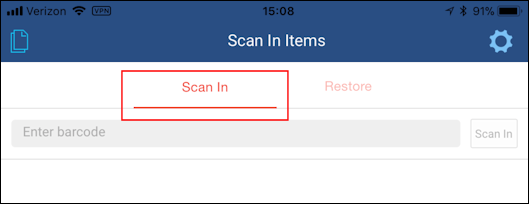 Scan In Tab
 -
Scan a barcode.When you scan a barcode, the system automatically checks the database for the barcode and displays the item details that it finds or identifies the barcode as Not Found.If you manually enter a barcode, you need to tap Search to have the system check the database for the barcode.
- Make the barcode field the focal point.
- Use a bluetooth-enabled, hand-held scanner that has been paired with your mobile device or tap the camera icon to use your mobile device's camera to scan the barcode.
-
Perform item actions.
- In an item row, swipe at the right edge from right to left to display the actions that you can perform on individual items.
 Item Actions
 - Select Clear or More (to display additional actions). More displays actions from the Scan In Settings options that you may not have already selected as a default action.
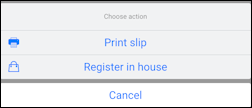 More Actions
 - Tap the action that you want to perform for the row item.
- If you choose to take no action, swipe the row from left to right to remove the action buttons.
- In an item row, swipe at the right edge from right to left to display the actions that you can perform on individual items.
Managing Your Scan In List
With the Pages icon, you can selectively delete items from the Scan In List or you can choose to delete all the items in the Scan In list.
To manage your Scan In list:
-
Tap the the Pages icon.
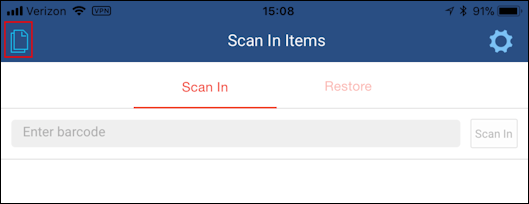 Pages Icon
 -
Tap one of the following options:
- Selective Clear
- Clear All
- Cancel
When you tap Selective Clear, delete icons appear next to each item in the list.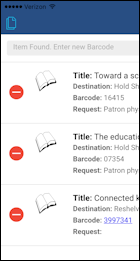 Selective ClearTo remove the delete icons from the display, tap Selective Clear, again.
 - Delete items as needed.
Working with Restore
For items that you want to restore to their permanent locations, use the Restore feature.
To restore items:
-
Select the Restore tab.
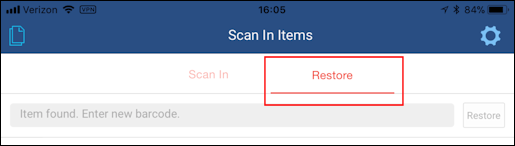 Restore Tab
 -
Scan a barcode.
-
If you enabled the Check Requests setting, the system checks for requests; and if a request is found, the system responds with the following message.
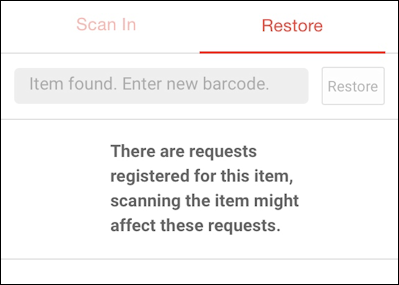 Requests Found MessageIf you decide to continue with restoring the item to its permanent location, swipe to the left on the item, tap Confirm Restore, and select OK.
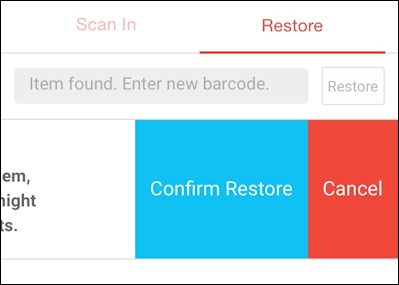
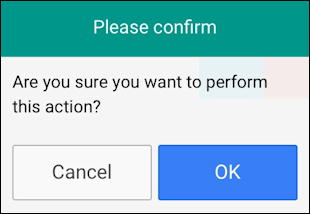 Confirm Restore Processing
 -
If the Check Requests setting is not enabled or you choose to Confirm Restore regardless of any requests, the item is restored to its permanent location. Details of the restored item are provided in the Scan In Items list.
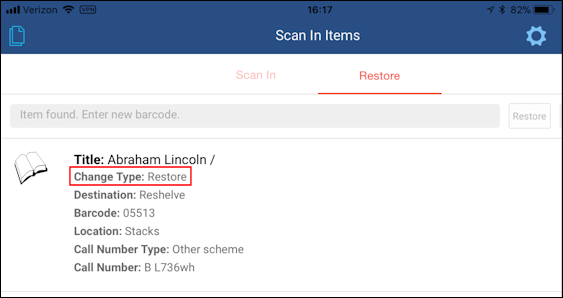 Restored Item Details
-
- Repeat these steps to restore additional items.
Working with Alma Mobile Settings
See Working with Settings for information about customizing your Alma Mobile settings.