
Resolving Import Issues
To resolve issues related to an import job, you must have one of the following roles:
- Purchasing Operator
- Purchasing Manager
- Catalog Manager
- Catalog Administrator
This chapter includes:
- Import Profile Types
- Managing Import Profiles
- Importing Records Using an Import Profile
- Monitor and View Import Jobs
- Resolving Import Issues (You are here)
- Importing Records with CSV or Excel Files
Resolving Import Issues
The following types of import issues can arise during the import process:
- Matching – The imported record matches an already existing record in the database. When this occurs, the issue is resolved according to the Match profile configured during import profile creation (see Configuring/Editing an Import Profile: Match Profile).
For details on resolving matching records, see Resolving Matching Issues.
- Validation – During the import process, the imported records are checked according to the validation task chain selected during import profile creation (see Creating/Editing an Import Profile: General Profile Information). If the check determines that an issue exists as an Error and not as a Warning, the file is sent to the Validation tab of the Resolve Import Issues page. Whether the issue is an Error or a Warning is determined according to the severity profile chosen during profile creation. For information on configuring validation exception (severity) profiles, see Working with Validation Exception Profiles.
It is not possible to fix records that cannot be validated. You can either force the import of the record or discard it. You also can force the import of the entire file or abort the import.For details on resolving validation issues, see Resolving Validation Issues.
- Errors – Something unexpected has happened which cannot be resolved. These errors include any problems with file data not related to matching or validation of records. The Errors tab of the Resolve Import Issues page displays only the files with these issues.
For details on viewing error records, see Viewing Import Errors.
Resolving Matching Issues
A matching discrepancy occurs when the imported record matches an already existing record in the database. When this occurs, the issue is resolved according to the Match profile handling method configured in the import profile (see Creating/Editing an Import Profile: General Profile Information). The following handling options are available:
- Manual – The file is sent to the Matching tab of the Resolve Import Issues page, where you can resolve the problem. For details, see Editing Matching Records.
- Automatic – The matching record is processed automatically, according to the Match Action options chosen when defining the import profile (see Creating/Editing an Import Profile: General Profile Information).
If either Merge or Overlay was defined and there are multiple record matches, the job reverts to manual operation where you manually choose which matching record to merge/overlay.
To resolve matching issues:
- On the Resolve Import Issues page (Acquisitions > Import > Resolve Import Issues or Resources > Import > Resolve Import Issues), select the Matching tab and locate the import job you want to view. (See Types of Import Profiles for information regarding the profile types that appear.)
You can also access the Resolve Import Issues page by selecting Manual Handling Required on the Monitor and View Imports page.You can also access this page with pre-defined filters by selecting one of the following tasks in the Task List in the persistent menu (see Tasks in the Task List)
- Import - match issues
- Import - validation issues
- Import (EOD) - match issues
- Import (EOD) - validation issues
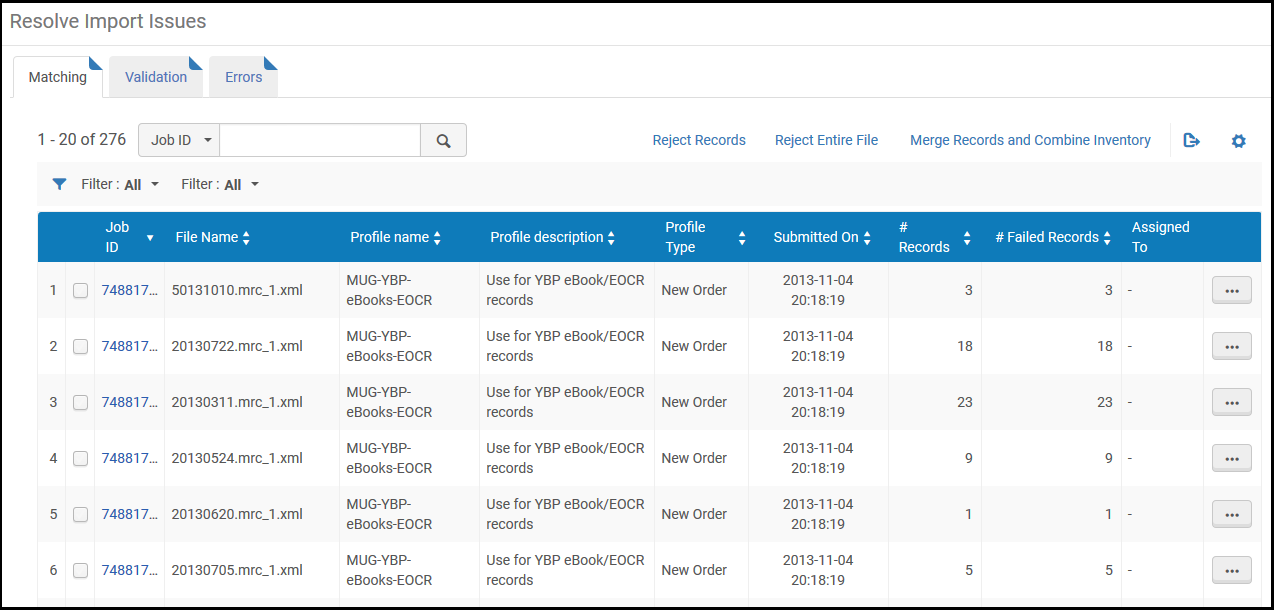 Resolve Import Issues Page – Matching Errors
 - Select an action from the row actions list:
The available actions depend on the user’s role.
- View records (see Viewing Matching Import File Records)
- Edit (see Editing Matching Records)
- Release assignment - Release the assignment of this issue.
- Do Not Import – Discard the records with matching errors, and import the valid records in the file.
- Reject File – Discard the entire file containing records with matching errors. The file is removed from the Handle Import Validation Errors page.
To perform multiple Do Not Import and Reject File actions on imported file records, on the Resolve Import Issues page select the issues on which you want to perform the actions and select Reject Records or Reject Entire File.
To merge records and combine inventory for duplicate multi-match records from multiple files from a single import job, on the Resolve Import Issues page select the files from the single import job and select Merge Records and Combine Inventory. See Merging Records and Combining Inventory for more information.
Viewing Matching Import File Records
To view the records within the import file that match existing Alma records: on the Resolve Import Issues page, select View records in the row actions list. The Handle Matching page opens. You can then determine whether you want to import these matching records.
On the Handle Matching page, you can filter the list of results by Handling Type, as follows:
- Manual – Manual handling for matches was configured during import profile configuration (see Configuring New Import Profiles)
- Multiple Matches Delete – The delete failed due to matching records
- Multiple Matches EOD – The EOD import failed due to matching records
- Multiple Matches Merge – The merge failed due to matching records
- Multiple Matches Overlay – The overlay failed due to matching records
The Handle Matching page displays the following columns in the Imported Records to Handle section:
- Row number
- Record ID
- Author
- Short Title
- Publisher
- Date
- Handling Type – The handling option for matches selected during import profile configuration (see Creating/Editing an Import Profile: General Profile Information).
- Action / View Matches
To view matching records:
On the Handle Matching page, select the record ID link or View Matches in the row actions list for the record whose matches you want to handle.
- If there is only one record that matches, the Side-By-Side Matching page appears:
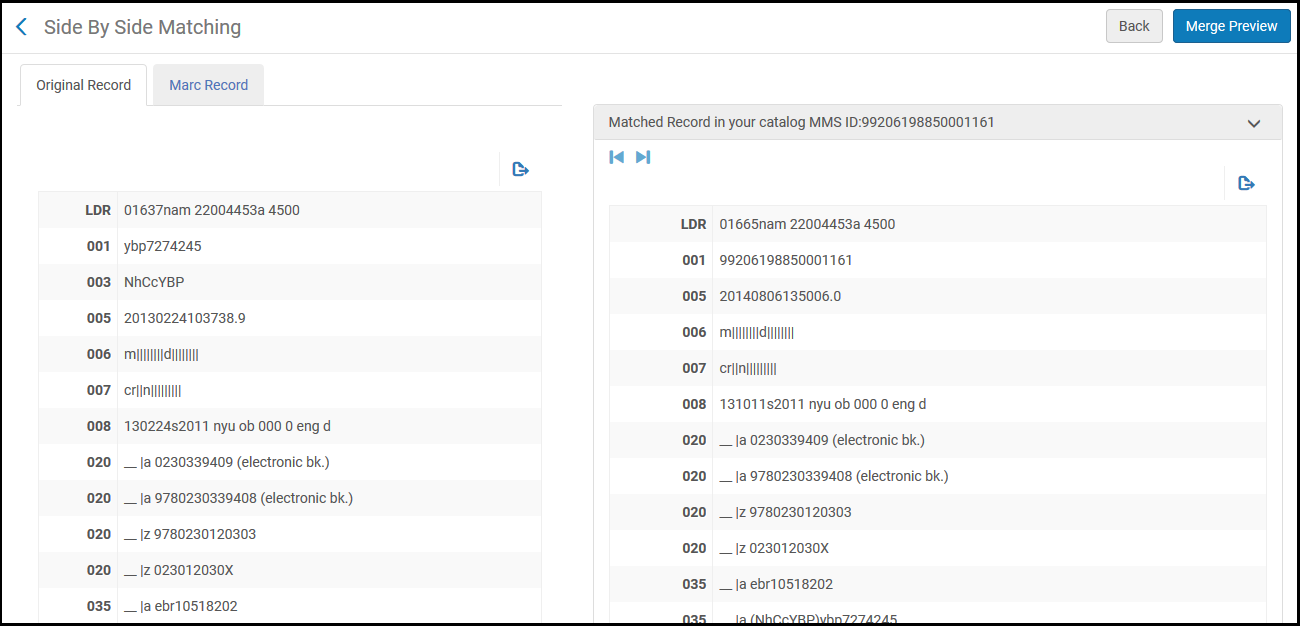 Side By Side Matching PageThe Side-By-Side Matching page displays the Imported Record Details on the left side of the page and the Matched Record on the right side of the page.
 - If there is more than one record that matches, the Import Record Matches page appears.
The left panel of the page displays the Imported Record Details, and the right panel displays the Matched Records in your catalog.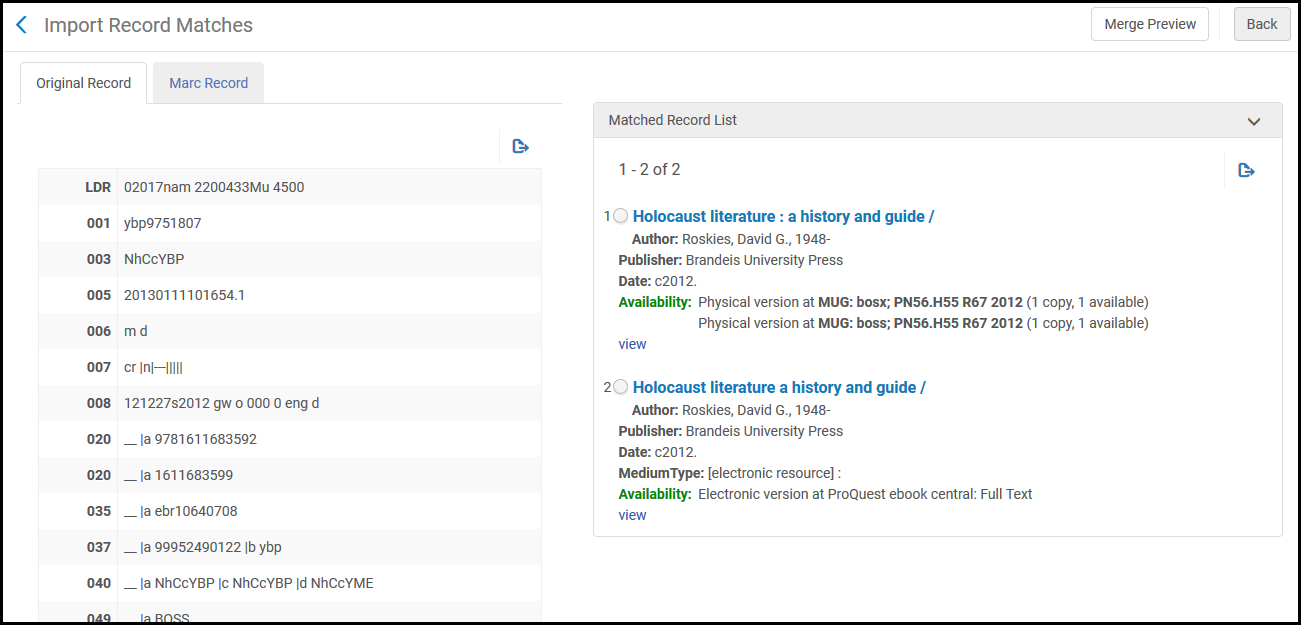 Import Record Matches PageIn the Matched Records List section, select the record that you want to match with the new record.
To preview how the record would look following an import, select a record in the Matched Record List (if there was more than one match) and select Merge Preview. The Merge Preview page appears. Select Back to return to the previous page.

Merged Preview Page
Editing Matching Records
To edit the records within the import file that match existing Alma records, on the Resolve Import Issues page, select Edit in the row actions list. The Handle Matching page opens.
When an operator works on an import issue, that issue becomes assigned to them.
To edit matching records:
- On the Handle Matching page, select the record ID link or View Matches in the row actions list for the record whose matches you want to handle. See Viewing Matching Import File Records for details. Additional actions appear on the Side-By-Side Matching page or Import Record Matches page.
Select Approve Import on the Handle Matching page to approve the import without viewing the records. The record is imported, but it may be a duplicate of an existing record. For information on monitoring imports, see Monitor and View Import Jobs.
- On the Side-By-Side Matching page or Import Record Matches page, select an action, as follows:
- Import – Import the record, although there may be a duplicate with an existing record.
- Do Not Import – Discard the new record.
- Merge – Merge the records according to the options chosen in the profile configuration. The history of all linking performed for this record (for example, attached PO lines) is retained. For details on configuring import profiles, see Managing Import Profiles. Note that if this option cannot be performed, as in the case of importing records marked for deletion, it is unavailable.
- Overlay – Discard all bibliographic data in the old record and replaces it with the data in the new record. Like merge, the history of all linking performed for this record is retained.
- Delete – Delete the bibliographic when it has no inventory associated with it.
- Use NZ Record (member institution implementing a Network Zone, only) – Discard the new record and instead use the record from the Network Zone.
Merging Records and Combining Inventory
New records might fail to import when multiple matching duplicate records exist in the Alma database. To handle these records, you can configure the "Merge Records and Combine Inventory for Multi-Match" section in the import profile (see Creating/Editing an Import Profile: Match Profile). This allows you to merge records and combine inventory when importing records.
When a file was produced using an import profile configured for "Merge Records and Combine Inventory for Multi-Match", then the action Merge Records and Combine Inventory is available for the file on the Resolve Import Issues page. If the import job that you ran was large and resulted in multiple files appearing on the Resolve Import Issues page, select the checkbox at the beginning of each row for these files and select Merge Records and Combine Inventory in the page actions list.
To merge records and combine inventory:
- On the Resolve Import Issues page (Resources > Import > Resolve Import Issues), locate the file(s) containing the duplicate records that you want to resolve in order to import a new record.
- Select Merge Records and Combine Inventory in the row actions list for the file, OR Select multiple files from the same import job and select Merge Records and Combine Inventory in the page actions list.
The Merge Records and Combine Inventory page action works only with multiple files from the same import job.A confirmation message appears:
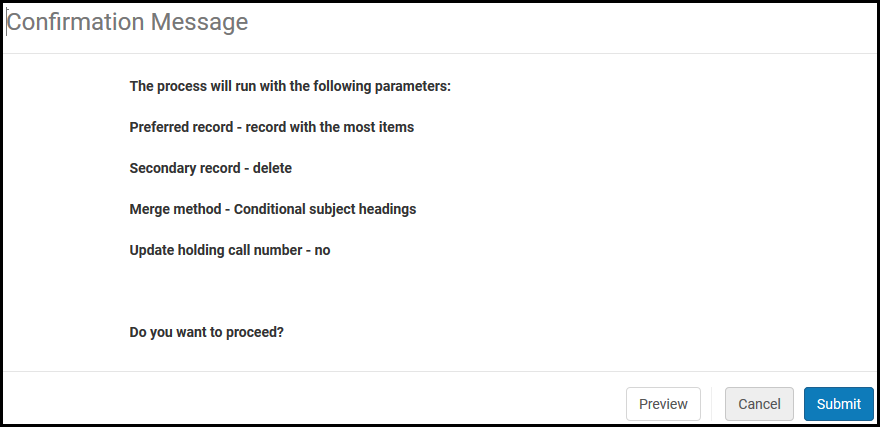 Merge Records and Combine Inventory confirmation messageThe confirmation message displays the settings that you selected in the import profile (that generated this failed import file). You can Preview the changes in Excel format, Cancel your request, or Submit the job to resolve the issues.
 - Optionally, select Preview to preview the changes (in Excel format) that will be implemented once you click Submit.
Each set of duplicate records is identified by a group number. For each group, the Operation column identifies the preferred record and the records to be merged with this preferred record. When the merge is complete, only one record will remain in the Alma database. This record will be merged with the new record that you are importing (unless you selected the Suppress or Keep it options in the import profile).
 Preview Multiple Matching Duplicate Record ChangesThere may also be some records identified as 'Ignore' in the Operation column. This may occur when the record was suppressed or if there was a lapse in time between running the original import job and working with the Resolved Import Issues page, and some records may no longer exist.
 - When you are ready to proceed, select Submit. The merge job runs. For more information, see Viewing Running Jobs and Viewing Scheduled Jobs.
- To view the report details, select the link for Merge records and combine inventory report in the job reports. Similar to other multi-match reports, this report shows the preferred and secondary (merged) records. In the Message column, the message for the secondary (merged) record shows the number of physical items, portfolios, PO lines, and so forth, that were merged with the preferred record.
 Merge Records and Combine Inventory Report
Resolving Validation Issues
Imported records are validated according to the validation task chain defined in the import profile (see Managing Import Profiles).
For jobs/records with validation issues, you can:
- Force the import
- Choose not to import
- Reject the file
- Create an XML file of the failed records
To resolve validation issues:
- On the Resolve Import Issues page (Acquisitions > Import > Resolve Import Issues or Resources > Import > Resolve Import Issues), select the Validation tab. The Resolve Import Validation Errors page appears.
You can also access the Resolve Import Validation Errors page by selecting Manual Handling Required in the Status column on the Monitor and View Imports page.
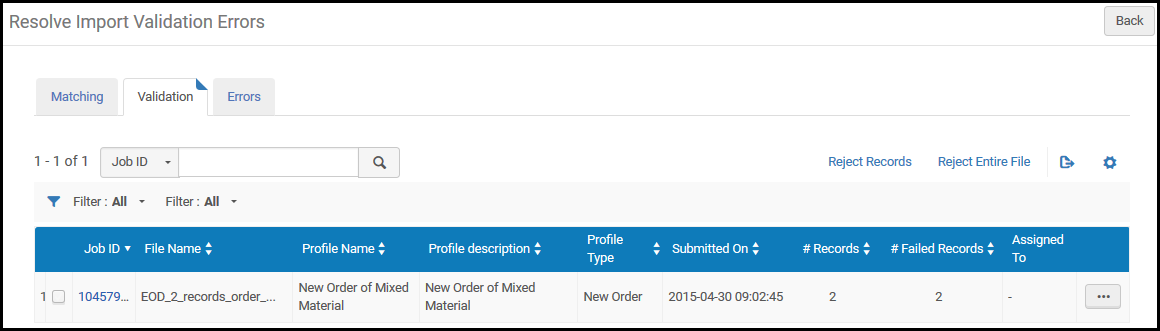 Resolve Import Validation Errors Page
 - Locate the import job and select a row action or select multiple actions and select a page action:
- View records (Viewing Import File Records With Validation Errors)
- Edit (Editing Records With Validation Errors)
- Release assignment - Release the assignment of this issue.
- Do Not Import / Reject Records – Discard the records with validation errors, and impor the valid records in the file.
- Reject File / Reject Entire File – Discard the file containing records with validation errors. The file is removed from the Handle Import Validation Errors page.
The available actions depend on whether the import job is assigned to you.
Viewing Import File Records With Validation Errors
You can view the records within the import file that match existing Alma records. You can then determine how you want to handle the records with validation errors.
To view validation errors:
- On the Resolve Import Validation Errors page, select View records in the row actions list for the relevant import file. The Handle Import Validation Errors page appears.
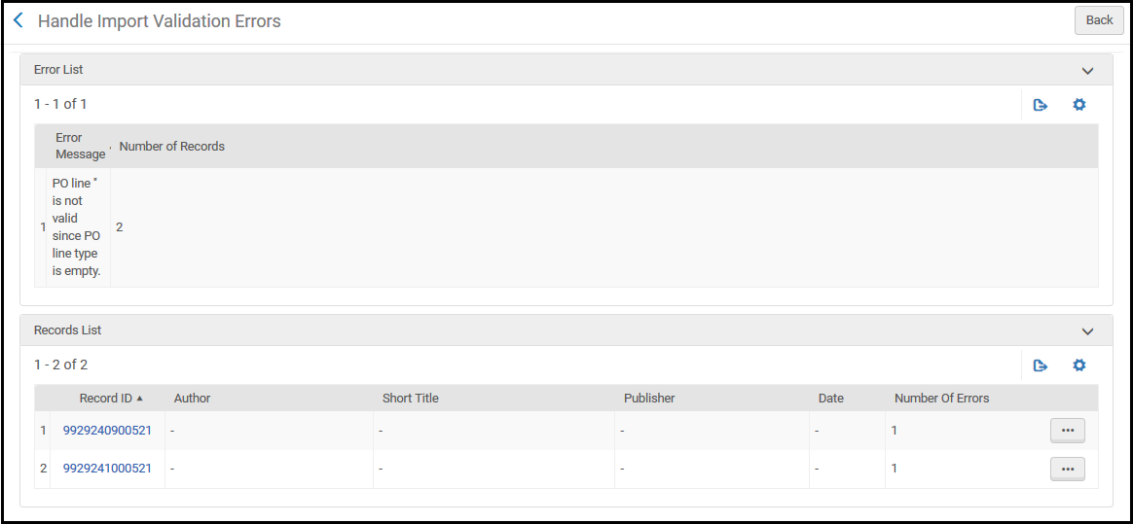 Handle Import Validation Errors PageThe Handle Import Validation Errors page includes the following sections:
- Details of the import job file. Note that Number of failed records includes the total number of failed records, including records whose issues were resolved.
- Error List – The validation errors. Displays the following columns:
- Error Message – The error that caused the validation to fail.
- Number of Records – The number of records that have an error.
- Records List – The record details with the following columns:
- Record ID
- Author
- Short Title
- Publisher
- Date
- Number of Errors
- In the Records List area, select View Errors in the row actions list. The Imported Record Details page appears.
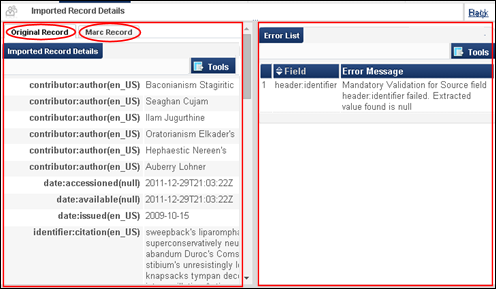 Imported Record Details PageThe left side of this page displays the record details in the following formats:
- Original record format
- MARC record format
The right side of the page displays the error information. The Error List section on this page displays the same error information as displayed in the Error List section on the Handle Import Validation Errors page. Export the file, make any necessary corrections, and re-import the file.
Editing Records With Validation Errors
The Edit option enables you to view the record details and validation errors and provides several options for managing the records/files with these errors.
To edit a record:
- On the Resolve Import Validation Errors page, select Edit in the row actions list for the relevant import file. The Handle Import Validation Errors page appears. See Viewing Import File Records With Validation Errors. Additional actions appear when you edit the page.
- Select an action, as follows:
- Do Not Import – Discard the records with validation errors while importing the valid records in the file.
- Force Import – Import all the records including those with errors.
- Reject File – Discard the file containing records with validation errors. The file is removed from the Handle Import Validation Errors page.
- Create File – Save the record details to an external XML file in which you can edit the records. You can then re-import the file.
- View Errors (row actions list)– See Viewing Import File Records With Validation Errors.
Viewing Import Errors
The Resolve Import Errors page lists the import jobs with unexpected errors that occurred during the import process. These errors include any problems with file data not related to matching or the validation of records. See the Monitor and View Imports page and Monitor and View Import Jobs for more details.
To view import errors:
- On the Resolve Import Issues page (Acquisitions > Import > Resolve Import Issues or Resources > Import > Resolve Import Issues), select the Errors tab. The Resolve Import Errors page appears.
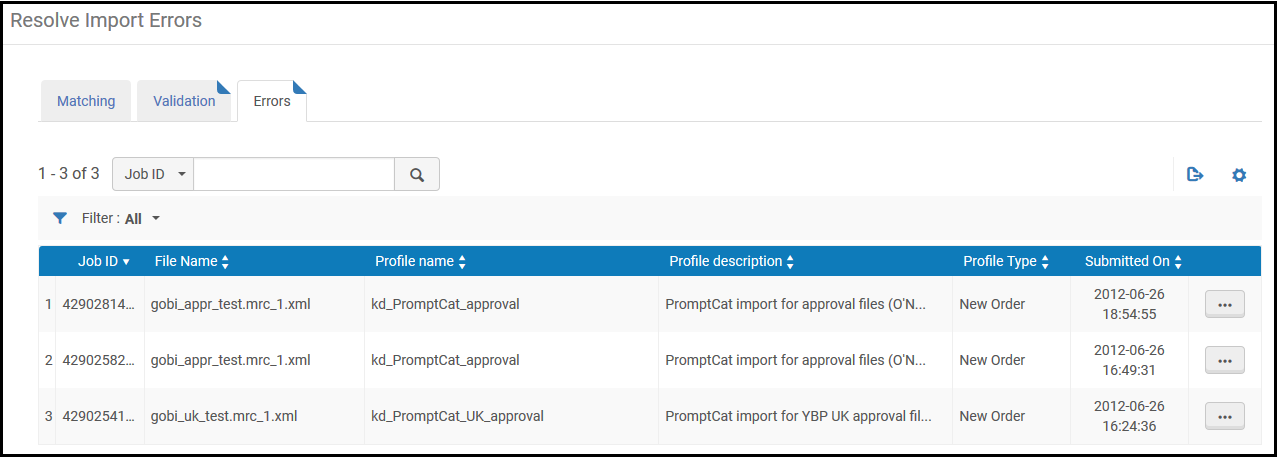 Resolve Import Errors Page
 - Select Download in the row actions list to download an XML or a binary file (depending on the format defined in the import profile) listing the records (up to 5000) that did not import properly. For example:
 Error(s) in downloaded XML
 - Correct any errors you detect and run the import process again.