
Adding a Facet for Video Formats
Out of the box, Primo displays the Resource Type facet, which has an Audio Visual value that displays results for both audio and video formats. This topic describes the steps used to add a local facet that allows users to narrow their search results by a specific type of video format (such as Blu-ray or DVD). Because video format types are known and finite, we will configure the new facet as a static facet.
The following figure illustrates the general flow used to create static facets:
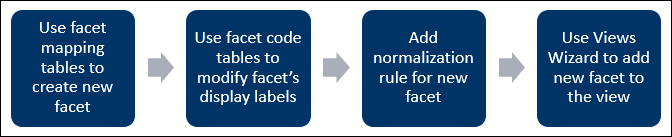
General Facet Creation Process
For more information on configuring facets, see Facets and the How to Add a Static Facet video.
To add a local static facet for video formats:
In this example, the video formats are cataloged under the MARC 538 a subfield and are mapped to the unused facets/lfc02 field in the PNX. The values may appear as follows in the source records:
-
538 __ |a VHS format.
-
538 __ |a DVD
-
538 __ |a Blu-ray disc; Dolby digital, region A, widescreen (1.78:1).
-
538 __ |a Videodisc format.
The video format information may be cataloged differently in your institution.
-
Customize the label that displays for the new facet in the Back Office's drop-down lists:
-
Edit the Facets Code Fields code table (Primo Home > Advanced Configuration > All Code Tables).
-
In the row that defines the facet_local2 field name, click Customize.
-
Change the value of the Field Codes field to Video Format. Your code table row should appear as follows:
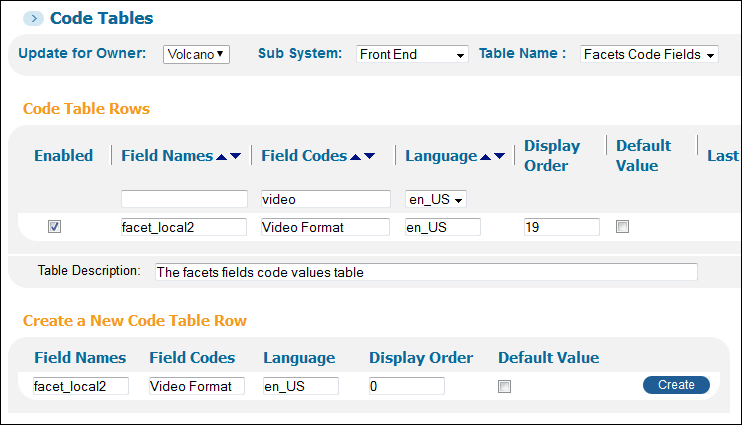 Modify Display Name in Back Office
 -
Click Save & Continue.
-
-
Configure the static facet mapping tables. For more information on using mapping tables, see Mapping Tables.
-
Create the new static facet:
-
Edit the Static Facets mapping table (Primo Home > Advanced Configuration > All Mapping Tables).
-
Click Customize if the table has not been customized for your institution.
-
Create a row for the new Video Format facet.
 Create Mapping Row for the New FacetIf the label for the new Video Format facet does not appear in the drop-down list, restart your browser.The new row will appears as follows:
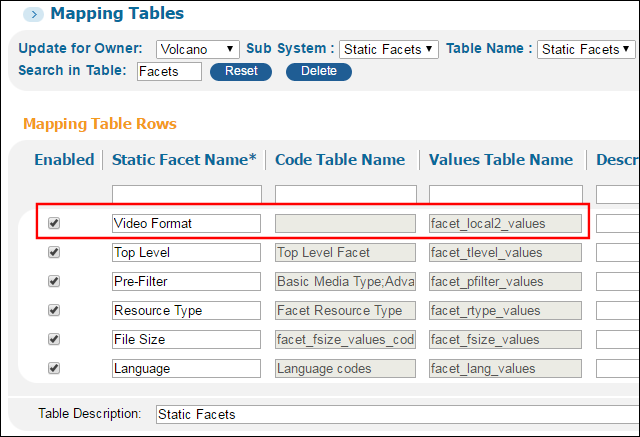 New Video Format Facet
 -
Click Save.
-
-
Create the list of static values that will be used for the new video format facet. These values should match the normalized values that are stored in the facets/lfc02 PNX field. You can use the generated facet_local2_values_codes code table to modify the display values later.
-
On the Static Facets subsystem page (Primo Home > Advanced Configuration > All Mapping Tables > Static Facets), edit the facet_local2_values mapping table.
-
Enter the following fields to create a mapping row for each possible facet value.
-
Value Name – Enter the value of the video format from the MARC 538 a subfield. The system uses this value to create the default label in the facet_local2_values_codes code table.
-
Value – Enter the code that the system will use to display this facet value in the Front End. The system uses this value to create the code in the facet_local2_values_codes code table.
 Create New Mapping RowThe completed list of facet values appears as follows:
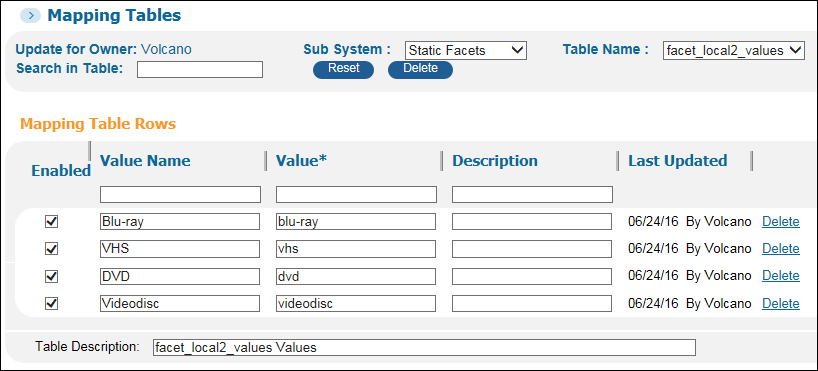 Facet Values for Video Formats
 -
-
Click Save.
-
-
On the Static Facets subsystem page (Primo Home > Advanced Configuration > All Mapping Tables > Static Facets), click Sync to create the facet_local2_values_codes code table and to generate the default codes and labels for the video format values.
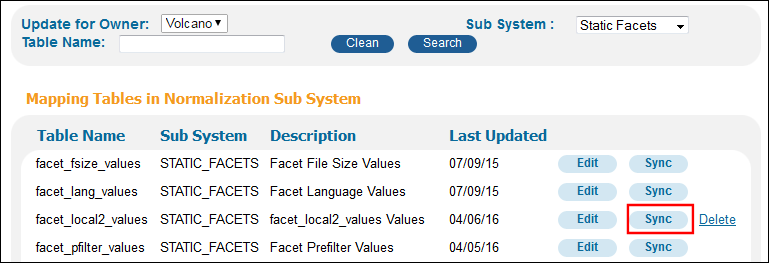 Create Facet Values Code TableIn addition, the name of the code table has been added to the Video Format mapping row in the Static Facets mapping table as follows:
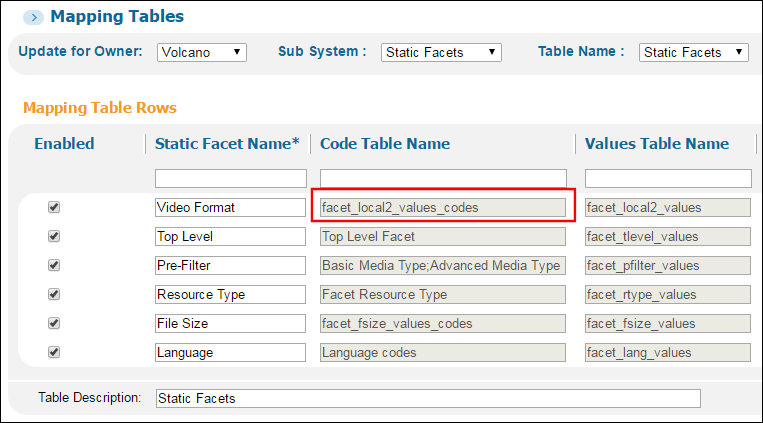 Updated Static Facets Mapping Table
-
-
Configure the facet code tables that define the display labels for the Front End. For more information on using code tables, see Code Tables.
-
Edit the Facet Labels code table (Primo Home > Advanced Configuration > All Code Tables) and add a row for the new Video Format facet:
- In the Create a New Code Table Row section, specify the following required fields and then click Create:
-
Code – Specify the following value, which represents the facets/lfc02 PNX field:default.facets.facet.facet_local2
-
Description – Specify Video Format, which is used for the new facet's label in the Front End.
-
Language – Specify en_US, which indicates the language of the label.
 Add Label for New Facet
 -
-
Click Save & Continue.
- In the Create a New Code Table Row section, specify the following required fields and then click Create:
-
If you want to customize the display labels for the facet values, edit the generated facet_local2_values_codes code table (Primo Home > Advanced Configuration > All Code Tables), modify the values in the Code column, and then click Save & Continue.
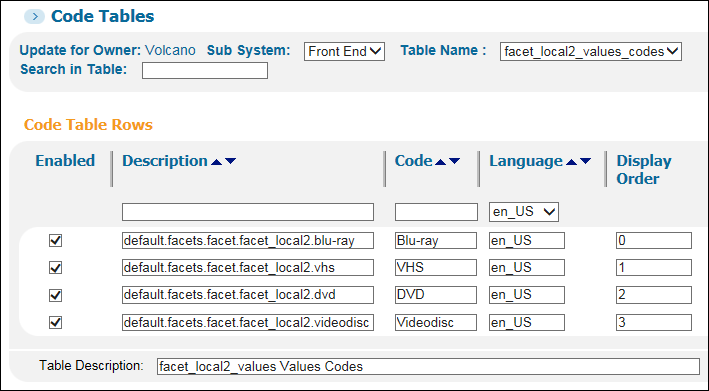 Video Format Value Codes
-
-
Create a new normalization rule that checks each record to see if it has a 538a subfield that starts with one of the specified video formats. If a match is found, the rule converts the video format to lowercase and stores it in the facets/lfc02 field. For more information on creating normalization rules, see Working with Normalization Rules.
-
On the Normalization Rules Set page (Primo Home > Advanced Configuration > Full Normalization Rule Configuration), edit your normalization rules set.The Manage Normalization Rules page opens.
-
From the PNX Section drop-down list, select Facets.
-
Select the Display Empty Fields check box to display all unused fields.
-
Edit the facets:lfc02 field.
-
Click Create in the Create a New Rule section.
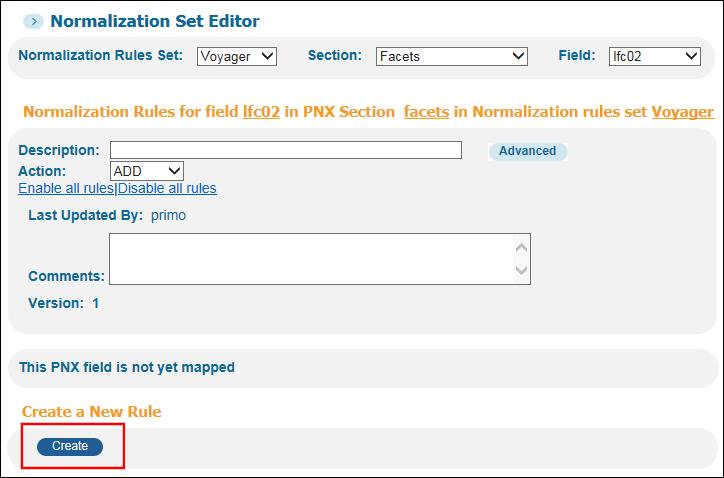 Create New Normalization Rule Section
 -
Enter the following fields to create a normalization rule that stores the facet value in the PNX:
-
Action – Select OR, which adds a single new PNX field for the matching MARC field and subfield. If a record contains multiple matching MARC fields, processing stops at the first match.
-
Type – Select MARC, which indicates the format of the source records.
-
Field – Specify the MARC 538 field.
-
Subfield – Select Include, and specify the a subfield.
-
Transformation 1 – Select the Take string (use reg. exp.) transformation.
-
Parameter 1 – Type the following regular expression: (^DVD|^VHS|^Blu-ray|^Videodisc). Click the Plus icon to add the second transformation row.
-
Transformation 2 – Select the Lower Case transformation to store a lowercase value for the code, which is defined in the facet_local2_values_codes code table and synchronized with the facet_local2_values mapping table.
-
Parameter 2 – Leave blank.
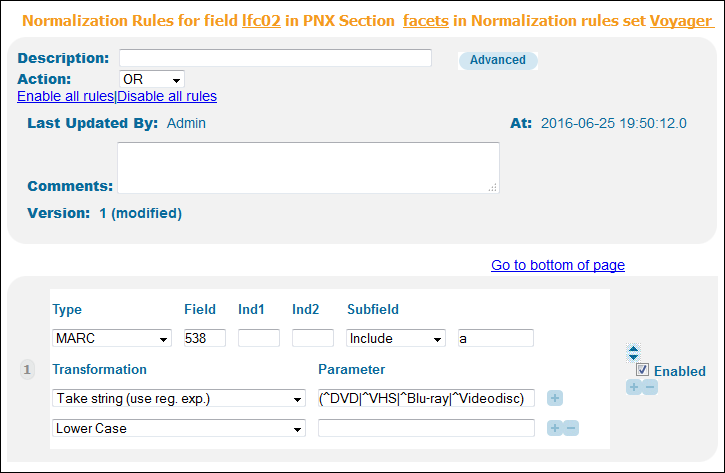 New Facet Normalization Rule
 -
-
Click Save to save your changes to the normalization rules set.
-
-
-
On the Deploy All page (Primo Home > Deploy All), select the following options and then click Deploy:
-
All Code Tables and Mapping Tables (Front End labels and more)
-
Normalization Rules
-
-
After the deployment has completed, define and run a no-harvest pipe. For more information on creating pipes, see Configuring Pipes.Until the daily scheduled Indexing_And_Hotswapping process has updated the search engine, your new Video Format facet will not be available in the Front End. If you run this process manually, it is recommended that you run it during off-peak hours.
-
After the pipe, indexing, and hotswapping processes have completed, configure your view to display the new facet. For more information on using the Views Wizard, see Views Wizard.
-
In the Views Wizard (Primo Home Ongoing Configuration Wizards > Views Wizard), edit your view.
-
Continue through the Views Wizard (by clicking either Save & Continue or Continue) until you reach the Tiles Configuration page.
-
On the Tiles Configuration page, edit the Brief Display > Refine My Results (facets) tile.
-
On the Edit Facets Attributes page, select Video Format from the Facet Type drop-down list under the Add new Facet to tile section and then click Create.
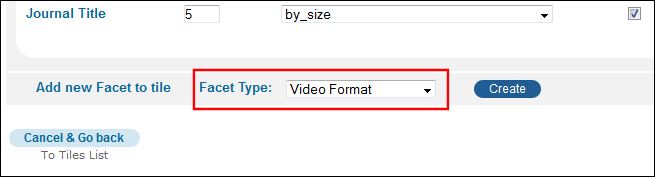 Add Facet to View
 -
In the Facets to display section, modify the following fields to configure how the video format facet displays in the Front End:
-
Items to Display – Indicates how many facet values will display. The default is 5.
-
Sort – Indicates the sort order of the facet's values: alpha_numeric, by_size, or none.
-
default_tab and other tabs – Select the search tabs that can display the new facet. If you do not select a tab, the facet will not appear in your search results.
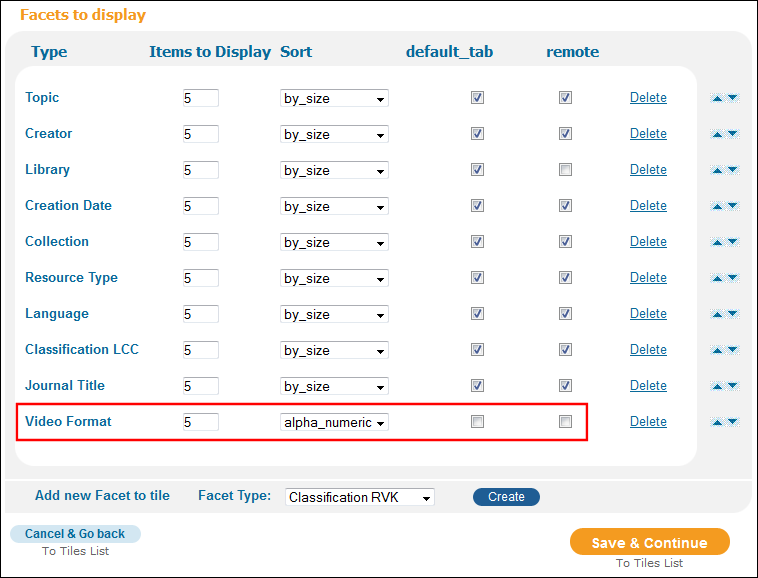 Facets to Display Section
 -
-
Click Save & Continue.
-
Click Continue.
-
Click Deploy Now.After performing a search in the Front End, the new facet appears as follows:
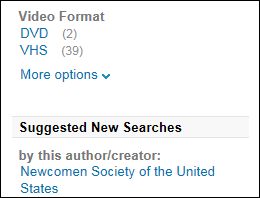 New Video Format FacetIf you want to deploy your changes later, you can specify the View option on the Deploy All page (Primo Home > Deploy All).
-