
Adding a Searchable Field
Primo maps information from the source records to the Search section in the PNX to allow this information to be indexed by the search engine. The local search fields (lsr01 - lsr50) allow you to specify additional information to be indexed and then searched by users in the Front End. Once a field is made searchable, you have the option to display it in the advanced and basic search drop-down lists so that users can search it specifically.
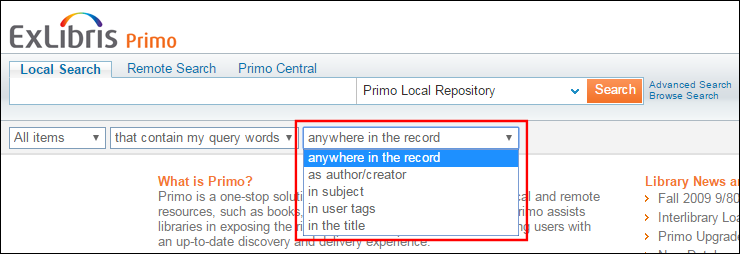
Searchable Field Drop-Down List for Basic Search
The following figure illustrates the general flow used to create searchable fields:
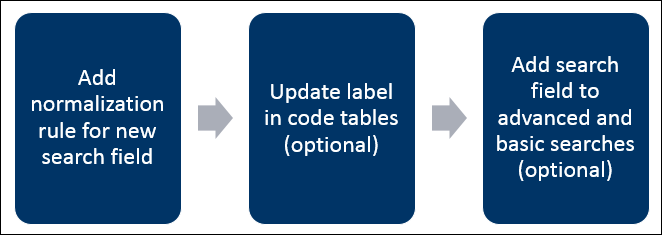
General Creation Process for Searchable Fields
For more information, see the How to Add a New Search Field video.
To add a searchable field:
-
Add a normalization rule that maps the call number (which is defined in MARC 949 subfield d for this example) from the source records to an unused local search field lsr07 in the Search section of the PNX:
-
Edit your normalization rules set on on the Normalization Rules Set page (Primo Home > Advanced Configuration > Full Normalization Rule Configuration). For more information on using the normalization rules editors,see Editing Normalization Rules Sets.The Manage Normalization Rules page opens.
-
From the PNX Section drop-down list, select Search and display all unused fields.
-
Add the following rule to map the call number in the source record to the lsr07 field in the Search section:
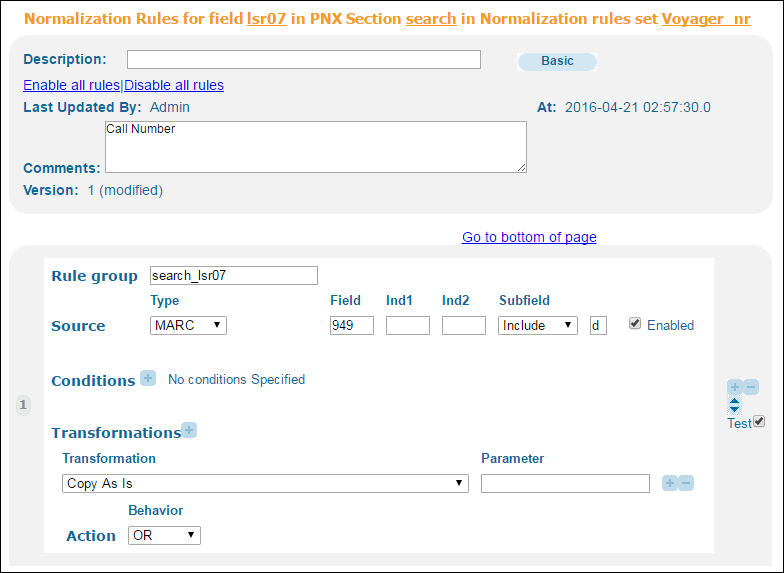 Normalization Rule for New Searchable Field
 -
Save your changes to the normalization rules.
-
On the Deploy All page (Primo Home > Deploy All), select the Normalization Rules option and then click Deploy:
-
Execute a no-harvest pipe to update the PNX records.You must schedule the indexing_and_hotswapping process to run after the pipe completes so that the indexes are updated in the search engine.
-
-
If you plan on adding the new field to the the searchable field drop-down lists in the Front End, update the necessary code tables. For more information on using code tables, see Code Tables.
-
In the Advanced Index Fields code table (Primo Home > Advanced Configuration > All Code Tables), update the following row to modify the label used for the advanced search:
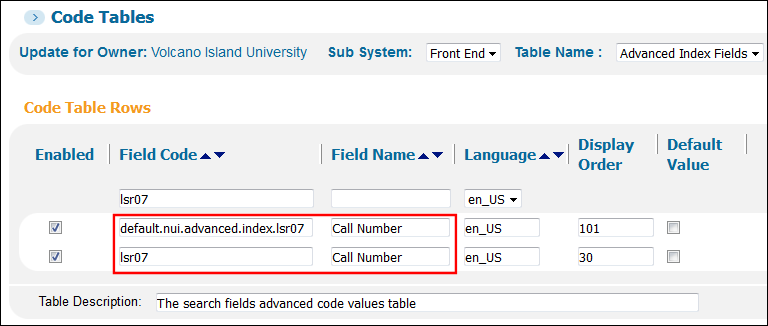 Advanced Search Drop-Down LabelBecause the classic and new Primo UIs use different codes for the label, make sure that you update the correct code. For the new UI, the codes contain nui.
 -
In the Basic Index Fields code table (Primo Home > Advanced Configuration > All Code Tables), update the following row to modify the label used for the basic search.
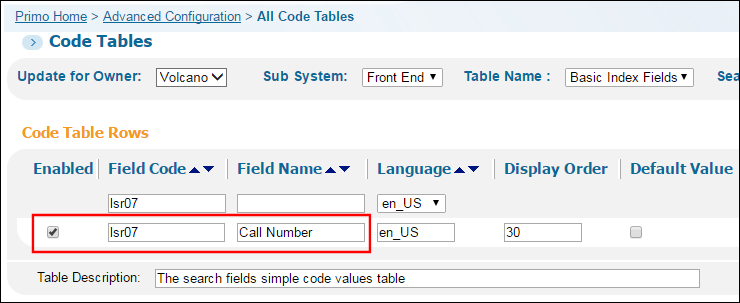 Basic Search Drop-Down List
 -
On the Deploy All page (Primo Home > Deploy All), select the All Code Tables and Mapping Tables (Front End labels and more) option and then click Deploy:
-
-
After the pipe has finished executing successfully and the indexing_and_hotswapping process has completed, configure your view if you want to add the new field to the searchable field drop-down lists in the Front End. For more information on using the Views Wizard, see Views Wizard.
-
In the Views Wizard (Primo Home > Ongoing Configuration Wizards > Views Wizard), edit your view.
-
Click through the wizard until you reach the Tiles Configuration page, and then edit the Home Page > Advanced Search tile.
-
On the Edit Advanced Search Attributes page, edit the Complex Search Line under the Define search pre-filters section.
-
On the Edit Advanced Search Attributes page, select Call Number from the Search Field Value drop-down list under the Search Target Fields of Advanced Search tile section and then click Create.
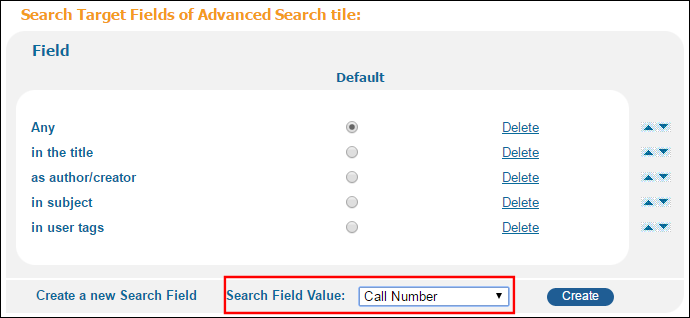 Add New Field to Advanced Search Drop-Down List
 -
Return to the Tiles Configuration page, and then edit the Home Page > Basic Search tile.
-
On the Edit Basic Search Attributes page, select Call Number from the Search Field Value drop-down list under the Search operators section and then click Create.
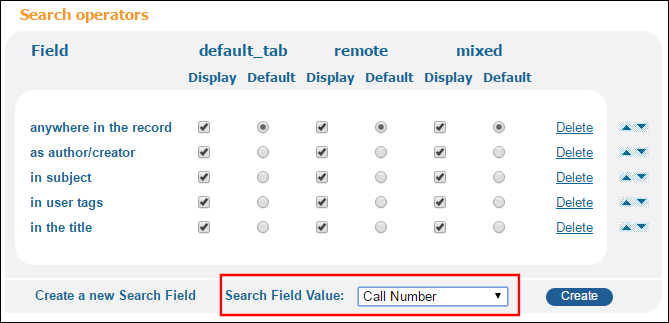 Add New Field to Basic Search Drop-Down List
 -
Save and deploy the changes.The following example shows the new field in the drop-down list for the basic search.
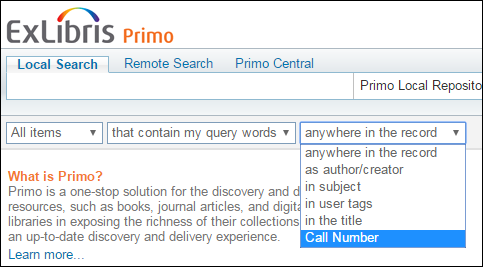 New Field Added to Basic Search Drop-Down List
-