
Using Aleph for User Authentication
When using Aleph to perform user authentication, user information is also requested from Aleph.
The following steps describe the interaction between the user, Primo, and Aleph to provide authentication and authorization:
-
The user invokes the sign-in option in Primo.
-
If the institution has more than one active profile, Primo displays the Primo parallel login page.
-
After the user selects the Aleph profile, the Authentication manager redirects the sign-in request to Aleph using the host X-Server defined in the configuration.
-
The user enters his or her credentials.
-
If the response is positive, the response will also include user information. If the response is negative, an error message will display on the Primo login page.
-
If the user has been authenticated, Primo will log the user in and redisplay the page from which the login was invoked.
To configure Primo to use Aleph authentication:
-
Open the User Authentication Wizard page (Primo Home > Ongoing Configuration Wizards > User Authentication Wizard).
-
Select your institution from the Owner drop-down list.
The source of your Primo institution must be Aleph in order use Aleph user authentication.
-
Create a new login profile. The Login Profile page opens. For more information on creating login profiles, see The Primo Authentication Manager.
-
Select ALEPH from the Select Authentication Method drop-down list.The ALEPH authentication parameters appear on the page.
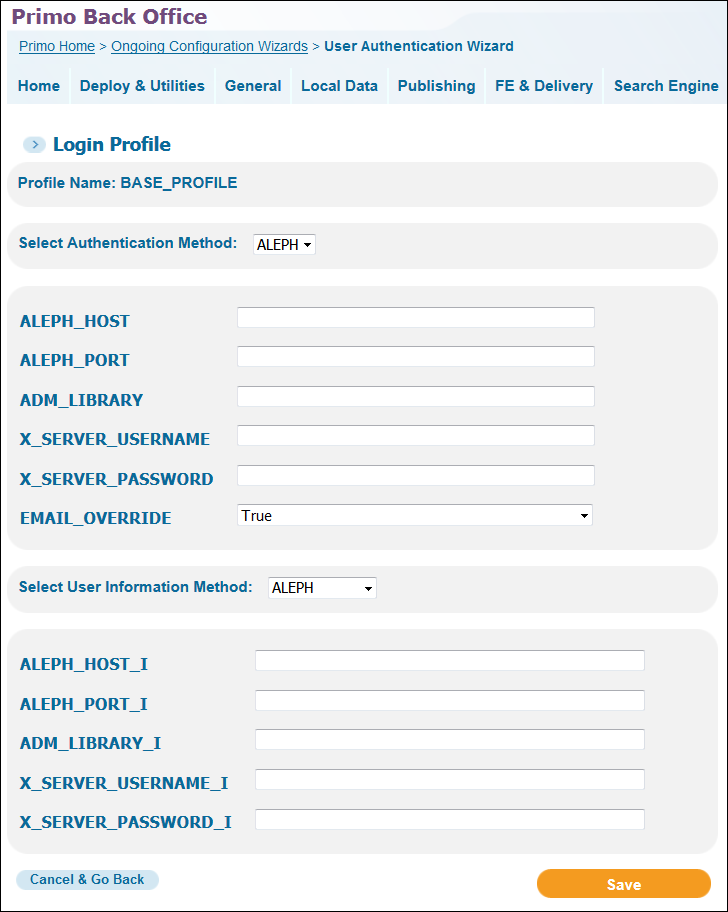 Aleph Login Profile Page
 -
Use the following table to configure the Aleph authentication parameters:
Aleph Authentication Parameters Parameter Description ALEPH_HOSTEnter the base URL for the Aleph server. For example: https://myServer.comALEPH_PORTEnter the port for the Aleph server.ADM_LIBRARYEnter the active Aleph ADM library.X_SERVER_USERNAMEEnter a valid staff user name that is authorized to use the X-server.X_SERVER_PASSWORDEnter the staff user's password for the specified staff user.EMAIL_OVERRIDEThe valid values are True and False (default).If set to True, the email returned with the user information will always override the email stored in the user’s profile in Primo. -
Aleph User Information Fields Parameter Description Select User Information MethodFor Aleph authentication, ALEPH is automatically populated for you.ALEPH_HOST_IEnter the base URL for the Aleph server. For example: https://myServer.comALEPH_PORT_IEnter the port for the Aleph server.ADM_LIBRARY_IEnter the active Aleph ADM library.X_SERVER_USERNAME_IEnter a valid staff user name that is authorized to use the X-server.X_SERVER_PASSWORD_IEnter the staff user's password for the specified staff user. -
Select Save to save your Aleph profile and to return to the Login Profiles page.
-
Edit your new Aleph profile. The Login Profile page will now include the Attributes Mapping button.
The Attributes Mapping button displays only when the user information method has been selected and saved.
-
Select Attributes Mapping to map the user attributes that are associated with the selected type of user authentication. For more information, see Attribute Mapping.
-
Select Save to save your profile and to return to the list of profiles on the Login Profiles page.