campusM Attendance Student Experience
![]()
This section describes the student check-in experience for the campusM Attendance feature. Attendance allows students to indicate their attendance in a class using an internet connected device, such as a mobile phone. The screenshots in this section are taken from the campusM iOS app for illustrative purposes. The end-user experience is consistent for all campusM apps – Android, iOS, and Web.
Workflow Overview
The following diagram provides a high-level overview of the student experience.
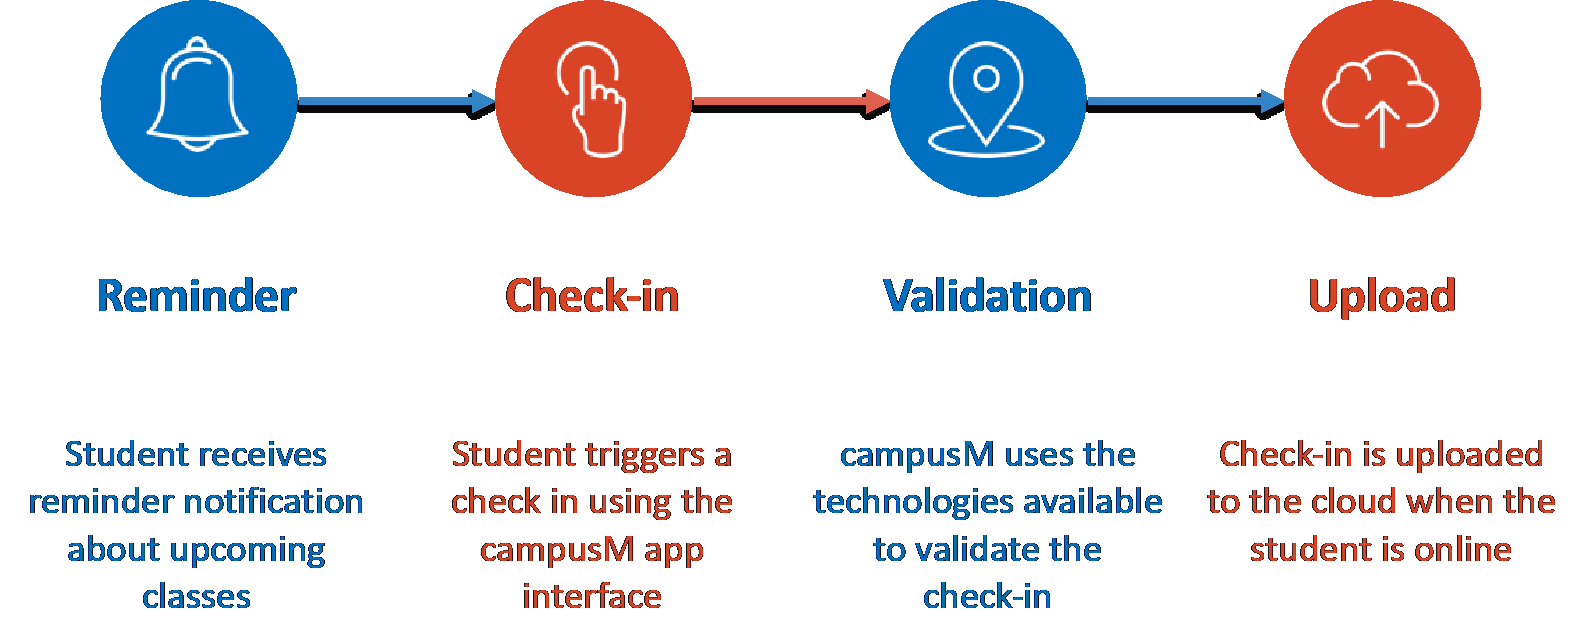
For information concerning configuring the Attendance feature, see Configuring Attendance.
Student Notifications
Notifications can be configured to be displayed on the student’s device. These notifications are locally scheduled based on the event data for the end user and saved on the device, so they are sent even if the student is offline and does not have an internet connection.

You can see that the dynamic event parameters added to the notification text have been completed with the specific event details when the notification is created.
When a student selects a notification, the check-in page appears.
Students can suppress notifications:
- For iOS: from the app settings.
- For Android: from the operating system notification settings
Student Live Tile
The Attendance live tile provides students with dynamic information on their current and upcoming classes that require checking in.

Selecting the Attendance live tile displays the Student Check-In page.
Student Check-In Page Overview
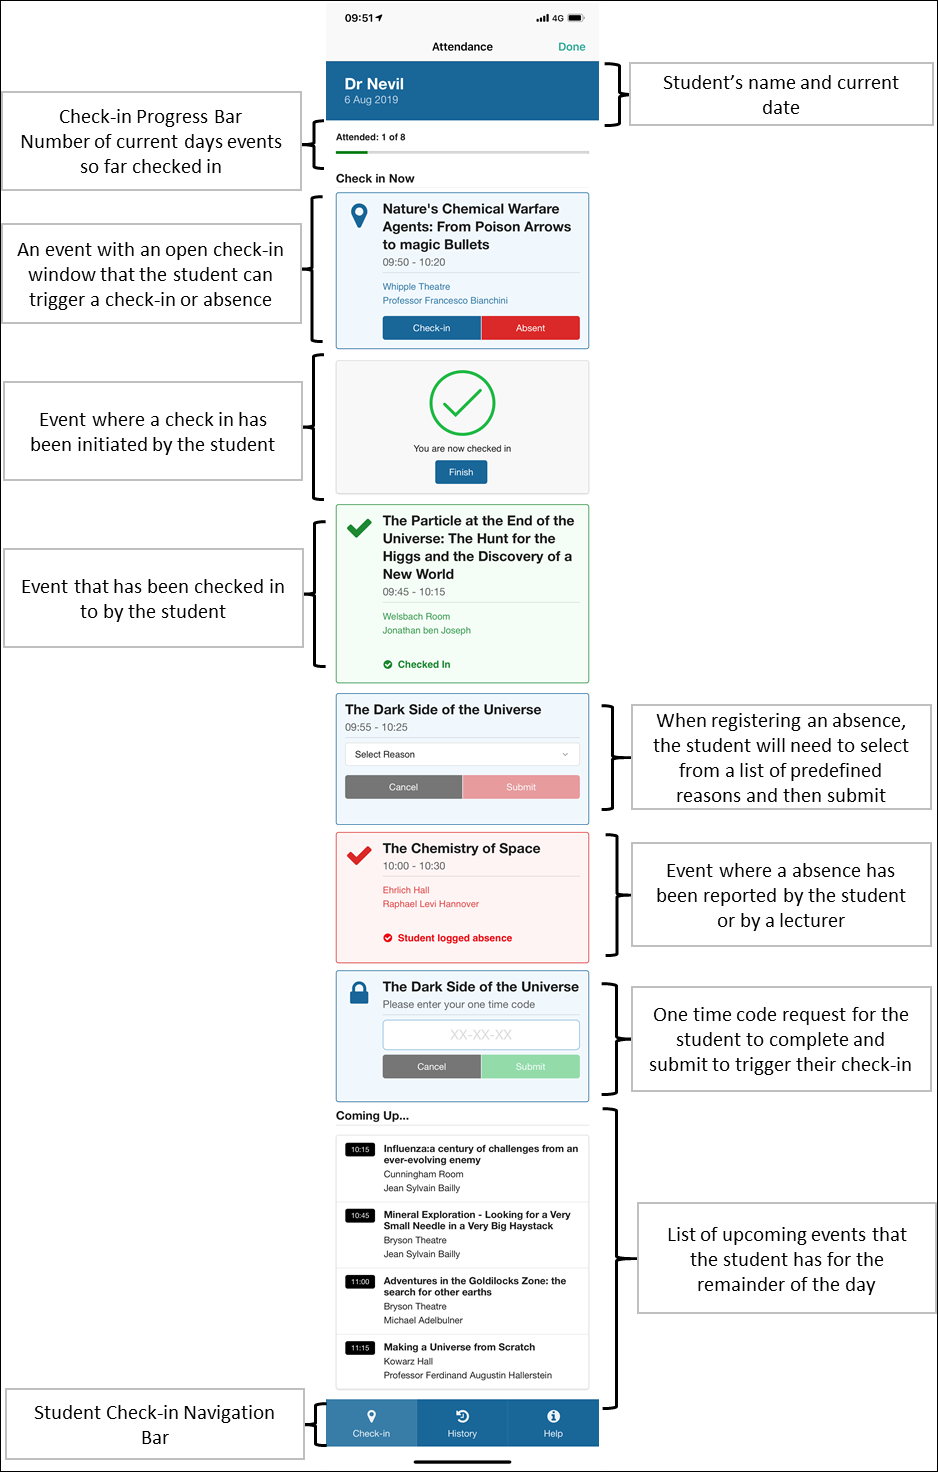
The Student Check-In page displays the student's current and upcoming classes for the day.
The student will only be able to check in once the time table is refreshed. This is only relevant in the case where the Timetable Refresh option is enabled (see Student Check-in Settings).
The diagram below describes the key components of the Student Check-In page.
Student Check-In Validation Workflows
From the Student Check-In page, students can check in to a class or indicate an absence (if configured) for events with an open check-in window. The workflow depends on the validation mechanism configured:
- No validation – the student selects the check-in button and the check-in transaction is completed. The student is provided with visual confirmation that the check-in was successful. Selecting Finish displays the Check-in page.
 No Validation
 - One-Time code validation – the student selects the check-in button and must enter an event code given to them by the lecturer. The student is provided with visual confirmation that the check-in was successful. Selecting Finish displays the Check-in page.
 One-Time Code Validation
 - QR code validation – a button appears on the check-in screen to enable the code to be scanned using the device's camera.
When first accessing the camera screen, the user is prompted to enable access to the camera (permissions). The student needs to scan a valid code for the location to successfully check-in.
 QR code Validation
 - Geolocation validation – the student's location is matched with the location of the class to confirm attendance. If the location services of the student's device are disabled, a message is displayed that they must be enabled before the student can check-in.
For the Web app, we are unable to enforce this requirement. The student is prompted to grant location permissions, but if denied, the check-in is completed without the location being confirmed.
 Geolocation Validation
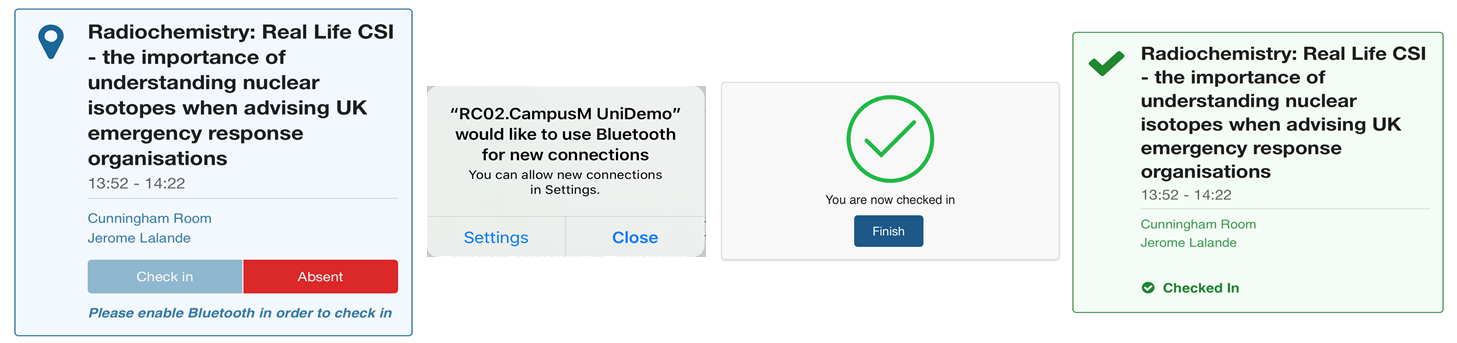
 - Crowdsource validation – the student's device sends a signal to an electronic beacon in the classroom to indicate the student's location. Bluetooth and location services must be enabled to successfully check in.
This validation mechanism works only for mobile devices (iOS and Android). If Crowdsource validation is the only validation mechanism configured, Web App users are directed to use a mobile device.
Note that depending on the configuration, students may initially see a Processing status, as the check-in is awaiting validation post check-in window closure. -
 Crowdsource Validation
 - IP validation – uses the student’s device's network address to confirm if they were connected to a valid network when the checking was performed. The institution configures subnetwork addresses (subnets) that are considered valid, and if the student is on the network (via WIFI, VPN, Ethernet), they are successfully checked-in.
 IP Validation
Absence
If Absence reasons are configured, students have the option to indicate an absence and select the reason for the absence from a predefined list.

Absent
Check-In History
Selecting the History button displays the student's check-in history for the last four days. The institution can enable the Attendance widget for the check-in history that provides students with a breakdown of their check-ins over the selected period, as per the date filter tab. The page has a date filter tab at the top, enabling students to switch between views of the check-ins of that day, the previous day (yesterday), and the last four weeks.
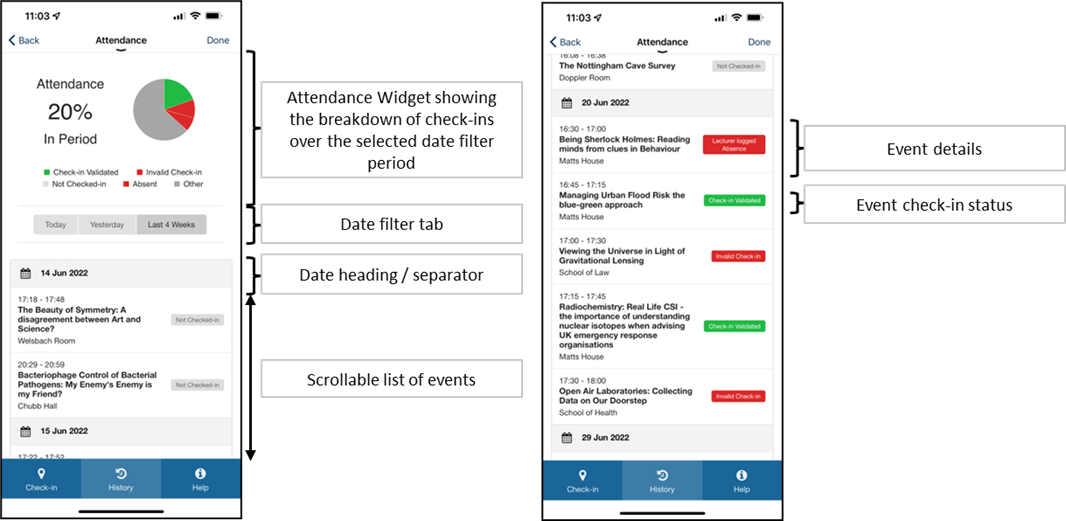
Each event in the student's timetable is listed along with the current check-in status. The status shown corresponds to the labels and colors configured within the Check-In History section in the app manager.
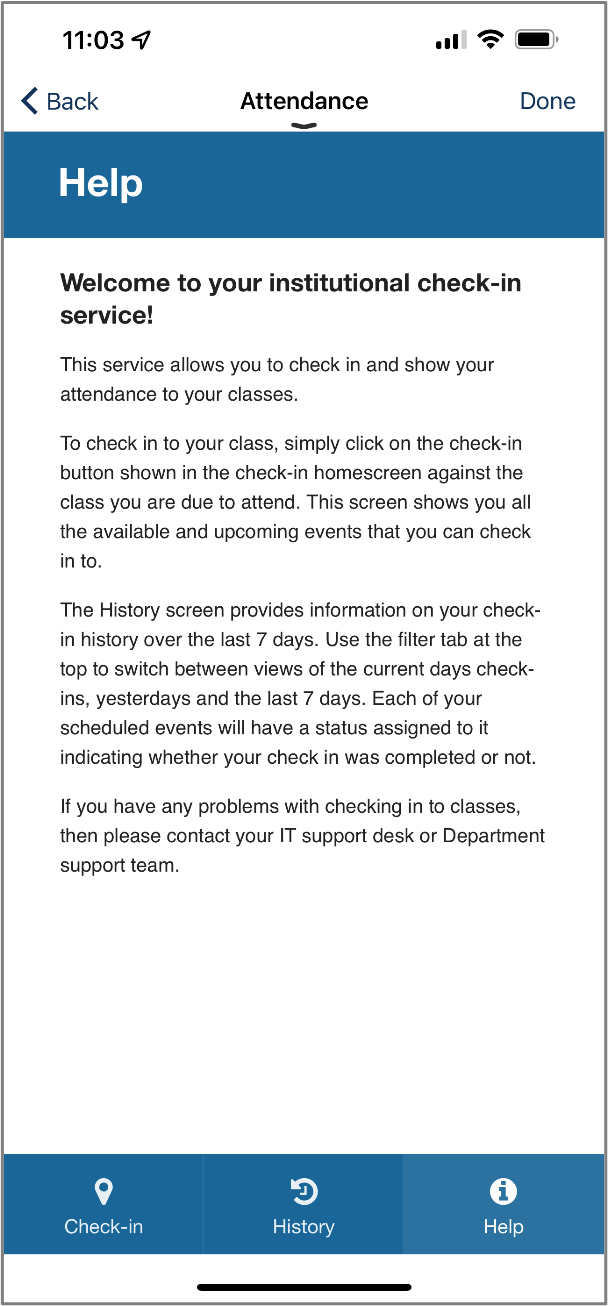
Help
To support students in their use of campusM Attendance, a contextualized help page is available by selecting the Help button.