
Microsoft Graph API Permissions and campusM Product Integrations
![]()
Registering a New Application
A new application must first be registered in Microsoft Azure.
- From the Microsoft Azure Manage Azure Active Directory section, select View.
 Manage Azure Active Directory
 - Add an App registration.
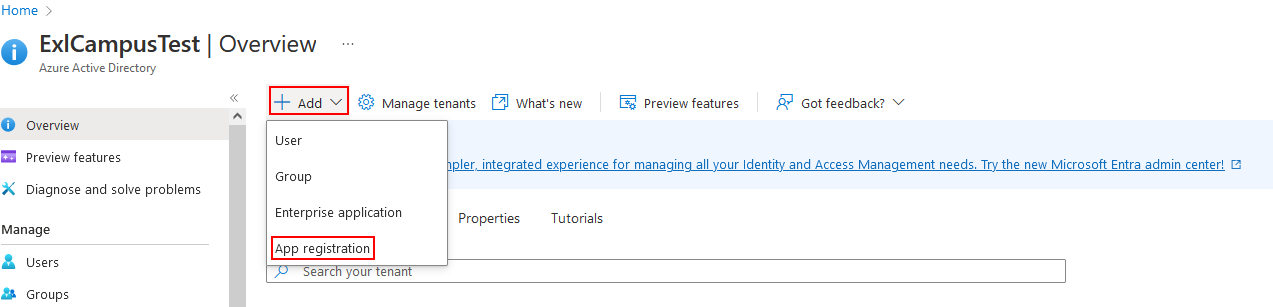 Add an App registration
 - From the Register an application screen:
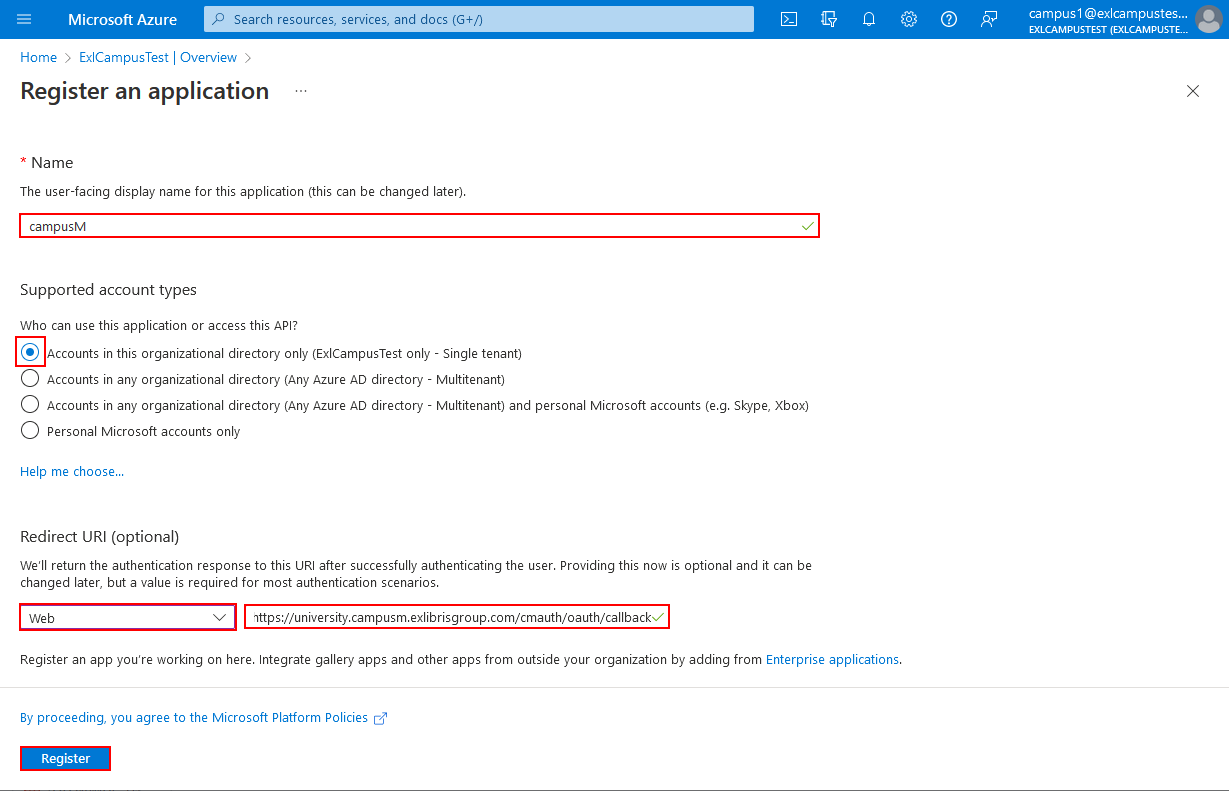
- Add a Name.
- Select the Supported account types Accounts in this organizational directory only (<YOURUSER> - Single tenant).
- Select the Web redirect option and add a redirect URI.
The Redirect URI must be the following: <App URL>/cmauth/oauth/callback.
- Select Register. Your application is created.
 Register an application
Creating a Client Secret
After creating an application, you must create a client secret.
To create a client secret:
- Select Manage > Certificates & secrets.
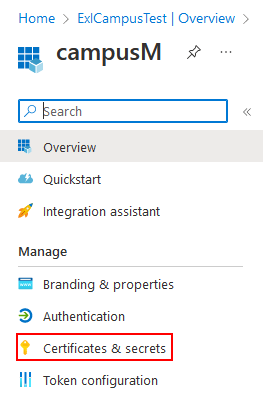 Certificates & secrets
 - Select New client secret.
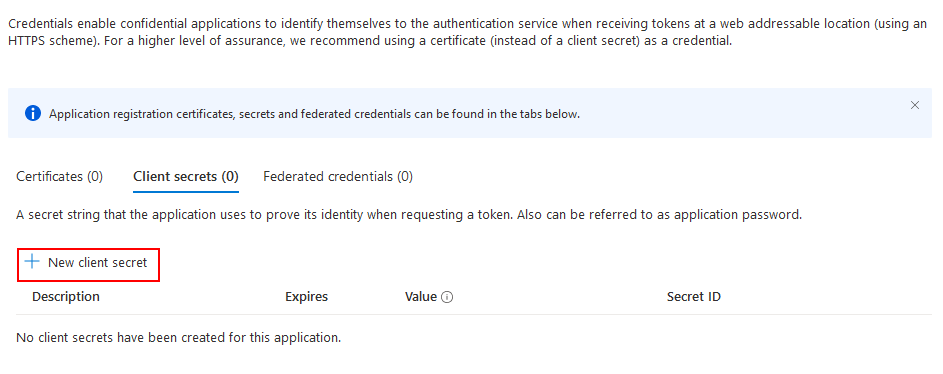 New client secret
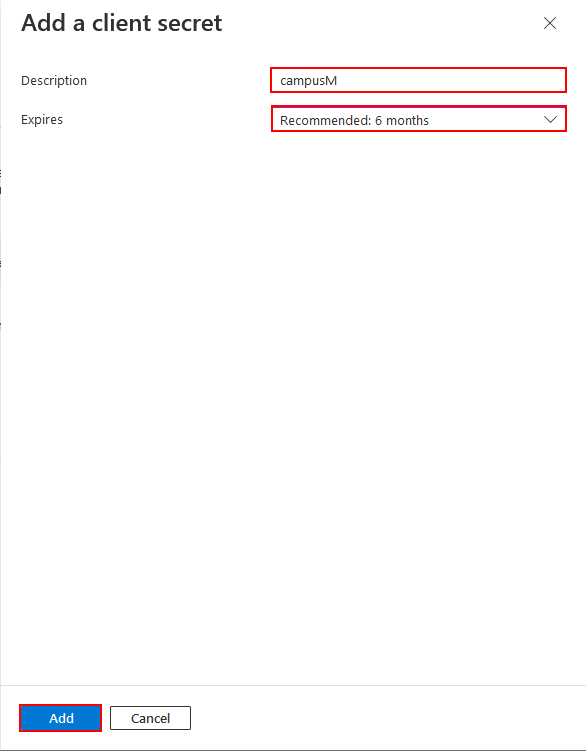
- Enter a Description.
- Select an Expires after date.
- Select Add. Your application credentials are updated.
 Add a client secret
- Copy the Value and Secret ID for later use.
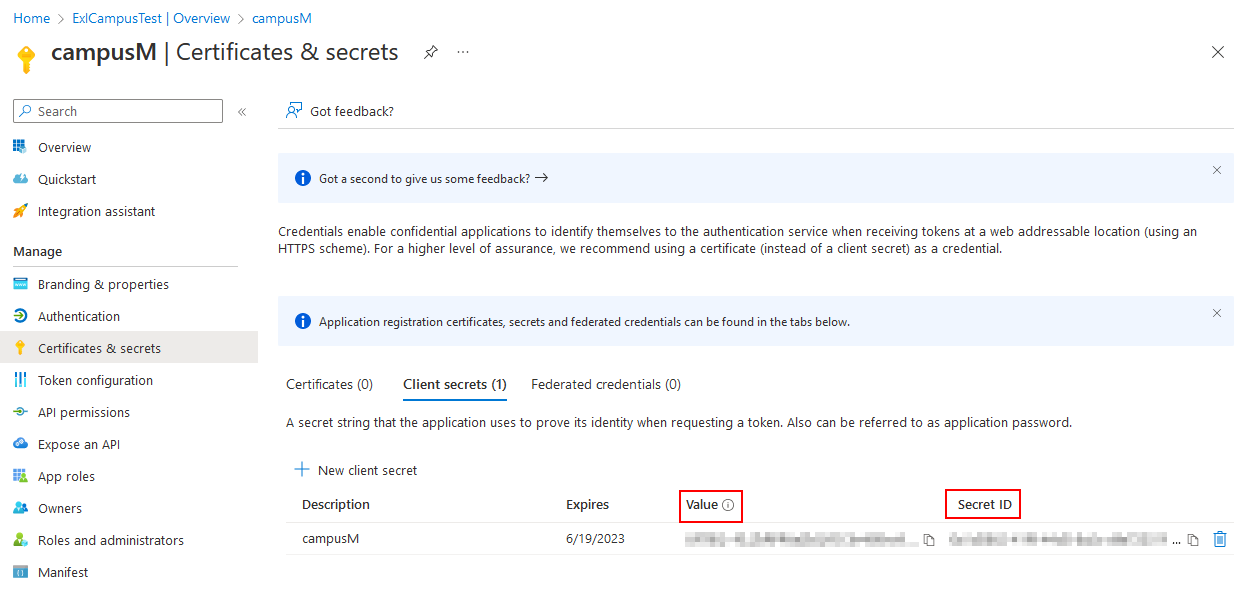 Client Value and Secret ID
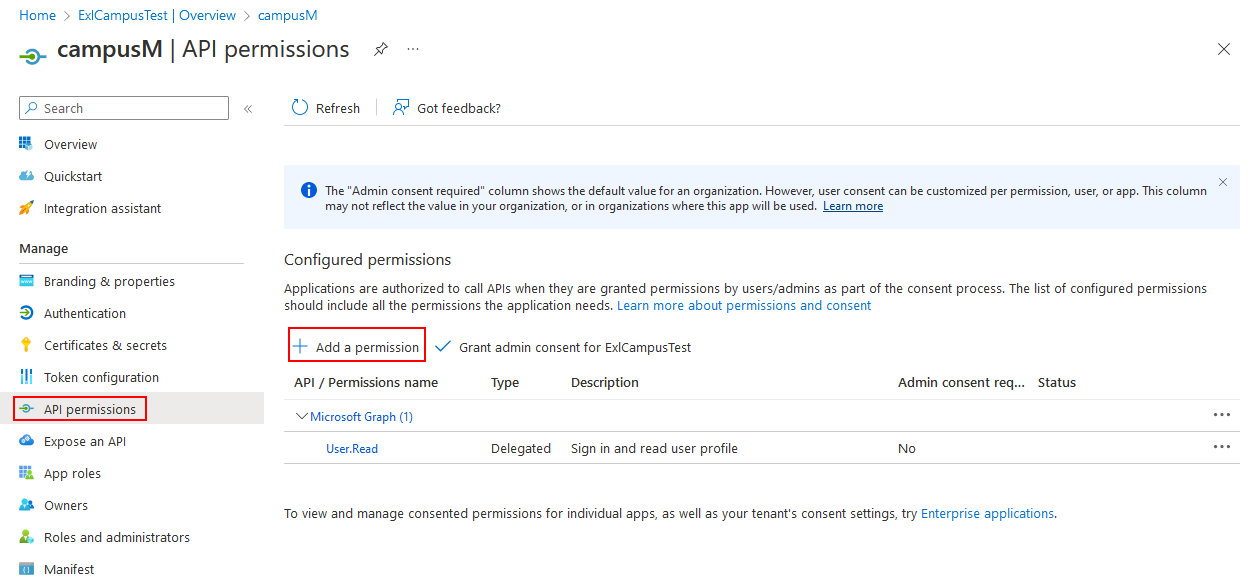
Permissions
Permissions must be granted for the Microsoft Graph API in the Microsoft Azure Portal to allow campusM to use the API. Different permissions are required for different campusM product integrations.
-
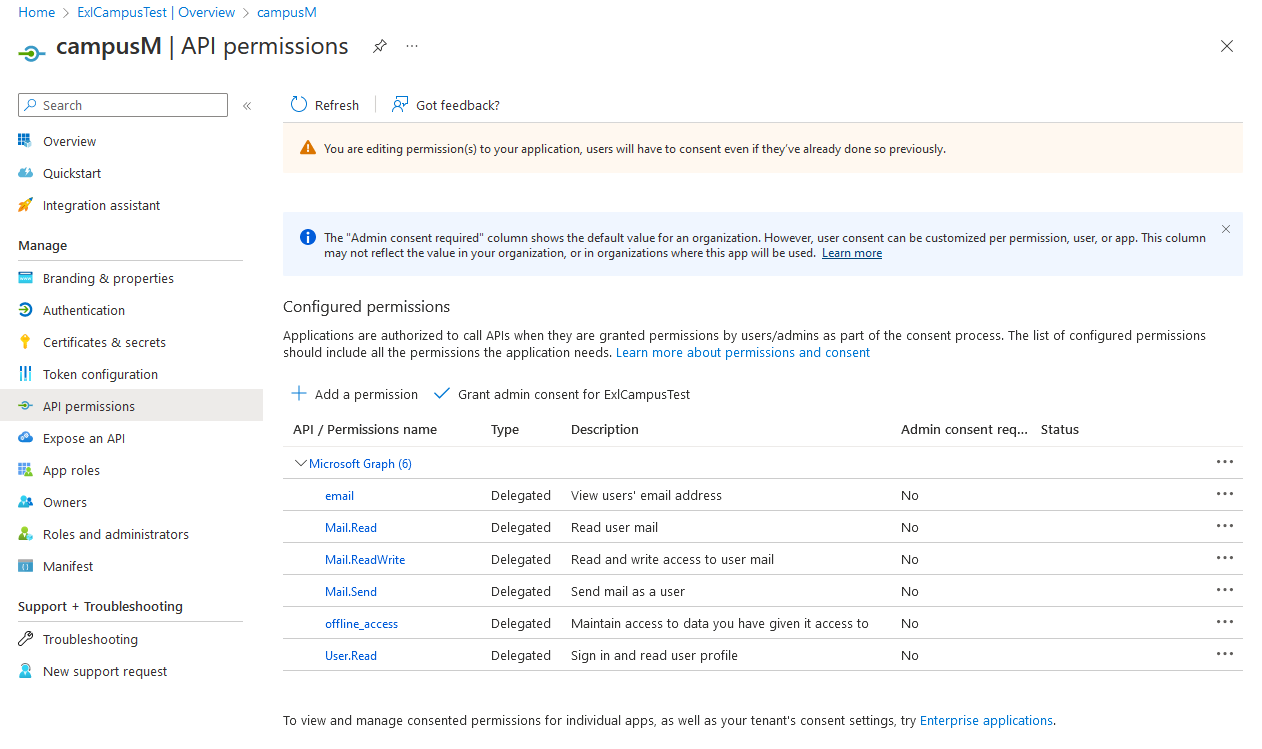
Select Manage > API permissions.
Select Add a permission.
 API permissions
 -
Select Microsoft APIs > Microsoft Graph.
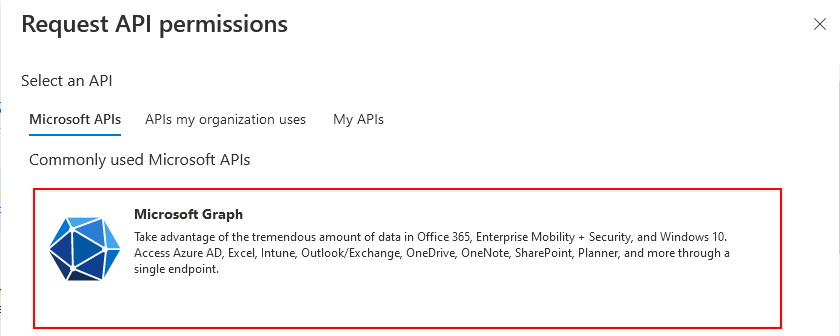 Microsoft Graph
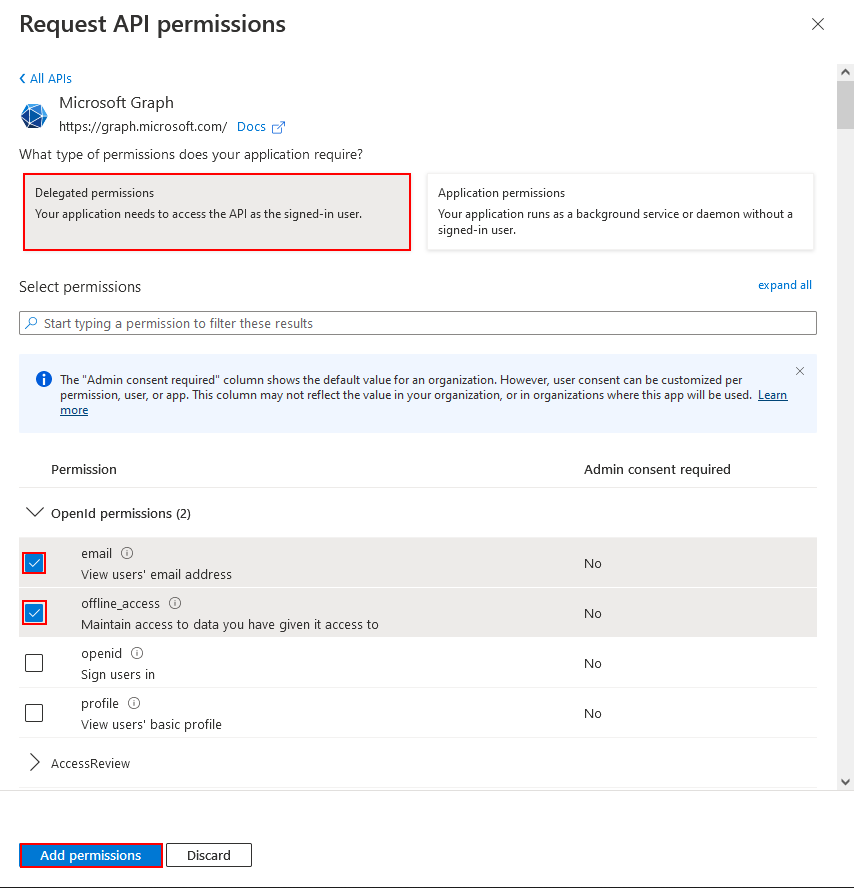
- Select the permission type.
Ensure that you are using the correct permission type when you are adding the permission. There are two permission types:
- Application permissions – allow an application to act as its own entity, rather than on behalf of a specific user.
- Delegated permissions – allow an application to perform actions on behalf of a particular user.
- Select the relevant permissions.
- Select Add permissions.
 Request API permissions
- Select the permission type.
The permissions are saved.
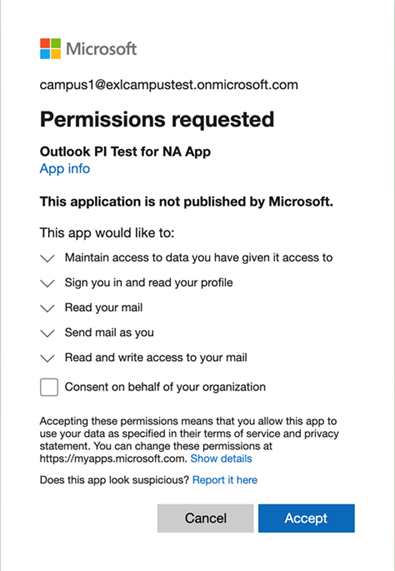
Granting Consent
When using Delegated permissions, a user must grant consent to allow the application to access their personal resources. However, it can also be granted by an admin, who can consent to the application accessing the resources for any user who uses the application. When using Application permissions, consent must be granted by an admin.
Overview of Product Integrations and Required Permissions
Directory Search
- Directory Search product integration:
- The permissions must be added as Application permission
- microsoft.graph is the specific API call that is used
- The Permissions section on the List users page states that “one of the following permissions is required to call this API.” We are using the Application permissions type. The permission options from least to most privileged are:
- User.Read.All
- User.ReadWrite.All
- Directory.Read.All
- Directory.ReadWrite.All
- Any of the above permissions grant required access
- We recommend using the least privileged (User.Read.All). Adding just this permission grants the product integration the access it needs.
- The Permissions section on the List users page states that “one of the following permissions is required to call this API.” We are using the Application permissions type. The permission options from least to most privileged are:
Outlook
- Outlook product integration:
- These are the specific API calls that are used:
- Required permissions:
- No permissions need to be directly added in the Microsoft Azure Portal.
- Test the OAuth profile
- Grant consent
- The user grants consent during login.
- Verify from the Microsoft Azure Portal that the permissions were added (the same permissions listed in the Integration Profile).
- The following Application permissions are required:
- Mail.Read
- Mail.ReadWrite
- Mail.Send
- offline_access
- User.Read
- No permissions need to be directly added in the Microsoft Azure Portal.
Roles
- Roles product integration:
- The permission must be added as Application permissions
- List memberOf is the specific API call that is being used
- The following Application permissions are required:
- Directory.Read.All
- Group.Read.All
- User.Read.All
- Descriptions for adding these permissions:
- User.Read.All and Group.Read.All – if you are managing the roles in groups.
- Directory.Read.All – if you are managing the roles in Directory Roles.