Intota: Attaching Provider Contacts
- Product: 360 Resource Manager
How do I Attach Contacts to a Database, Provider, or Title?
Note: Follow these instructions if you're using the legacy Client Center and not Intota.
How to Attach Contacts to a Database, Provider, or Title in Intota - Click Tools and then select Contacts from the submenu. Alternatively, click on the Contacts link in the Quick Links section of the home page. The Contacts list appears.
- Click the contact you want to attach. The Contact Details page appears.
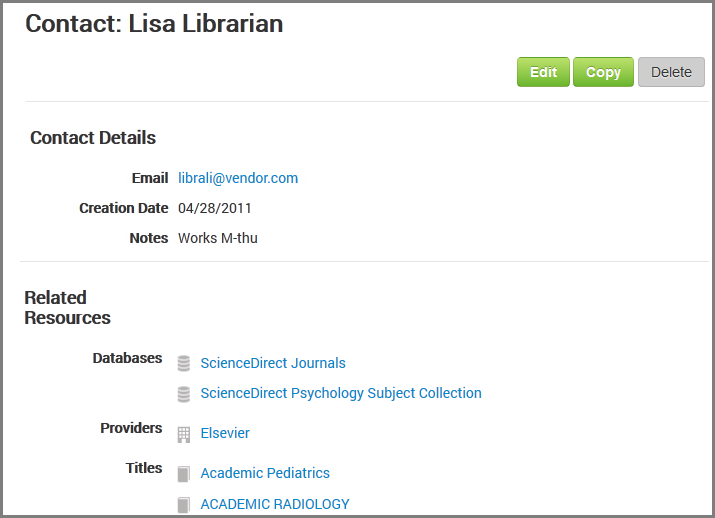
- Click the Edit button.
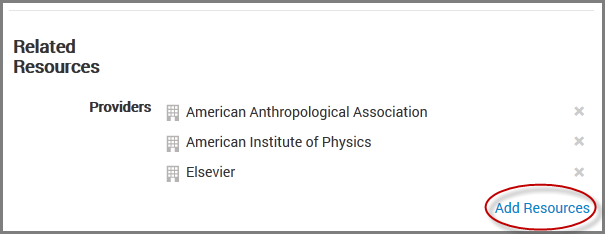
- Scroll to the Related Resources section at the bottom of the page.
- Click Add Resources (lower-right).
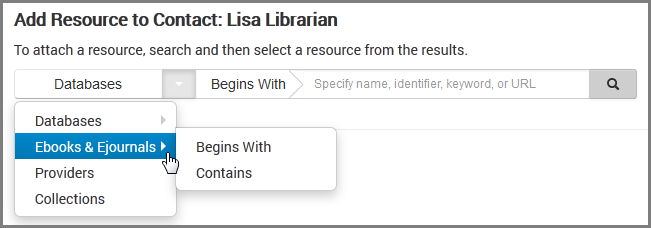
- Choose the appropriate type of resource you want from the drop-down list (Databases, e-Resources, Providers, and Collections).
- Enter the name of the resource you want to find into the search field and click the magnifying glass button. If necessary, select a filter: Contains or Begins With. A list of results appears.
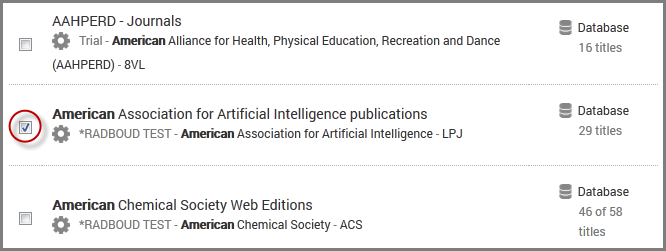
- Select the check box for each of the resources you want to attach.
- Click the Add button (upper-right of page).
Contact information is inherited through the resource hierarchy. Contacts added to a provider will display in all the "Proquest" databases and all of the titles within those databases.
How to Attach a Contact to a Provider in the legacy Client Center or How to Attach Contacts to a Database
- Select a provider by clicking on a provider name on the Data Management page or an e-Catalog search results page:

- On the Provider Details screen, click Contacts in the left-side navigation tree.
- Click Attach on the right side of the header to attach a contact.
- Check the box next to the name of the contact you want to attach.
- Click Save.
In addition to the provider, the contact will automatically be attached to all of that provider's databases to which your library subscribes, as well as all titles within those databases.
- Select a database by clicking on a database name on the Data Management page:
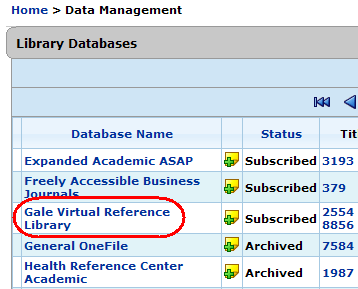
-
On the Database Details page, click Contacts on left side:
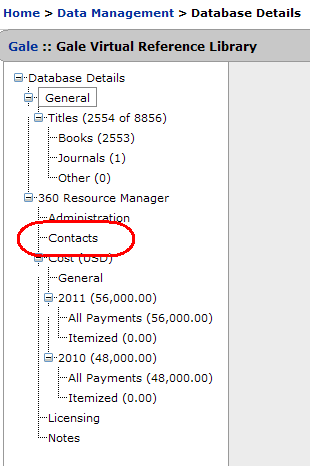
-
You will see the list of contacts currently attached to the database (if any). Click Attach on the upper-right side of the page:

-
You will see a list of all contacts that your library has added to 360 Resource Manager. Check the box on the left side of the name of the contact you want to attach to this database:

- Click Save.
- Date Created: 9-Feb-2014
- Last Edited Date: 29-Mar-2015
- Old Article Number: 7346

