
How do I create a Pivot Table in Alma Analytics?
- Product: Alma
Question
I would like to transpose certain rows in my Alma Analytics report into columns. How can I do this in OBI?
Answer
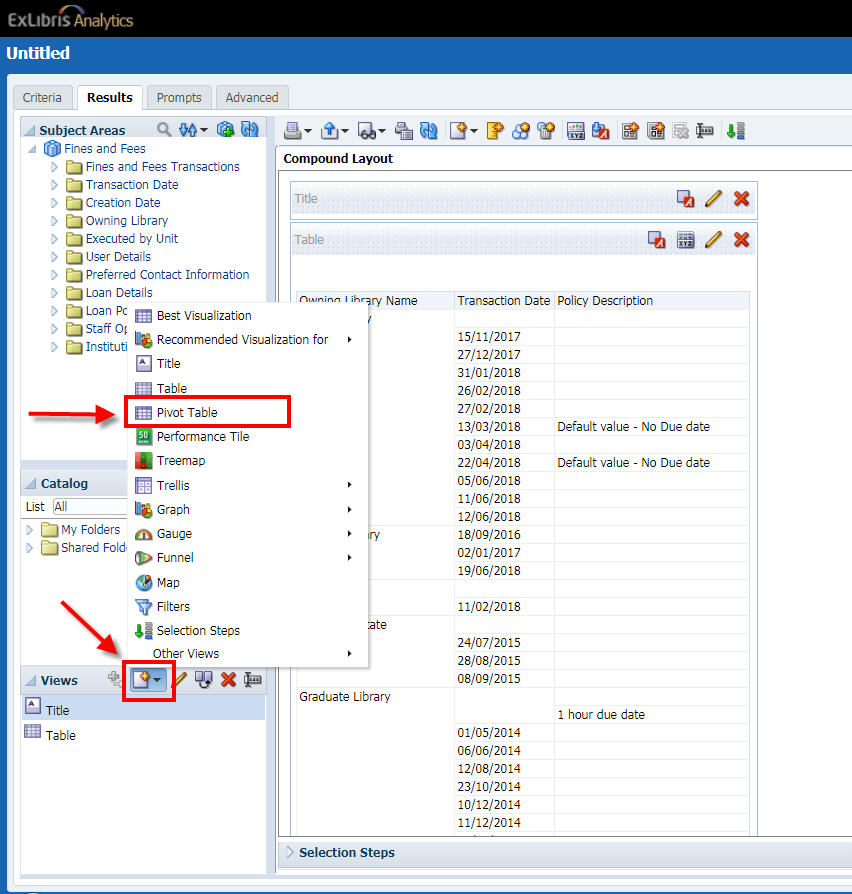
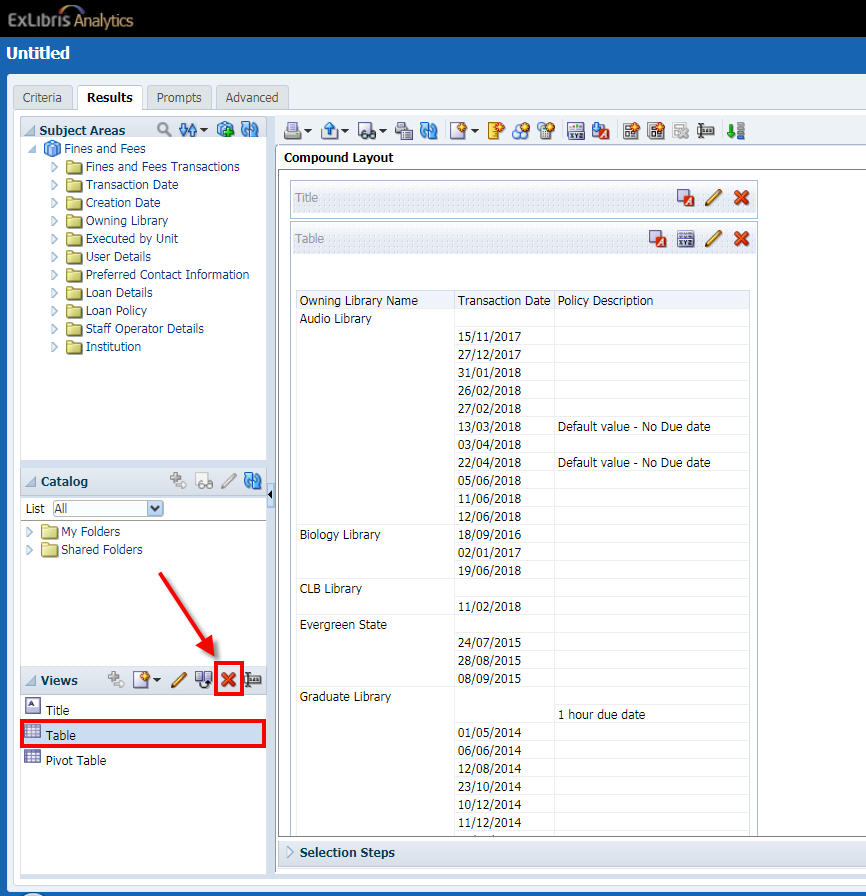
1. Edit your report and go to the "Results" tab.
2. Click the "New View" icon in the bottom left corner and select "Pivot Table"
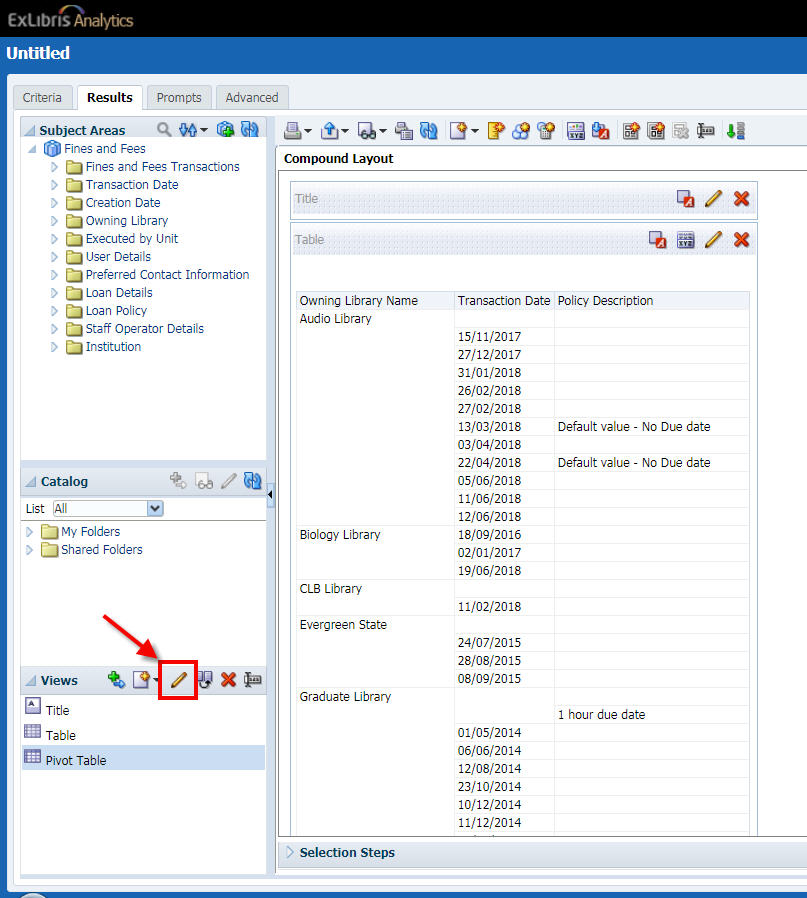
3. If the Pivot Table does not open for editing automatically, select "Pivot Table" in the "Views" section, then click the pencil icon to edit it.
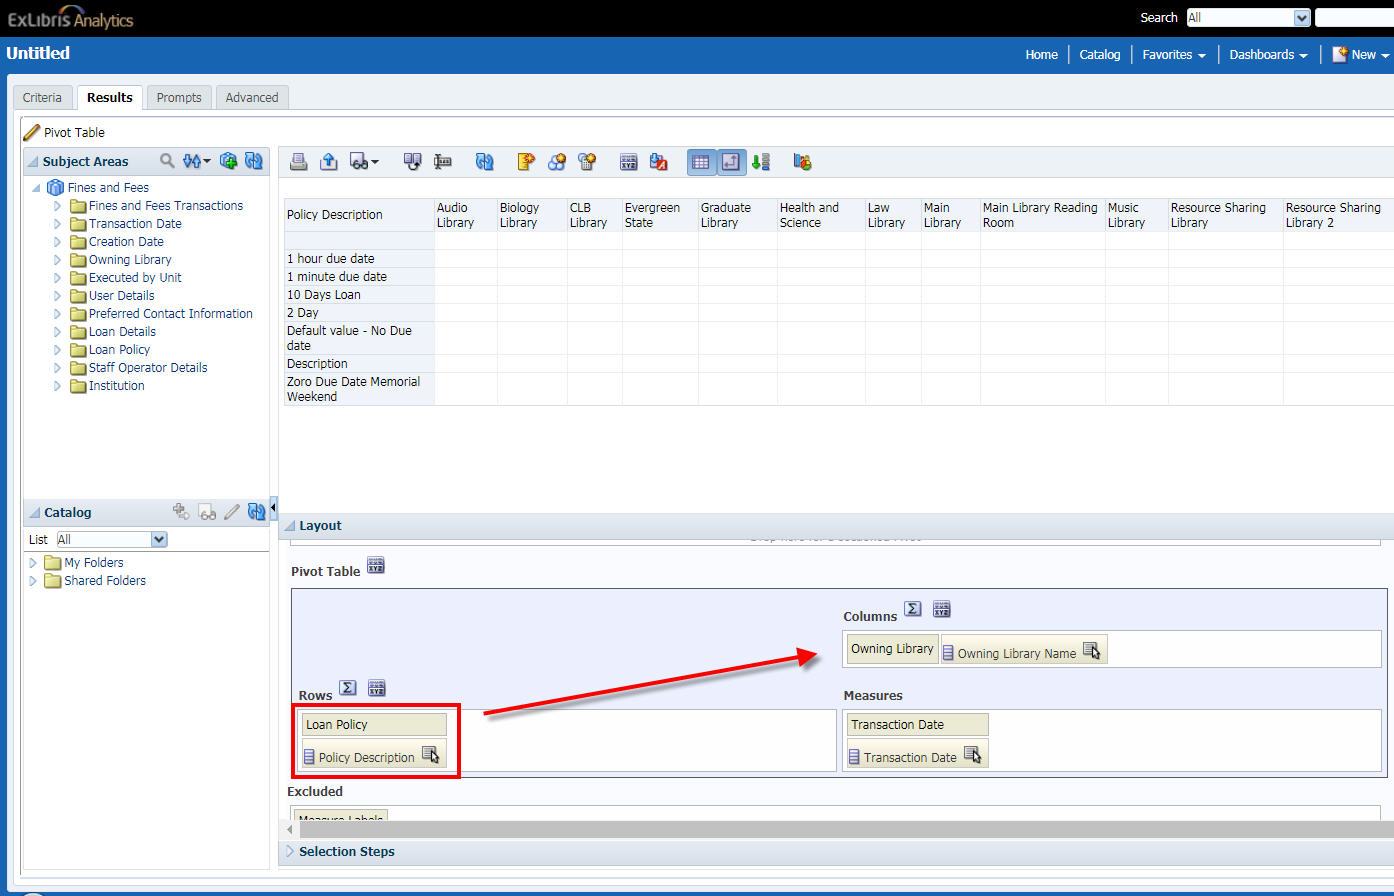
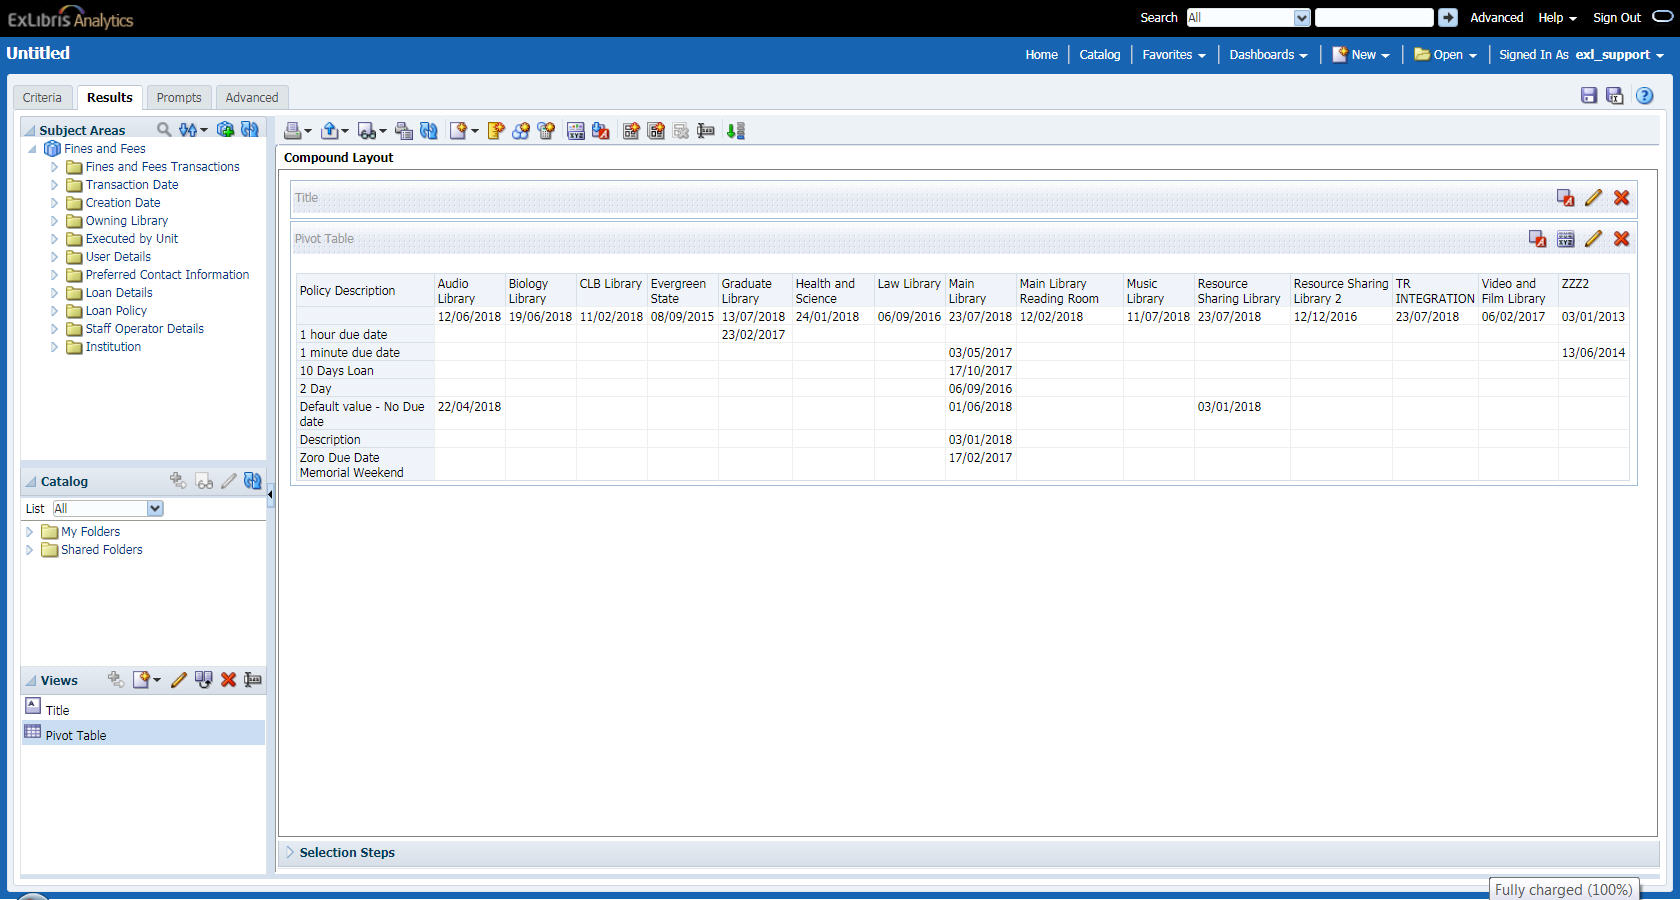
4. Within the "Layout" section, drag and drop the field(s) you would like to transpose from the "Rows" box to the "Columns" box. Move other fields as desired.
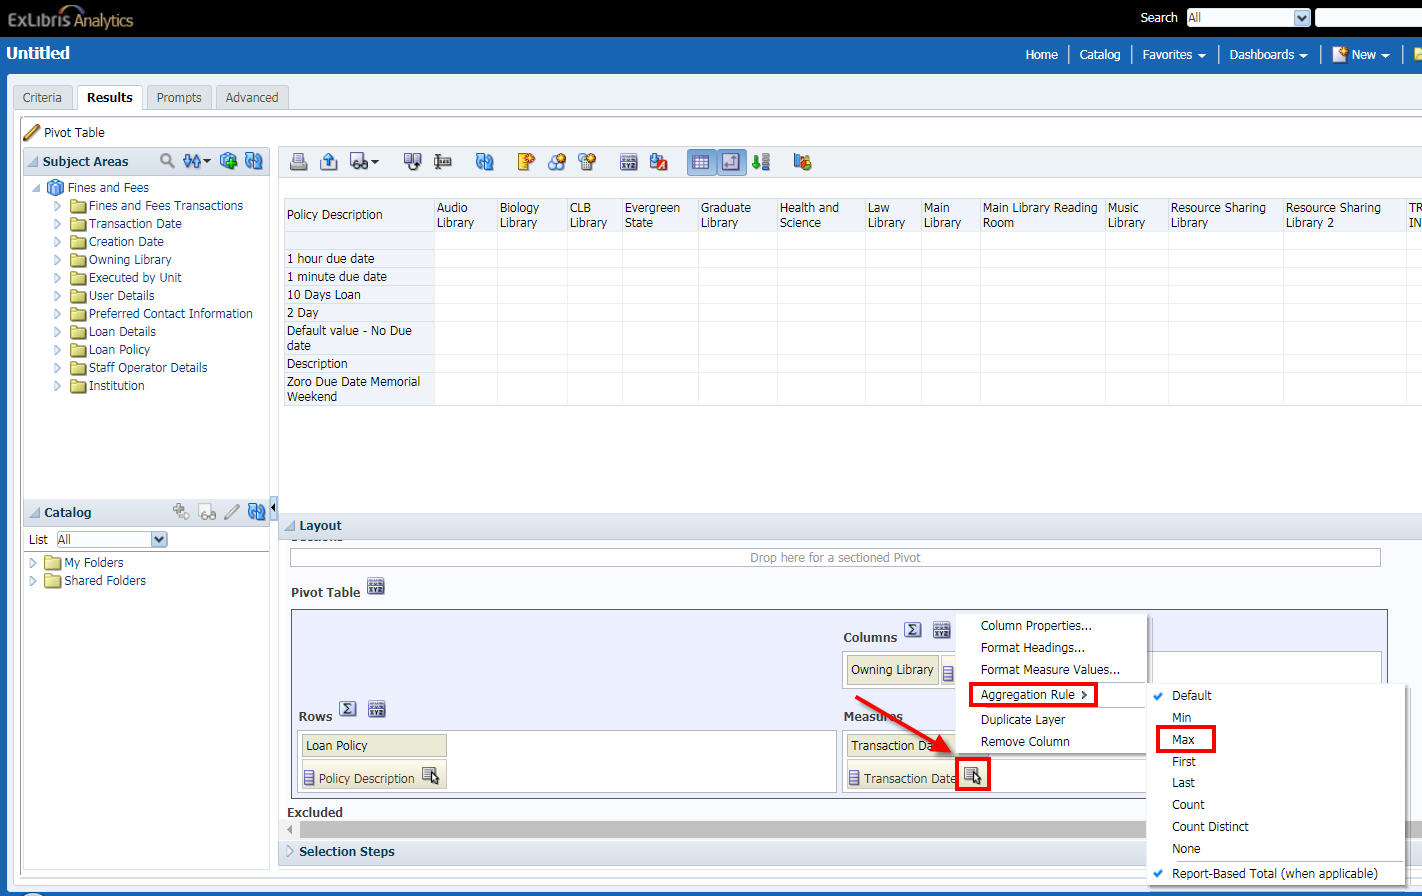
5. If you move a text-based field to the "Measures" box, the preview report may not show any values in any of the cells. To fix this, click "More Options..." for the field in the "Measures" box and select "Aggregation Rule > Max".
6. When you are finished adjusting the Pivot Table, click the "Done" button.
![]()
7. To remove the original table from the main view, select "Table" from the "Views" section and click "Remove View from Analysis".
7. To add the Pivot Table to the view, select "Pivot Table" from the "Views" section and click "Add View".

Your completed Pivot Table should now appear in the main view.
Additional Information
Instructions from Oracle are available here: https://analytics-na01.alma.exlibrisgroup.com/analytics/olh/l_en/creatingviews006.htm#i1005297
- Article last edited: 24-Jul-2018