Making the Primo Front End Read Only
This procedure is applicable to the classic Primo UI only and is not supported in the new Primo UI and Primo VE.
- OPAC via Primo requests
- Access to My Account
- Creating new tags
- Creating or editing reviews
- Saving queries
- Adding items to the e-Shelf basket (as an authenticated user)
- Ordering items in the Main menu
- Create a file called readonly.css and include the following information:
* Readonly Attributes */
/* Hide the e-shelf feature */
.EXLMyShelf,.EXLResultsList td.EXLMyShelfStar, .EXLFacetContainer div.EXLFacetActionsV2 li.EXLFacetSaveToEShelfAction, .EXLTabHeaderButtons ol.EXLTabHeaderButtonSendToList li.EXLButtonSendToMyShelf {display: none;}/* Hide the My Account feature */
.EXLMyAccount {display: none;}/* Hide the ability to add new Tags and reviews and to view your reviews and tags */
.EXLTagsContainer p:first-child, .EXLReviewsContent p:first-child, div#myTags, .EXLTagsPageRecentTags, .EXLReviewsContent cite {display: none;}/* Hide the ability to place requests */
.EXLTabsRibbon div li.EXLRequestTab {display:none;}
.EXLLocationTableActions {display:none;}
.EXLLocationTableHeaderActions {display:none;}/* Hide the ability to save queries */
.EXLFacetContainer div.EXLFacetActionsV2 li.EXLFacetSaveSearchAction {display: none;}/* Create a readonly banner that displays a read-only message at the top of the Front End */
div.readonly {padding: 0px; margin: 0px 0px 0px 0px; font-size: 80%;
border-bottom: 1px solid #E1E1E1; border-top: 1px solid #E1E1E1;
background-color: #d93f3b; color: #ffffff; text-align: center;
line-height: 36px; font-weight: bold;} - Save the file to the server. If you do not have access to the server, use the File Uploader utility (Primo Home > Primo Utilities) to upload the file.
- Edit the CSS mapping table (Primo Home > Advanced Configuration > All Mapping Tables > Front End subsystem).
- In each mapping row, append readonly.css to the list of CSS files in the CSS URL field. For example: Primo_default.3.0.css;../uploaded_files/<YOUR_VIEW>/readonly.css
- Save and deploy your changes to the mapping table.
- Edit the Static HTML file that you use for the header and add the following text:
<script type="text/javascript">
// To be added in your static HTML file header during the Alma cutover period
//<![CDATA[
(function() {
// You can customize the message if you want
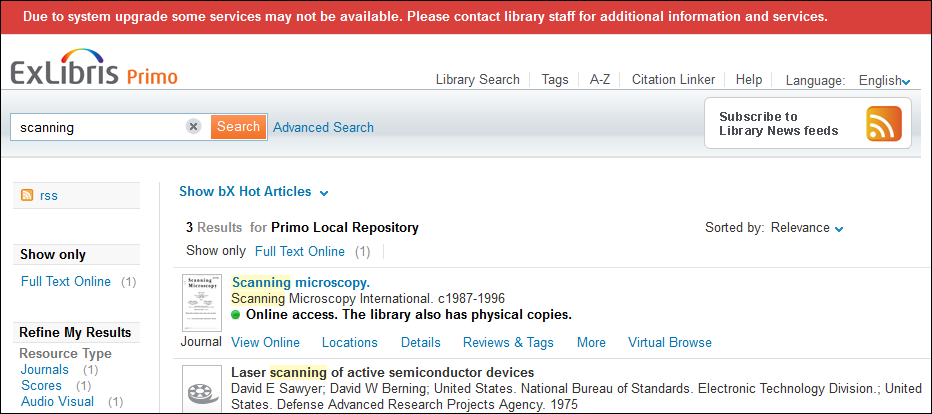
var mess = 'Due to system upgrade some services may not be available. Please contact library staff for additional information and services.';
$('body').prepend('<div class="readonly">' + mess + '</div>');
}());//]]>
</script> - Save the modified static HTML file to the server. If you do not have access to the server, use the File Uploader utility (Primo Home > Primo Utilities) to upload the file. In the FE, you should see the message at the top of the page: