
Configuring Import Profiles for Primo VE
To configure import profiles, you must have the Discovery Administrator role.
Adding a Discovery Import Profile
An Import profile enables you to define an external data source, apply normalization rules, configure delivery links, and schedule the execution of the import profile job.
Primo VE Administration Certification > External Data Sources (12 min)
During the import, the contents of any field must not exceed the maximum field size of 32,766 characters (which is set by Apache Solr).
-
Open the Import Profiles page (Configuration Menu > Discovery > Loading External Data Sources > Discovery Import Profiles), which lists all the Discovery import profiles.
-
Select Add New Profile to open the Import Profile Details page.
 Import Profile - Choose Discovery Type (Step 1)
 -
Ensure that the Discovery option has been selected and then select Next.
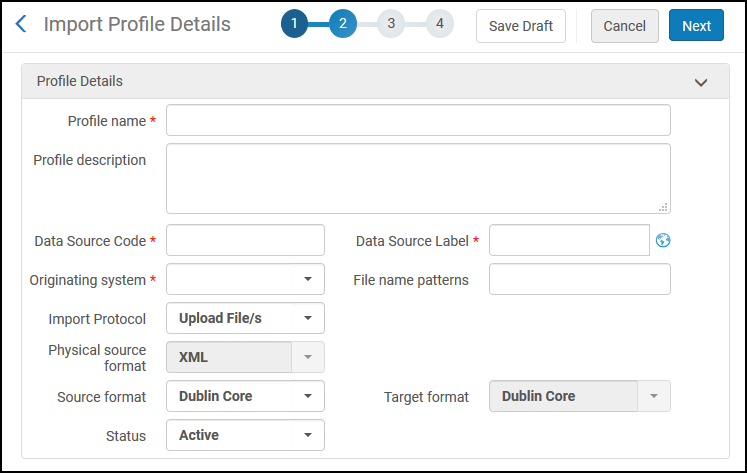 Import Profile Details Page (Step 2 - Profile Details Tab)
 -
Specify the following fields and then select Next.
Discovery Import Profile - Profile Details Field Description Profile Details Profile name (required)
The unique profile name. After it has been defined, it cannot be changed. This name appears in the list of import profiles and also appears at the top of the page.
Profile description
A free text description of the profile that shows on the list of import profiles.
Data Source Code (required)
The unique code used to identify the external data source to the system. After it has been defined, it cannot be changed.
Data Source Label
Defines the data source's display name in the UI and its custom scope name on the Define a Custom Scope page (Configuration > Discovery Search Configuration > Search Profiles). See Defining a Local Data Scope to add search conditions for your external data source.
 Search Scope for External Data Sources
-
You must save and reopen new search profiles before you can use the Globe icon to translate this field.
-
Changes to this label update its associated code in the Data Source code table.
File name patterns
A file name pattern (such as *.xml) filters out records that do not conform to the pattern you specify. Use this when the FTP directory contains additional files that should not be imported.
Alma looks for this pattern as a sub-string in the file name, exactly like a regular expression, except for two changes:
-
A period . matches only a period (as if you had entered \\.).
-
An asterisk * matches zero or more characters of any type (as if you had entered .*).
Otherwise, use regular expressions.
Ensure that the regular expression you use exactly matches only the files that you want to import. For example:
-
The following retrieves all files ending in ".xml" (without the quotes): .xml$
-
The following retrieves all files containing the string “yLk” (without the quotes): yLk
-
The following retrieves all files beginning with “YLK” (without the quotes): ^YLK
-
The following retrieves all files beginning with “YLK” (without the quotes) followed by a space: ^YLK\s
-
The following retrieves any file that contains at least one of the following words (without the quotes): “harry” or “potter” or “rowling”: \b(harry|potter|rowling)\b
-
The following retrieves any file that contains all the following words (without the quotes): “harry” and “potter” and “rowling”: (?=*?\bharry\b)(?=*?\bpotter\b)(?=*?\browling\b)
Originating system (required)
The type of system from which the records originated.
When using the MARC21 Bibliographic source format, set this field to Other.
Import protocol
The protocol used to retrieve the file containing the records. The options are:
-
FTP – Retrieve by FTP. You must enter fields under Import Processing and FTP Information (see below).
-
Upload File/s – Upload the file from a local or network drive.
-
OAI – Retrieve using OAI. You must define additional fields associated with the OAI server.
Physical source format
The file format of the import file. The available options are:
-
XML
-
Binary – Used with MARC21 Bibliographic source format only.
Source format
The format of the source records in the import file. Ensure that you base your selection on the source format of the incoming records, not the physical format of the import file or OAI feed:
-
Dublin Core – Dublin Core records encoded in oai-dc format.
-
Generic XML – Generic XML records (including Dublin Core records encoded in oai-dc format).
-
MARC21 Bibliographic – MARC21 records encoded in XML or binary format. With this format, your source records must include either an 035.a or 001 field, which is used as the Source control number to identify the record.
-
UNIMARC Bibliographic – UNIMARC records encoded in XML or binary format. With this format, your source records must include either an 035.a or 001 field, which is used as the Source control number to identify the record.
MARCXML files must be inside an OAI envelope because Discovery Import Profiles use an OAI File Splitter.
Target format
The format in which to save the records in Primo VE. The available options are:
-
Dublin Core – Select this option if Source format is Dublin Core or Generic XML.
-
MARC21 Bibliographic – This option is selected for you if Source format is MARC21 Bibliographic.
-
UNIMARC Bibliographic – This option is selected for you if Source format is UNIMARC Bibliographic.
Status
The default is Active. Select Inactive if you do not want the import profile to be available for use at this time.
Share with Network
For consortia environments only, this parameter indicates whether the external resource is included in the 'Entire network' search scope and shared with other member institution's catalogs.
Enabling/disabling this feature requires you to republish the external data source.
File Splitter Parameters (Generic XML only) Root element tag
The name of the first tag in the file before the list of the records to process (for example, ListRecords).
Record elements tag
The name of the tag representing the beginning of a record. A file may contain one or more records.
XPath to the identifier tag
The XPath to the identifier tag of the record. This should be the tag that contains the unique identifier for the record.
XPath to the location of the deleted status
The XPath to the location of the deleted status of the record. Default value for a record is: deleted = false.
Delete record regular expression
This regular expression is applied to the value found under the XPath to the location of the deleted status field. If the regular expression matches the value found, the record is marked as deleted.
Scheduling Appears if you selected FTP or OAI. When the profile is scheduled, a Metadata Import job appears in the list of scheduled jobs in Alma. For more information on this job, see Viewing Scheduled Jobs and Viewing Running Jobs.
Files to import
Select All for all files found in the FTP location. Select New to select only those files that have not yet been imported.
Scheduler status
Whether the scheduling is active or inactive.
Scheduler
Select one of the scheduling options from the drop-down list. Times depend on your time zone and the server you are using.
Email Notifications
Which users and email addresses receive email notifications when the publishing profile completes. Opens the Email Notifications for Scheduled Jobs page. You can choose whether to send the notifications for successful jobs and/or jobs that contain errors.
FTP Information Appears only if you selected FTP as the Import Protocol.
Description
A description of the FTP submission format that is defined in this section.
Server/Port
The IP address and port of the FTP server sending or receiving the files.
Username/Password
The username and password for logging on to the server that is sending or receiving the files.
Input directory
The path of the submission format’s input directory.
Max. number of files
Not in use. Accept the default value.
Max file size/Size type
Not in use. Accept the default value.
FTP server secured
Whether to use a secure FTP transfer (SFTP)
FTP passive mode
Whether to use FTP passive mode or not. This depends on the setting in your FTP server.
Test Connection
Select to run a test of the FTP connection
OAI DetailsAppears only if you selected OAI as the Import Protocol.
OAI Base URL
The OAI provider’s URL that is used to harvest the metadata from the OAI repository.
Authentication
Indicates whether the OAI server requires you to enter a username and password.
Username
The username if authentication is required to access the server.
Password
The password if authentication is required to access the server.
Connect and Edit
Select to refresh the page with the associated OAI fields after entering the base URL of the server and authentication information if necessary.
Before saving an OAI import profile, you must first select this button to test the OAI connection when adding or updating fields in the OAI Details section.
The following fields appear after you select Connect and Edit. This enables you to specify information specific to the OAI repository, which is provided by the OAI provider.
Repository Name
The name of the repository.
Granularity
Indicates the granularity of the repositories date stamp.
Earliest Date Stamp
The earliest that data exists in the OAI provider records.
Admin's E-Mail
The e-mail address of an administrator of the OAI repository.
Metadata Prefix
The metadata prefix from the OAI provider. Primo VE supports many formats (such as oai_dc, marc21, and oai_qdc). Please contact Support if you need a different format.
Set
If selective harvesting by group is necessary, specify the set name.
Identifier Prefix
The shared prefix that appears before the actual unique record identifier when harvesting by the identifier.
Harvest Start Date
When submitting a new import job and after the job completes successfully, the Harvest Start Date is updated automatically with the job’s ending time.
For contentDM harvests, it is recommended that you leave this field empty due to an issue with contentDM.
Encode Date
Whether the repository supports encoding dates.
Encode data
Whether the repository encodes the data.
Open Test Page
Select to test the OAI connection and flow. See Testing OAI Import Protocol Flow.
-
-
In the Normalization tab, select a normalization rules process if this data source requires additional normalization. For more information, see Creating Normalization Processes for External Data Sources.
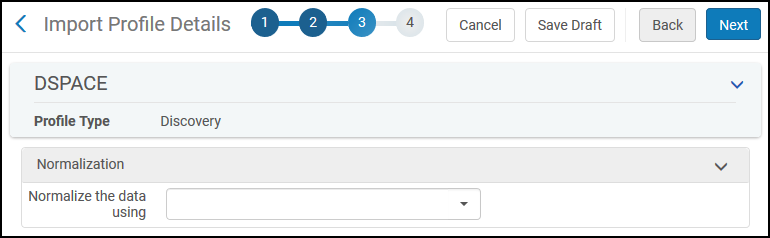 Import Profile Details Page (Step 3 - Normalization Tab)
 -
In the Delivery tab, configure the following types of delivery links in their respective sections:
-
Link to Resource – Displays digital resources that include a link to the digital repository file. This configuration provides unrestricted access to full text and displays the link to full text in both the View Online and Links section on the Full Display page. In addition, records of this type display the Available online status on the Brief Results page and are included with the Available online facet.
When both this option and the Link to Resource - Other Statuses option are configured, the import uses only one configuration. For more details, see Link to Resource - Other Statuses. -
Link to Resource - Other Statuses – Displays digital resources that may or may not include a link to the digital repository file. This configuration provides either restricted access to full text or no access to full text. When restricted access is given to the record, a link to full text appears in both the View Online and Links sections on the Full Display page. In addition, records of this type display one of the following restricted availability statuses on the Brief Results page: Not available online, Check for availability, Not available online + Check holdings, or Check for availability + Check holdings. For more information regarding these statuses, see Configuring Display Labels for Availability Statuses and Full Text Links.
You can configure both the Link to Resource and Link to Resource - Other Statuses options, but the import uses only one option to create the link to full text and to determine which availability status appears for the external record. The following table shows which configuration is given preference when both are configured. If the conditions for the preferred configuration are not met, the import uses the other configuration option if its conditions are met.
Link to Resource Link to Resource - Other Statuses Method Used to Create Link to Full Text Template Template If its conditions are met, use only the template from the Link to resource section. Template Static URL from source If its conditions are met, use only the static URL from the Link to resource - Other Statuses section. Static URL from source Template If its conditions are met, use only the static URL from the Link to resource section. Static URL from source Static URL from source If its conditions are met, use only the static URL from the Link to resource - Other Statuses section. -
Link to Request – Displays physical records that are loaded from an external data source and includes a link to the source system for the physical item's delivery options. This type of link appears in the Links section on the Full Display page, and records with this type of link display the Check holdings status on the Brief Results page and are included with the Held by library facet.
-
Link to Thumbnail – Displays the thumbnails for resource type images.
The link must return an image file of a valid type (such as .bmp, .png, .jpg, and so forth).
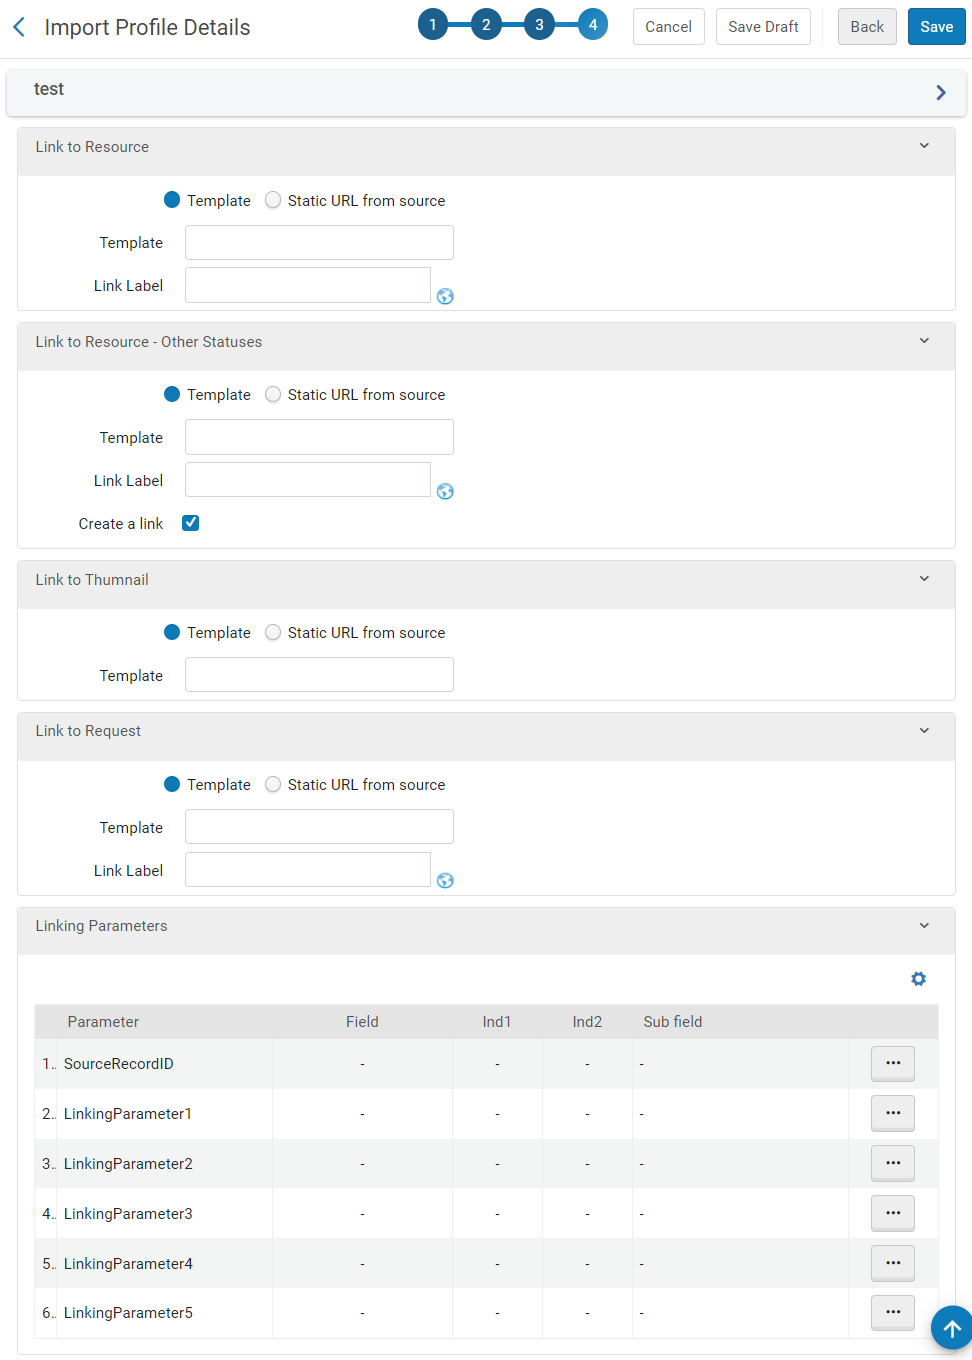 Import Profile Details Page (Step 4 - Delivery Tab)
-
For each type of link (resource, request, and thumbnail), specify the following information:
-
Select the method used to create the delivery links:
-
Template – Select this option if it is necessary to generate the delivery links using a combination of static text and linking parameters, which include normalized data taken from the source record. In addition to the source record's ID ($$SourceRecordID), the linking parameters ($$LinkingParameter1 - $$LinkingParameter5) are defined in the Linking Parameters section.
-
Static URL from source – This method enables you to use the source record's static URL for delivery, which may be stored in a Dublin Core tag (such as dc:uri) or a MARC21 field.
-
-
For the Template method only, specify the relevant linking parameters and static text to build the delivery link in the Template field. For example:
http://hdl.handle.net/$$LinkingParameter1The number of links returned in the Links section of the record's full details depends on the number of linking parameters used in the linking template:
-
Single linking parameter – This option returns static links that are stored in the specified source field. If the field indicated by the linking parameter is repeated in the source record, Primo VE displays a link for each field. This configuration may look something like the following:
Template Parameter Definitions DC Source Links Section $$LinkingParam1
$$LinkingParam1 = dc:source
<dc:source>https://google.com</dc:source>
<dc:source>https://en.wikipedia.org</dc:source>
Multiple links are created:
- https://google.com
- https://en.wikipedia.org
-
Multiple linking parameters – This option returns a single link that dynamically returns the record based on the specified linking parameters. If the field indicated by a linking parameter is repeated in the source record, only the first occurrence of each is used to create the link in Primo VE. This configuration may look something like the following:
Template Parameter Definitions DC Source Links Section https://test.com/request?creator=$$LinkingParameter2&type=$$LinkingParameter3
$$LinkingParam2 = dc:creator
$$LinkingParam3 = dc:type
<dc:creator>Brown</dc:creator>
<dc:creator>Black</dc:creator
<dc:type>Thesis</dc:type>
A single link is created:
https://test.com/request?creator=Brown&type=Thesis
-
-
For the Static URL method only, enter the following fields:
-
Dublin core tag – (DC targets only) Specify the Dublin Core tag from which to retrieve the record's static URL.
-
Field, Ind1, Ind2, and Sub field – (MARC targets only) Specify the MARC field, matching indicators, and the MARC subfield from which to retrieve the record's static URL.
-
-
Link Label – For resource links only, specify the label that displays for all resource links in Primo VE.
You must save and reopen new search profiles before you can use the Globe icon to translate this field.
-
Create a link – This checkbox appears only for the for the Link to Resource - Other Statuses option. If you are using the Static URL method, you can omit the full text links in the record's full display by clearing this checkbox. There is no option to omit the full text links when using the Template method.
-
-
In the Linking Parameters section, edit each linking parameter that was assigned to a template above. The Edit Linking Parameter dialog box opens:
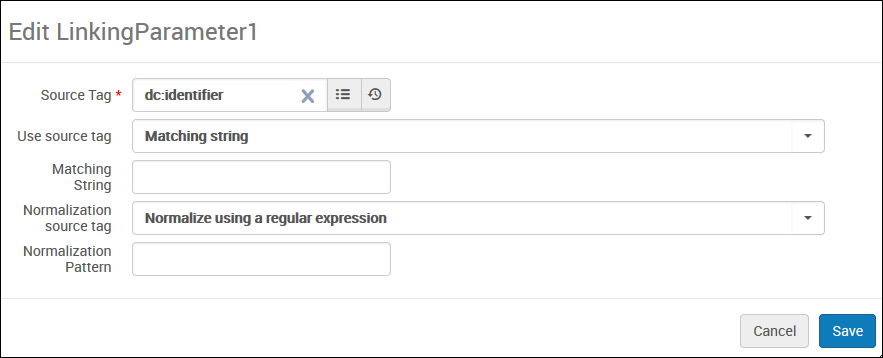 Edit Linking Parameter Dialog Box
 -
Specify the following fields and then select Save.
-
Source Tag (DC only) - Search for and select the DC source tag from which to get the delivery URL.
-
Field, Ind1, Ind2, and Sub field (MARC only) - Search for and select the MARC field, matching indicators, and the MARC subfield from which to get the delivery URL.
-
Use source tag - Select one of the following options to indicate whether the tag must contain a specific value:
-
Always - No matching string is necessary. The value is always used.
-
Matching string - The value of the tag must match the string specified in the Matching String field.
-
Matching string using a regular expression - The value of the tag must match the result of the regular expression specified in the Matching string field.
-
-
Matching String - If matching is necessary, specify the string that you want to match.
-
Normalization source tag - Select one of the following options to indicate whether normalization is necessary before loading the value into Primo VE.
-
No normalization - No normalization is needed. The value of the tag is taken as is.
-
Normalization using a regular expression - A regular expression is used to extract part of the value before saving to Primo VE.
-
-
Normalization pattern - If you need to extract parts of the tag, use regex groups to capture the necessary parts, which are concatenated to form the returned value from the source tag.
The following configuration matches dc:identifier fields with values that begin only with http or https, and then concatenates the values extracted with groups part1 and part2. For example, if dc:identifier contained the URL https://knowledge.exlibrisgroup.com/part1=whatever&part2=_you_want, the returned value would be whatever_you_want.
Field Value Source Tag
dc:identifier
Use source tag
Matching string using a regular expression
Matching String
^(?:http(s)?:\/\/).*
Normalization source tag
Normalization using a regular expression
Normalization pattern
.*part1=(.+)&part2=(.+)
-
-
-
Select Save to save the import profile.
Configuring Display Labels for Availability Statuses and Full Text Links
The Calculated Availability Text Labels code table enables you to customize/translate the display labels for restricted/unrestricted availability statuses and full-text links. The following table lists the supported codes.
| Code | Description |
|---|---|
| Link to Resource - Other Statuses (Restricted): See Link to Resource - Other Statuses option for more information. | |
|
delivery.code.ext_restrictedWithLink |
This code displays the following availability status label when there is restricted access to full text: Check for availability |
|
delivery.code.ext_restrictedWithLink_and_physical |
This code displays the following availability status label when there is restricted access to full text, but there may be access to physical inventory: Check for availability + Check holdings |
|
delivery.code.ext_restrictedNoLabel |
This code displays the following label for full-text links if no label is configured for restricted resources: Link to external resource |
| Link to Resource (Unrestricted): See Link to Resource option for more information. | |
|
delivery.code.ext_not_restricted |
This code displays the following availability status label when there is unrestricted access to full text: Available Online |
|
delivery.code.ext_not_restricted_and_physical |
This code displays the following availability status label when there is unrestricted access to full text and there may be access to physical inventory: Available online + Check holdings |
Running a Discovery Import Profile
Discovery import profiles enable you to import records from external sources or update records that you have already imported from an external source.
-
Because the import assigns a unique MMS ID to each record based on the specified identifier in the import profile, subsequent imports of the same record (regardless of the import profile used) updates the existing record and does not create a new record.
-
If records are imported with one discovery import profile and updated with a second discovery import profile, the search scope for those records are changed to reflect the data source code and label of the second discovery import profile. If you had created conditions for the original data source in a local data scope, they must be updated to reflect the change to the data source.
To run a discovery import profile:
-
Open the Import Profiles page (Configuration Menu > Discovery > Loading External Data Sources > Discovery Import Profiles), which lists all of the Discovery import profiles.
-
From the list of profiles, select one of the following row actions for the external source:
-
Run – Execute this command the first time that you want to load external data into Primo. If you use this option to reload data, permalinks for the records are not retained.
-
Reload – This action enables you to reload all records from an external data source without having to reharvest files from the external data source. This is useful if you need to apply indexing changes to existing records.
Any records added before the Primo VE July 2020 Release will not be processed with this option.
-
Reload and Delete – This action enables you to reload existing data and retain the permalinks for each existing record. This option removes any records that are not included in the harvest or import files.
-
Any records added before the Primo VE July 2020 Release will not be processed with this option.
-
For OAI, the records that are imported are based on the Harvest Start Date field. Any record harvested before that date is not included in the import. To import all records from the repository, clear the Harvest Start Date field.
-
The report for the import profile job does not return a list of deleted record identifiers. You must contact Ex Libris support to get the list.
-
-
-
If you are loading records from files stored on your workstation, specify the files and select Submit. For example:
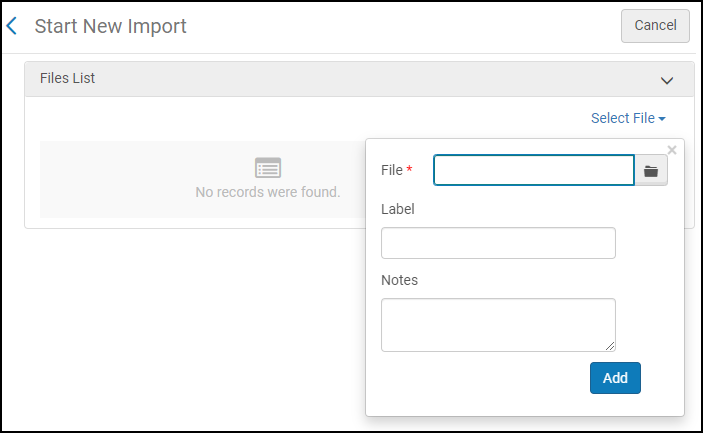 Select Files for Import
 -
On the Job History page, select Refresh to view the progress of the import. For example:
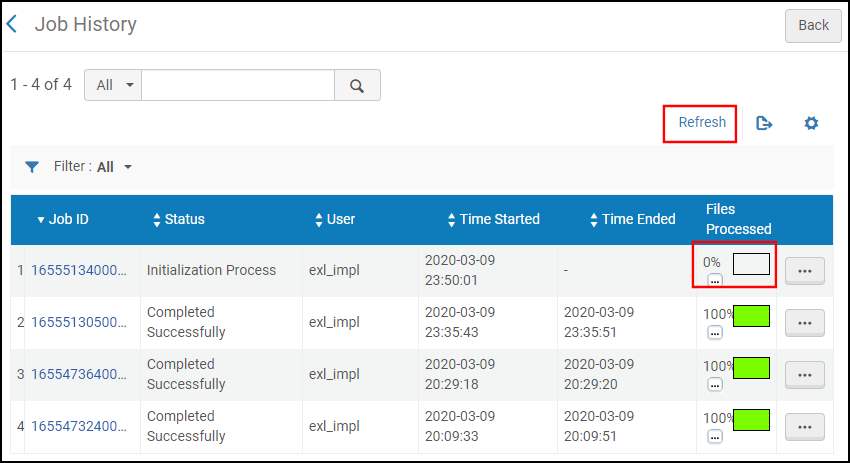 Monitor Discovery Import Profile