
Integrating the Google Search Console with Primo VE
Alma allows you to integrate the Google Search Console with your Primo VE institution and any Google sitemap files that you have created so that Google can monitor your institution's activity. The integration consists of the following steps:
-
If you want Google to find and monitor Primo records that are dynamic (as a result of search queries), create the Google sitemap files. For more information, see Configuring Sitemap Files for Primo VE.
-
Configure the Google Search Console. For more information, see Configuring Google Search Console.
-
Allow Google Search Console to monitor your Primo VE institution. For more information, see Allowing Google Search Console to Monitor Search Activity.
Allowing Google Search Console to Monitor Search Activity
Primo VE uses Alma's integration system to allow Google Search Console to monitor your Primo VE institution.
-
Before you perform this integration, you must first get the necessary verification information from Google. For more details, see Configuring Google Search Console.
-
Alma supports only one Google Console integration profile.
-
Open the Integration Profile List page (Configuration Menu > General > External Systems > Integration Profiles).
-
If an integration profile for Google Console has not already been created, select Add Integration Profile to open the Integration Profile page. Otherwise, edit the previously created Google profile and make any necessary changes.
-
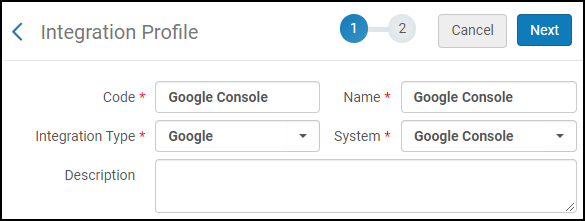
Specify the following fields, and then select Next:
-
Code – Enter a unique identifier for this integration profile.
-
Name – Enter a unique name for this Google integration profile.
-
Integration Type – Select Google.
-
System – Select Google Console.
 Select the Type of Integration - Step 1
After the creation of this integration profile, these fields can be modified in the General Information tab.
-
-
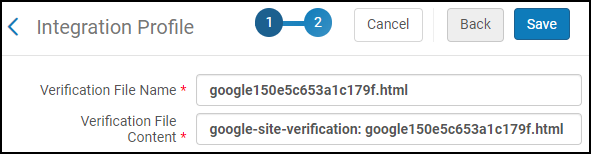
Specify the following fields, and then select Save to create the integration profile.
-
Verification File Name – Specify the name of the verification file that you received from Google Search Console. For more information, see Configuring Google Search Console.
-
Verification File Content – Specify the contents of the verification file, which includes the type of content and file name, using the following format: google-site-verification: <html_file_name>.
 Specify the Verification Information from Google - Step 2
After the creation of this integration profile, these fields can be modified in the Actions tab.
-
-
If you want to add contact information to this integration profile, edit the new integration profile and select the Contact Info tab.
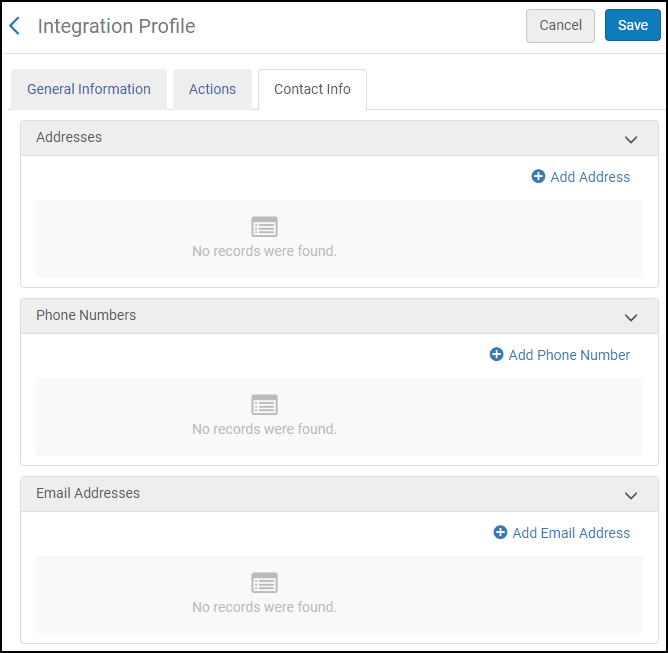 Contact Info Tab in the New Integration Profile
Configuring Google Search Console
Google Search Console provides tools to allow you to monitor the activity of your website. For more details, see https://search.google.com/search-console/about.
If you want the Google Search Console to monitor records that are dynamic (as a result of search queries), you must first create the Google sitemap files. For more information, see Configuring Sitemap Files for Primo VE.
-
Enter the following URL to access the Google Search Console website:
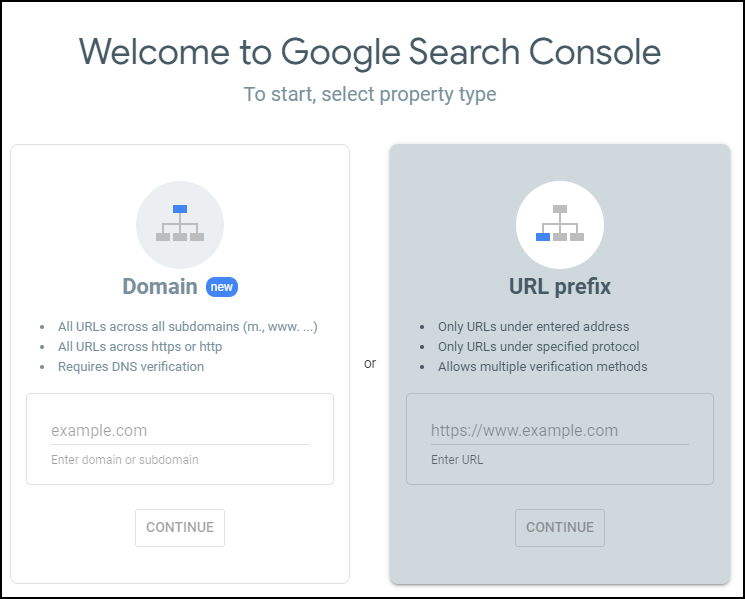 Google Search Console Welcome Website
If you have not signed in to Google, you are prompted to sign in.
-
In the URL Prefix pane, enter the base URL for your Primo VE institution, and then select Continue. For example, https://myinst.primo.exlibrisgroup.com.
-
Copy the name of the html file, which you will need later to add the verification information to the Primo VE server.
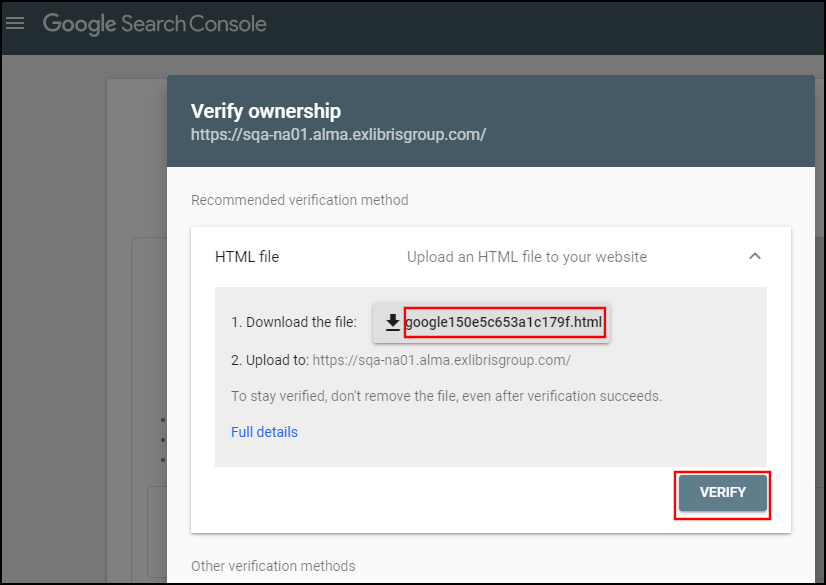 Verify Ownership Page
 -
Create the Google Console integration profile for your institution. For more information, see Allowing Google Search Console to Monitor Search Activity, and then return to the Verify Ownership page.
-
Select Verify to allow Google Search Console to verify the existence of the verification information on your Primo VE server.