
Login Pages for User Authentication
If you are working with Primo VE and not Primo, see Configuring User Authentication for Primo VE.
Configuring Login Pages for the New UI
The following pages are used for user authentication in the new Primo UI:
-
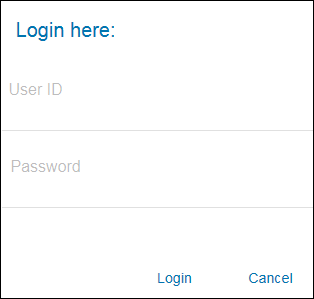
Login page – The following page opens when signing in locally using LDAP or Alma. It allows users to specify their credentials to gain access to the new Primo UI. An optional help description and up to four links for additional help pages can be configured in the help drop-down area of the Login page.
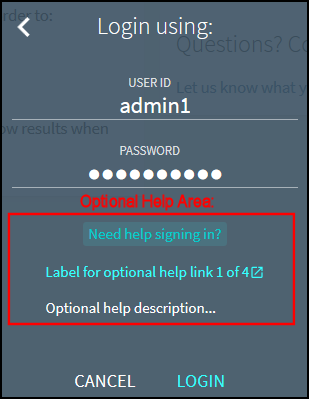 Login Page
 -
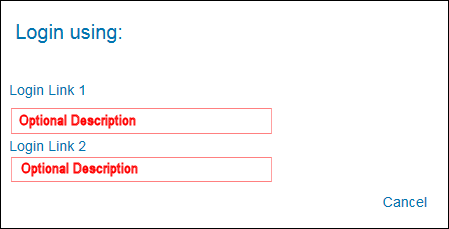
Parallel Links page – When more than one login profile (maximum of five login profiles) is enabled, the following page allows users to select a user authentication system from which to sign in. Local authentication using Alma or LDAP opens the above Login page. For each login link, you can specify an optional description to help users select a user authentication system.
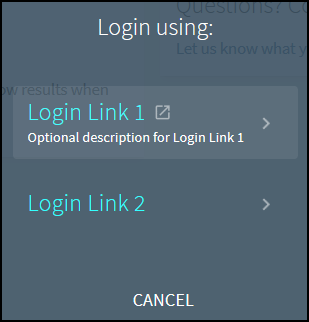 Parallel Links Page
For Alma-Primo environments, authentication is not supported for users who include emojis in their display names.
Configuration Options
You can use the following tables to customize the login pages:
-
User Login code table - This table defines the display labels for all titles, links, buttons, and descriptive text that appear on the Login and Parallel Links pages. The drop-down help area displays only if you have defined either the default.nui.help.description code in this table or a help link in the User Login Links mapping table.
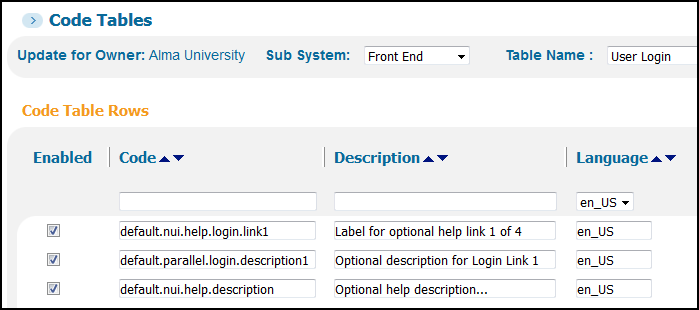 User Login Code Table
 -
User Login Links mapping table - This table defines up to four help links that appear in the drop-down help area on the Login page. When clicked, these links open a custom help page that is specified with the field.
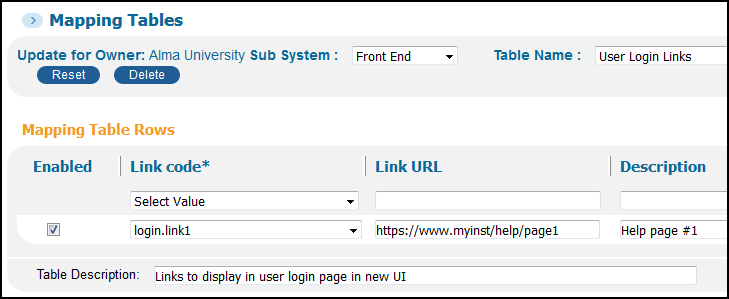 User Login Links Mapping Table
Configuring Login Pages for the Classic UI
-
Login page – The following page opens when signing in locally using LDAP or Alma. It allows users to specify their credentials to gain access to the Primo Front End. Optional login tips can be added to a new static HTML, which can be displayed at the bottom or the right side of the page.
 Login Page
 -
Parallel Links page – The following page opens when both primary and secondary login profiles are enabled in the login profile. It allows users to select the Login page for either the primary or secondary user authentication system. The links for local authentication open the above Login page. For each link, you can specify an optional description to help users select a specific Login page.
 Parallel Links Page
Configuration Options
-
Code tables – The User Login code table allows you to modify the labels that appear on the login pages and to provide localization as needed.
-
Views Wizard – The signin_tips.html file (Home Page > Ongoing Configuration Wizards > Views Wizard > Static HTML tile) allows you to display login tips on the login page. Out of the box, this file is empty.
-
CSS definitions – The following elements allow you to format the login pages:
-
.EXLPRMLoginInlineTips – Specify the following properties to hide or display the tool tips on the bottom of the login page, respectively: {display:none;} or {display:block;}.
-
.EXLPRMLoginColumnTips – Specify the following properties to hide or display the tool tips on the right side of the login page, respectively: {display:none;} or {display:block;}.
-
.EXLPRMLoginCard – Includes selectors such as the following to change the look of objects on the login card of the login page and the parallel login page:
-
a – Applies formatting to all links.
-
input – Applies formatting to all input fields.
-
md-button – Applies formatting to all buttons.
-
-
-
Create a static HTML file for your login tips.
-
Use the Uploader tool (Primo Home > Primo Utilities > File Uploader) to upload the file to the following directory on the Primo server:/uploaded_files/<view_code>
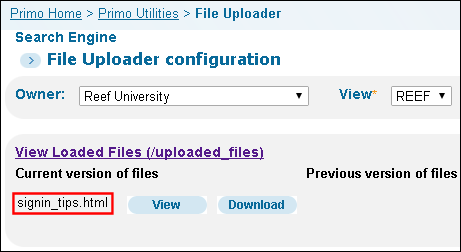 Uploaded File to the Server
 -
In the Views Wizard (Primo Home > Ongoing Configuration Wizards > Views Wizard - Home Page > Static HTML page) change the path of the Login Tips Page field to the path of the uploaded file.
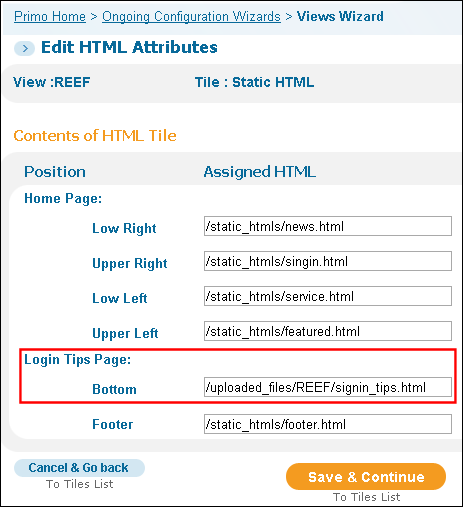 Updated Path to Sign-in Tips Static HTML
 -
Save and deploy the view.
-
Make the following changes to your customized CSS file:
-
Add the following line:.EXLPRMLoginInLineTips {display:none;}
-
Change the following line:.EXLPRMLoginColumnTips {display:none;}To:.EXLPRMLoginColumnTips {display:block;}
-