
Testing Normalization Rules
The normalization rules test utility allows you to test your normalization rules before deploying them. Primo provides sets of test records in various formats, but you can create and load your own test records. The test utility supports the following run levels:
-
For an entire normalization rules set
-
All rules for a PNX field
-
Specific rules for a PNX field
In principle, it is not necessary to deploy the set in order to use the test utility. However, this is required in case you added or updated a mapping table and the rule you want to test uses that mapping table.
Loading Sample Test Records
As sample records are added, they are placed in the following directories, which are located under the /exlibris/primo/p<version>_<copy>/ng/primo/home/profile/publish/demo_data directory on the Back Office server:
-
marc: for records in MARC21 format
-
mab: for records in MAB format
-
dc: for records in Dublin Core format
-
digitool: for records in Digital Entity format (from Digitool)
If your institution has access to the Back Office server, you can manage the records directly on the server. Otherwise, the files can be loaded and managed using the Back Office UI.
To load a test file:
-
Place your records in a tar file and gzip them.For testing, Ex Libris recommends that you have at least 100 records in your file.
-
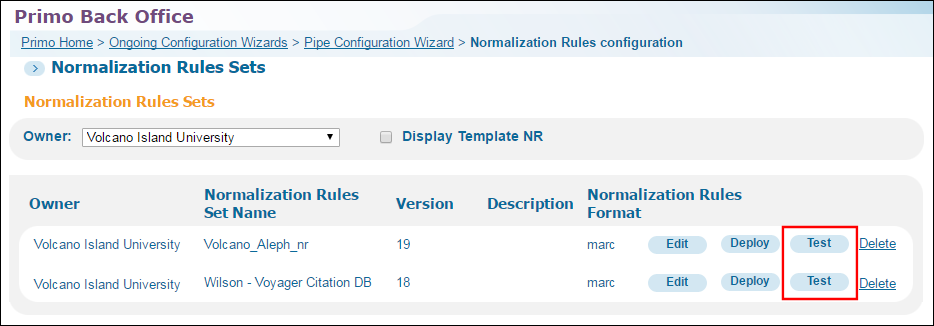
On the Normalization Rules Sets page (Primo Home > Ongoing Configuration Wizards > Pipe Configuration Wizard > Normalization Rules Configuration), click Test next to the Normalization Rules Set you that you want to test.
 Test Normalization Rules Set
 -
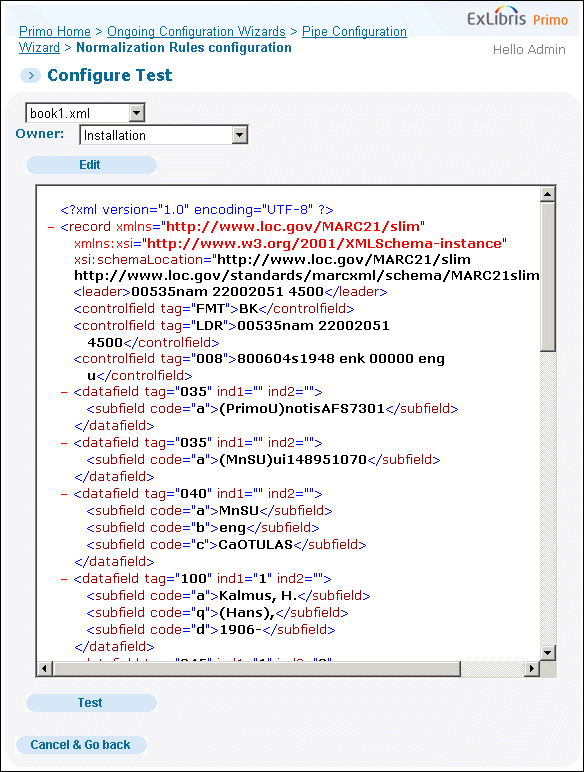
On the Configure Test page, click Choose File.
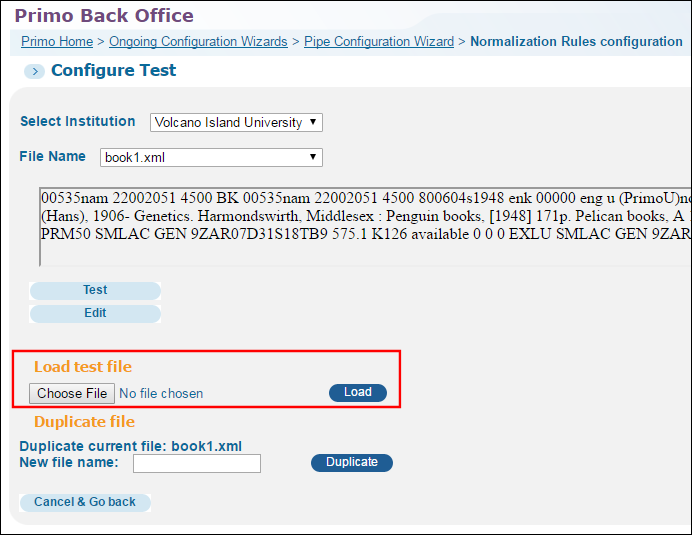 Configure Test Page
 -
In the dialog box, select your sample test file and click Open.
-
On the Configure Test page, click Load.
Duplicating Test Files
Primo allows you to duplicate test records so that you can create similar tests based on an initial test file.
To duplicate a test file:
-
On the Normalization Rules Sets page (Primo Home > Ongoing Configuration Wizards > Pipe Configuration Wizard > Normalization Rules Configuration), click Test next to the Normalization Rules Set you that you want to test.
-
Test Normalization Rules Set
-
On the Configure Test page, select the file that you want to duplicate from the File Name drop-down list.
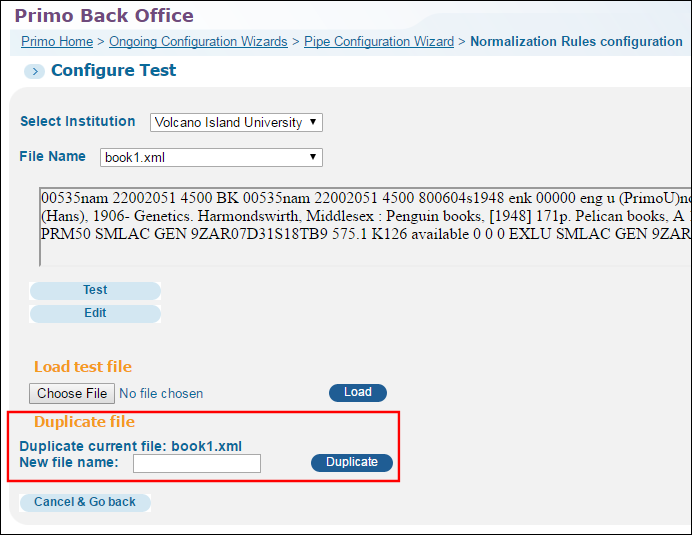 Configure Test Page
 -
Enter the name of the new file in the New file name field and then click Duplicate.
Editing Test Files
Primo allows you to edit test files that have been loaded into the system.
To edit a test file:
-
On the Normalization Rules Sets page (Primo Home > Ongoing Configuration Wizards > Pipe Configuration Wizard > Normalization Rules Configuration), click Test next to the Normalization Rules Set you that you want to test.
-
Test Normalization Rules Set
-
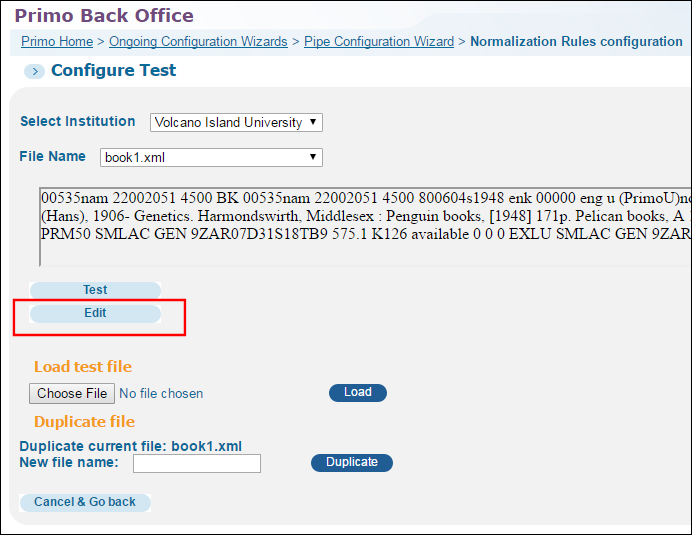
On the Configure Test page, click Edit.
 Configure Test Page
 -
Select the file that you want to edit from the File Name drop-down list.
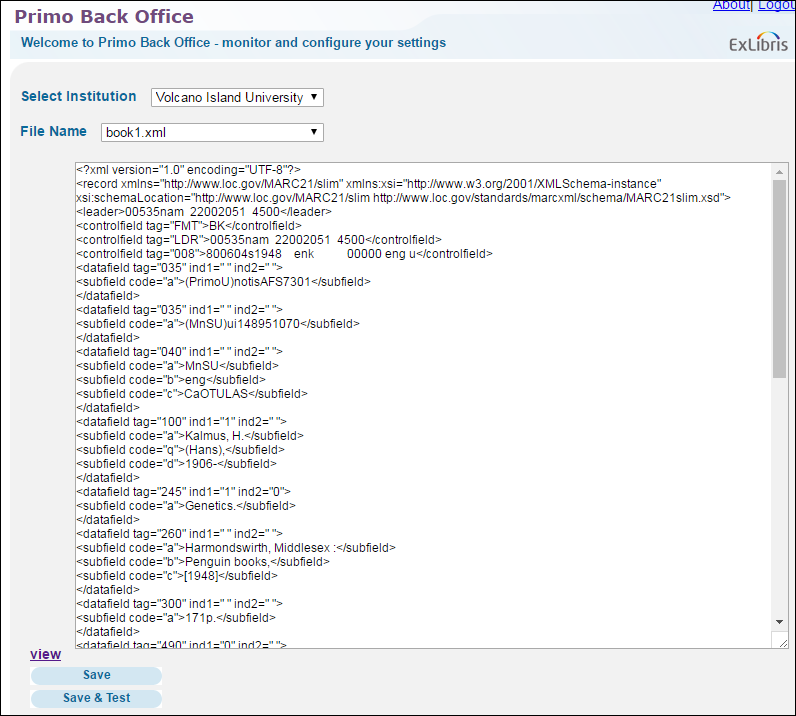 Edit Test File Page
 -
In the text box below the the File Name drop-down list, make your changes to the file and then click Save or Save & Test.
Testing an Entire Normalization Rules Set
The Test option has been added to the list of normalization rule sets to test the entire set.
To test an entire normalization rule set:
-
Click Test next to the rule set that you want to edit in the Pipe Configuration Wizard page.A new window opens with a drop-down list of the sample records from the demo_data directory. The test is performed only on a single record.
 Test Normalization Rule Window
 -
Select one of the records from the drop-down list.In addition, you can edit the file by clicking Edit or redisplay the file in view-only mode by clicking View.
-
In the Owner field, select the configuration level of the normalization rules that you want to test. For installation-level staff users, select either the installation level or a specific institution. For institution-level staff users, your institution will be pre-selected.When a pipe is executed, the system first looks for the normalization rules belonging to the institution. If a table does not exist, the system will use the table configured at the installation level.
-
Test the record by clicking Test. The test utility displays a two-part page, which contains the PNX on the left side and the source record on the right side.
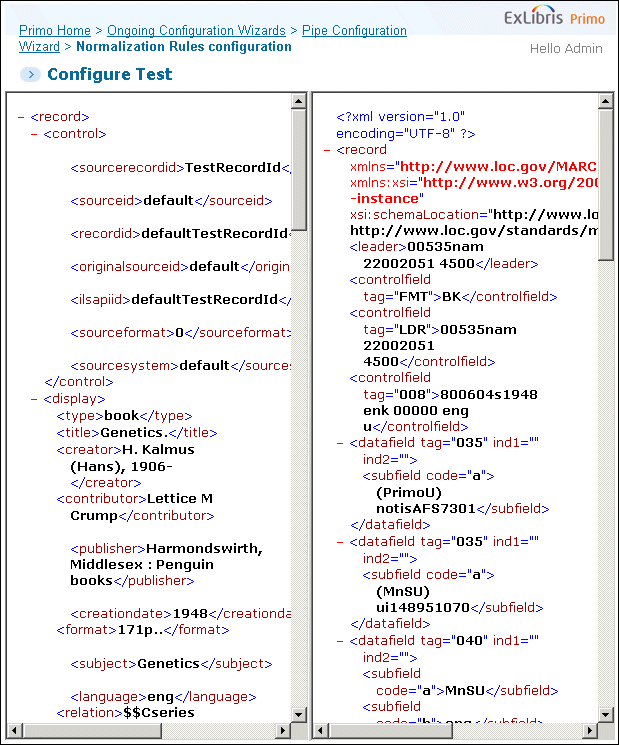 Test Normalization - PNX and Source Record View
Running the Test Utility for a PNX Field
In order to run a test for a specific PNX field and/or specific rules of a PNX field, it is necessary to display the basic or advanced editor.
To run the test utility for a PNX field:
-
Access the Pipe Configuration Wizard page in the Back Office. (For instructions, refer to the Primo Administration Guide.)At the bottom of the screen is a Testing section, which includes a drop-down list of the sample records for the normalization rule set on which you are working. It is possible to edit or test the record or a different record from this page.
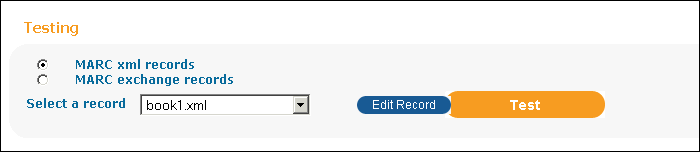 Running Test Utility
 -
Select Edit Record, or if you do not want to edit the record, click Test.If you clicked Test, a new window opens, displaying the PNX field that is being tested on the left side and the complete source record on the right side.By default, all the rules for the PNX field are selected for testing. However, it is possible to select specific rules by clicking Deselect and then selecting specific rules by checking Test, which is located on the left side of every rule. To re-select all rules, click Select.