
Branding the Services Page
The look of the Services page is configured with the Customization Package Manager, which allows you to modify the css\custom1.css and js\custom.js files and any related image files under the img folder.
-
On the Views List page (Configuration Menu > Discovery > Display Configuration > Configure Views), edit the row that contains the view for your Services page.
-
Select the Manage Customization Package tab.
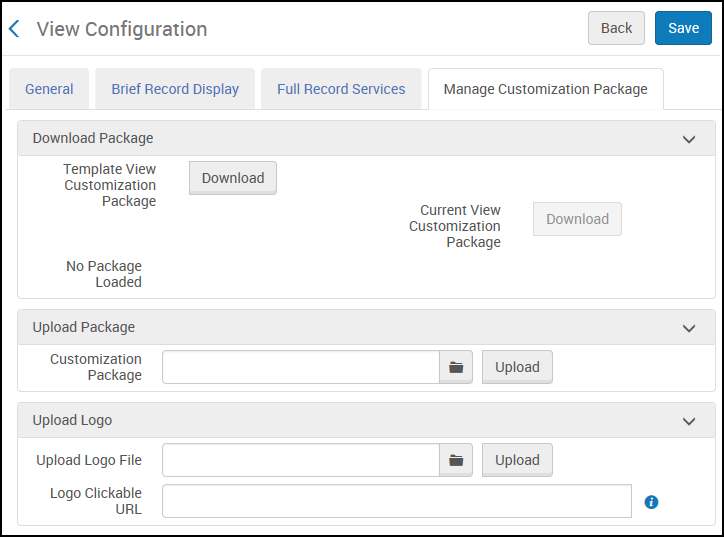 Manage Customization Package Tab
 -
Select Download to download the customization package. If this is the first time, a template file is downloaded.
-
Unzip the package and edit the css\custom1.css and js\custom.js files as needed.
-
Make sure that the root directory for the package uses the <institution ID>-Services format—for example, 01ABC_INST-Services.
-
Zip the package.
-
Specify the name of the zipped package and select Upload.
Adding a Selectable Logo
The Manage Customization Package tab on the View Configuration page (Configuration Menu > Discovery > Display Configuration > Configure Views) allows you to upload a new logo and define a link that opens a page when user's select the logo.
-
Edit your view on the View Configuration page (Configuration Menu > Discovery > Display Configuration > Configure Views).
-
Select the Manage Customization Package tab.
-
In the Upload Logo section, select an image to upload in the Upload Logo File field and then select Upload.
-
If you want the image to be selectable, specify the redirection URL in the Logo Selectable URL field.
-
Select Save to save your customizations to the view.