
Configuring Display Items
Alma allows you to configure the information that appears in the following areas under the Get It section on the record's Services page.
-
Brief item display - This area opens instantly and can contain up to four displays lines. Out of the box, Alma displays the item's status, terms of use, and the item's description on separate display lines if available for the item. You can configure up to four display lines. Each line can contain up to three fields, which are separated by your choice of delimiter.
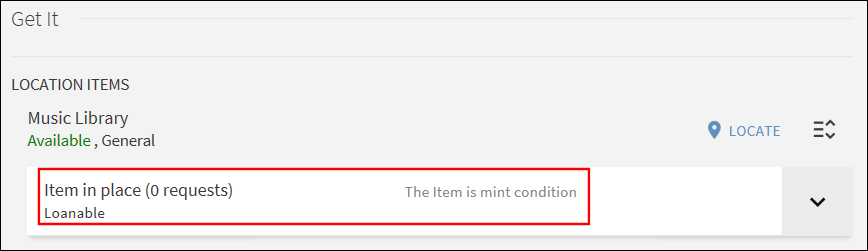
Brief Item Display - First Two Rows on Each Side (if needed)
-
Full item display - The user must select the down arrow
 to display the information that appears in these display lines. Out of the box, the Get It service displays the additional call number, public notes, material type, location (which includes the library, location, and call number fields), and the barcode on separate display lines if available for the item. You can configure up to 12 display lines. Each line can contain up to three fields, which are separated by a space.
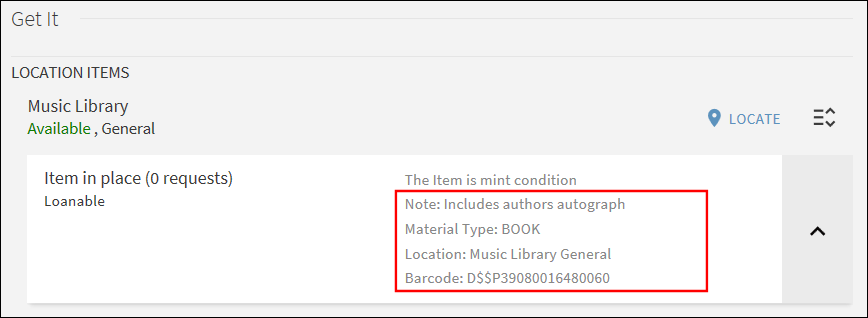
Full Item Display Section - Right Side Only
Data fields that are configured in both the brief and item display areas will display only once.
To configure display lines in the brief and full item display areas:
-
Open the Display Items page (Configuration Menu > Discovery > GetIt Configuration > Items Display Configuration).
 Display Items Page - Showing Default Settings
 -
If you have not already done so, select Customize in the Brief Item Display section to allow you to edit its display lines.
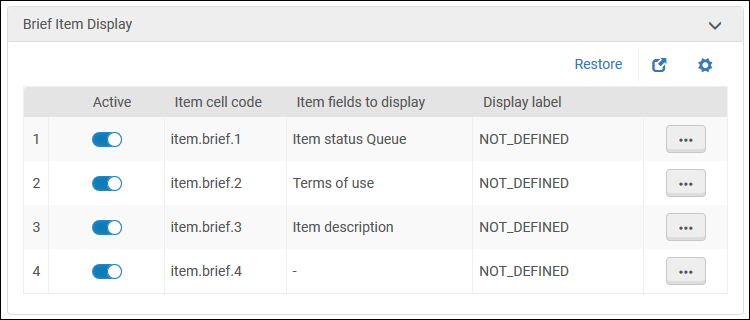 Brief Item Display Section
 -
In the Brief Item Display section, you can perform the following operations:
-
Activate/deactivate a display line by selecting its Active field.
-
Add a field to a display line:
-
Edit the row containing the display line that you want to modify. The Row Fields page opens.
-
Select Add to open the Add Field dialog box.
-
Select a field from the Code drop-down list.
-
Select Add to add the new field and to return to the Row Fields page.
-
On the Row Fields page, select Add to add additional fields to the display line.
-
Select the up/down arrows to reorder the fields in the display line.
-
Select Back to return to the Display Fields page.
-
-
Define the display line's label:
-
Edit the row containing the display line that you want to modify. The Row Fields page opens.
-
Select Edit Display Label. The Edit Display Label page opens.
-
Type the display line's label in the Label field. If you do not want a label to display, type NOT_DEFINED.
-
Select Save.
-
Select Back to return to the Display Fields page.
-
-
Define a delimiter for a display line:
-
Edit the row containing the display line that you want to modify. The Row Fields page opens.
-
Select Edit Delimiter. The Edit Delimiter page opens.
-
Type the delimiter in the Delimiter field. The default delimiter is set to a space.
-
Select Save.
-
Select Back to return to the Display Fields page.
-
-
Delete a field from a display line:
-
Edit the row containing the display line that you want to modify. The Row Fields page opens.
-
Select the display line's Delete row action.
-
Select Back to return to the Display Fields page.
-
-
Delete an entire display line:
-
Edit the row containing the display line that you want to modify. The Row Fields page opens.
-
Select the Delete row action for all fields.
-
Select Back to return to the Display Fields page.
-
-
Reorder fields on a display line:
-
Edit the row containing the display line that you want to modify. The Row Fields page opens.
-
Select the up/down arrows to reorder the fields .
-
Select Back to return to the Display Fields page.
-
-
-
If you have not already done so, select Customize in the Full Item Display section to allow you to edit its display lines.
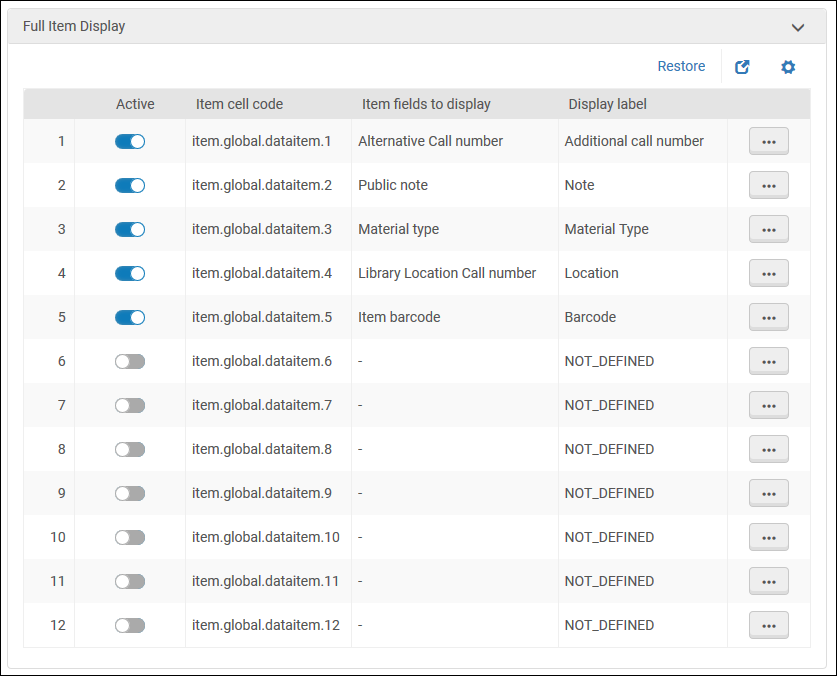 Full Item Display Section
 -
In the Full Item Display section, you can perform the following operations:
-
Activate/deactivate a display line by selecting its Active field.
-
Add a field to a display line:
-
Edit the row containing the display line that you want to modify. The Row Fields page opens.
-
Select Add to open the Add Field dialog box.
-
Select a field from the Code drop-down list.
-
Select Add to add the new field and to return to the Row Fields page.
-
On the Row Fields page, select Add to add additional fields to the display line.
-
Select the up/down arrows to reorder the fields in the display line.
-
Select Back to return to the Display Fields page.
-
-
Define the display line's label:
-
Edit the row containing the display line that you want to modify. The Row Fields page opens.
-
Select Edit Display Label. The Edit Display Label page opens.
-
Type the display line's label in the Label field. If you do not want a label to display, type NOT_DEFINED.
-
Select Save.
-
Select Back to return to the Display Fields page.
-
-
Delete a field from a display line:
-
Edit the row containing the display line that you want to modify. The Row Fields page opens.
-
Select the display line's Delete row action.
-
Select Back to return to the Display Fields page.
-
-
Delete an entire display line:
-
Edit the row containing the display line that you want to modify. The Row Fields page opens.
-
Select the Delete row action for all fields.
-
Select Back to return to the Display Fields page.
-
-
Reorder fields on a display line:
-
Edit the row containing the display line that you want to modify. The Row Fields page opens.
-
Select the up/down arrows to reorder the fields .
-
Select Back to return to the Display Fields page.
-
-