
Publishing Electronic Holdings to Google Scholar
- Catalog Administrator
- Repository Administrator
- General System Administrator
Currently, Google Scholar Library Links cover only journal articles. Books are not yet covered by Library Links. However, Alma still publishes ebooks in the institutional holdings file, in case Google Scholar will change its policy one day and will treat eBooks as well. Till that happens, the book titles are displayed as having full text access, but the title appears in Google Scholar with no Fulltext link.
Alma registers every new customer to Google Scholar. If there is a structural change inside the Google Scholar profile (for instance, adding/removing a sub-profile for a specific campus), users need to contact Alma Support to re-register the new profiles.
- Title
- Identifiers - Note that only records with ISSN/ISBN identifiers (coming from the 022/020 fields) are published.
- Full coverage, if it exists
- One institutional holdings file for each "Available for" group that has been defined in the Network Zone. Each "Available for" group corresponds to each of the member institutions.
- One institutional holdings file from each member institution.
When groups are not defined, the availability defaults to All (see Configuring Distributed Access to Electronic Resources from the Network Zone - Ex Libris Knowledge Center (exlibrisgroup.com). In this case the Publishing to Google scholar will publish all NZ holdings to All members (that have an active scheduled registered GS profile), in addition to each IZ publishing their own holdings.
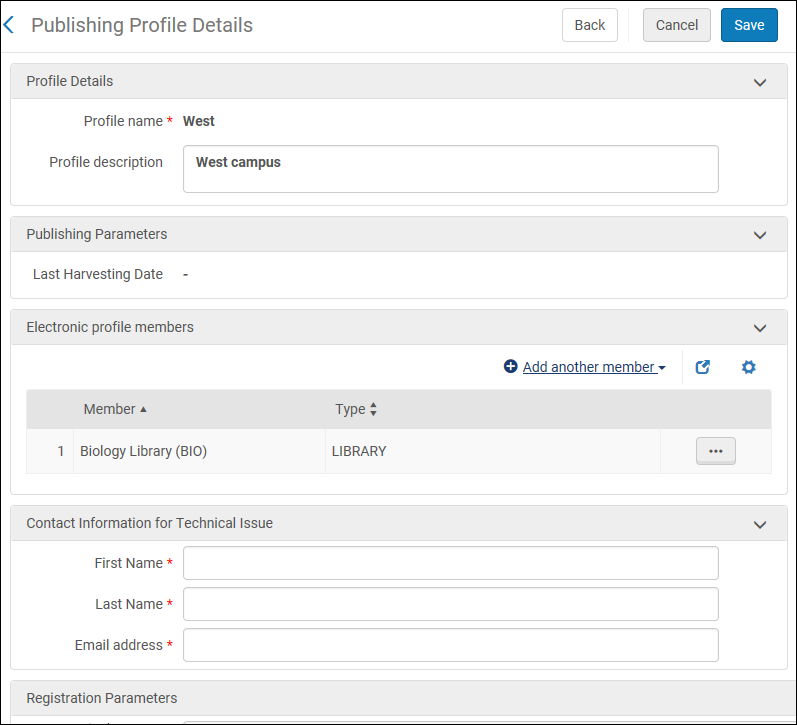
- On the Publishing Profiles page (Resources > Publishing > Publishing Profiles), select Edit in the row actions list for the Publish electronic records to Google Scholar publishing profile. The Publishing Profile Details page for Google Scholar appears.
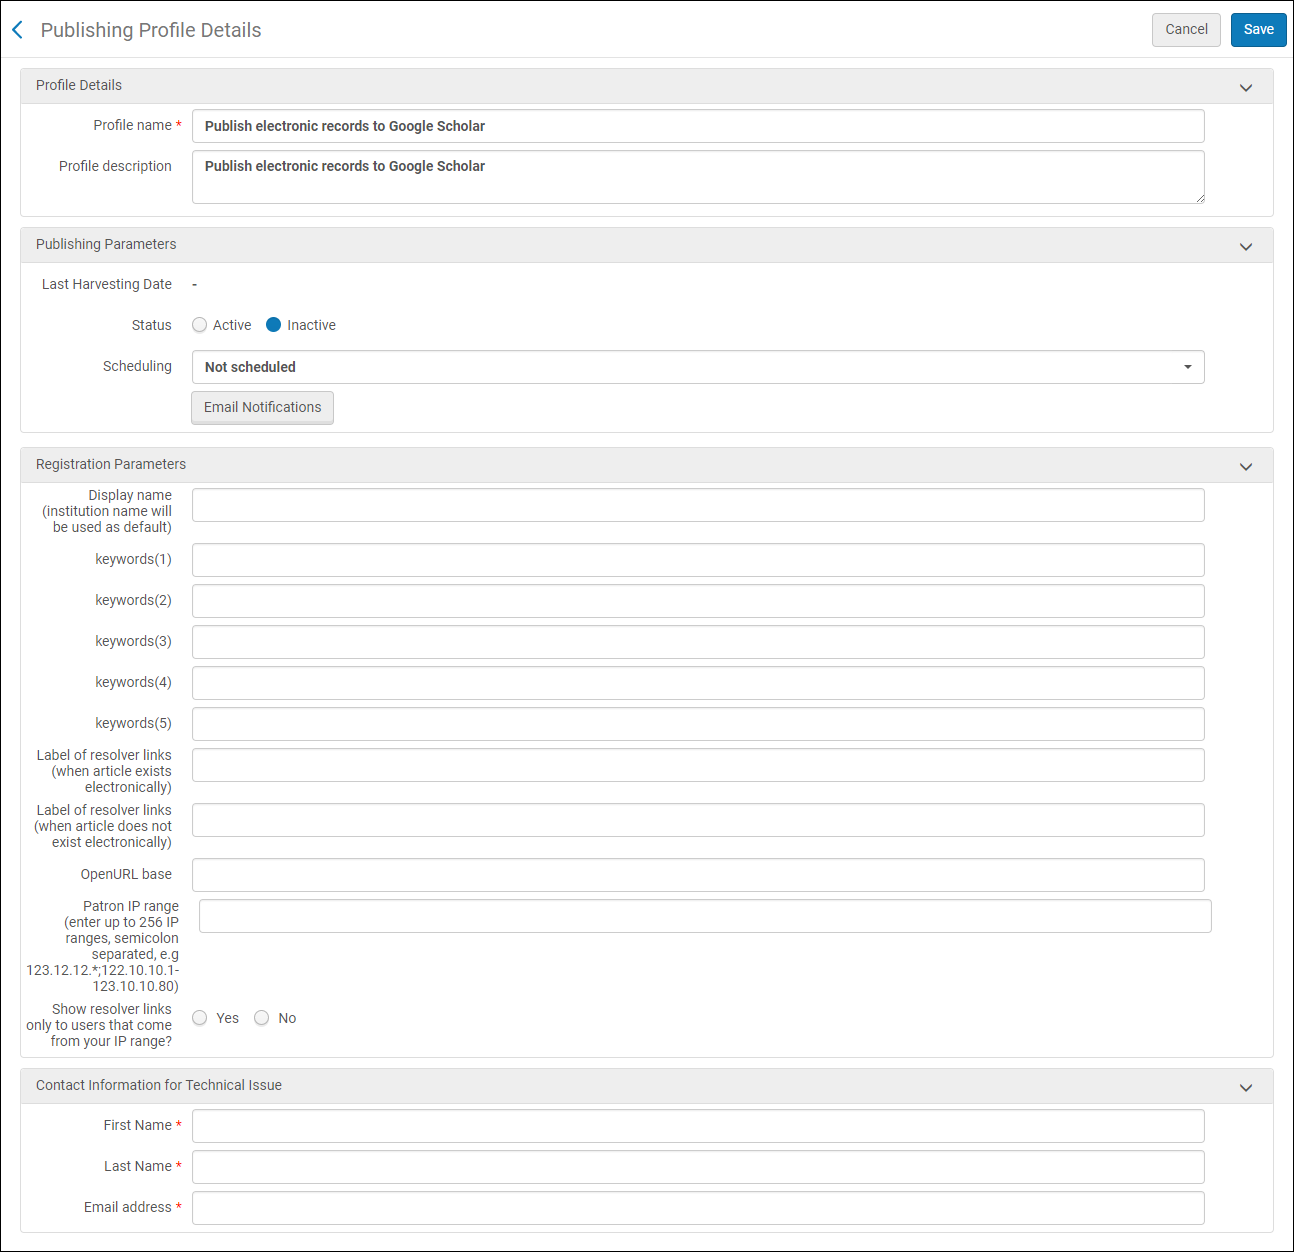 Publishing Profile Details Page (Standard Configuration)For multi-campus configurations, the Publishing Profile Details page opens and displays the Electronic profiles section, which allows you to configure Google Scholar settings per campus. For more information, see Adding a Profile for a Multicampus Configuration.
 -
Configure the fields in the profile.
Registration Parameters Parameter Description Publishing Parameters: Status Active or Inactive. Scheduling The publishing schedule. Hostname* This field may or may not appear.
This field enables publishing to Google from multiple different URL names.
For example, if an institution has one view with the URL "mylibrary.myinstitution.edu" its scope is for all the library materials, and a second view for research with URL "myresearch.myinstitution.edu" where they have a scope for their thesis only.
In this scenario, institutions could publish to Google different materials and tell it which URL to link to.Email Notifications Specify which users and email addresses will receive email notifications when the publishing profile has completed. Registration Parameters: Display Name The display name for your institution/campus in the Google Scholar preferences. If no name is provided, the display name defaults to the institution name. Keywords 1/2/3/4/5 The keywords (such as the school’s nickname) that enable users to find the library when configuring their preferences in Google Scholar. This field is optional and has a limit of five words or 30 characters. Label of resolver links (when article exists electronically) The label for the link that appears in Google Scholar search results. This field is mandatory and has a limit of 25 characters. For example: ViewIt@MyUIf you have an old Google Scholar account, it is recommended that you set a new label for testing purposes, so that you can distinguish between your old and new systems. Following verification, you can change the label back to its required setting.Note that your old label must be decommissioned after “Go Live,” when you start working with Google Scholar productively.Label of resolver links (when article does not exist electronically) The label for the link that appears in Google Scholar search results. This field is mandatory and has a limit of 25 characters. For example: GetIt@MyUOpenURL base The value is the base URL of the Alma services page. This field is mandatory and has a limit of 1024 characters.
- Use the following format for Alma-Summon: https://<Alma_domain>/openurl/<Institution_code>/<View_code>
- Use the following format for Primo (new UI) and Primo VE: https://<Primo_domain>/openurl/<Institution_code>/<View_code>?
Use the following format for Alma-Summon: https://<Alma_domain>/openurl/<Institution_code>/<View_code>
Use the following format for Primo VE: https://<Primo_domain>/openurl/<Institution_code>/<View_code>
Use the following format for Primo (new UI): https://<Primo_domain>/openurl/<Institution_code>/<View_code>?The base URL should include the following elements:
- Alma_domain – Specify the domain name used to access Alma.
- Primo_domain – Specify the domain name used to access the end user interface for Primo/Primo VE.
- Institution_code – For Primo, specify the institution code defined in Primo. For Primo VE and Alma-Summon environments, specify the institution code defined in Alma.
- View_code – Specify the code of your services page view.
- For Primo, specify the code that is defined for your discovery view with the Views Wizard in the Primo Back Office.
- For Primo VE, specify the code that is defined for your discovery view on the View Configuration page. For example: 01MY_INST:MyView
- For Alma-Summon, specify the code that is defined for your Services page on the View Configuration page. For example: 01MY_INST:Services.
Example for Primo VE:
https://mylibrary.primo.exlibrisgroup.com/openurl/01MY_INST/01MY_INST:MY_VIEWExample for Summon:
https://na01.alma.exlibrisgroup.com/openurl/01MY_INST/01MY_INST:ServicesExample for Primo (new UI):
https://primo2.prod.hosted.exlibrisgroup.com/openurl/01MY_INST/MY_VIEWPatron IP range The range of library IP addresses that allow users to see your links without selecting your institution under Google Scholar Settings > Library links (see the figure Google Scholar Library Links in Verifying Google Scholar Data). This field is optional Enter no more than 256 IP ranges separated with semicolons. For example: 123.12.12.*;122.10.10.1-123.10.10.80Show resolver links only to users that come from your IP range? Whether users must perform searches from within the specified IP ranges to see your links in Google Scholar search results. This field is mandatory. The valid values are yes and no. The default value is no, which is recommended unless your links reveal sensitive information. Contact Information for Technical Issue Enter your institution’s contact information in First name, Last name, and Email address. - Select Save to save the changes.
Make sure that you have scheduled the Google publishing job to run either Saturday or Sunday. Google’s harvesting process begins on Mondays and may not finish until Thursday of that week.The label you configured is visible on the live Google Scholar site, which is why it is recommended that you initially configure your profile using a test label. If you are concerned about the display of a test label during implementation, it is recommended that you do not test Google Scholar until after “Go Live.” (In any event, your old label should not be decommissioned until after “Go Live.”)
- Verify that your Google Scholar data is correct (see below, Verifying Google Scholar Data).
Adding a Profile for a Multicampus Configuration
- After adding email addresses while adding a Google Scholar profile (see Publishing Electronic Holdings to Google Scholar), select Add Profile to open the Add Profile dialog box.
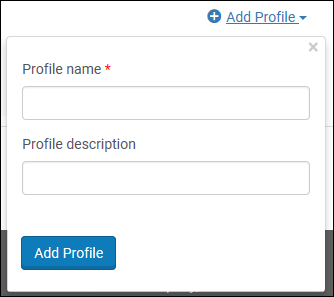 Add Profile Dialog Box (Multicampus Configurations Only)
 - Specify a name for campus or library in Profile name.
Do not use special characters except for underscore (_) or hyphen (-) in the profile name. The name is part of an URL for Google crawler and is therefore limited to URL-friendly characters. Introducing special characters will result in job failed when running the job "Publishing to Google Scholar".
- Select Add and Close to return to the Publishing Profile Details page.
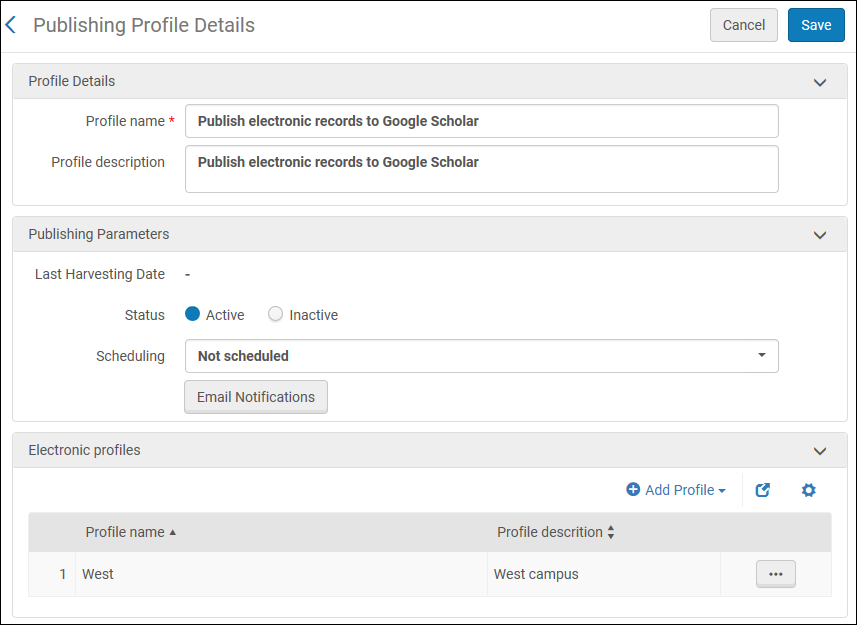 Publishing Profile Details Page (Added Profile)
 - Edit the new profile. The Publishing Profile Details page for the selected profile opens.
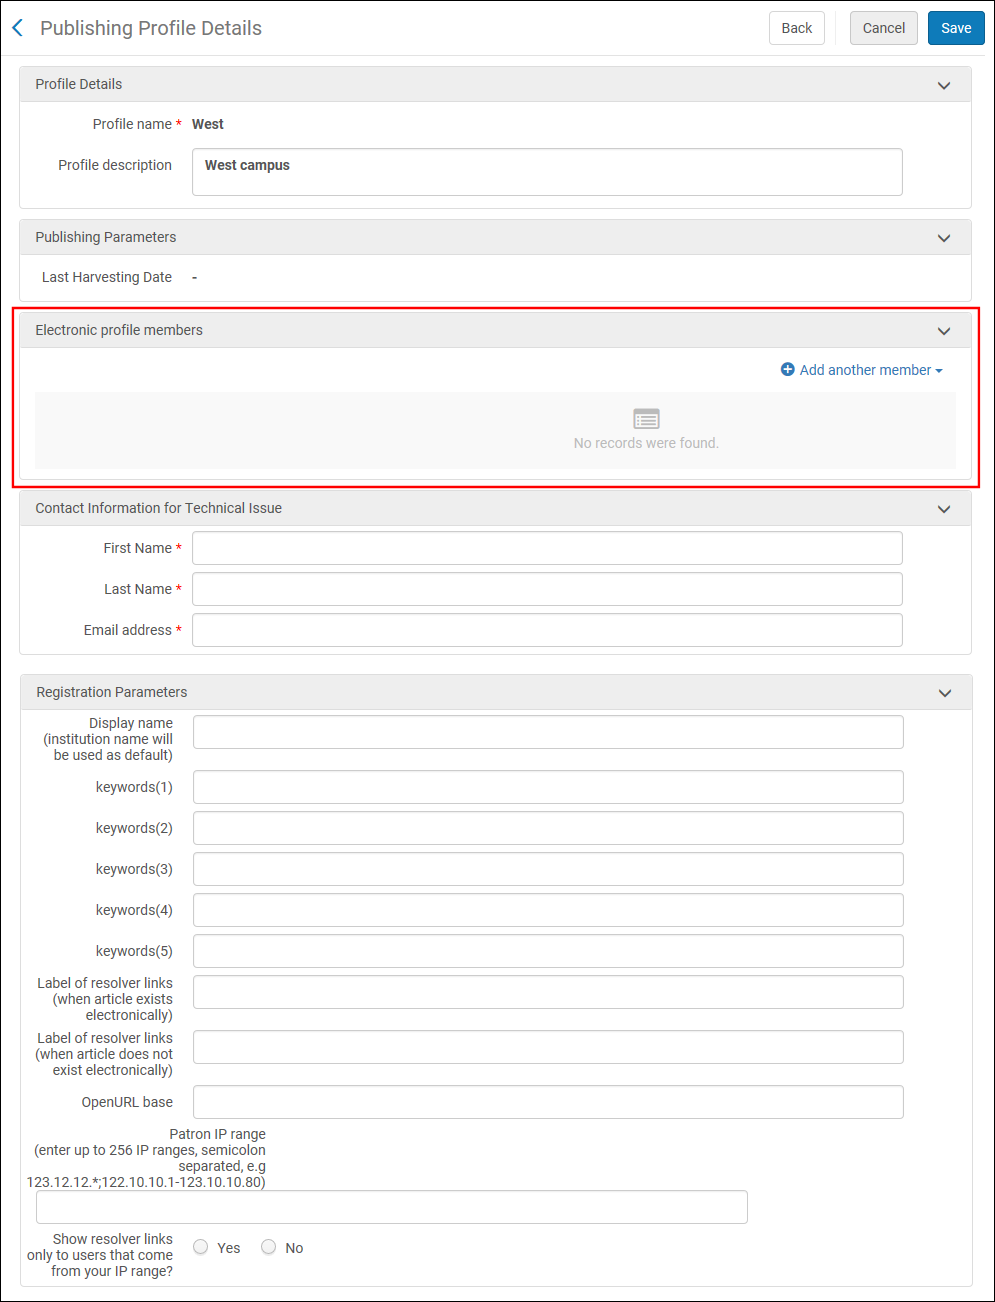 Publishing Profile Details Page (Electronic Profile Members)
 - In the Electronic profile members section, select Add another member and then use the following fields to add members to the profile group:
- Campus – Select a campus from the drop-down list and select Add Campus.
- Library – Select a library from the drop-down list and select Add Library.
 Publishing Profile Details Page (Member Added)
 - Complete the profile, as described in Publishing Electronic Holdings to Google Scholar.
Setting up your Google Scholar or Accessing your Google Scholar Data
- Access the Google Scholar page (http://scholar.google.com/).
- Configure the library links settings in Google Scholar. This allows you to view links to articles from your library. If you have configured IP ranges for Google Scholar, the settings should default to your institution’s registered names when accessed from machines within the registered IP ranges.
To verify the default settings or modify the settings in Google Scholar:
- Select Settings.
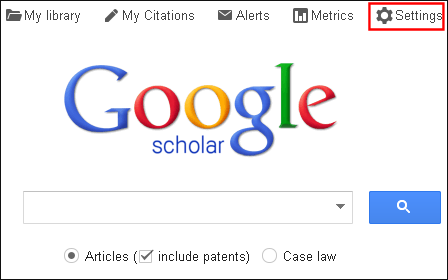 Configuring Library Links in Google Scholar
 - Select Library links under Scholar Settings.
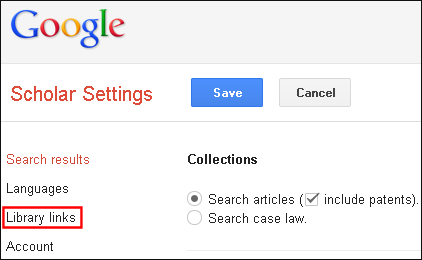 Google Scholar Library Links
 - Search for your library, select it, and select Save.
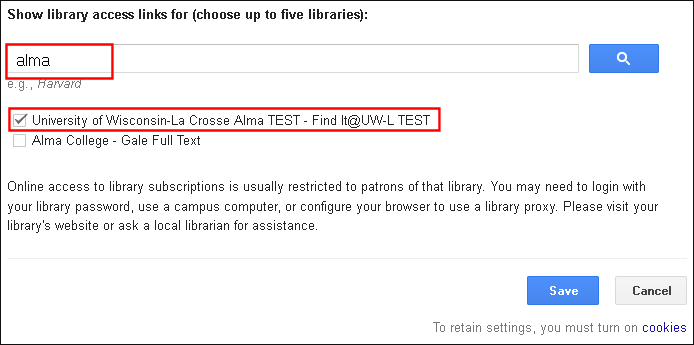 Select Library
- Select Settings.
- Search Google Scholar for an article that is available at your library, and select the link for your institution. If the availability of the article is unknown or unavailable, you may need to select More to access the link for your library.
 Search Google Scholar
 - Verify that you are redirected to Primo and can access articles as expected.