
OpenID Connect
To configure an OpenID Connect type of integration profile, you must have the following role:
- General System Administrator
Alma integration supports the OpenID Connect standard for user authentication. See the Developer Network for more information.
When an Alma staff user (or Primo VE patron) attempts to log in, user authentication can be processed using systems that support the OpenID Connect standard such as Auth0 and Azure. This works in a manner similar to the social login process in Alma.
For Primo VE information, see Configuring User Authentication for Primo VE.
Multiple OpenID Connect integration profiles can be defined in Alma. This enables you to define different user authentication for different groups of users, for example, for students and faculty staff.
Creating an OpenID Connect Integration Profile
If you want to use this method of authentication, you need to create and configure an OpenID Connect integration profile.
To create an OpenID Connect integration profile:
- Open the Integration Profile List page (Configuration Menu > General > External Systems > Integration Profiles).
- Select Add Integration Profile.
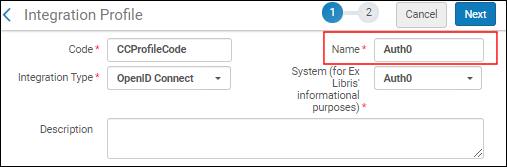
- From the Integration Type dropdown, select OpenID Connect.
- From the System dropdown, select the option that represents the OpenID Connect authentication system that you are using.
-
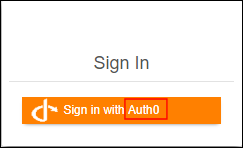
Enter a code and name for this integration profile. This name is used in the label for the log-in option in Primo:
- Select Next.
- Select Active if you want to begin using this integration profile after saving it. Select Inactive if you want to enabled the profile at a later time.
- Enter the following information provided by the OpenID Connect authentication system:
- App ID
- App Secret
- Well-known URL - Select to automatically fill in all the below fields with the default OIDC information. This saves you time and helps ensure that all the fields are defined correctly. If you select not to use the well-known URL, fill in the below fields manually.
- Authorization endpoint
- Token endpoint
- Scopes - Select a space-delimited list of scopes. The minimum scope for the authentication process is 'openid'.
- Matching Claims - Claim code containing the user ID. For most OpenID providers that would be 'sub', the subject identifier. If you elect a different claim code, the "UserInfo endpoint" field opens where you can call the UserInfo endpoint with the access token to retrieve the additional claims. Alma will locate the user using the configured claim in either the id_token or in the output of the UserInfo request.
- Force Authentication - Select this if you want to force authentication when Alma authenticates users via OIDC. This helps ensure that the user is properly authenticated with the correct institution.
- (New for August) Base64 encode the state parameter - Select this to encode the relay state parameter in base64 (instead of URL-encode). This might be needed for integration with AWS.
- Select Save.