
Setting up the Google Search Console and Analytics
Google Analytics and Verification
In order to track traffic to your portal and profile, you can link your website to both the Google Search Console and to Google Analytics. To configure this, navigate to Configuration > General > Institutional Settings.
Google Analytics Tracking and Verification IDs
Google Analytics
-
Open a user in Google Analytics.
-
Get a tracking ID.
-
Input the tracking ID into the esploro_qa_tracking_id parameter in the Institutional Settings page in Esploro - see Configuring Institution Settings.
-
Save the Institutional Settings page.
We support both Google Analytics 4 and Universal Analytics. Universal Analytics information will no longer be available after July 2023.
For more information see Google Analytics documentation.
Google Search Console
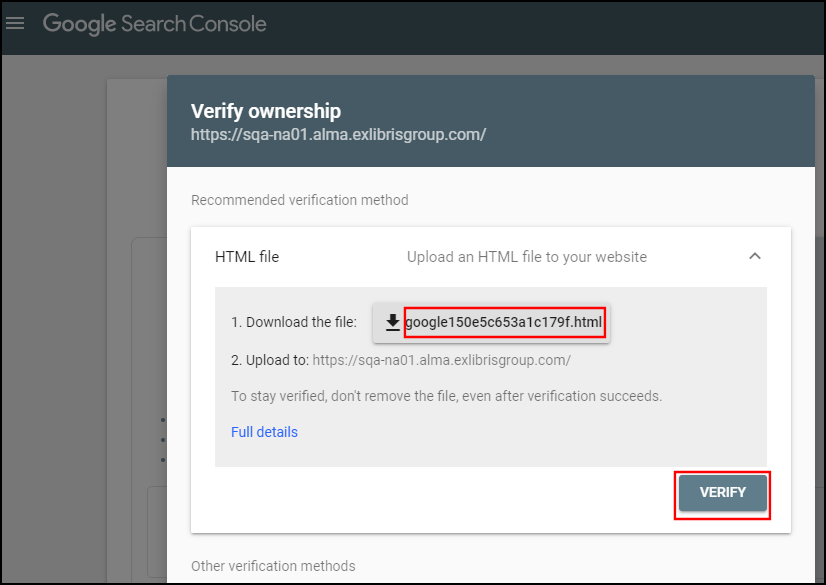
There are several methods to verify ownership of your website in the Google search console. We recommend using the HTML file upload method for the URL:
-
Open the Integration Profile List page (Configuration Menu > General > External Systems > Integration Profiles).
-
Select Add Integration Profile to open the Integration Profile page.
-
Specify the following fields, and then select Next:
-
Code – Enter a unique identifier for this integration profile.
-
Name – Enter a unique name for this Google integration profile.
-
Integration Type – Select Google.
-
System – Select Google Console.
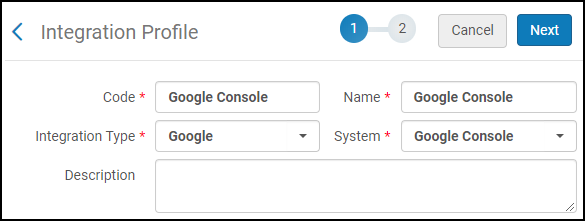
Select the Type of Integration - Step 1
After the creation of this integration profile, these fields can be modified in the General Information tab.
-
-
In the Google search console, after selecting the HTML file verification method, download the HTML file.
-
In the integration profile in Esploro, specify the following fields, and then select Save to create the integration profile.
-
Verification File Name – Specify the name of the verification file that you received from the Google Search Console.
-
Verification File Content – Specify the contents of the verification file, which includes the type of content and file name, using the following format: google-site-verification: <html_file_name>.
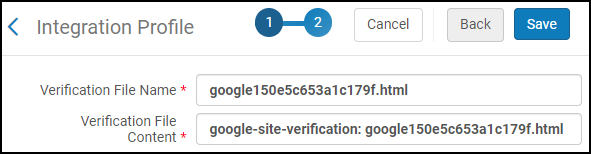
Specify the Verification Information from Google - Step 2
After the creation of this integration profile, these fields can be modified in the Actions tab.
-
-
If you want to add contact information to this integration profile, edit the new integration profile and select the Contact Info tab.

Contact Info Tab in the New Integration Profile
-
Sign in to the Search Console.
-
Enter your website domain.
-
Copy the verification code and paste it to the esploro_google_verification parameter in the Institutional Settings page in Esploro - see Configuring Institution Settings.
-
Save the Institutional Settings page.