
Intota: Proxy Setup
- Product: Intota
Is there anything specific I need to know when setting up my proxy information in Intota's Library Settings page?
When working in Library Settings, the below is additional information on setting up common library proxies. Setting up a proxy in Intota means that Intota prepends the proxy URL to links in your discovery services.
Library Settings is where you do your proxy setup, select Admin on the Intota menu bar to display Library Settings in the submenu.
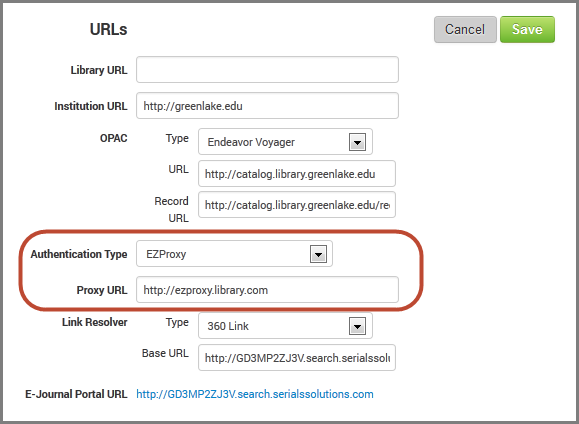
The URL section of Library Settings contains the Authentication Type and Proxy URL settings:
The rest of the document covers the following sections:
Information Specific to Particular Proxy Systems
Dynix RPA
Have your RPA Proxy prefix URL ready (Example: http://000.74.92.10/rpa/webauth.exe?rs=xxx&ur=). If you don't know the proxy prefix, check with your proxy administrator.
-
Create new resource codes that match the database codes in our Knowledgebase.
-
Contact Library Support (using the Contact Us menu above) for a list of the database codes that need to be added.
-
Log on to the RPA Admin module.
-
Locate the existing resource code entry for each database, select Copy, and then add the database code. To distinguish copies from the existing database codes, your library can add SS: before the database name.
-
In the Proxy URL field in Intota's Library Settings page displayed above, make sure that you remove any hard-coded resource codes and enter rs=xxx instead, as our system automatically enters the database code.
EZProxy
In the Proxy URL field be sure to include /login?url=.
For more help with EZproxy, visit the OCLC EZproxy documentation page.
Innovative Interfaces (III)
Your III proxy URL is usually the domain name of your catalog; for example, http://lib.uri.edu. If you don't know the proxy URL, check with your proxy administrator.
In the Proxy URL field, make sure you remove 0- from the proxy prefix, as our system automatically adds it. For example, if you put http://lib.uri.edu in the Proxy URL field, then the URLs will be the following:
Obvia
In the Proxy URL field, be sure to enter your Obvia prefix URL.
OpenAthens Redirector
In the Proxy URL field, enter your Redirector prefix URL.
Configure special article linking parameters for EBSCOhost databases (Authentication Type and Customer ID) and ProQuest databases (Account ID) on their respective Database Details pages. For more details, see 360 Services: Target Setup Guide for EBSCOhost, Factiva, Gale, Get It Now (Copyright Clearance Center), NewsBank, and ProQuest.
Fully Encoded URL
In order to work successfully with third party proxy servers like EZProxy and III s WAM, the default setup for Intota does not generate URLs that are 100% fully encoded. If your library uses another type of proxy server (such as one that your library developed on its own), you may want Intota to generate fully encoded URLs that comply with the Internet Engineering Task Force s RFCs (Request for Comments) such as RFC 2616 (Hypertext Transfer Protocol HTTP/1.1) and RFC 2396 (Uniform Resource Identifiers (URI): Generic Syntax).
-
Select Fully Coded URL from the Authentication Type drop-down menu displayed above.
If your proxy server is listed in the Authentication Type drop-down menu, you should select it; you should not select Fully Coded URL.
-
Enter your proxy URL in the Proxy URL field.
-
Select Save.
Testing Your Proxied URLs
The proxy will not be available to your library's patrons until the next day. Therefore, you may want to test (preview) proxied journal-level links right away to make sure they work:
-
Go to your list of providers by clicking Resources on the menu bar and selecting Providers in the submenu.
-
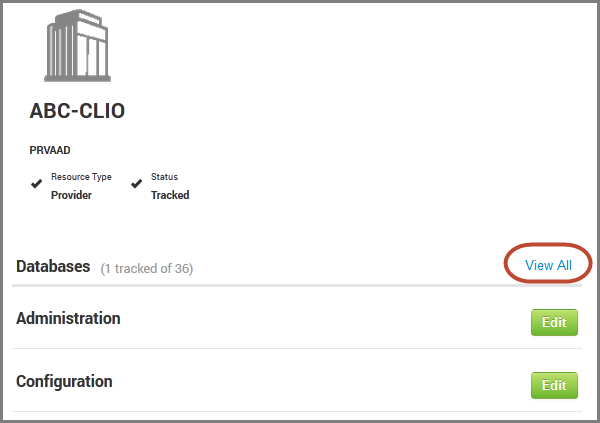
Select the provider for which you want to test your proxy update and you are taken to the Provider Details page.
-
Select View All to the right of Databases.
-
Select URL Preview in the right side More column, and a sample of title URLs (with your proxy pre-pended) will display.
-
Select a link to test the URL. If the link does not work, there may be something wrong with the proxy, or you may have entered the wrong prefix URL.
- Date Created: 21-Jun-2014
- Last Edited Date: 19-Mar-2022