
Intota: Library Settings
- Product: Intota
How do we work with Library Settings in Intota?
Libraries use the Library Settings page to enter library address and contact information, URLs, IPs, date formats, and more. Generally this information only needs to be entered once and is infrequently updated by libraries.
-
Note: In order to view and make changes, your Intota account permissions must have Library Settings options for View or View/Edit.
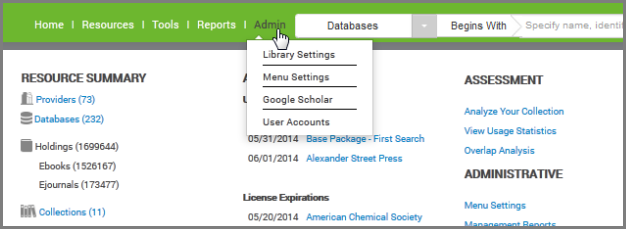
From the Intota home page, click Admin on the menu bar and then select Library Settings in the submenu:
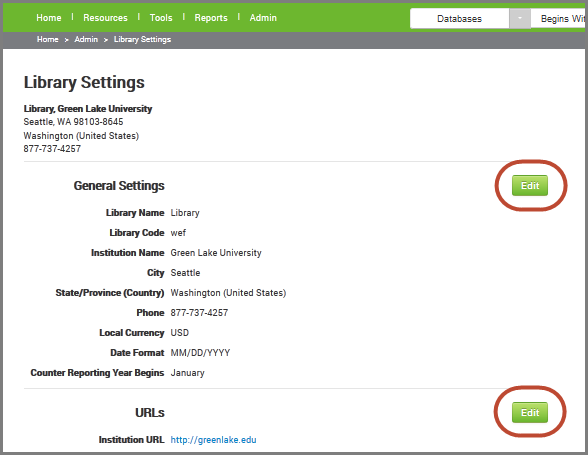
By default the fields that display in each section are those fields that are populated; click Edit to view all available fields in a section. Changes will take effect for your users after the daily profile data refresh.
Click a subject in this list to jump to that section of information later on this page:
General Settings
Library Name and Institution Name are required fields.
The Local Currency field is used for managing resource Costs.
The Date Format controls how dates are displayed in Intota and also 360 Search the federated search tool.
To change date formats for your other patron-facing services, you'll need to make the changes in the Custom Text (Advanced) sections of the E-Journal Portal Adminstration Console and 360 Link Administration Console.
The Counter Reporting Year Begins is used to define the beginning of the year for costs. This is set to January by default, and you'll need to contact us if you need to change it (use the Contact Us option at the top of this support center page). See more on the Fiscal Year Setting.
URLs
There are several entries in the Library URLs page:
-
Library/Institution URLs
Library URL and Institution URL are optional fields. Enter your library URL as well as the link to your institution's web site in these fields. Having access to those URLs can help ProQuest's support team when trying to resolve an issue with your profile.
-
OPAC Information
To add your library's catalog information, first select your OPAC Type and then add the URL to access your Catalog.
We also encourage you to include a URL to access an individual record from your catalog in the OPAC Record URL field. This provides us with an item-level linking syntax that will be used in Summon, and is also useful for our Support team when creating custom links to your OPAC in 360 Link.
-
Authentication Type and Proxy URL
Select your library's Authentication Type and add the proxy URL. Adding your library's proxy information to these fields will prepend the proxy URL to the title and database links in the E-Journal Portal and the article and journal links in 360 Link, as well as article-level links in Summon. You can suppress this on a database-by-database level if you need to.
See Proxy Setup for additional details on setup for EZProxy, Innovative Interfaces (III) Proxy, Dynix RPA Proxy, and Obvia Proxy.
For Summon, a change to the Proxy URL field is unlike other Library Settings that take effect for your users after the daily profile data refresh; a Proxy URL change will take effect in Summon when CDI is updated. This likely means the change will go live in a few days. You can, however, immediately test your updated proxy URL by previewing title-level links in Intota.
-
Link Resolver Product and Base URL
If your library uses a link-resolver product, select the product and provide the URL. The link resolver information is used by Summon, and is otherwise informational only. If you use 360 Link, the URL will be populated for you. For more, see Getting Started with 360 Link. For 360 Link, the Link Resolver Base URL should be provided to your referring sources for linking through 360 Link to full-text content.
-
E-Journal Portal URL
If you want patrons to be able to access your E-Journal Portal, this is the URL you will provide (or link to from your library's web pages).
-
Force HTTPS At All Times
Select this option If you want to enforce encryption and ensure that E-Journal Portal 2.0 and 360 Link 2.0 do do not display mixed content in the browser.
IP Addresses
Add your library's IPs to enable authentication into Intota discovery services' Summon and 360 Link (link resolver) as needed. Note that 360 Link only uses IP Authentication when you are working with Google Scholar.
Use the Add IP field to enter a single IP or a range. Enter full IP addresses or ranges in these fields, like this: xxx.xxx.xxx.xxx. Use a dash to enter a range, for example xxx.xx.xx.0 - xxx.xx.xx.255
The system does not accept CIDR format, like this: xxx.xxx.xxx.xxx/n.
Note that after you enter an IP address or IP range, click on the + icon displayed below. The system will display another field in case you have more IPs to enter. When finished, click the Save button.

- Date Created: 1-Jun-2014
- Last Edited Date: 19-Mar-2022