
User Groups
User groups can be used in Pivot-RP to share information between users with similar areas of interest, such as funding opportunities, newsletters, and other communications. There are two types of user groups:
- Personal Groups – user groups that any user can create and add users to. Only the creator can add users and information to personal groups.
- Public Groups – user groups created by a Pivot-RP administrator that are visible to all users who can choose to join the group.
Personal Groups
You can set up groups of users with which to share information. You manage groups on the Groups page (select Groups in the user menu).
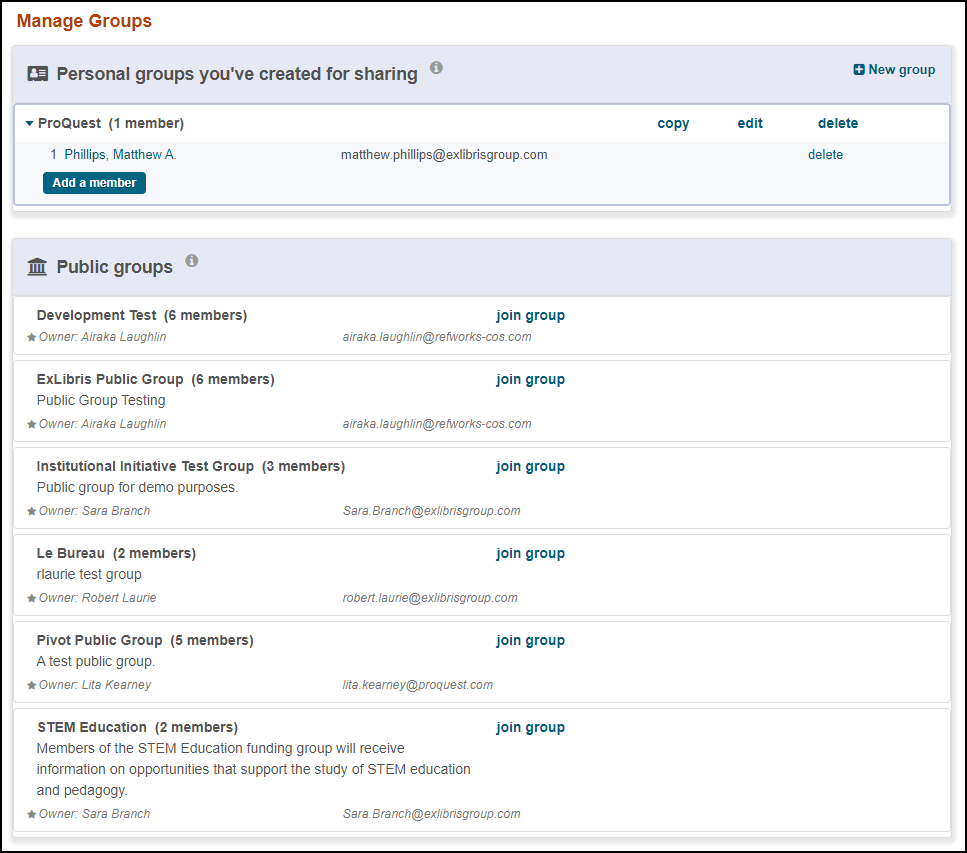
- On the Manage Groups page, select New Group. The Add a New Group dialog box opens.
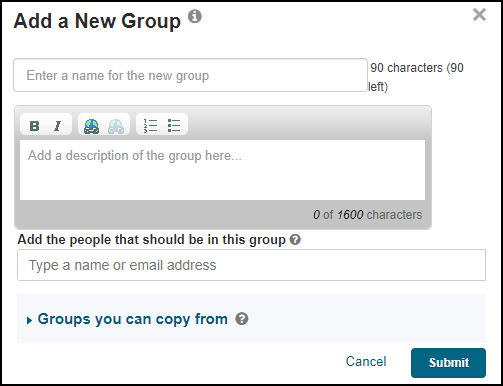 Add a New Group
 - Enter a group name and select users to add to the group. This field uses auto-complete to suggest Pivot-RP users with profiles in your institution (not user accounts). In addition to Pivot-RP users, you can add any email address you want to a group. When sharing opportunities with a non-registered user, the user receives brief information about the opportunity but cannot see the full opportunity until they have a user account.
You can also copy all of the members from an existing group to create a new group. To do this, select Groups you can copy from and select an existing group.
- When you are done, select Submit. The group is created.
You can add or delete names to/from a group, and you can copy, rename, or delete a group.
You can add users to a group (new or existing) from the search results page after searching for profiles: select the users and select Add to Group.
All administrators have at least one pre-defined user group called All Research Administrators. This group contains all users whose profile role is Research Administrator.
Public Groups
Public groups are created by Pivot-RP administrators and are visible to all users. There are three possible roles for groups members:
- Owners – the Pivot-RP administrator that created the group is the owner. Owners can add and delete members and can assign group administrators.
- Group Administrators – the owner of the group can assign any member of the group to be the group administrator. The group administrator can add and delete members and share content with the group.
- Members – Users who join a group are members. Users can choose to join or leave a group or can be added to a group by the group owner or administrator. Members receive group information, but cannot contribute information to the group or see the other members of the group
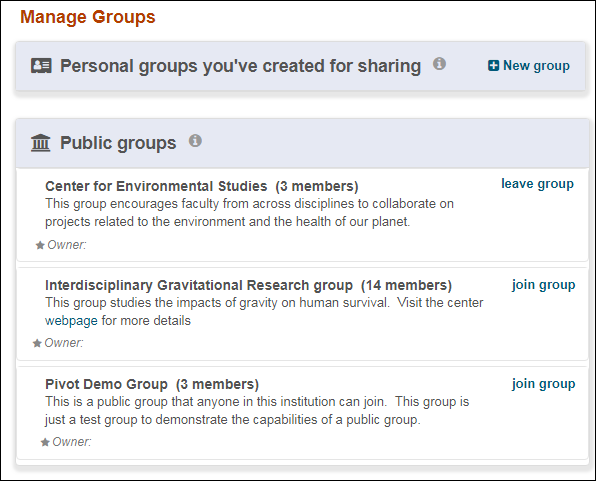
To join a public group, open the Groups page (select Groups in the user menu or Manage Groups from the Admin Dashboard) and select join group for the group you want to join.
To leave a public group, select leave group for the group you want to leave.
- Owners do not have to be members of the group they create and are not automatically added as members.
- Public groups are visible to everyone at your institution. Anyone can join a group and become a member.
- Members can leave a group at any time.
- Members cannot see the other members of the group (unless administrators reveal names of recipients in a group when sharing opportunities).
Creating Public Groups
Pivot-RP administrators can create public groups from the Groups page (select Groups in the user menu or Manage Groups from the Admin Dashboard) in the same way personal groups are created. For more information, see Personal Groups.
Additionally, Pivot-RP administrators can convert a personal group into a public group by selecting make public next to a personal group on the Groups page.
Managing Public Group Members
Owners can assign public group members administrator privileges. This allows them to add and delete members and view all of the members of the group.
To manage public group members, open the Groups page (select Groups in the user menu or Manage Groups from the Admin Dashboard). The following appears, for example, under Public groups:
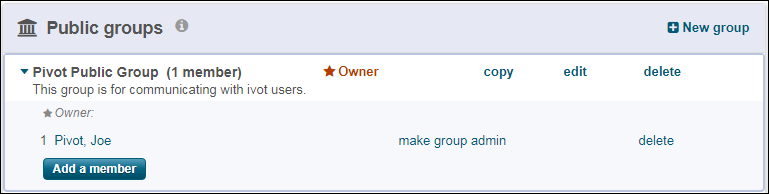
To assign administrator privileges to a public group member, select make group admin next to the name of the member.
To remove administrator privileges from a public group member, select remove group admin next to the name of the member.
To delete a public group member, select delete next to the name of the member.