
Managing Users
Managing Users
Administrators require the User Manager role to manage users in Rosetta.
The Rosetta system enables Administrators to manage different types of users, which includes adding new users, searching users, and deleting users. Administrators can manage users from the User List page.
To access the User List page, follow the path from the Advanced Configuration page to Users > User Management.
The following actions can be performed on this page:
- Adding a User
- Cloning a User
- Updating a User
- Deleting a User
- Releasing the Work of a User
- Sharing Users
Adding a User
Administrators can add a new user to the Rosetta system. The process of adding a new user consists of the following steps:
- Providing user information, such as a user name, password, and status
- Assigning a role
- Providing information about the role, which includes defining role parameters
To add a user:
- On the User List page (see Managing Users), click Add User.
The User Details page opens.

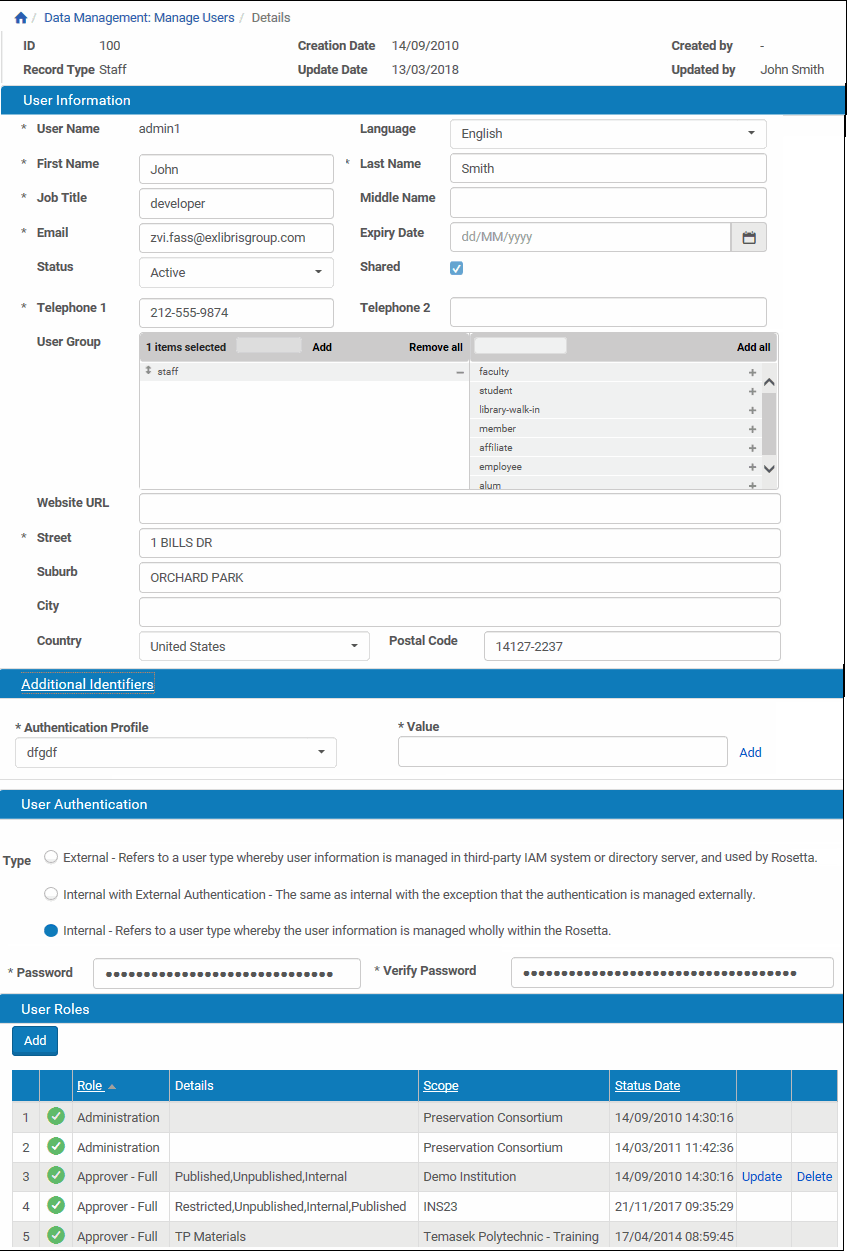
User Details Page
- In the User Information page, provide the information as requested. For the User Group section, select the user groups to which you want to assign the user. To add a new user group, enter the name of the user group and click Add.
- In the Additional identifiers pane, in the Authentication Profile field, enter the name of the SAML server and in the Value field, enter the identifier. Click Add to add the additional identifier. Rosetta can perform SAML authentication using any of the identifiers you configure.
- In the User Authentication pane, indicate if the user is manged externally, internally with external authentication, or internally.
All fields with an asterisk (*) are mandatory.
- Click Save. The Add New Roles page opens.
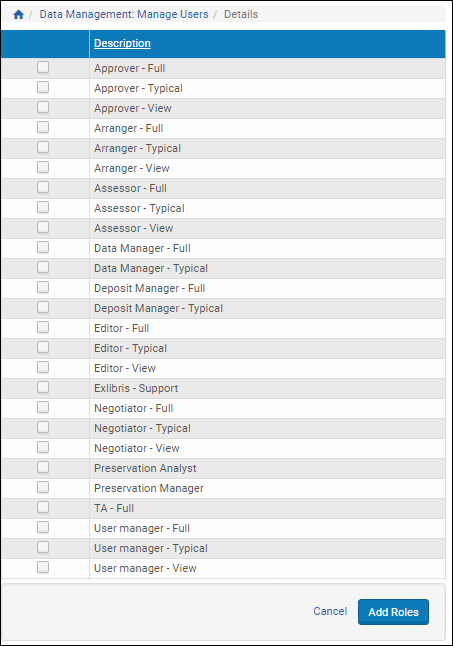
Add New Roles Page
- Select the roles that you want assign to the user. For detailed information, see Working with User Roles.
- Click Add Roles. The User Role Details page opens.
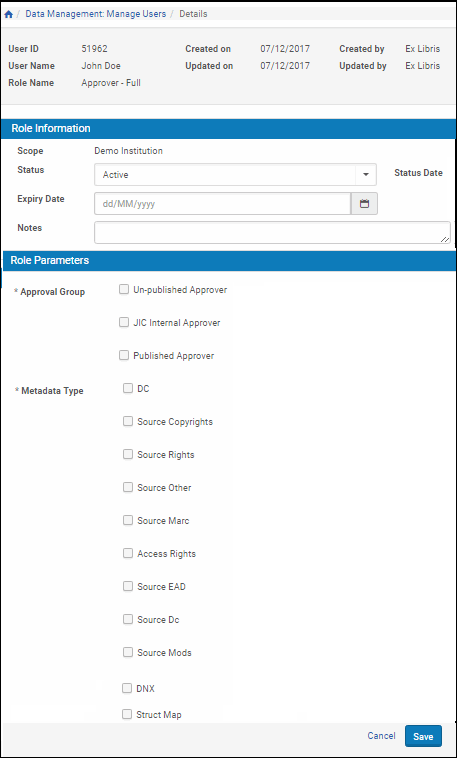
User Role Details Page
- Provide the information as requested.
The list of parameters displayed in the User Role Parameters pane varies depending on the user role.
- Click Save. The new user is saved in the Rosetta system.
The user now can log on and work with the Rosetta system, according to the defined user role.
Cloning a User
To create a new user with the same roles as an existing one, you can clone the existing one. Cloning creates the same user with the following characteristics and limitations:
- Limited to Staff users
- In the Management (institution) UI, cloning is limited to roles scoped to the current institution
- In the Administration (consortium) UI, roles across all institutions are duplicated
User roles cannot be edited until the new user's information is saved. After adding user information, click Save to save a user with the same roles, or click Apply to save the user information and edit the user roles.
Updating a User
Administrators can update both the general user information and the user roles of an existing user.
To update a user:
- On the User List page (see Managing Users), locate the user you want to update and click Update. The User Details page opens.
User Details Page
- Modify the fields that you want to update.
- Click Save.
The updated user information is saved in the Rosetta system.
Deleting a User
To remove a user from the system and prevent all further access by that user, Administrators can delete an existing user.
To delete a user:
- On the User List page (see Managing Users), locate the user you want to delete and click Delete. The confirmation page opens.
- Click OK.
The user is deleted from the Rosetta system.
Releasing the Work of a User
You can unassign all SIPs and RIPs of a user and unlock any locked IEs. This can be useful if a user is unexpectedly unavailable for a considerable length of time, but you do not want to delete the user.
To release the work of a user, select the Release Work row action for the user:
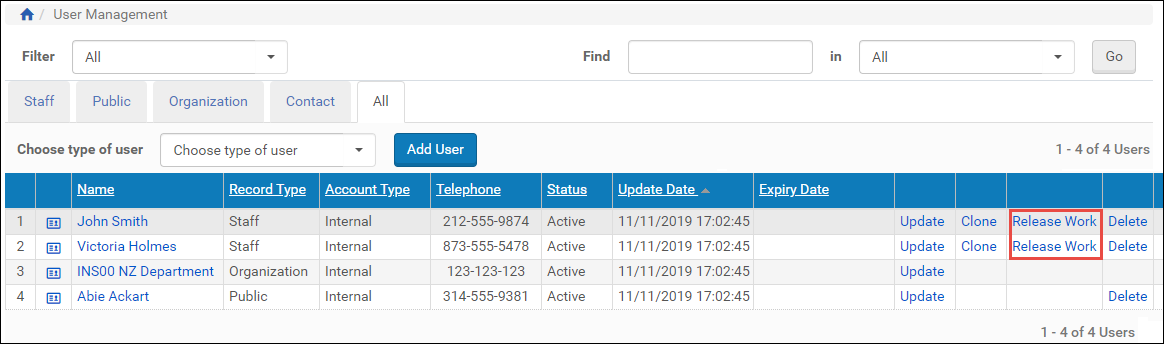
Release Work
Sharing Users
You can choose to share your users with other institutions, allowing them to access these users with their management interface according to roles assigned by the user manager of the respective institution. To share users, select the Shared checkbox when configuring the user.
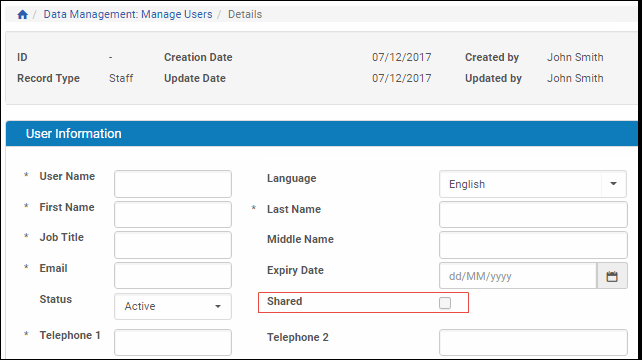
Sharing Users
- Only Administration User Managers and the institution that created the user can set the Shared checkbox.
- If the user has been assigned roles in another institution, the Shared checkbox cannot be cleared until those roles are removed.
- If a Contact user is connected with a Group Producer created in another institution, the Shared checkbox cannot be cleared until the connection is removed.