
Access Rights
Configuring Access Rights Policies
How Access Rights Work
- A user requests an IE, representation, or file.
- The system checks the access rights policy for the IE.
- If the access rights requirements are not met, the system blocks the IE and sends a message to the user.
- If the access rights requirements for the IE are met, the system grants access to the user seeking the IE.
Adding an Access Rights Policy
- From the Rosetta drop-down menu, click Data Management > Policies > Access Rights Policies.
Access Rights Policies
- Click Add Shared Metadata Record. The Details page opens.
Add Access Rights Policy Page
- In the Copyright Template drop-down list, select the template that must be used to display the copyright statement. (For information on configuring the copyright statements, see Configuring Delivery Copyrights Statements.)
- Click Add Expression. The Add Expression page opens.
Add Expression Page
- In the Criteria drop-down list, select the criterion by which the Rosetta system must compare the actual parameters of a user with the parameters you define in the expression. Criteria values are taken from the Access Rights Key Code Table. The table below defines the items you are likely to find in the list.
Expression Criteria Name Access Is Granted... User Group to users who belong to these user groups, as defined in their user group field. User ID to the specific user with this user ID (Rosetta user ID). IP Range for calls coming from the specified IP range. Both IP v4 and IP v6 are supported. For more information, see the note below. Registered User to users who are registered and authenticated by Rosetta. (Not to users who attempt to access from outside the institution’s network) Everyone to everyone. Concurrent Users to a certain number of users at a time (IE-level policies only). AR Plug-in to users of an access rights plug-in that integrates its external interface with that of Rosetta. LDAP User Group List to a user who belongs to the listed group defined in the institution’s directory and whose credentials are transferred by LDAP (Lightweight Directory Access Protocol). LDAP User Department to a user who belongs to the listed department defined in the institution’s directory and whose credentials are transferred by LDAP. LDAP Tuples if the text string sent through LDAP meets the criterion. LDAP Course Enrollment if the text string sent through LDAP meets the criterion. Moving Wall based on a specified time before/from the selected date. Select Metadata – File Level or Metadata – IE Level to choose from any metadata-based file or IE-level date field (dc, dcterms, DNX) or select Date to specify a fixed date. Supported time units are years, months, weeks, and days. Expiration Date up until the specified date. Rosetta version 8.2 and newer versions support the following IPv6 syntax:- Expanded address (eight colon delimited groups, each comprised of four hexadecimal digits)
For example:
2620:012a:8001:0000:0000:0000:0000:0004
- Omitted leading zeros
For example:
2620:12a:8001:0:0:0:0:4
- Compressed fields (using "::")
For example:
2620:12a:8001::4
- IPv4-mapped IPv6
For example:
::ffff:23.185.0.4
Square brackets are not supported. Filter them out with an external network component (for example, Proxy, Load-Balancer, etc).
Your selection for Criteria may change the labels for the fields just below it. Wait to see if the page refreshes before continuing.
- Expanded address (eight colon delimited groups, each comprised of four hexadecimal digits)
- In the Operator drop-down list, select an operator (such as equals) to be used to compare the actual parameters of a content consumer with the parameters defined in the Value field. The values for operators are generated by the type of data selected in the Criteria field.
The page reloads when you enter a value that changes the fields below the active field. For example, IP Range as a Criteria will change the Operator field to within or contains; if you select contains, one blank field loads below the operator field; if you select within, two values load. See the figure below.
Adding an Expression to an Existing Group
- Finish entering the values. If your policy includes more than one group, make sure you have the correct group specified in the top portion of the form.
- Click Save. The policy is saved to the group specified.The list of existing access rights policies re-opens.
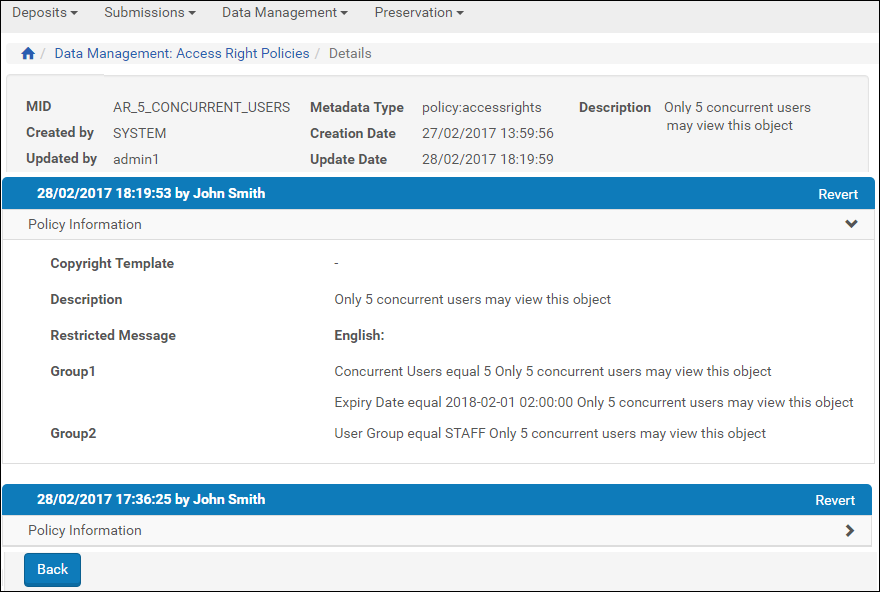
- You can add groups and expressions within the groups until you have completed a policy. The following figure shows a policy with two groups and three expressions amog them.
Access Rights Groups and Expressions
Rosetta reads the groups as if an OR logical operator separated them. Rosetta reads the expressions within the groups as if an AND operator separates them. So, for the figure above, the user gains access if he or she is both in the IP range AND a Registered user, or if he or she is in the user group Staff. Either one of those two groups/conditions will qualify the user for access.
- Click Save. The Metadata Search page opens with your access rights policy included in the list.
Editing an Access Rights Policy
- On the Access Rights Polices page (see Adding an Access Rights Policy), locate the access rights policy that you want to edit and click Edit. The Access Rights Editor opens.
Access Rights Editor
The page contains a list of expressions. Each expression defines criteria (such as an IP address) that a content consumer must meet in order to view the content object.
- Do one of the following:
- Add an expression, as described in steps 3 through 8 in Adding an Access Rights Policy.
- Delete an expression, as described in Deleting an Expression from an Access Rights Policy.
Changes will affect all institutions – Continue?
Deleting an Expression from an Access Rights Policy
- On the Access Rights Editor page (see Editing an Access Rights Policy), locate the expression that you want to delete and click Delete. The confirmation page opens.
- Click OK. The expression is removed from the list of expressions.
Displaying a Previous Version of an Access Rights Policy
- Click History for the access rights policy that you what to roll back. A list of versions of the access rights policy appears
Reverting to a Previous Version of an Access Rights Policy
- Click Revert for the version to which you want to revert.
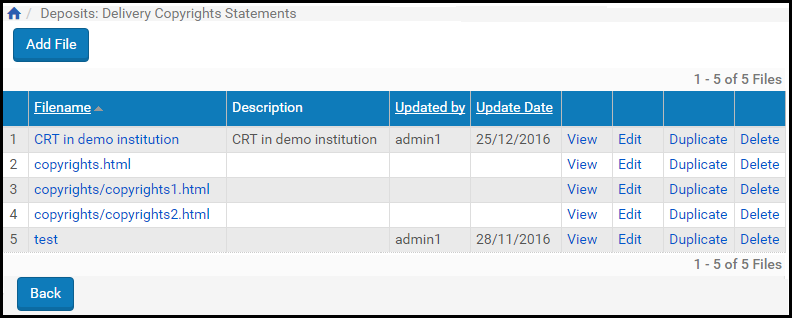
Configuring Delivery Copyrights Statements
Assigning an Access Rights Policy
- Conduct a search for the object whose access you want to restrict. From the Search Results page, click the Editor link that corresponds to your object’s row.
The object opens in the Web Editor. - In the Actions drop-down menu at the bottom right of the page, click Lock Object and then click the Go button.
The page refreshes with the notice: Locked By: Me. - In the tree pane, select the IE, representation, or file to which you want to assign an access rights policy.
- In the main pane, click the Metadata tab.

IE Selected, Metadata Tab Open
- From the Metadata tab, click the Assign AR Policy button. The Access Rights Policies page opens.
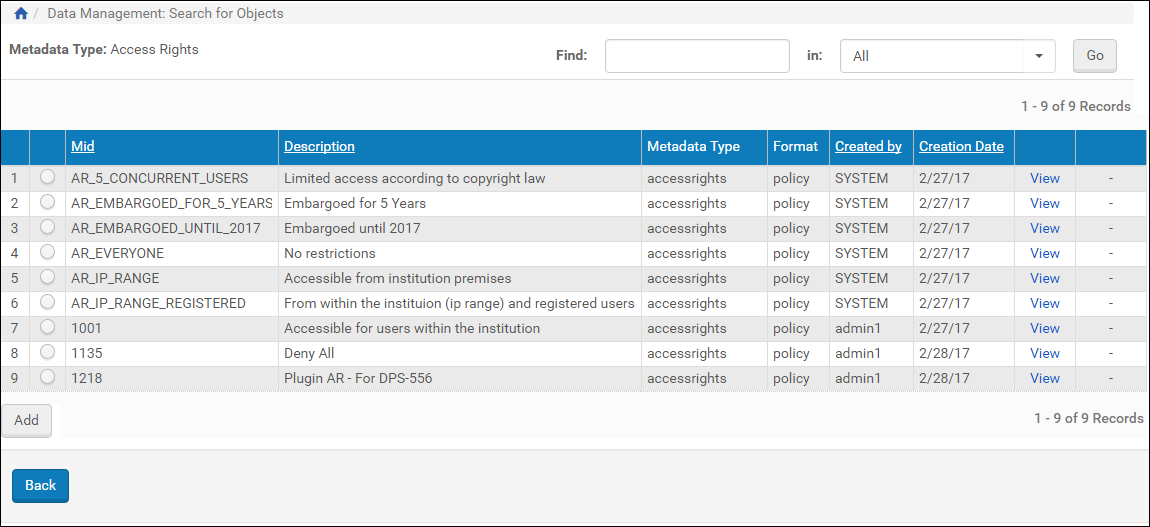
Access Rights List
- Locate the access rights policy you want to assign to the IE or representation and select its button, then click Add.
- Because an access rights policy is not required for a representation, the policy can be removed by clicking the Remove action.
- The system generates a provenance event whenever an access rights policy is assigned or removed.
Access Rights Exceptions
- Setting Up Access Rights Exceptions
- Displaying a Previous Version of an Access Rights Policy
- Assigning an Exception to a Set
- Access Rights Exceptions in the Web Editor
Setting Up Access Rights Exceptions
- From the Rosetta drop-down menu, follow the path: Data Management > Policies > Access Rights Exceptions.
The Access Rights Exceptions List page opens. Any existing rights exceptions display in a table with several options for actions that can be performed on them.
Access Rights Exceptions List
- Click the Add Access Rights Exceptions button above the list of exceptions.
The Edit Access Rights Exceptions page opens:.
Edit Access Rights Exceptions Page
- Select a Copyright Template from the existing templates in the drop-down list.
- Enter a description for the AR in the Description text field. This text identifies the exception on the List of Access Rights Exceptions page.
- Enter the message you would like users to see when they do not have access to the object based on this particular access rights policy. If you do not enter a custom message, a general default message appears on the user’s page.
- Click the Add Expression button.
The AR Expression page opens. If this is your first expression for this exception, New Group will be selected by default. (On subsequent expressions, To Existing Group will also be available for selection.)
Edit Access Rights Exceptions Page - Add Expression
- For the Criteria drop-down field, select the item you want to use as a measure for this expression.
The fields below may adjust to accommodate the Criteria selection. - Select an Operator to compare the Criteria selection with the value(s) you will enter.
- Enter a value or values in the Value 1 (and Value 2, if applicable) field
- Click the Save button.
The AR Full View page opens with the expression you just added:
Access Rights Exception with One Expression
- To add another expression, click the Add Expression button and repeat that portion of the procedure. Repeat as needed.
- Click the Save button.
Your exception is added to the List of Access Rights Exceptions.
Displaying a Previous Version of an Access Rights Exception
Assigning an Exception to a Set
- On the Access Rights Exception List page, find the AR exception you want to assign and click the corresponding Assign to Set text link.
Step 1 of the Assign to Set wizard opens. It displays the name of the process, which is assigned by the system and is read-only. - Click the Next button to move to step 2 of the wizard.
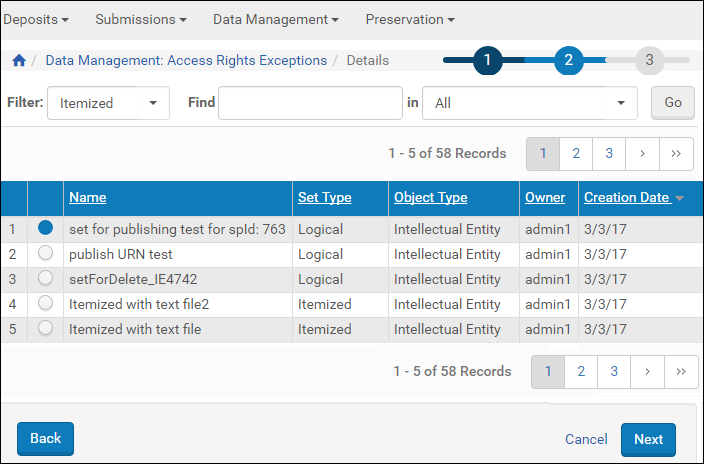
Assign AR Exception to Set
- Select the set to which you want to apply the AR exception to and click Next.
The third step of the wizard opens, displaying the process name and scheduling information.

Assign to Set - Wizard Step 3
- If the information is correct, click Next. (If it is not, click Back and return to step 2 to correct it, if possible.)
The access rights exception will be applied to the set you identified. The original Access Rights Exceptions List opens to complete the procedure.You can repeat this procedure to assign more exceptions to more sets (or a single exception to multiple sets).
Access Rights Exceptions in the Web Editor
- Using the Search for Object or Search for Metadata page (Data Management > Search and Manage Queries > Search for Objects), look up the IE to which you want to assign access rights exceptions.
- Click the Info text link of the row corresponding to the IE you want.
The IE opens in the Web Editor with the Object Summary tab open. If the IE is already locked, an exclamation point with brief text will indicate this above the object hierarchy tree. - If the IE is not locked, then, in the Actions drop-down box (lower right of page), select Lock object and click the GO button.
- Click the Metadata tab in the object information box.
Metadata for the IE displays in the object information box. Above the metadata table, several buttons, including Add AR Exceptions, are available for this IE. - Click the Add AR Exceptions button.
The Local Access Rights Metadata Type page opens. The system displays a list of all access rights exceptions created from the Access Rights Exceptions List page.
Local AR Exceptions
- Click one radio button beside the exception you want, then click the Add button.
The IE details page opens with the added exception showing under the Metadata tab with options to view or remove the exception.