
How to Add Custom Fonts to Creative Studio Pages
- Product: campusM
- Operating system: N/A
Question
How can I add custom fonts to my Creative Studio pages?
Answer
This knowledge article provides guidance on how to use custom fonts within your Creative Studio Pages.
The example will be based on Google Fonts https://developers.google.com/fonts/), a free repository of high quality, browser friendly fonts that are easy to use within CSS. You can use your own custom fonts, but these font files need to be available in such a way as to be referenceable within the style sheet.
If using your own customer font, ensure you have the necessary license to use the selected font within content pages.
Creating the required StyleSheets to reference the custom font
- In creative studio, click on the content menu node associated with the pages you want to use the font within using the node directory on the left-hand side of the screen (TIP: use the Search bar at the top of the directory to find the menu option title)
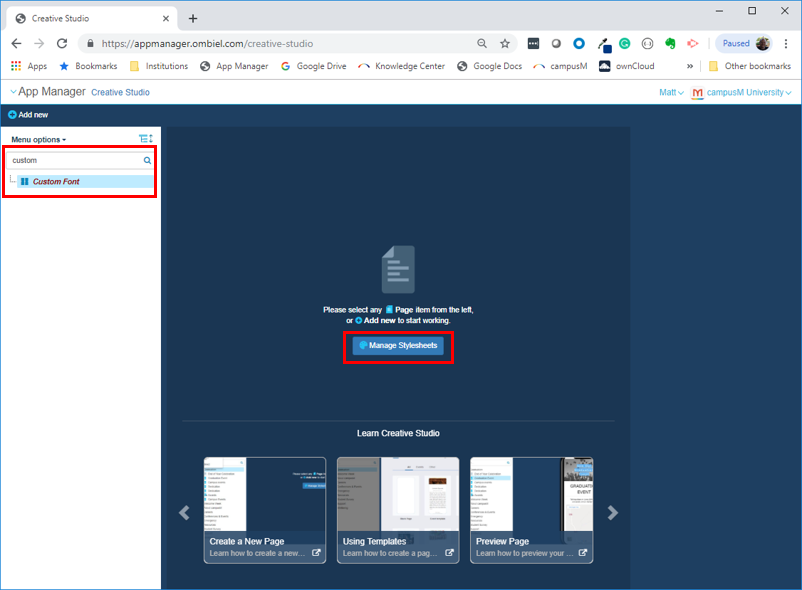
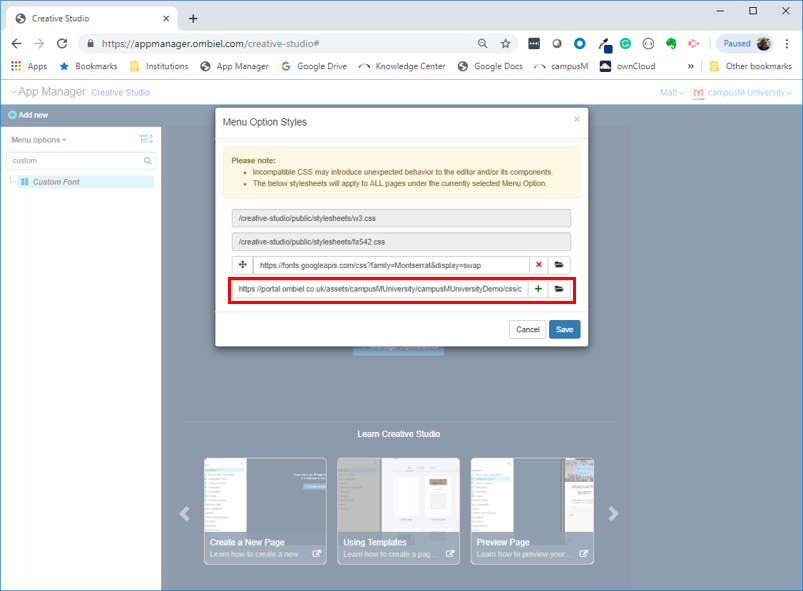
- In the central window you should now see the Manage StyleSheet button. Click this to enter the Menu Option Styles menu to add custom StyleSheets to this content node.
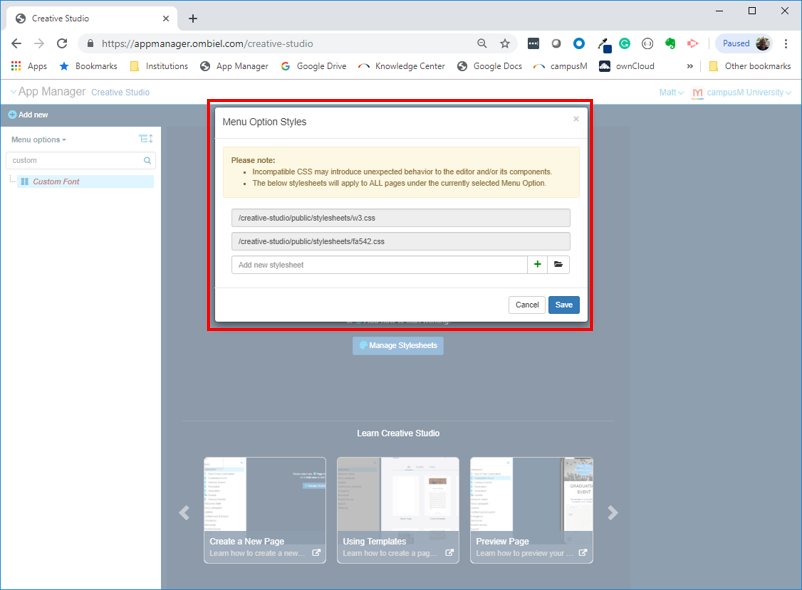
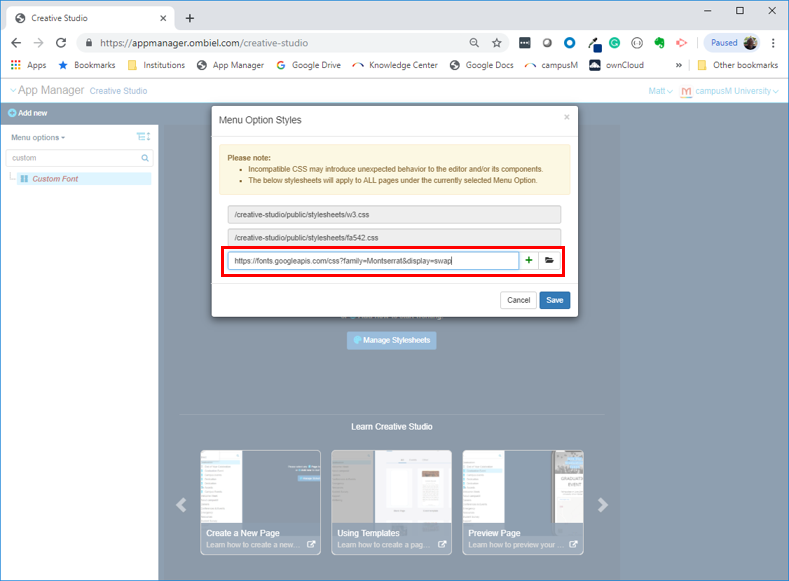
- For this example, we will add in the Montserrat Google font using the API link: https://fonts.googleapis.com/css?fam...t&display=swap
- To add the reference to this font, simply copy the embed link that references the font into the ‘Add new styleSheet box’
- Next we need to create a CSS styleSheet that references this font family. In your text editor of choice, create a new CSS styleSheet which takes to following form:
-
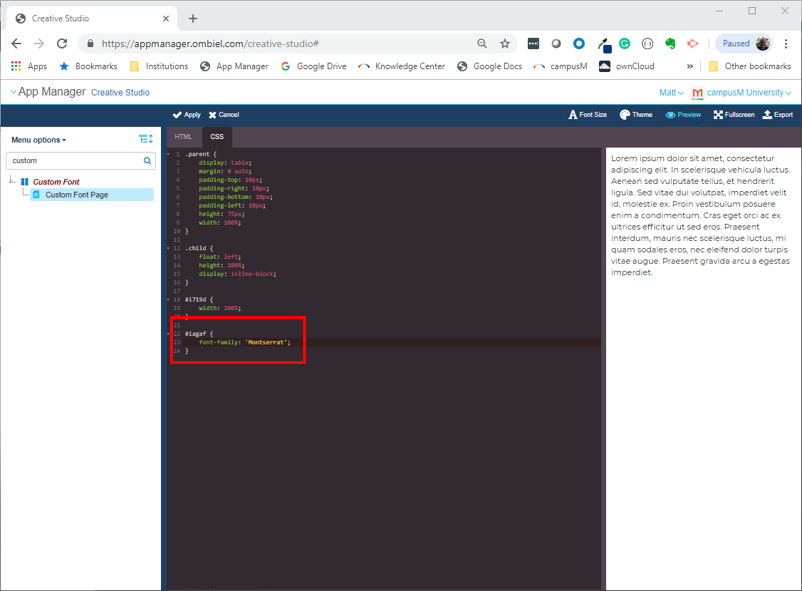
1. .Montserrat {
2. font-family: 'Montserrat';
3. } - Save this CSS file and add to your apps assets using Asset Manager
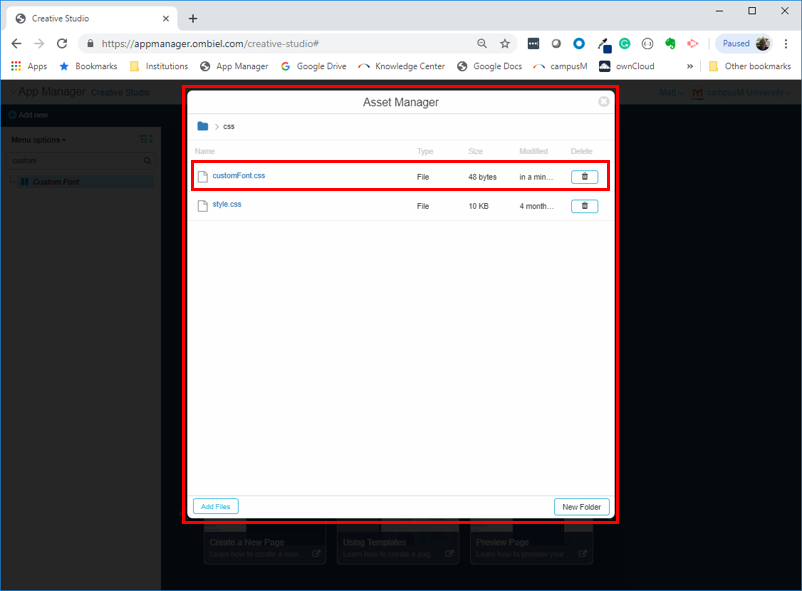
- Now add this newly uploaded CSS file to the content node styleSheets as above by clicking the folder icon to the right of the ‘Add new stylesheet’ box. Browse to the CSS file you uploaded and click on the filename to add it to the StyleSheet box
- Click save to save the two new styleSheet additions
Using the new custom font within your pages
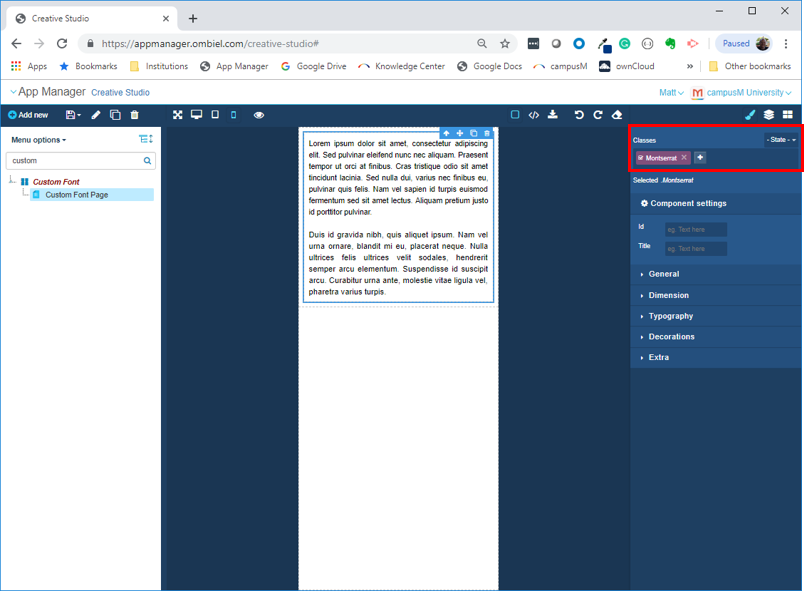
- To apply the new font to your body of test, first select the text box you want to apply the change to
- In the Classes box in the ‘Styles/component settings’ configuration pane, click the ‘+’ button and type the name of the font class you added in your CSS file. For this example, I referenced the font family as ‘Montserrat’. Hitting return will apply this font.
- Alternatively, for advanced users, you can reference the font family directly in the CSS code for the page using the code editing feature available in Creative Studio
- Article last edited: 18-Jun-2019