
Configuring Microsoft Azure (Graph) for the Roles Product Integration
![]()
This page describes the procedure for configuring the Roles product integration with Microsoft Azure (Graph). For more information, see Microsoft Graph API Permissions and campusM Product Integrations.
If you already have an application created on Azure for campusM, you can skip the first step.
- Create the Application in Microsoft Azure:
- Login to Azure.
- Navigate to the Azure Active Directory > App Registrations.
- Select New Registration.
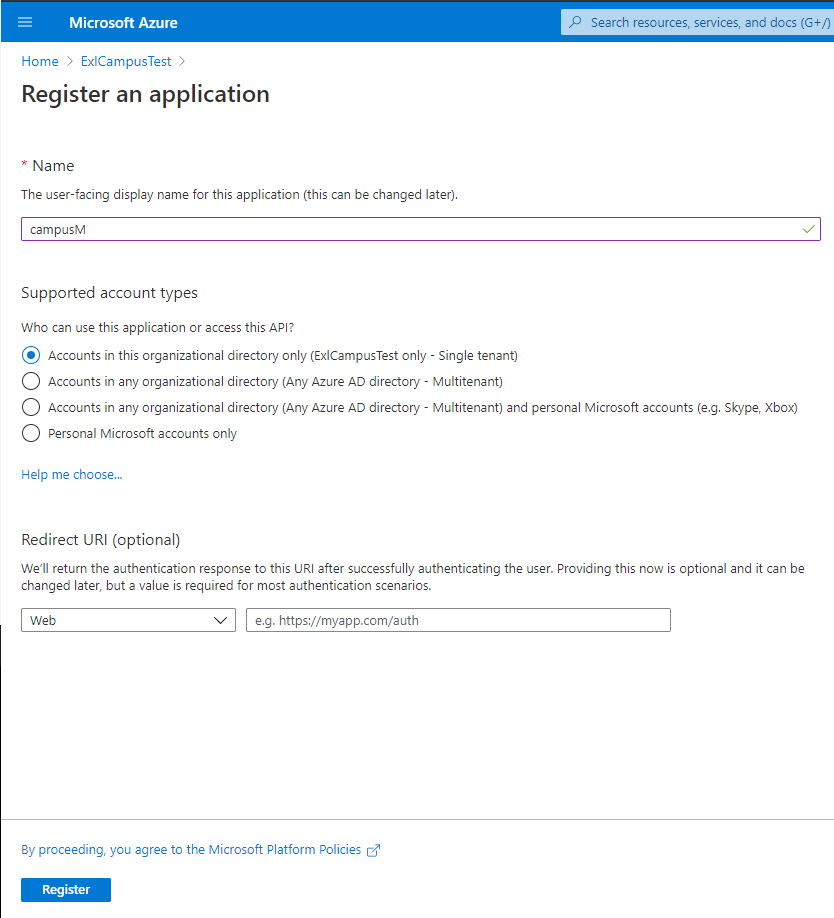 Register an Application
 - Fill in the relevant details for your organizational requirements and click Register.
- Select Integration Assistant on the left pane, select Daemon, and select Evaluate my app Registration.
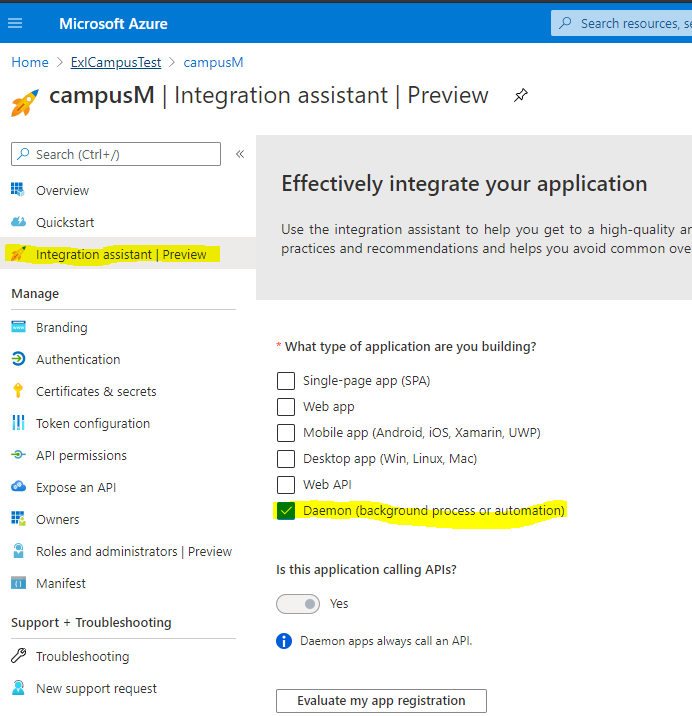 Evaluate Registration
 - Configure API permissions on Microsoft Graph for use by the roles service.
- Navigate to API permissions and select Add a Permission.
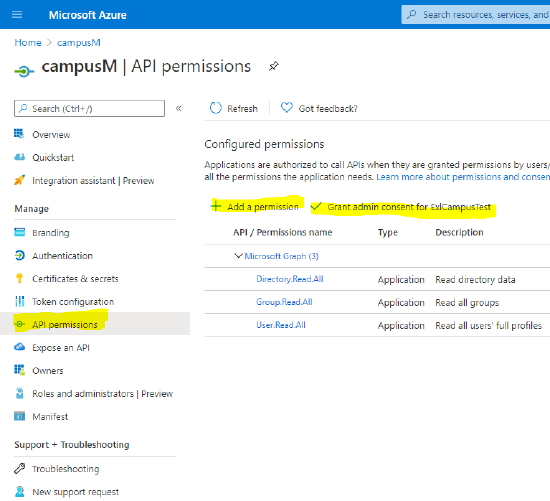 Add A Permission
 - Select Microsoft Graph and select Application permissions.
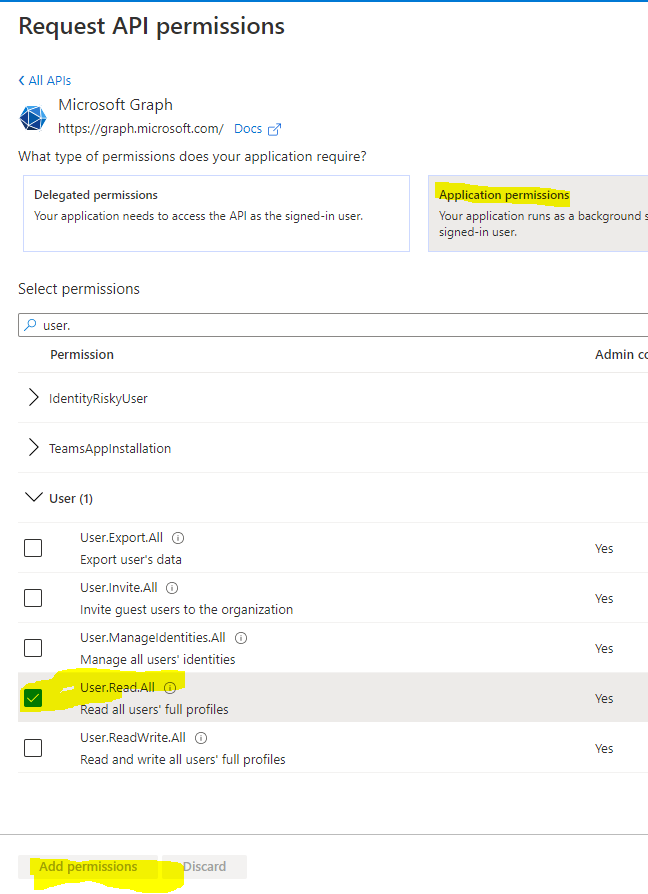 Application Permissions
 - Add the following permissions:
- User.Read.All and Group.Read.All – if you are managing the roles in groups.
- Directory.Read.All – if you are managing the roles in Directory Roles.
- Select Grant Admin Consent.
- Navigate to API permissions and select Add a Permission.
- Add a Client Secret to be used by campusM roles service.
- Navigate to Certificates & secrets in the navigation pane and click New client secret.
 New Client Secret
 - Copy the client secret to be added to the Roles PI in Appmanager.
- Navigate to Certificates & secrets in the navigation pane and click New client secret.
- Retrieve App Registration Metadata to complete the Roles PI in appmanager.
- Navigate to Overview on the Navigation pane and copy the values of the below fields:
- Directory (tenant) ID
- Application (client) ID
- In the Roles product integration, use these values to configure the Tenant ID and Client ID. The Grant Type field should have the value: client_credentials
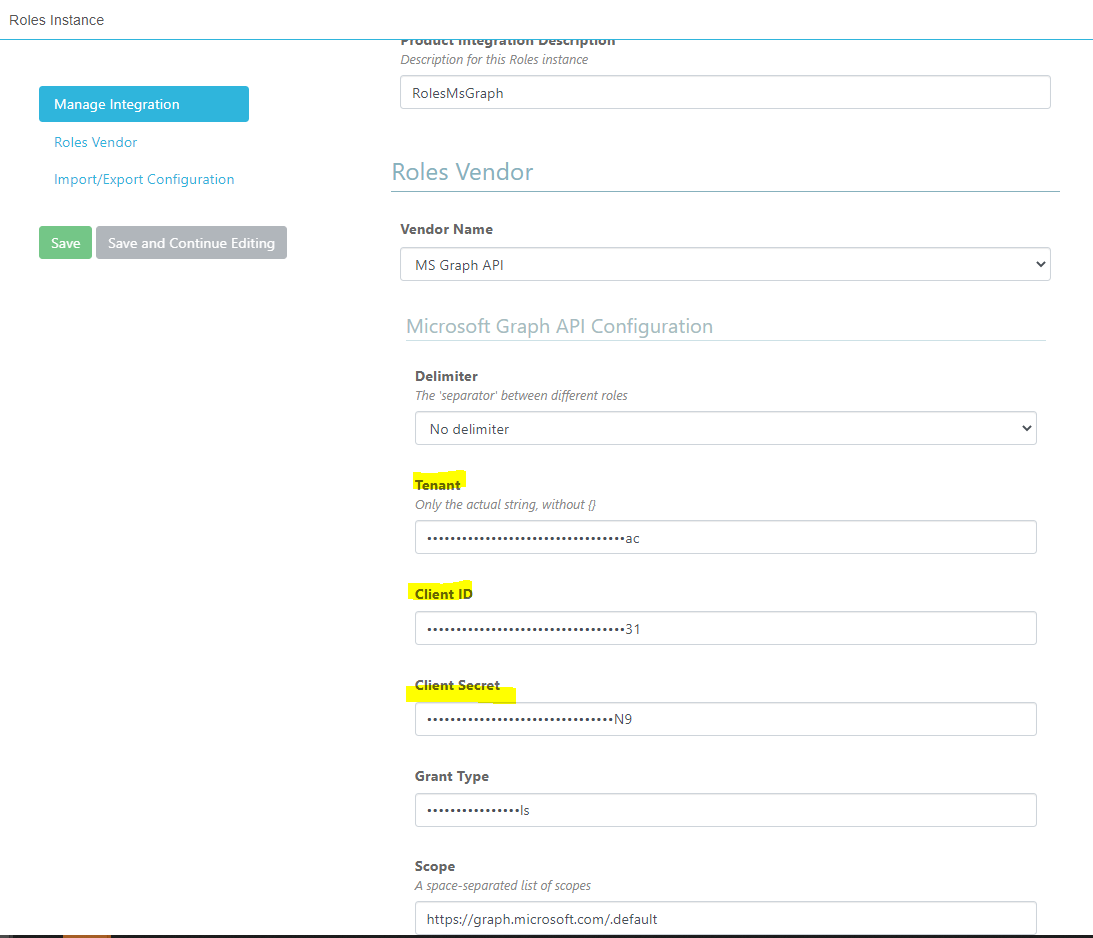 Roles Product Integration Configuration
 - Navigate to Overview on the Navigation pane and copy the values of the below fields:
- Common errors:
- A 401 error typically indicates the secret value or another value is wrong.
You should use the secret value, not the secret ID.
- A 403 error typically indicates that you have not granted the correct API permissions.
- A 401 error typically indicates the secret value or another value is wrong.