
Using Bins to group values together in Alma Analytics
- Product: Alma
Background
Bins can be used in Alma Analytics to combine a set of column values into a single group. These bins are a user-friendly way of creating a "Case When" statement to replace a certain value with another.
For example, one might want to report on the number of loans by Students versus Staff, but these patrons may have several different User Groups that need to be combined.
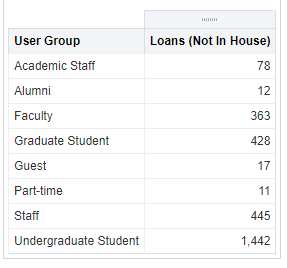
In this example, an institution has several different User Groups for patrons:
We would like to combine these User Groups in order to distinguish between Staff and Students, like so:
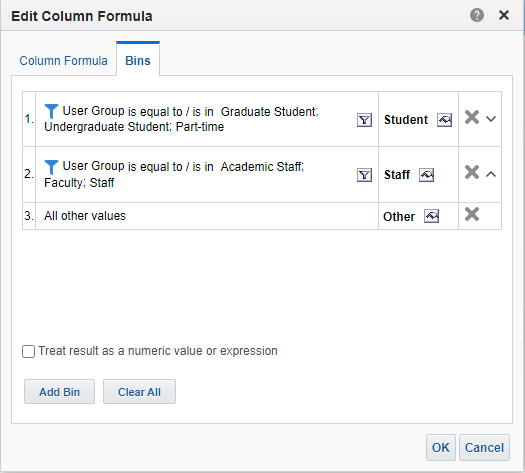
- Student: Graduate Student, Undergraduate Student, Part-time
- Staff: Academic Staff, Faculty, Staff
- Other: group any other User Groups together, like Alumni and Guest patrons
Instructions
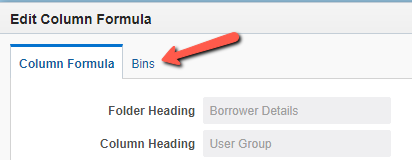
- On the Criteria tab, select the "User Group" column and click Edit Formula
- Click the Bins tab
- Click Add Bin
- Create a filter to select the "Student" values: User Group is equal to / is in Graduate Student;Undergraduate Student;Part-time
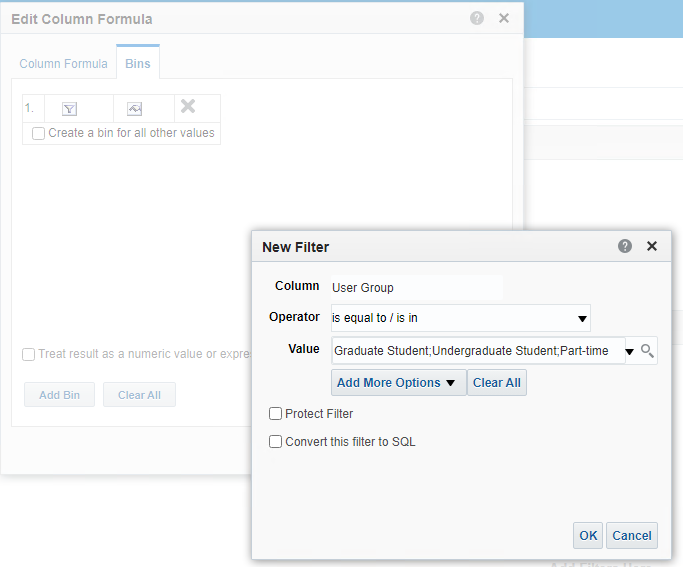
- Click OK
- Enter the name of the Bin: Student
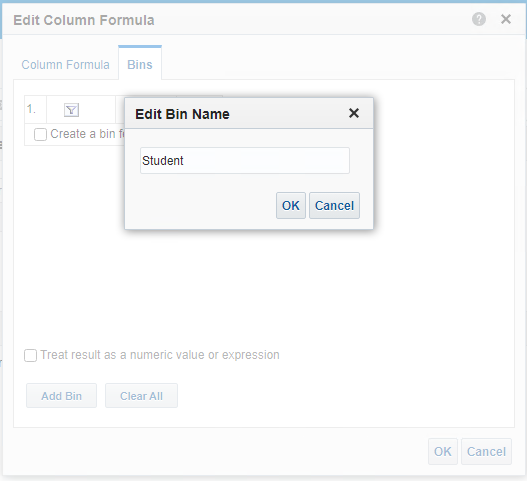
- Click OK
- Repeat steps 2-6 to create a "Staff" bin for Academic Staff, Faculty, and Staff User Groups
- Click the checkbox for Create a bin for all other values
- Name this catch-all Bin: Other
- Click OK
- The final Bins should look like:
- Click OK to close the column formula interface
- Go to the Results tab
- The loans are now grouped according to our Bins:

Additional Information
Editing the Column Formula after creating the Bins shows the advanced "Case When" statement created by the Bins:

By default this formula is not editable, as it corresponds to the selections made on the Bins tab.
In order to edit this "Case When" statement manually, return to the Bins tab and click Clear All, then click Yes to retain the case statement.
Other Resources
For other resources to assist in creating Alma Analytics reports, please see our compilation here.
- Article last edited: 01-Dec-2021