Integrating an Alma Institution with SUDOC
Alma supports a workflow that provides integration with SUDOC, the French National Catalog. With this capability, bibliographic record changes can be imported from SUDOC into Alma. This is handled with email exchanges between an Alma library and ABES, the SUDOC Cataloging Services. See SUDOC Workflow for more details of the workflow. The following is an example of the email sent to ABES that triggers the start of the import procedure:
|
From: <Library Email Address>
GTD_ILN=trytr |
This email initiates a process in ABES that creates files of changed records placed in the ABES FTP/SFTP server and sends a response email with a subject line of GTD Status: 0 and a list of the files created. The schedule for sending the trigger email is defined in the Alma SUDOC central integration profile. See Configuring the Central Catalog Integration Profile for SUDOC.
SUDOC Workflow
The SUDOC integration workflow processes in the following manner:
-
Integration Job:
- Per the scheduled frequency, the integration profile samples the incoming mail to check if new files located in ABES FTP server (waiting for import).
- Per the scheduled frequency, an email is sent from the library to ABES to request library updates (with the subject GET TITLE DATA and the content as described above in the body of the email).
- If new emails (with the GTD Status: 0) are detected with the list of files, the job accesses the ABES FTP/SFTP server and gets the files (per the FTP/SFTP server details set in the SUDOC import profile). ABES manages the files on the FTP/SFTP server.
- If the GTD status is somthing other than 0, the files are not processed and an error is reported.
- Files included in successful emails (with the GTD Status: 0) are processed by the SUDOC import job.
-
Import Job:
- For a successful email (with GTD Status: 0), the SUDOC import profile handles the files (with the status OK) and the library’s repository is updated.
- In cases where more than one file is placed in the ABES FTP/SFTP server, the files are processed one by one according to their chronological order.
- Only type A (bibliographic updates) are processed. Any other type is reported as an error.
Configuring the Central Catalog Integration Profile for SUDOC
In order to integrate with SUDOC, you must configure a Central Catalog Integration profile.
- From the Integration Profile List page (Configuration Menu > General > External Systems > Integration Profiles), select Add Integration Profile.
- Enter a Code and Name for the integration profile.
- Select Central Catalog Integration from the Integration Type drop-down list.
- Select Next. The next page of the Integration Profile configuration appears.
-
Complete the integration profile using the table below for more information.
Central Catalog Integration – SUDOC Field Description Central Catalog System System Select SUDOC (file based) as the central catalog system type that you are configuring.Only one Central Catalog Integration profile can be configured per institution.System Configuration Abes Email
Enter the ABES email address to which the GET TITLE DATA email is sent from the library's email account (not an Alma email account).
Library ILN
Enter the library number as identified by SUDOC. This number will be part of the GET TITLE DATA email sent to ABES.
Library Email
Enter the library's email address from which emails are sent to ABES requesting updates.
The subject line of these emails must be GET TITLE DATA.
Email Server Host
Enter the IP address of the library's email server (not an Alma server).
Email Server Port
Enter the port number of the library's email server (not an Alma server).
Username Enter the user name for the library's email server. Password Enter the password for the library's email server. FTP Server Enter the address/IP for the ABES FTP/SFTP server. FTP Sub Directory
Enter the FTP directory in which the files are placed by ABES.
Order Number Enter the library order number that will be included in the GET TITLE DATA email sent to ABES. Select one of the scheduling options to define the frequency of sending an email to ABES and sampling the incoming box to look for new files from ABES.You may also manually run this integration profile by selecting Run.
- Select Save.
Configuring an Import Profile for the ABES/SUDOC Integration Processing
- From the Import Profiles page (Resources > Import > Manage Import Profiles), select Add New Profile.
- Select the Repository profile type and select Next.
-
Enter your import profile details for the steps of the wizard and using the table below for an explanation of your parameter options.
SUDOC Import Profile Field Description Wizard Step 2:Profile Details Profile NameEnter a name for your SUDOC import profile.Profile Description Use this parameter to further describe and identify the profile that you are creating. Originating System Select the SUDOC system from the list of options. File name patterns Enter the prefix pattern used by ABES for the files that are stored in the ABES FTP/SFTP server. For example:- For files that begin with TR, use ^TR
- For files that end with RAW, use RAW$
- To retrieve file type A when file type A and file type B is provided, use A
Import Protocol Select FTP from the drop-down list. Crosswalk Select No. Physical Sources FormatSelect Binary.Encoding Select UTF-8. Source Format Select UNIMARC Bibliographic. Target Format Select UNIMARC Bibliographic. Status Select Active when you are ready to begin using the import profile. Scheduling Files to importSelect New.Scheduler StatusSelect Active in order to select a Scheduler option.SchedulerSelect a scheduling option from the drop-down list that matches your requirements.Email Notifications Select Email Notifications and enter the email addresses to be used for notifications regarding the scheduled jobs. FTP Information DescriptionEnter a description of the FTP/SFTP.Server Enter the FTP/SFTP server address. This should match the information in the central catalog profile that you created. See Configuring the Central Catalog Integration Profile for SUDOC. Port Enter the port number for the FTP/SFTP server. User Name Enter the user name for the FTP/SFTP server. Password Enter the password for the FTP/SFTP server. Input DirectoryEnter the FTP directory in which the files are placed by ABESMax. Number of Files Enter the maximum number of FTP files. Max. File Size From the drop-down list, select the maximum file size for a single file. Size type From the drop-down list, select the size type (MB, GB, or TB). FTP Server Secured Select this check box for secured server. FTP Passive Mode Select this check box for passive mode. Test Connection Select Test Connection to confirm that the parameters you have set work properly. Wizard Step 3:Filter Filter Out the Data Using Select the normalization option that matches your requirements for filtering. Normalization Correct the Data Using Select the normalization rule that matches your requirements for correcting the data. Validation Exception Profile Handle invalid data usingSelect UnimarcXML Bib Metadata Editing On Save.Wizard Step 4:Match Profile Serial match method Select 035 (Other System Identifier) Match Method. System Identifier Prefix Specify the system identifier prefix, if there is one. Non Serial match method Select 035 (Other System Identifier) Match Method. System Identifier Prefix Specify the system identifier prefix, if there is one. Match Actions Handling method Select Automatic. Upon match Select Overlay. Merge/Overly Select the following:- Merge method – Overlay all fields but local
- Select Action – Select one of the following actions that matches your requirements:
- Allow bibliographic record deletion
- Do not override/merge a record with lower brief version
- Unlink bibliographic records from Community Zone
- Do not override/merge record with an older version – Select Disabled.
Automatic Multi-Match Handling Select Action Select one of the following options, if needed, that matches your requirements:- Disregard matches for bibliographic CZ linked records
- Disregard invalid/canceled system control number identifiers
- Prefer record with the same inventory type (electronic/physical)
- Skip and do no import unresolved records
Merge Records and Combine Inventory for Multi-Match Merge and Combine Select Disabled. Preferred record Select Record with the most items. Secondary record Select Delete. Merge method Select Overlay all fields but local. Update holding call number Select this option if you want to update the holdings call number when importing. Handle Record Redirection Canceled record field/Canceled record subfield Specify the field/subfield for the canceled record. Canceled record Select Delete. Merge method Select Overlay all fields but local. Update holding call number Select this option if you want the holdings call number updated. No Match Upon no match Select Import. Wizard Step 5:Set Management Tags for all the Records Imported Using this Profile Suppress record/s from publish/delivery For the imported records, select this option if you want these records to be suppressed. Synchronize with OCLC Select Don't publish. Synchronize with Libraries Australia Select Don't publish. Wizard Step 6:Inventory Operations Select None. - Select Save.
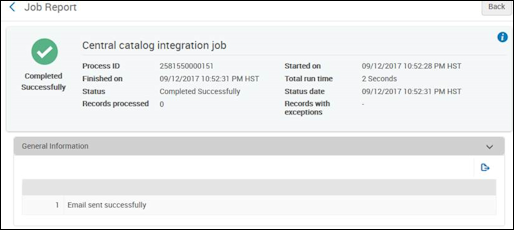
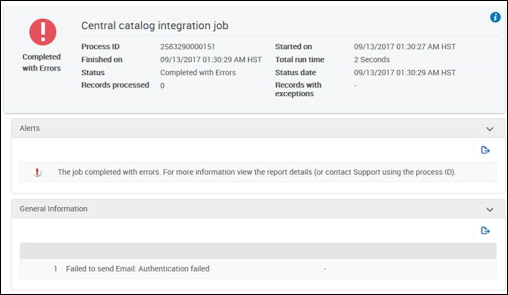
SUDOC Job Report
When the SUDOC integration profile job and import jobs have completed, the following type of job report is produced for successful and failed jobs.