
Configuring Distributed Access to Electronic Resources from the Network Zone
- Repository Administrator
- General System Administrator
Adding an Inventory Management Group
To allow central office operators to allocate electronic resources to specific libraries or campuses within a member Institution Zone, Inventory Network Groups should be created including the relevant campuses/libraries from within the institution.
To enable this feature, set the customer parameter nz_multi_campus_members to true. Access the customer parameter from Configuration Menu > Resources > Other Settings.
- On the Inventory 'Available For' Management Groups page of the Network Zone, select Add Group. The Add Group dialog box appears.
- Enter a name for the group, optionally enter a description, and select Add and Close. The group appears on the Inventory 'Available For' Management Groups page.
- Select Edit from the group's actions list. The Inventory Management Group Details page appears.
- Select the institution to add to the group and select Add Institution. The institution is added to the group.
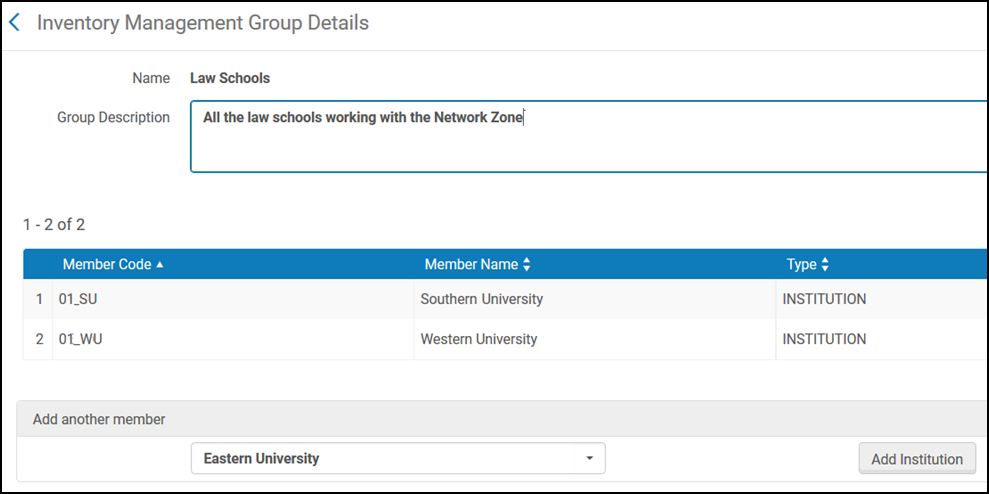
- If you enabled this feature, you can also select the campus/library to add to the group:
 Inventory Management Group Details
 - When you are finished, select Save.
The group is now configured. You can delete the group on the Inventory 'Available For' Management Groups page.
If you delete an inventory management group that is connected to inventory, the relevant setting in the inventory is also deleted and cannot be automatically restored.
By default, you define management group restrictions on electronic collections only. In this case, portfolios inherit inventory management group restrictions from electronic services, and services from electronic collections. These restrictions appear at the top of the Group Settings tab of the service or collection. To define different management group restrictions on different levels of resources, define specific inventory management group restrictions for portfolios and services, separately from the inventory management group restrictions that are defined for the electronic collections with which they're associated.
For more information about inheriting group restrictions, see the E-Resources: Inherited ”Available For” Groups video.
Proxy Settings for Inventory Groups in the Network Zone
- Activate the electronic collection in the Network Zone.
- Make it Available For a specific Institution Zone (in this example, a group containing 'University of Knowledge') using Group Setting at the level of the electronic collection service.
- If the institution Zone ('University of Knowledge') uses proxy for access, then in the 'Available For' Group Settings set the below:
- Proxy Enabled – select Yes
- Proxy selected – leave empty

This is how it works:
- OpenURL (from the Discovery or any other OpenURL compliant source) is sent to 'University of Knowledge'. Alma Link Resolver checks in the Network Zone if there are any electronic services available for the OpenURL.
- If Alma Link Resolver finds an electronic service that is available for 'University of Knowledge', it presents it to the end user. Once the end user clicks it, Alma Link Resolver generates the target URL including Proxy (as proxy was enabled for the service). The proxy that will be used is the default Proxy according to the user’s context: if the user is in a library/campus, and a default proxy is defined for this library/campus, this proxy will be used. If no proxy is defined in the level of campus/library, or the user is not in this context – the institution’s default proxy will be used.