
Best Practice Toolkit: Integrating with the LMS
Who should use this toolkit?
Libraries should review this guide as part of the initial integration with the Learning Management System (LMS, also known as the Course Management System or the Virtual Learning Environment), but also periodically as new options may have become available in Leganto since your initial implementation.
This page uses the Leganto new UI. For information about integrating Leganto with the LMS using the classic UI, see: Best Practice Toolkit: Integrating with the LMS--Classic UI
Background
Leganto provides the best end user experience when integrated into the LMS, and the library should ensure that this experience is as user friendly as possible for both students and instructors.
There are a number of options available related to this integration, and this toolkit is designed to help you decide the best option to meet your local needs.
Determine the best approach for your institution:
What to call Leganto?
You should decide this before the integration is set up, as your LMS administrators will need this information when they configure Leganto. We strongly recommend that you do not call it Leganto. Your instructors and students won’t know what this means, and won’t think to click on a link called “Leganto” when they’re looking for their course materials. We also generally recommend that you don’t refer to it as something related to the library, such as “Library Resources.” Some user studies show that faculty and students think this is going to be a personal library of resources, rather than course materials that the library provides access to.
Think about the student experience. What will students be looking for when you want them to click on the Leganto link, and what language will prompt them to click in the right place? We recommend naming Leganto something that ties directly to the student need, such as “Course Materials,” “Course Resources,” “Course Readings,” or “Reading List.”
To embed or not to embed?
Leganto can be either embedded in LMS or configured to open in a new tab. There are pros and cons to both options.
Embedding
- Leganto is more integrated with the LMS, creating a more seamless experience for end users
- Some LMS's provide a small iFrame for embedded LTI tools. Depending on the LMS, the Leganto user experience can be affected when embedded, especially for instructors building lists.
Open in a new tab
- Better Leganto experience, especially on smaller screens
- Pop-up blockers can result in problems for end users
- Users sometimes have trouble navigating between tabs
We generally recommend embedding Leganto into the LMS to create the most integrated experience for instructors and students, but understand that this may not be the best fit for every institution and every LMS.
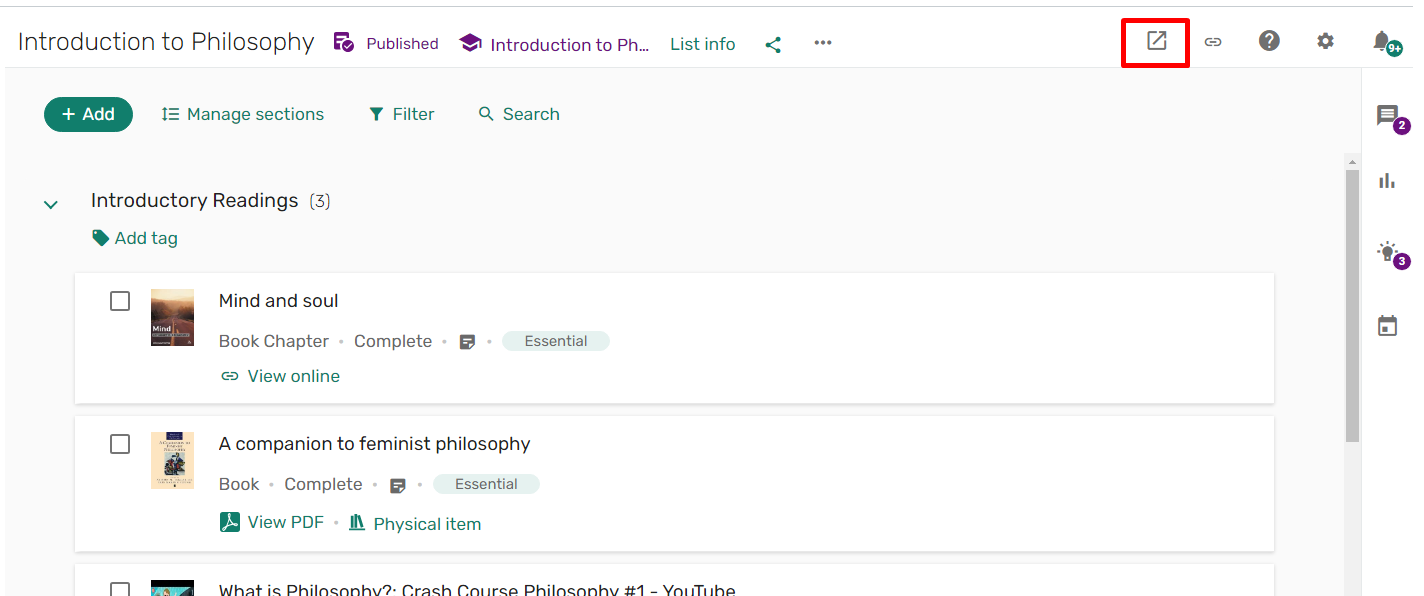
When embedded, users have the option to easily open Leganto in a new tab. We recommend highlighting this option in any instructional material you create or trainings that you deliver, especially for instructors. The "open in a new tab" option is configurable. To enable or disable the option, go to Leganto Configuration > General > Settings and change the parameter iframe_open_new_tab.
Optimize Leganto to support embedded use
If you choose to embed Leganto into the LMS, there are a few configuration settings that can help optimize the user experience.
Configuring the iFrame height:
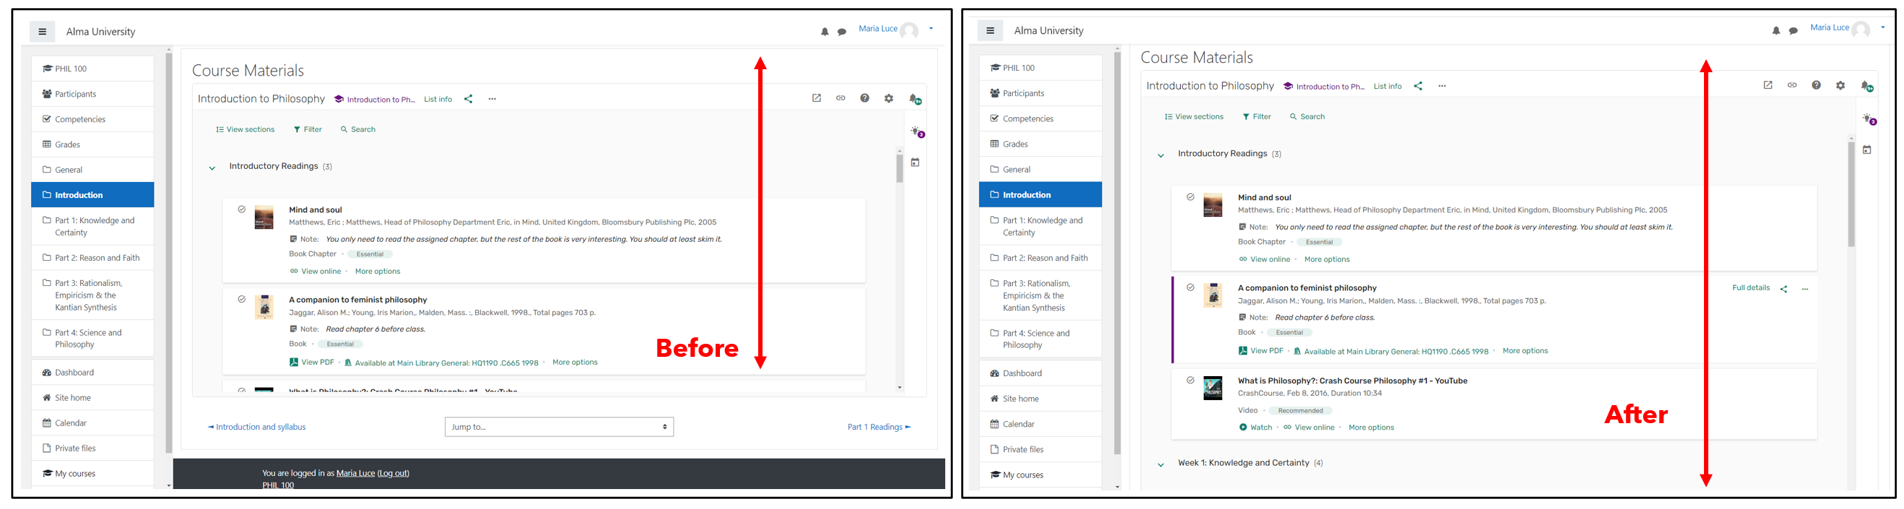
When embedded into the Learning Management System, the default iFrame height might be too low, resulting in a poor user experience. You can change the iFrame height so users have more vertical space to work in Leganto. For technical instructions, see Developer Network: iFrame height
We recommend testing the user experience when Leganto is embedded in the LMS and customizing the iFrame height if necessary.
If you have Leganto integrated with more than one Learning Management System you may not be able to use this feature. As an example, Canvas requires only numbers, but Moodle requires a setting in either px or vh. Ensure that any setting you put here works well for any LMS you have integrated with Leganto.
Sample integration:
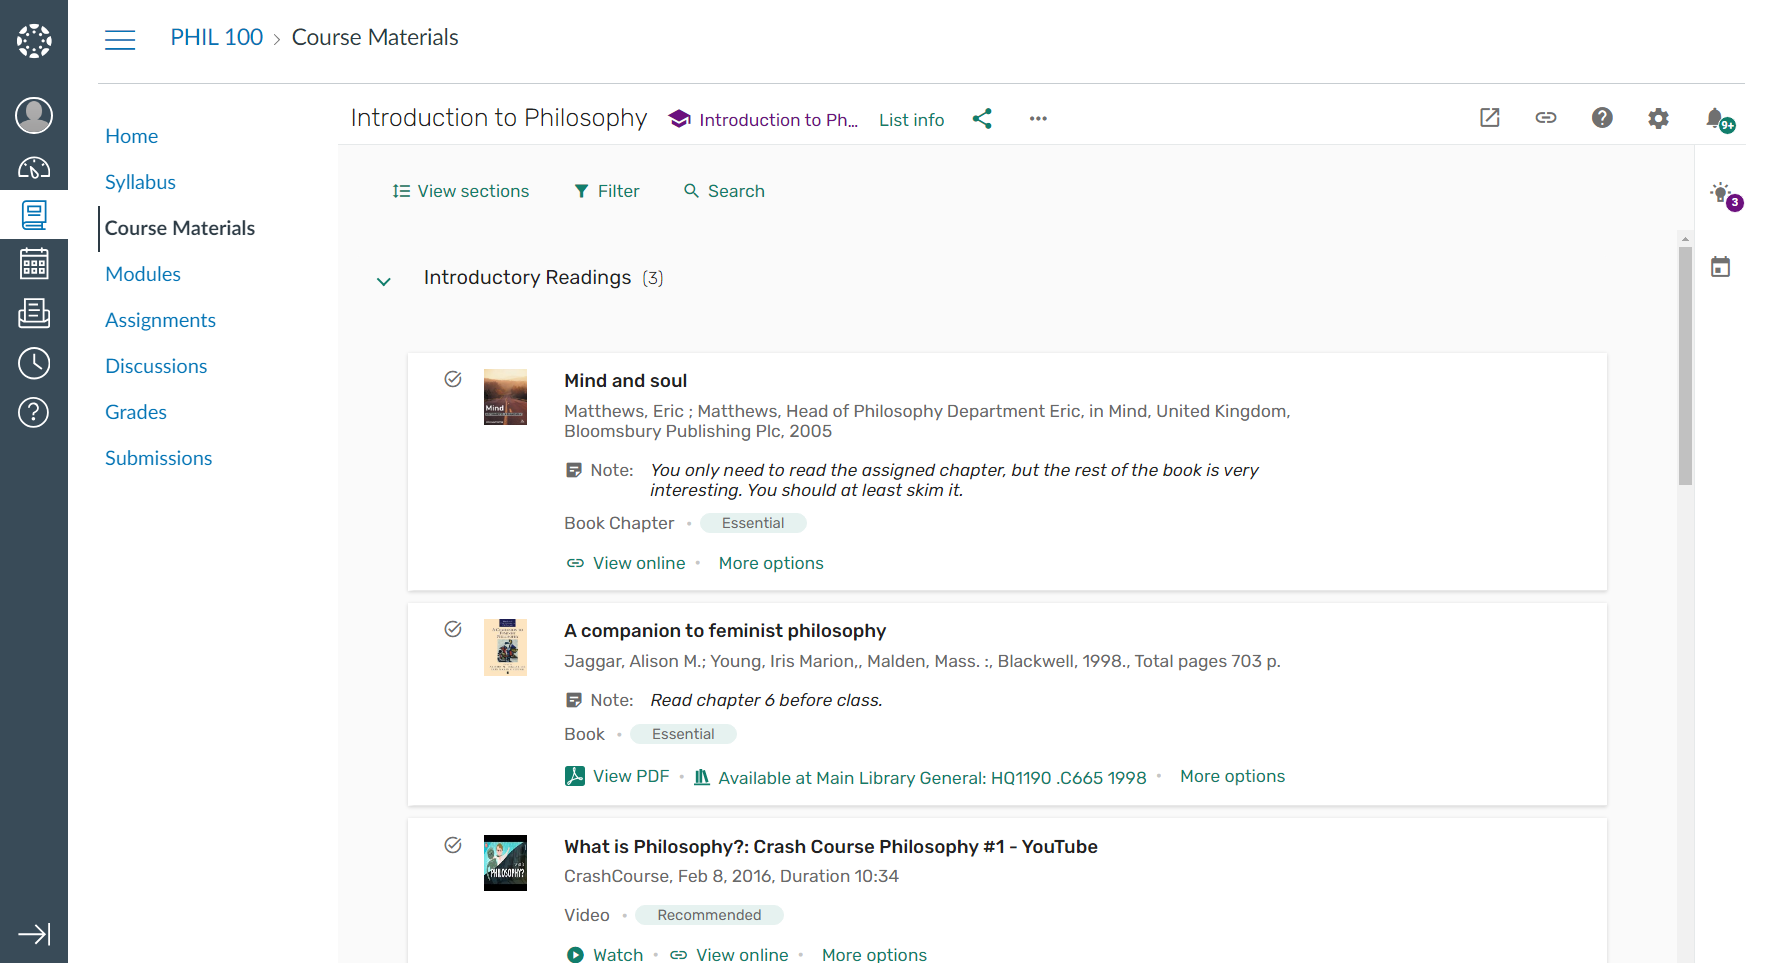
The screenshot below represents our recommended integration. Note that the external tool is called "Course Materials", Leganto is embedded in the LMS, and the iFrame height maximizes the available screen space.
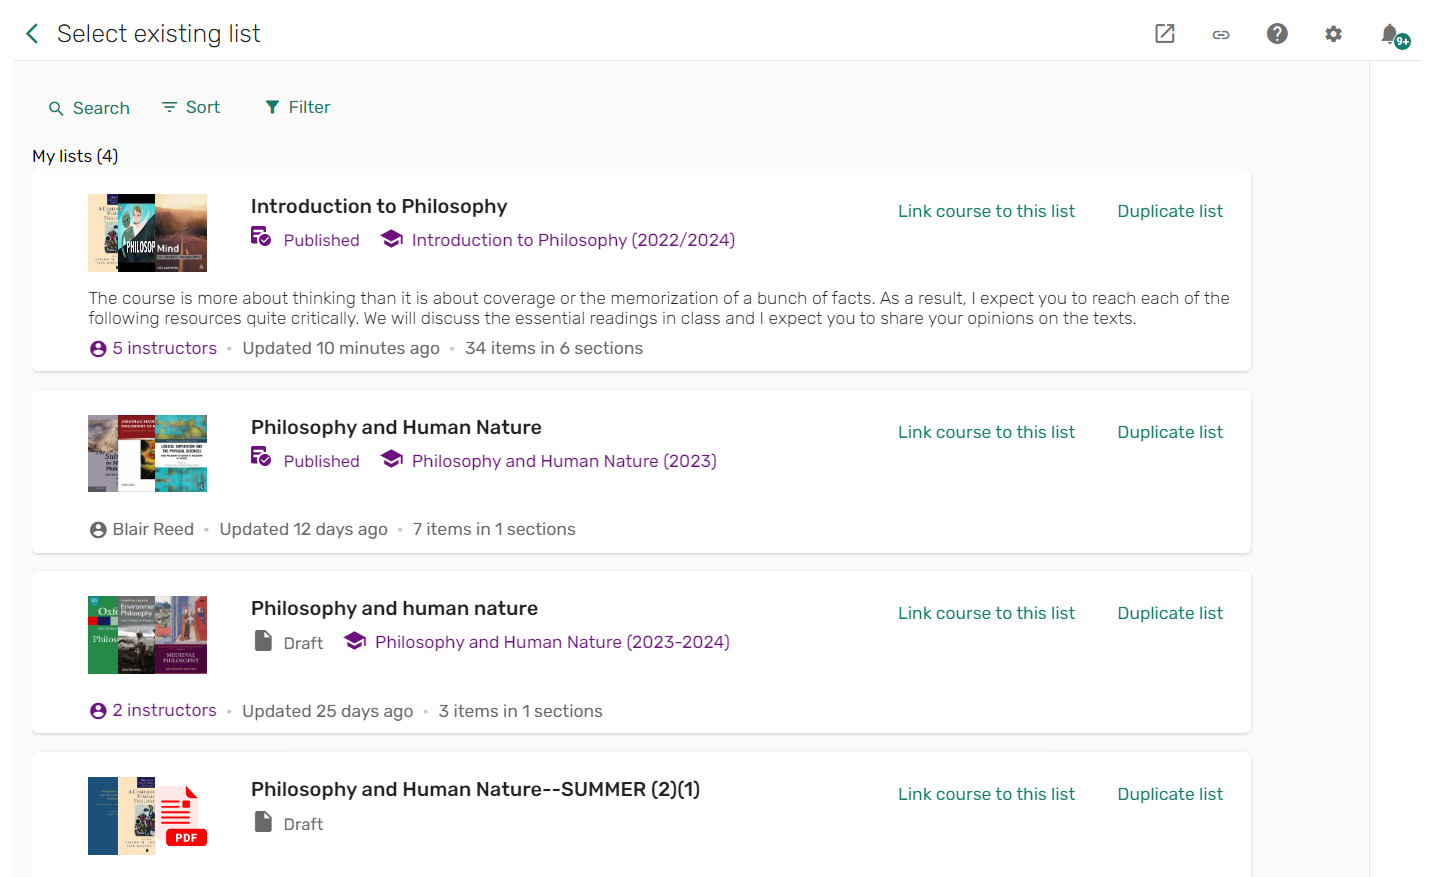
Customizing the quick start screen
When a course doesn't have a reading list, the instructor sees the quick start screen instead:
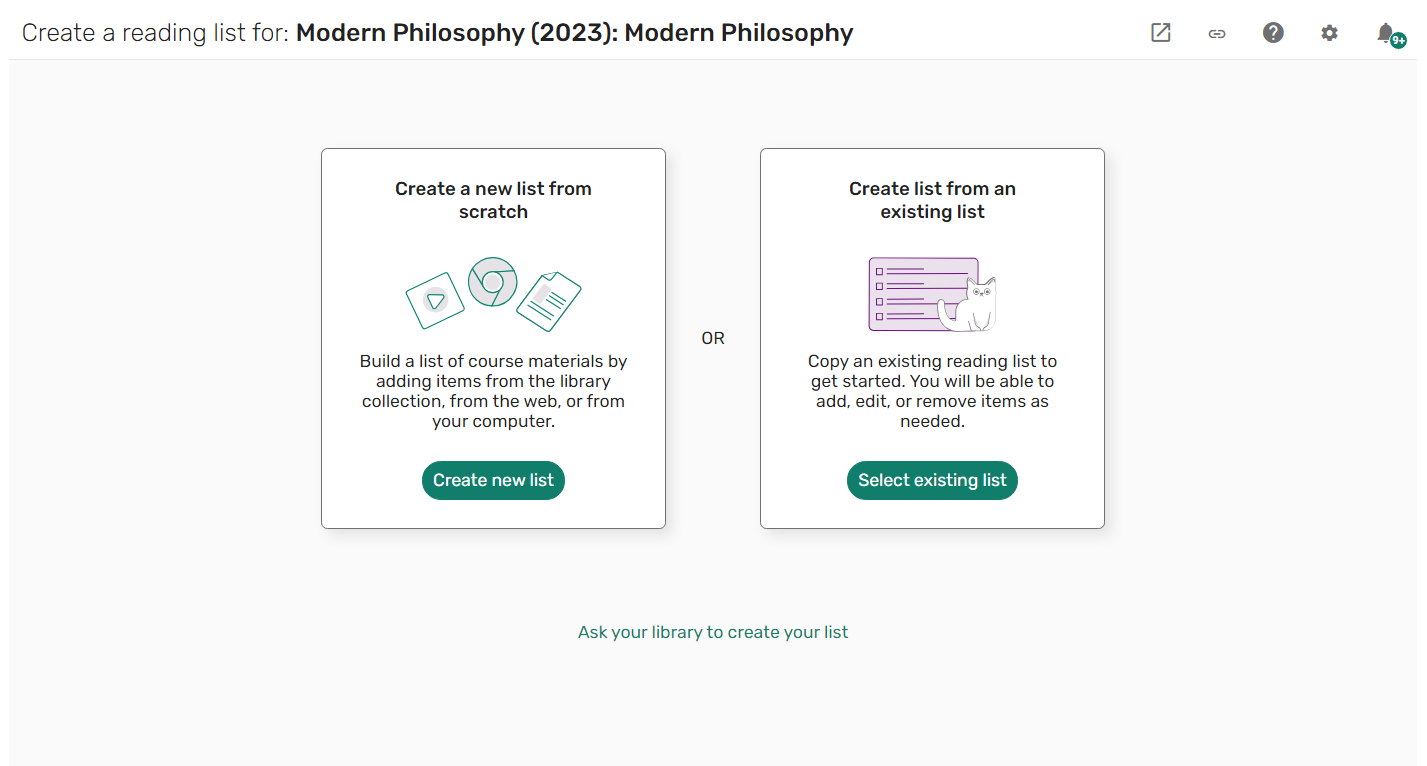
You can customize the options that display to instructor on the quick start screen, as well as any of the text on the page.
The options that display on the Quick Start Screen result in different workflows for instructors. The possible options include:
- Create a new reading list from scratch: The instructor creates the reading list.
- Create a list from an existing list: The instructor can choose an existing list and either create a copy or link the current course to the existing copy. The option to duplicate a list is referred to in the documentation as "rollover." See: Enabling Instructor Rollover. The option to link the current course to the existing copy can be disabled.
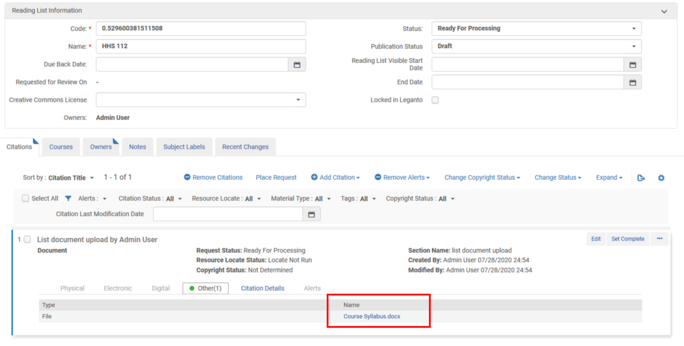
- Upload a document containing an existing reading list: The instructor uploads a file, such as a syllabus, that contains the reading list information. The reading list will come into Alma as a reading list that is ready for processing. When the library views the reading list, it will only have one citation, which is the uploaded file. From here, the library will view the file and use it to create the reading list for the instructor. See: Configuring Whether Instructors Can Upload Files that Contain Reading Lists
You can configure which of the above options display. Customize the options using the parameter cms_entry_actions (Configuration > Leganto > LTI > Settings).
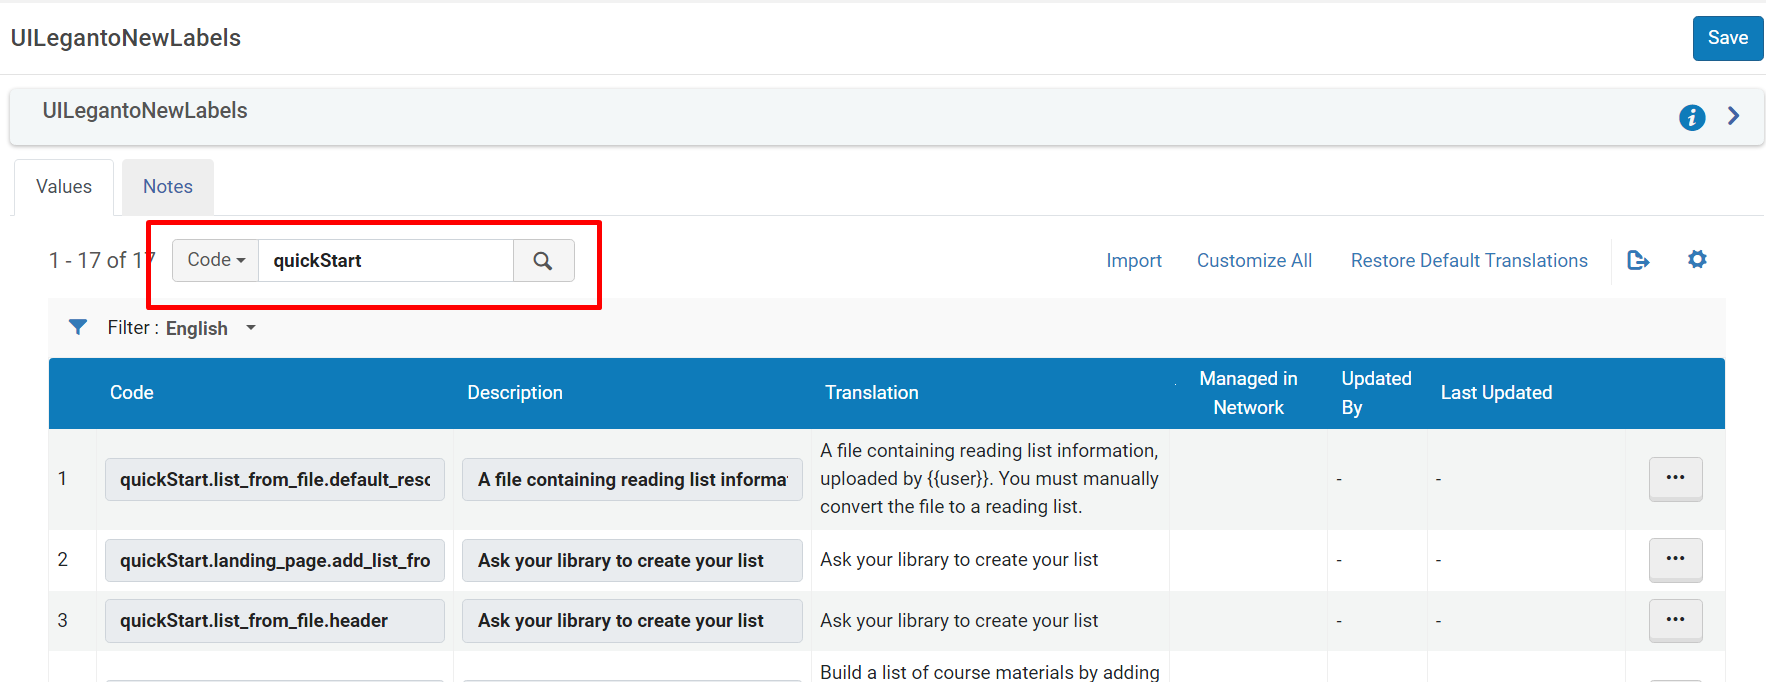
To change any of the text on the quick start screen, search for the text you want to change in the Leganto Labels table (Configuration > Leganto > General > Labels -- New UI). Search the code quickStart to see all labels. Note that each section of text is a separate label.
To view the list creation workflow, see: Log in and Create a List
Creating courses via LTI
When instructors click on the Leganto link from a course that doesn’t already exist in Alma, after they choose one of the options from the quick start screen they are prompted to confirm the course details. Instructors can change the course name, dates, number of participants, and academic department. When they click "Confirm", the course record will be created in Alma with the course code from the LMS. The course name can be automatically pulled in from the LMS if you configure the Course Name Field Name on the Integration Profile.
For information about enabling, disabling and further configuring this option, see: Configuring Whether Instructors Can Create or Modify Courses

It is also possible to bypass this screen for your instructors, and have courses created automatically using the course code, course name, and course dates from the Learning Management System. In this case, the course is created behind the scenes in Alma, and the instructor only sees the quick start screen. Essentially, by having the course created automatically you're eliminating one of the screens that instructors have to click through to get to the reading list.
This is configured in Configuration > Leganto > LTI > Settings. If you want courses to be created automatically, set the parameter create_course_automatically to true.
Note that you must also configure a default processing department and specify the LMS parameter that holds the course name in the LTI integration profile.
See: Creating Courses Automatically from an LTI Link.
To pull start and end dates for the course from the LMS, you must update the custom parameters on the external tool in your LMS. For more information, see the instructions for setting up the LTI integration for your LMS on the Developer Network. Both LTI 1.1 and 1.3 support this option.
Alternatively, you can set default start and end dates in Alma and these dates will be used when creating courses automatically.
This is configured in: Configuration > Fulfillment > General > Other Settings

See: Configuring Other Settings (Fulfillment)
When Leganto is configured to create courses automatically, the instructor is not prompted to enter course information and the course is created in Alma using the course code and course name from the LMS, and using the course dates configured in either the LMS or Alma. The disadvantage of this method is that the course is created in Alma with potentially fewer details, since the instructor is not prompted to fill in the academic department or number of students.
In general, we recommend having courses created automatically as it results in a better and more streamlined user experience for instructors.
Further information
For more information please refer to the following articles:
Configuring Learning Tools Interoperability (LTI)
Developer Network: LTI Integrations