
Configuring Learning Tools Interoperability (LTI)
- General System Administrator
- Configuring Whether Instructors Can Create or Modify Courses
- Configuring Whether Instructors Can Upload Files that Contain Reading Lists
- Enabling Instructor Rollover
- On the Alma Integration Profile List page (Configuration Menu > Leganto > LTI > Integration Profiles), select Add Integration Profile. The Integration Profile page appears.
 Page 1 of the Wizard
 - In the Integration type field, select LTI Tool.
The page refreshes with different fields.
 LTI Integration Profile, Page 1
 - Enter a Name for the profile.
- Select your course management system in the LMS System field. The current options are:
- Other - When selected, the System Description field appears, enabling you to enter additional system details.
- Moodle
- Canvas
- Blackboard
- Desire2Learn
- Sakai
- Enter an optional Description.
- Select Next. The second page of the wizard appears.
 LTI Integration Profile Step 2
When using Blackboard, some functionality provided within reading lists may not be accessible if instructors have enabled the LMS's student view. To make sure that instructors are aware of this, they will now receive the following message when they access a reading list while the LMS's Student View is enabled: Reading Lists can’t be loaded in the learning management system’s Student View. Instead, use the View List as a Student option in the Reading List’s Main Menu.
This message can be configured in the Labels table (Leganto Configuration > General > Labels), in the lti.user.error.studentView code.There is currently only one option for the mandatory field LTI Type. - In the LTI Version field, select your LTI version, either 1.1 or 1.3. After selecting the LTI version, the page refreshes with the credentials you must enter into your course management system. Copy these credentials and enter them in your course management system where required.
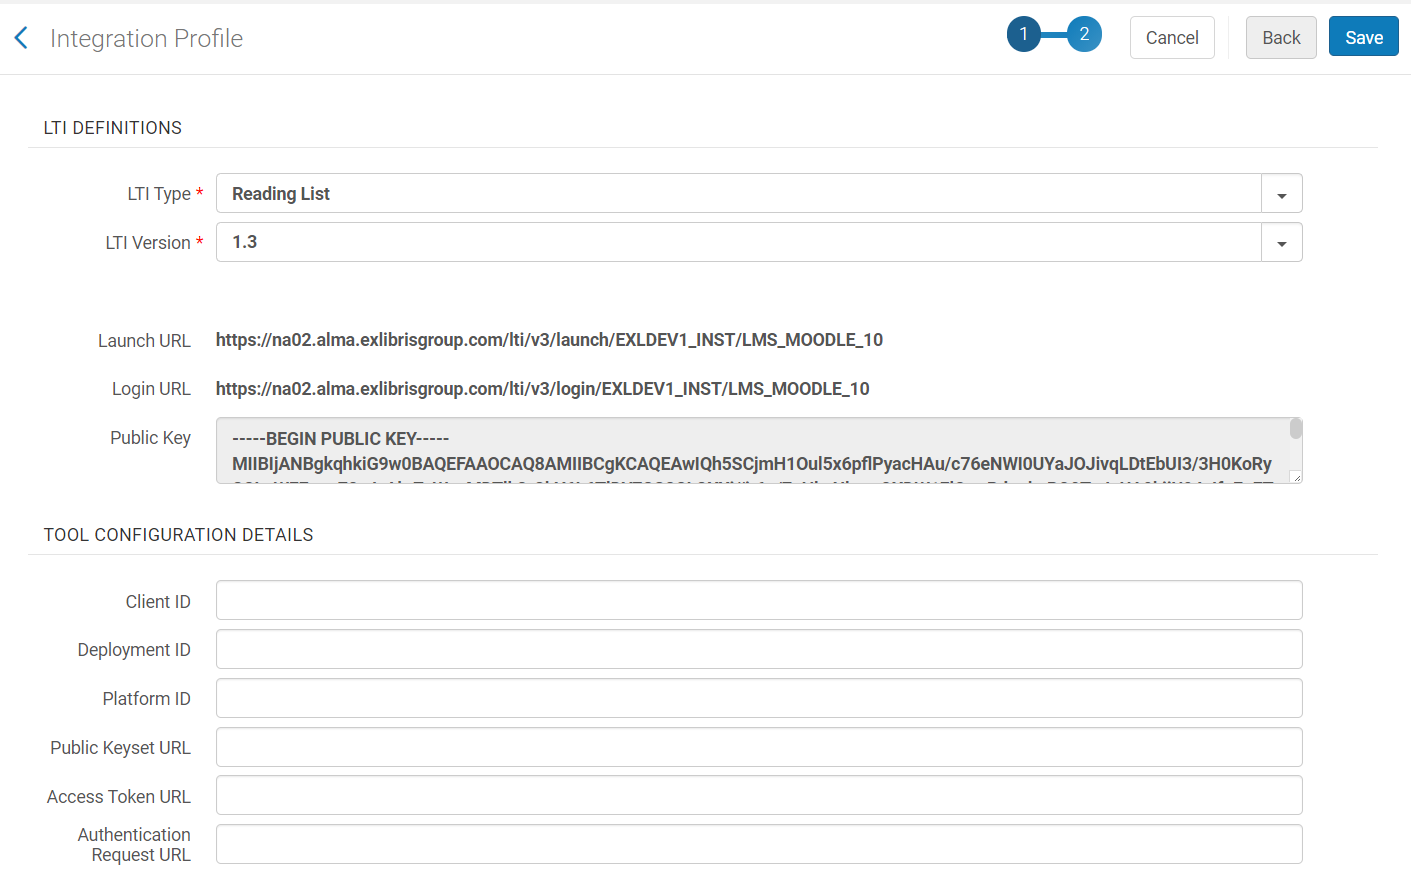 LTI Integration Profile, Page 2 – For Version 1.XIf you add the URL parameter debug=true to the end of the LTI Launch URL, then the URL points to a debug screen instead of Leganto (if there are no other URL parameters, add ?debug=true; if there are other URL parameters, add &debug=true). This may be useful for troubleshooting. Note that this URL works only when accessing Leganto from the LMS; the URL with the debug parameter does not work in a web browser.
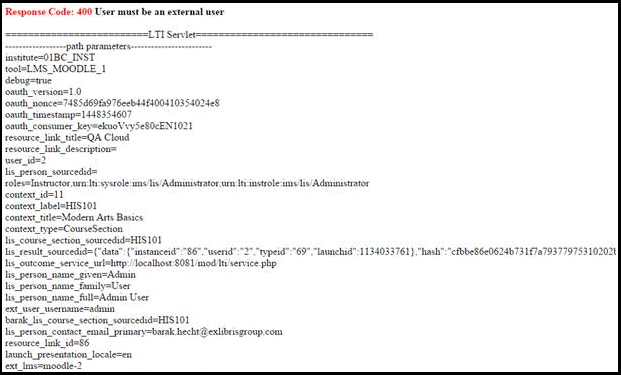 Leganto Debug Page
 - When Leganto is embedded in an iFrame, you can select to have the top menu hidden by default. The top menu contains the user and language menus.
A user trying to access Leganto embedded in an LMS may see a message indicating that Leganto must run in a new tab. When the user confirms, Leganto opens in a new tab instead of embedded.
A parameter can be set to hide the logout option in the user menu when viewing Leganto in embedded mode. - If required, specify the user ID and/or course code fields. This is only relevant for LTI 1.1 integration profiles.
This is useful when the names of these fields are not the default values, which are:
- User ID:
- Moodle – ext_user_username
- Sakai – ext_sakai_eid
- Canvas – lis_user_username
- Desire2Learn – ext_d2l_username
- Other – custom_lis_user_username
- Course Code: custom_lis_course_id or custom_lis_course_code. If you are using Blackboard collapsed courses, and you would like that the parent course's reading list appears when a link to a child course is selected, enter context_label in this field.
- User ID:
- Select User information is mandatory to make first name, last name, and email address mandatory fields. If you select this, any users who do not already have values for these fields are asked to enter values for these fields the next time they try to enter Leganto from your LMS.
- Add a Custom link to LMS help URL to direct users to a specified link. When the Custom link to LMS help URL field is blank (default), users are directed to the Ex Libris Leganto help.
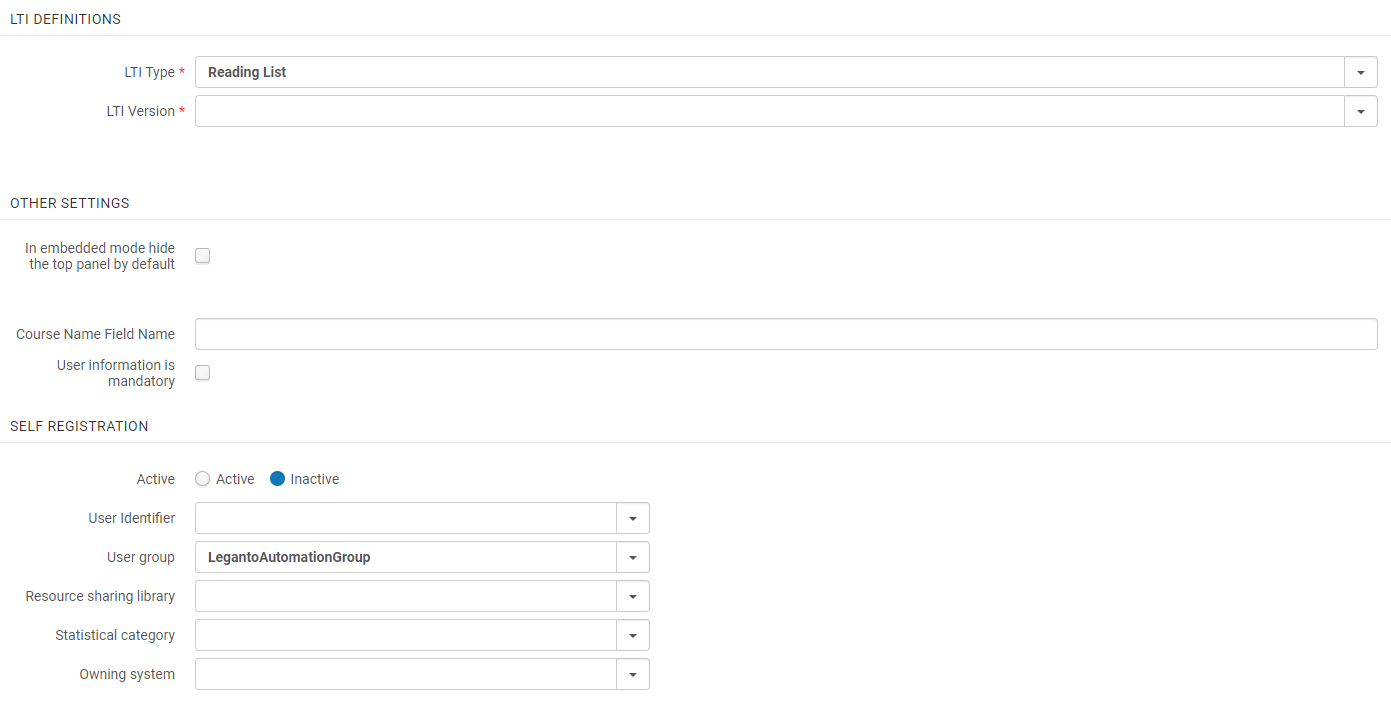
- When an LMS user does not exist, the user is redirected to a login page. If you would like Alma to automatically create any unregistered users (similar to what happens for Social Login), select Active in the Self-Registration section and configure the following fields in this section:
- User Identifier — Select the user identifier type that the users use to log in.
 SELF REGISTRATION
If the User Identifier is left blank, the Alma user Primary identifier is automically assigned as the User Identifier.
When enabled by Ex Libris, you can select the option LTI id of self registered. When selected, Alma assumes that this integration profile is for an "open course", which may have users who want to register with usernames that already exist in Alma. Alma ensures that these users do not clash with any existing Alma users by creating the users with a string added to their username. So even if a user named mark already exists in Alma, a user with the name mark coming from this profile is registered as a new username. When any other ID is selected, users are assumed to be institution users, and usernames are checked against existing usernames. A user named mark that already exists is not given a new username.
- User Group — The user group to which to assign all users created by this profile. See Configuring User Groups.
- Resource Sharing Library — The resource sharing library to assign to all users created by this profile. See Resource Sharing.
- Statistical Category — The statistical Analytics category to which to assign to all users created by this profile. See Configuring Statistical Categories for Analytics.
- User Identifier — Select the user identifier type that the users use to log in.
- Select Save. The credentials are saved in Alma.
- Optionally add normalization rules for the course codes and user IDs imported using this profile. See Configuring LTI Profile Normalization Rules.
- Optionally map LMS roles to instructors in Leganto. See Mapping LMS Roles to Instructors in Leganto.
-
You will need to share information from this page with your LMS administrator, who will continue the setup within the LMS. See the Developer Network for more information about setting up the integration using LTI 1.1 or LTI 1.3.
For LTI 1.3, you need to update this integration profile with additional information from your LMS administrator, as described in the instructions on the Developer Network. (Update Your Integration Profile.)
Configuring LTI Profile Normalization Rules
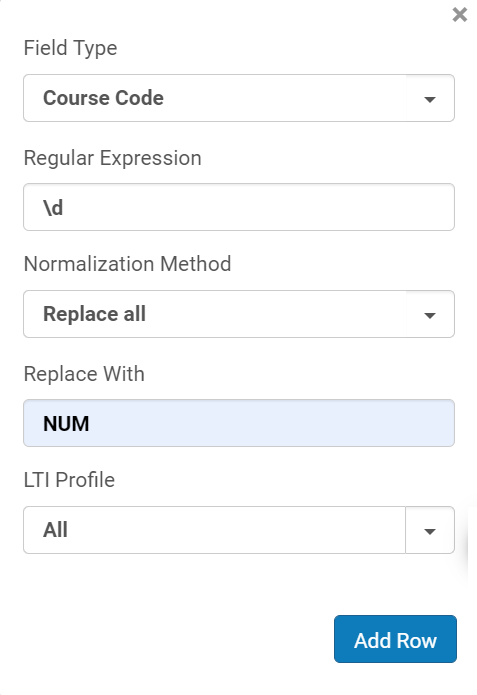
- Field Type — The field in the record to normalize: Course Code or User Id.
- Regular Expression — A regular expression to search for in the field.
- Normalization Method — What to do with the string in the field that matches the regular expression:
- Concat to end — Append the contents of Replace With after the matched string in the field.
- Concat to start — Insert the contents of Replace With before the matched string in the field.
- Keep — Keep the contents of the regular expression that appear in the first set of parentheses (for example, keep $1 and discard the rest of the field). Replace With is ignored. For example, if your regular expression is .{2}(.*), then admin becomes min.
- Lowercase — Lowercase the contents of the regular expression that appear in the first set of parentheses (for example, replace $1). Replace With is ignored. For example, if your regular expression is .{2}(.*), then ADMIN becomes ADmin.
- Remove — Remove the contents of the regular expression that appear in the first set of parentheses (for example, discard $1). Replace With is ignored. For example, if your regular expression is .{2}(.*), then ADMIN becomes AD.
- Replace — Replace the contents of the regular expression that appear in the first set of parentheses with the contents of Replace With (for example, replace $1). For example, if your regular expression is .{2}(.*) and Replace With is 123, then ADMIN becomes AD123.
- Replace all — Replace all contents of the regular expression that appear in the first set of parentheses with the contents of Replace With (for example, replace all $1). For example, if your regular expression is .{2}(.*) and Replace With is 123, then all instances of ADMIN become AD123.
- Uppercase — Uppercase the contents of the regular expression that appear in the first set of parentheses (for example, replace $1). Replace With is ignored. For example, if your regular expression is .{2}(.*), then admin becomes adMIN.
- Replace With — See Normalization Method.
- LTI Profile — The LTI profile to which this customization applies.
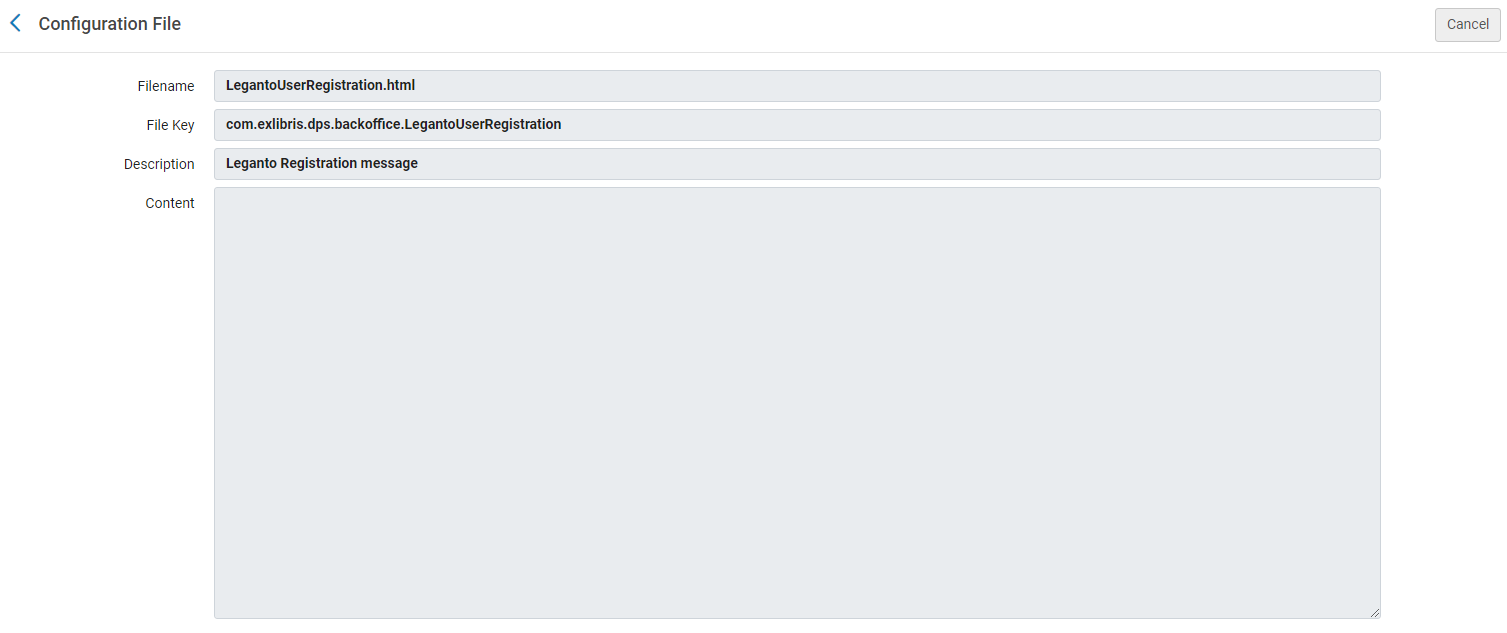
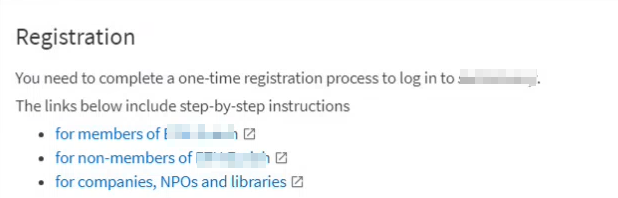
For institutions who register new users using a system external to Alma and/or Leganto, the message that is displayed regarding the user registration process can be customized by editing the LegantoUserRegistration.html file (Configuration > Fulfillment > Copyright Management > Copyright Declaration).
This file supports HTML and labels set in Configuration > Leganto > General > Customer Labels.
Mapping LMS Roles to Instructors in Leganto
You can configure Alma to automatically update user information based on the LMS. When a user selects an LTI link to access Leganto, the following actions can occur:
-
The instructor role is automatically added to the user account (according to the role in the LMS).
-
The instructor is automatically added as an instructor on the course.
When the Instructor role is added through an LTI, when the Roles field is updated to add the Instructor role, the User's name appears as the Operator on the User Details History.
The Instructor role is not added to users who already have the Course Reserves Operator or Course Reserves Manager role.
You create this mapping on the LTI - Course Management System Roles Mapping mapping table (Configuration > Leganto > LTI > Course Management System Roles Mapping). For more information about mapping tables, see Mapping Tables.
Working with the LMS Role
Leganto receives the role from the LMS in a parameter called roles. The role looks like the following:
- roles=urn:lti:role:ims/lis/Instructor
Everything to the right of the = sign is the LMS role. In the above example, this refers to urn:lti:role:ims/lis/Instructor.

You can add, edit, and delete rows. In each row, configure:
- The LTI profile to which this mapping applies.
- A substring to match within the LMS role, used to determine whether to map the role. This field is case-insensitive. For example, if the role received from the LMS is urn:lti:role:ims/lis/Instructor, then the substring instructor matches the role.
- The number of days after which the role expires.
- Whether users with this role are added as instructors to the relevant course.
If Expiration Days is set for a role, and a user with that role accesses Leganto before the expiration date, Leganto automatically extends that expiration date for the amount of time configured in the Expiration Days field to allow continued access.
If you are using Canvas, update the custom fields on the External Tool (for LTI 1.1) or the Developer Key (for LTI 1.3) in Canvas to include lms_user_roles=$Canvas.membership.roles. See the Developer Network for details. Once updated, use the LMS role: TeacherEnrollment on the Course Management System Roles Mapping table. Otherwise, users are added as instructors in Leganto if they are listed as instructors on any course in Canvas.
For more information about mapping LTI course management system roles, see the IMS Global website.
Direct Access to Reading List, Section, or Citation from a LMS
- Directly accessing a reading list opens Leganto on the reading list page. See Linking to a Reading List in the Leganto User Interface Guide.
- Directly accessing a section is the same as directly accessing a reading list, except that all other sections in the reading list are collapsed by default/all other sections are filtered out by default (depending on your library's setting). See Linking to a Section in the Leganto User Interface Guide.
- Directly accessing a citation opens Leganto on the citation page. See Linking to a Citation in the Leganto User Interface Guide.