
Logging in and Creating a List
For more information, watch Log In and Create a List.
Accessing Leganto
Students and instructors generally access an embedded version of Leganto from within an LMS. Login is automatic when your institution is configured for single sign-on.
In some cases, an instructor may see a Quick Start Welcome screen instead of the Login page or My Lists page; see The Quick Start Welcome Screens.
After logging in, you see a Welcome screen, unless you or Ex Libris has disabled this. After closing the Welcome screen, you see the Lists page.
Log out by selecting Log out in the user menu.

If you have lost your username or password, or require any assistance, contact your library.
Guests access Leganto from a shared link. Guest access is available for all published list that are shared with Anyone. The My lists/All lists toggle is disabled and only All lists is available.
For mobile access, see Logging in and List Structure.
Creating a List
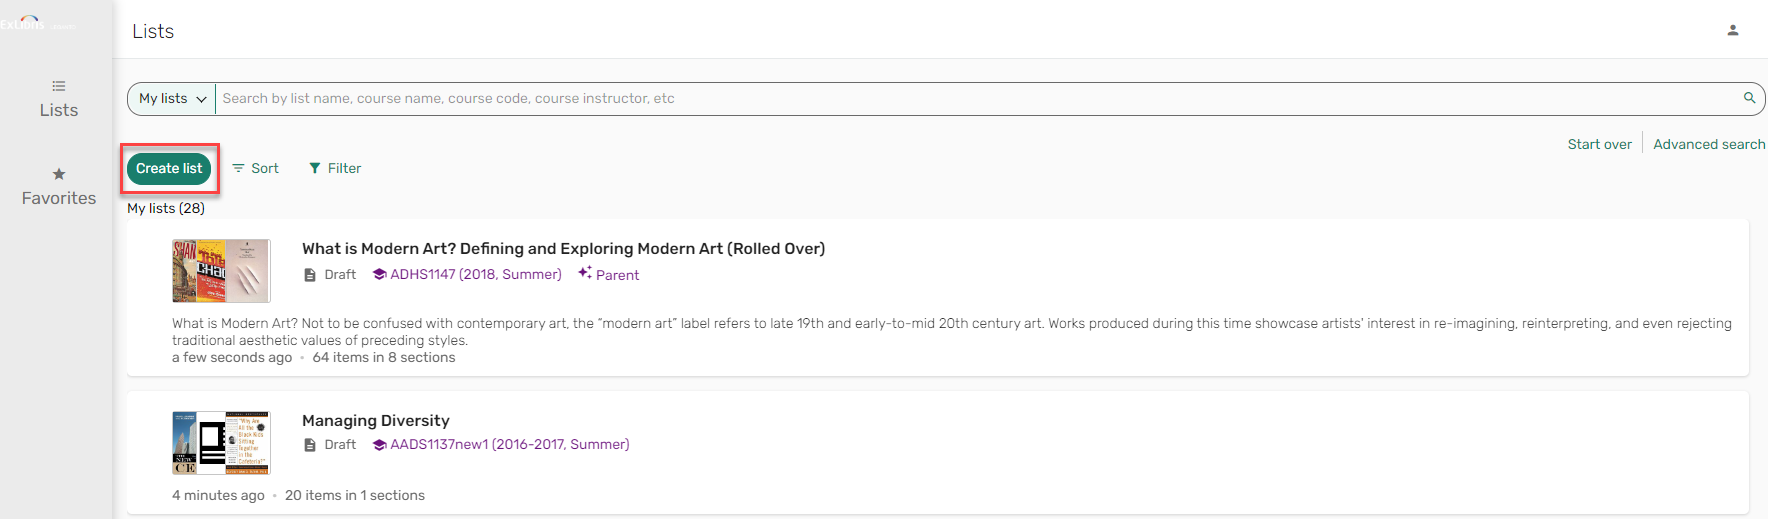
You can create a new reading list from scratch from the Lists page.
- From the Lists page, select Create list.
 Create list
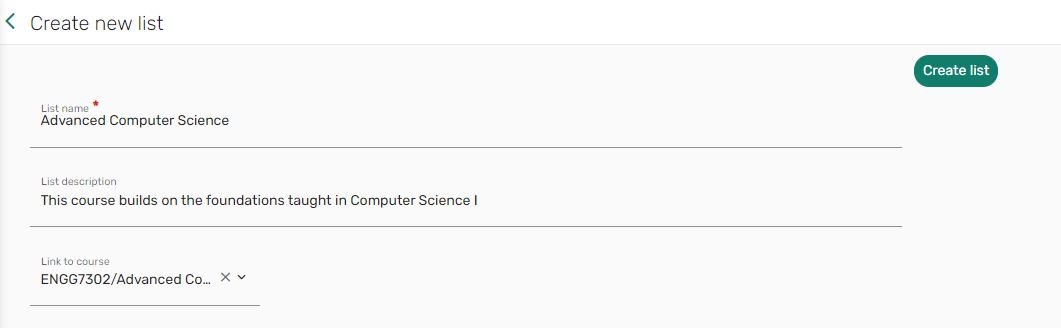
 - Enter a Title, and if relevant, a Description.
- Start typing the course code or name to see course options.
You can also create the list without associating the list with a course. If needed, you can associate the list with a course at a later point.
 Create new list
 - Select Create list. The list is created. You can now start adding sections and items to the list. See Adding a Section to a List and Searching and Adding from a Library.
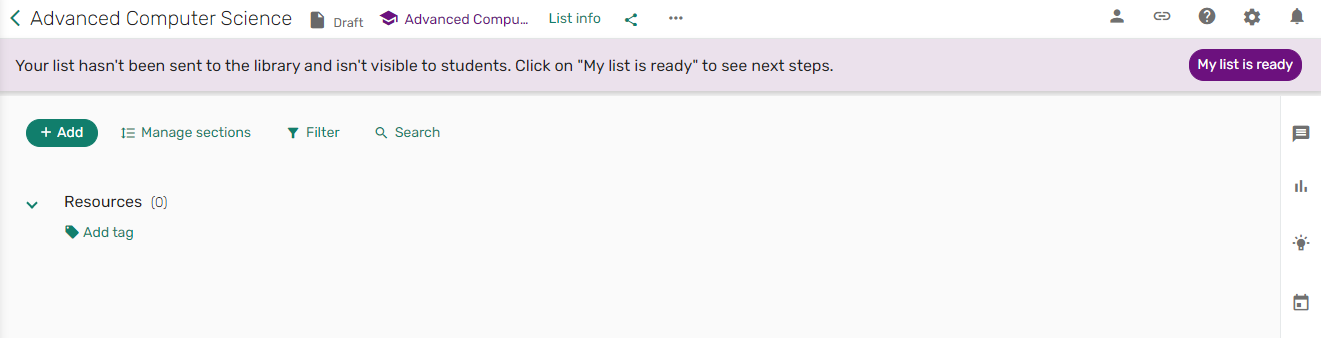 Newly created list
Your new list now appears on the Lists page with a Draft/Published status based on your library's publishing settings.
For optimum loading speed, we recommend creating a maximum of 100-200 lists.
Preventing Instructors from Creating New Lists
For institutions whose librarians are the sole list creators, it is now possible to configure Leganto to prevent instructors from creating new lists. The following workflows are now supported:
- Instructors can create new reading lists (no changes).
- Instructors can create reading lists from the learning management system (LMS) but not from the standalone. This ensures all reading lists are linked to courses.
- Instructors can create reading lists from the standalone but not from the LMS. This provides flexibility for instructors who create lists that are not linked to courses.
- Instructors cannot create any new reading lists. This gives the library full control over all lists that are created.
To prevent instructors from creating reading lists in the standalone, set the parameter instructor_create_list (Configuration > Leganto > List Management > Settings) to false (default true). When set to false, the Create list menu does not appear to instructors.
To prevent instructors from creating reading lists when beginning in the LMS, the parameter cms_entry_actions (Configuration > Leganto > LTI > Settings) cannot contain the value all or the parameter value list.
All other parameters that enable list creation such as Duplicate and Rollover must be disabled separately.
Uploading or Linking a Syllabus to a List
When enabled by your library, you can upload or link to a syllabus. See Enabling Reading List Syllabuses.
- From the list action (...), select Edit list.
- Enter a URL for the syllabus or drag and drop or select a file.
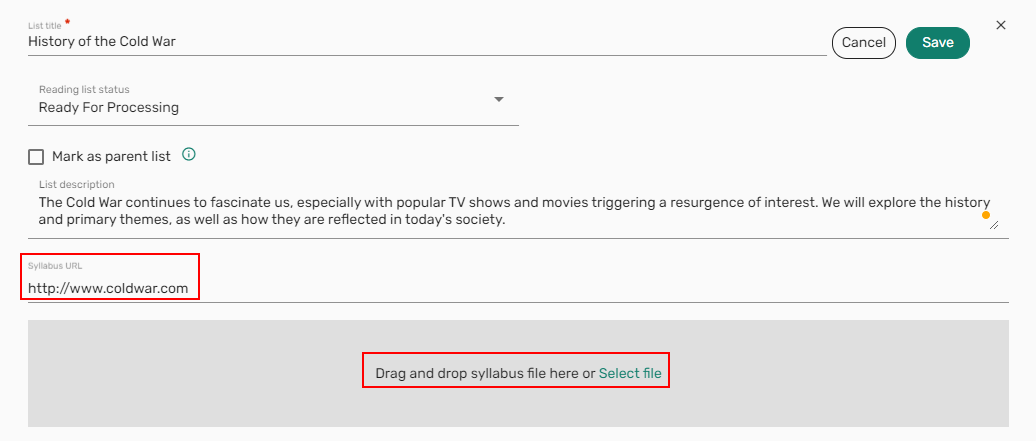 Syllabus URL
 -
Select Save. The link/file is added to the list.
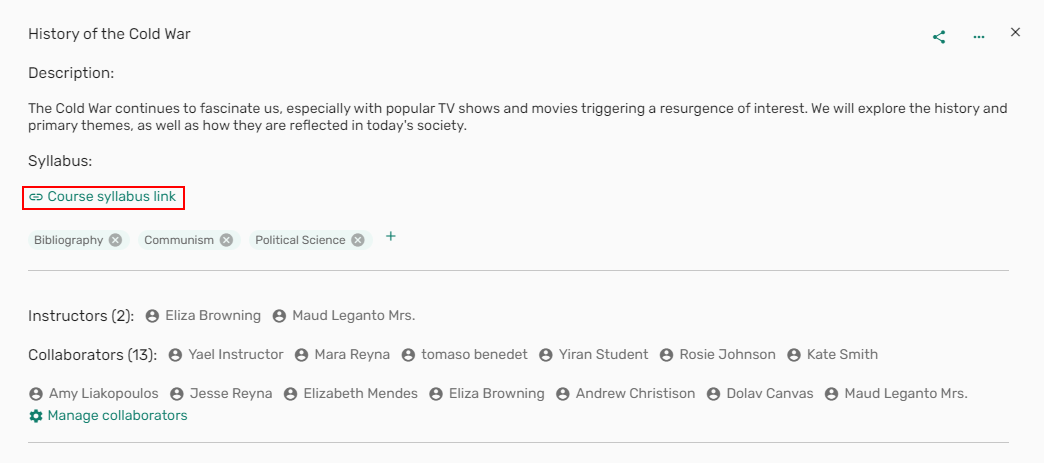 Course syllabus link
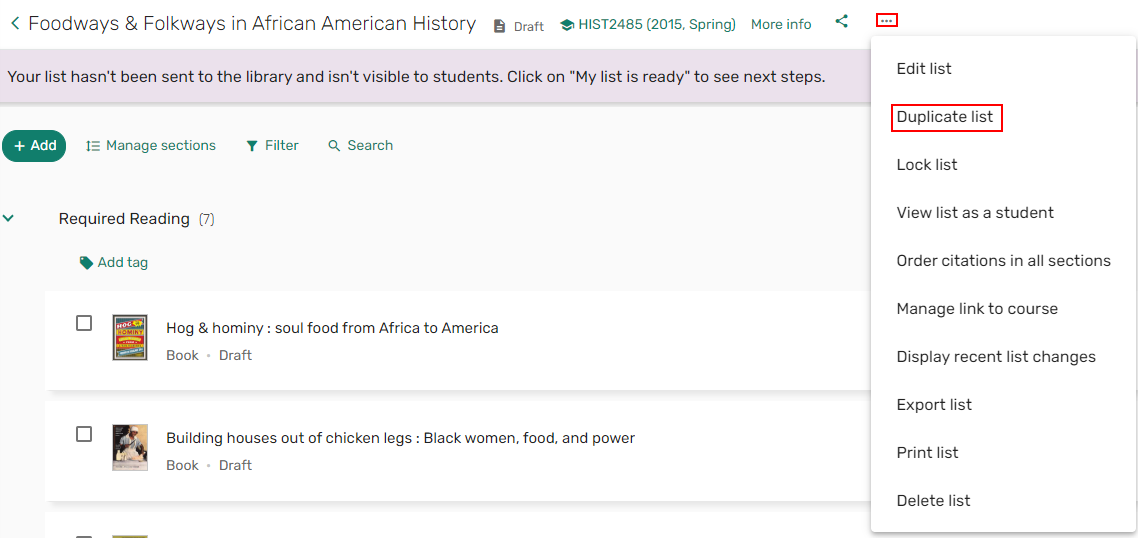
Duplicating a List
Duplicating a list makes a copy of the list and all sections and items. As part of the duplicating workflow, you can decide whether other aspects of the list will be copied or reset.
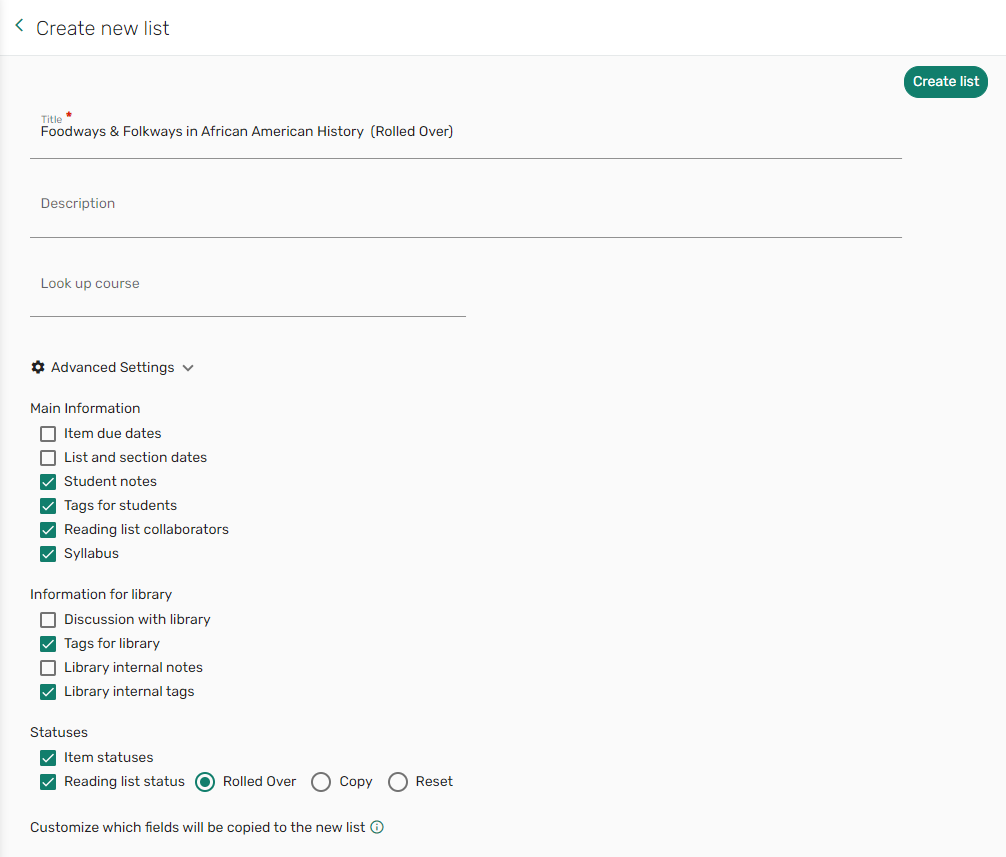
Select Duplicate list in the list menu. Out-of-the-box, the duplicated list has the old list's name with (Rolled Over) appended to it. This label configuration can be changed from Configuration > Leganto > General > Labels - New UI.
When duplicating a list, you can associate the list with a course. Optionally, you may want to review or change the Advanced Settings to confirm whether other aspects of the list are copied or reset.
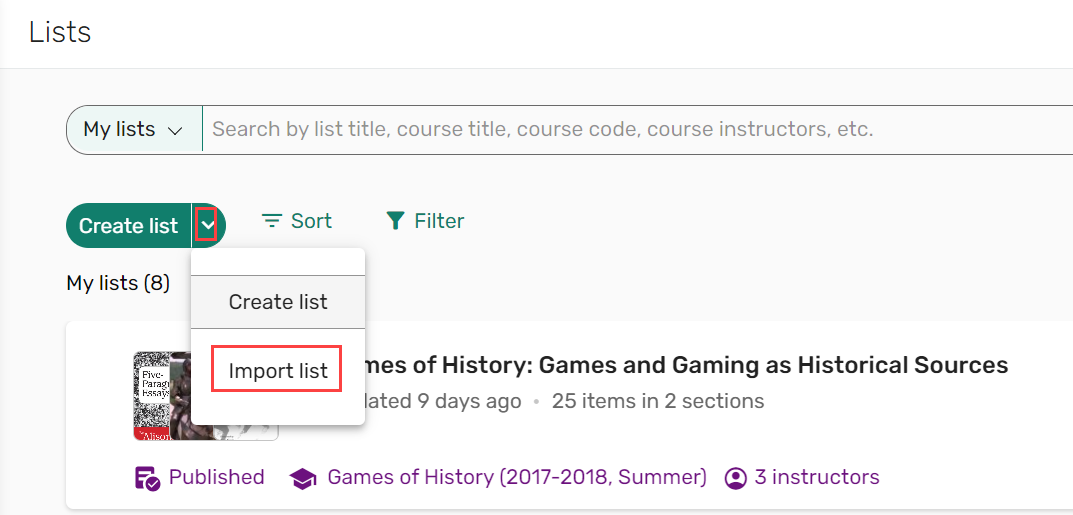
Importing an Exported List
Lists can be created by importing an existing list.
- From the Lists page, select Create list > Import list.
-
Select the File type lgn.
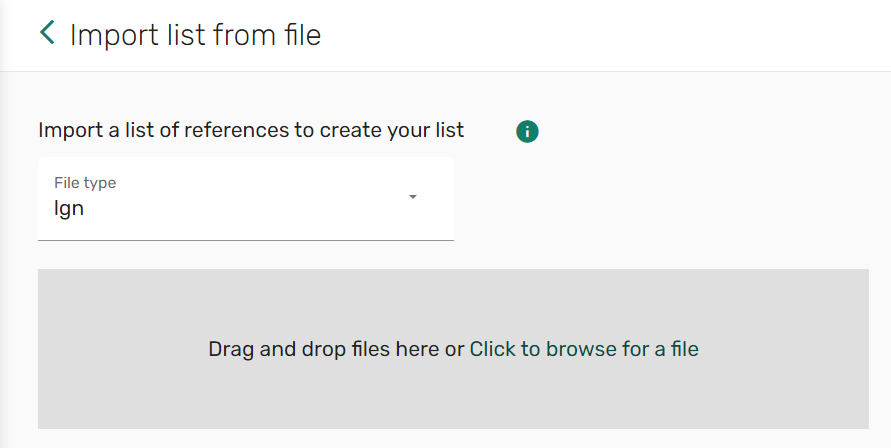 File type lgn
 - The list with your references are uploaded to Leganto.
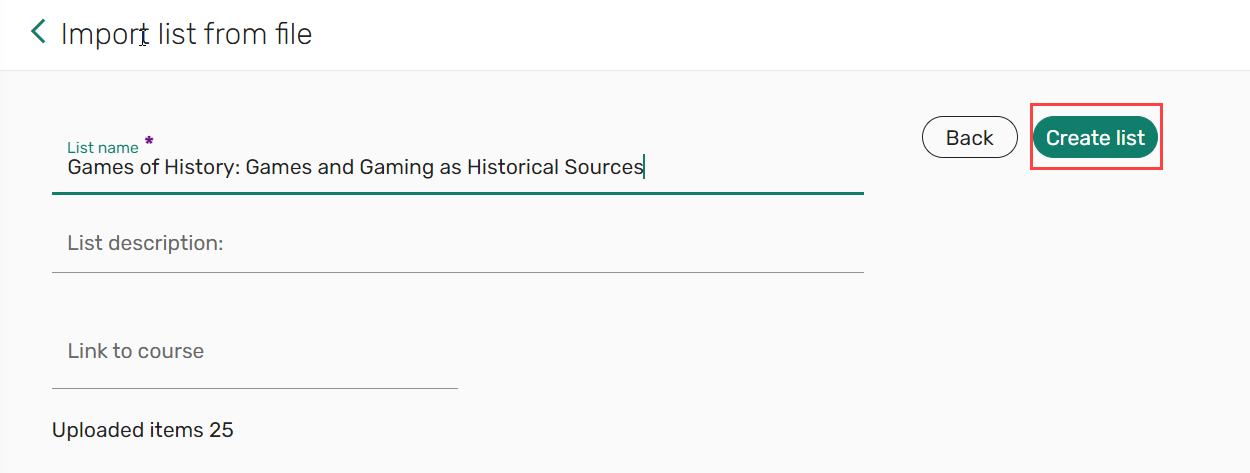
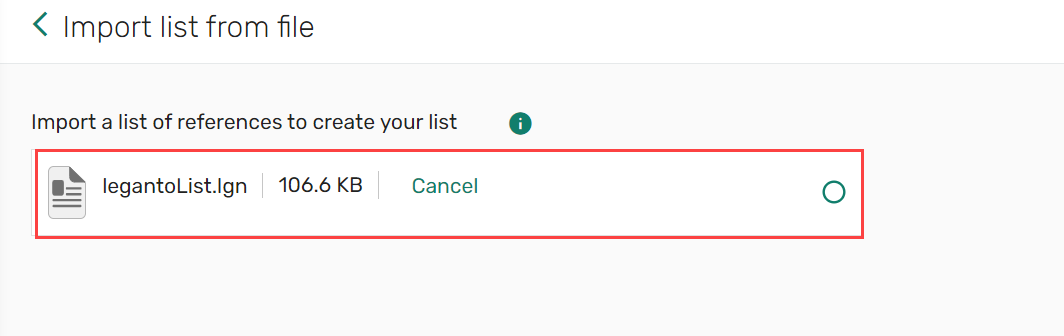 Imported list from file
 - Select Create list to add the list with all its items. The list is created.
 Create list
Deleting a List
Instructors can delete lists from the Lists menu in Leganto.
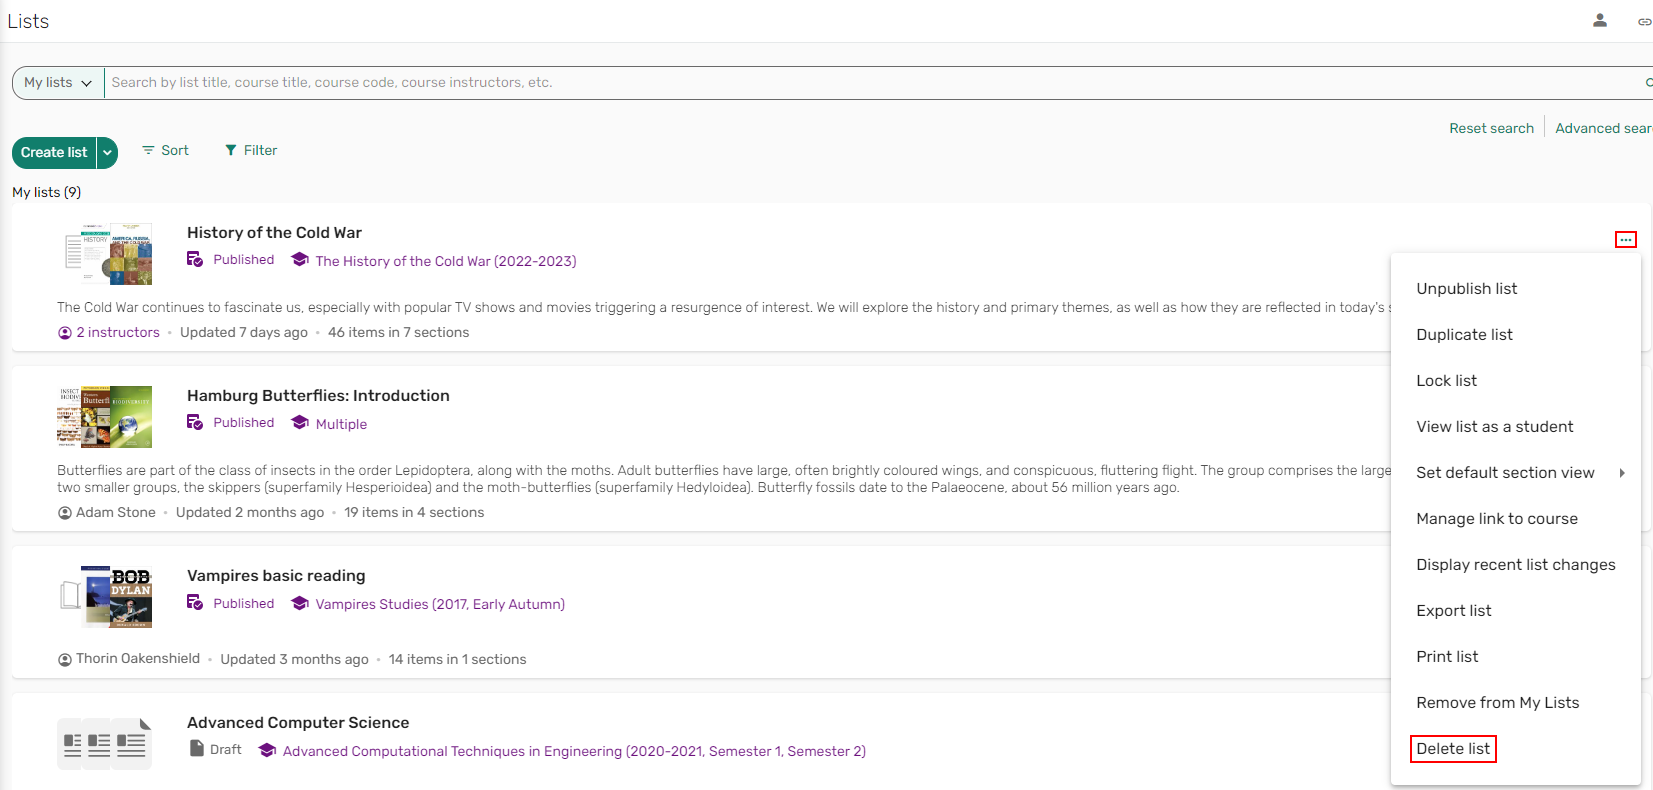
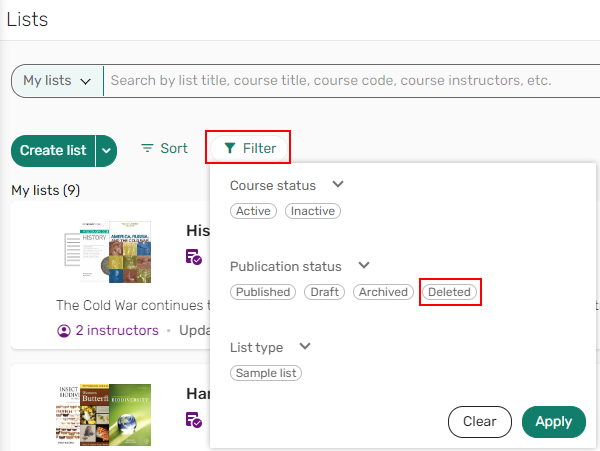
Additionally, Instructors can filter Lists by recently deleted lists.
Deleted lists can be restored from Leganto. When restoring a deleted list, the list is restored with a Draft publication status.
Archiving Lists
When configured, instructors can filter Lists by by archived lists (archived_lists (Configuration > Leganto > Features > Leganto Features) is set to true).

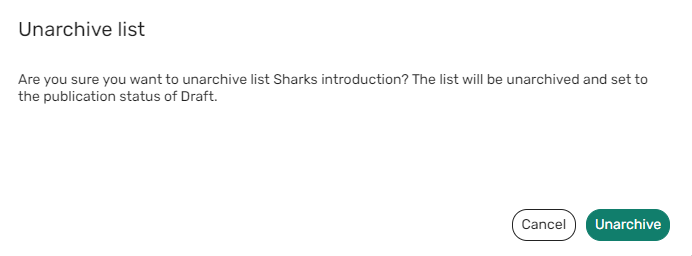
Archived lists can be unarchived from Leganto.

When unarchiving a list, the list is restored with a Draft publication status.
Managing Course Associations
You can associate a list with a course when creating a list or after a list is created.
- Enter text (Such as Course code or Course name) in the Look up course field and select the course. When you select Create list, the list is then associated with the selected course.
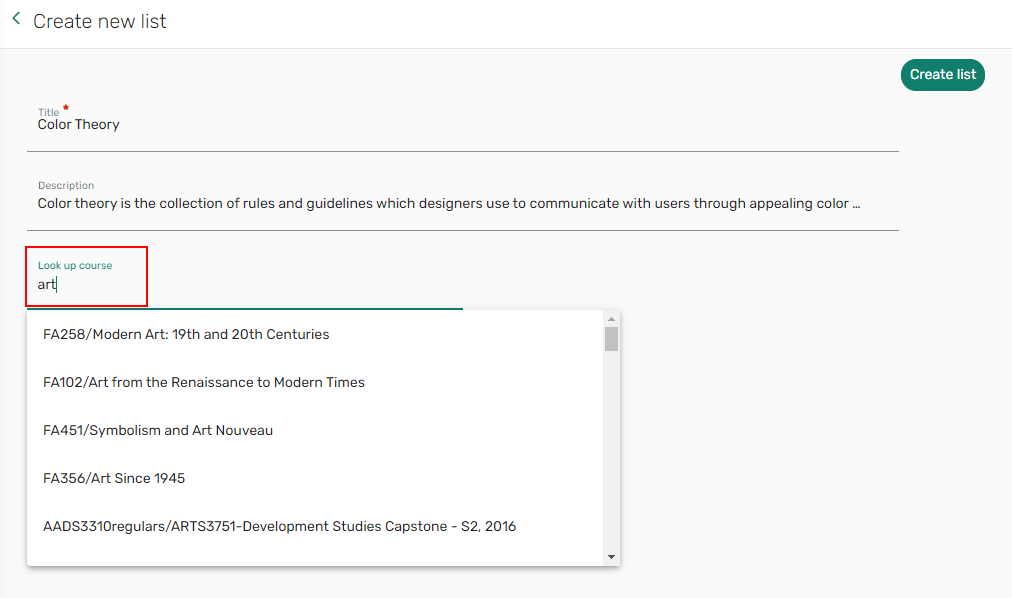 Look up course
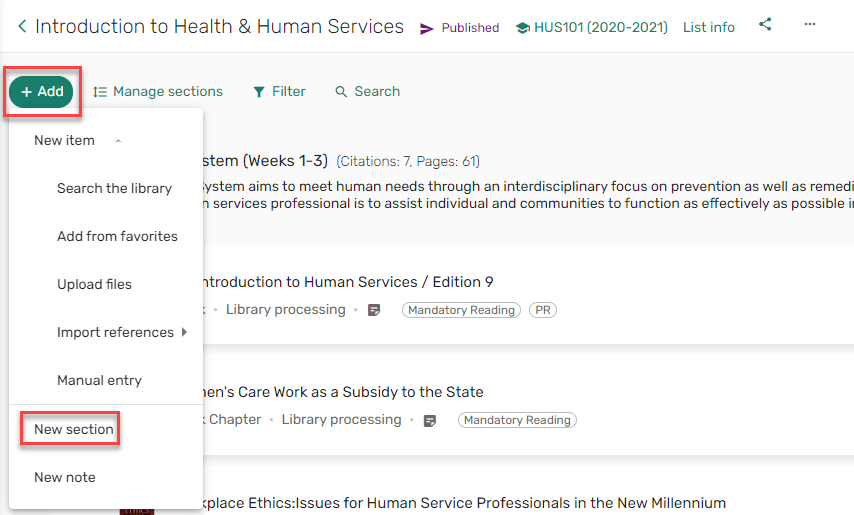
Adding a Section to a List
You can create a new section from scratch or by duplicating an existing section. Lists created in Leganto include a default section. You can configure the default section name to appear when a reading list is created in Alma or imported into Leganto using the new defaultSection.title label in the Labels configuration table (Configuration > General > Labels). Whenever you import references into Leganto or create the list in Alma, the value of this label appears in Leganto as the section name. The label's default value is Resources. When creating a reading list in Alma or importing a reading list into Leganto, the description defaults to blank.
- Select Add > New section. The Add new section pane opens.
 Add New section
 - Enter the section Title.
- If relevant, enter a Description.
- To make a section viewable during a specific date range, enter a Start date, End date, and check Display section during these dates only.
- Select where in the list the section should appear.
- Select Add.
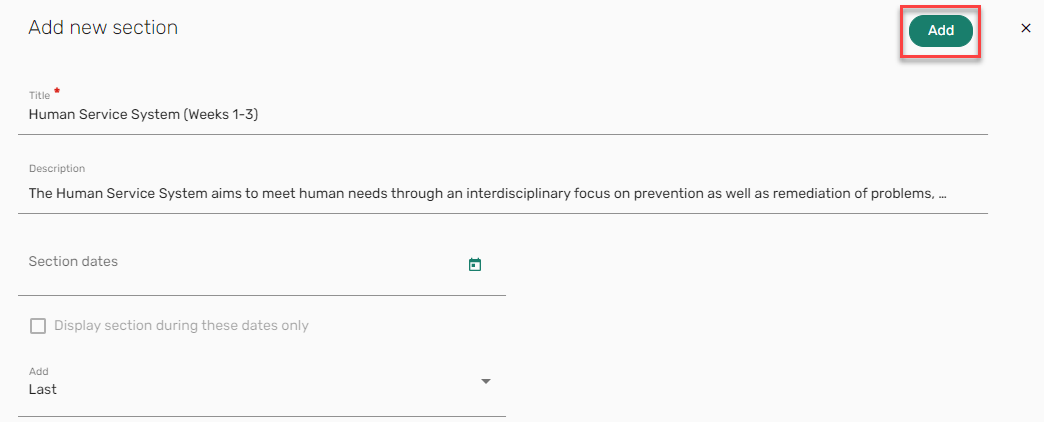 Add new section
The section is added to the list.
 New section
You can reorder a section at any time by collapsing the section and dragging the
 icon. For more information, see Collapsing or Expanding a Section.
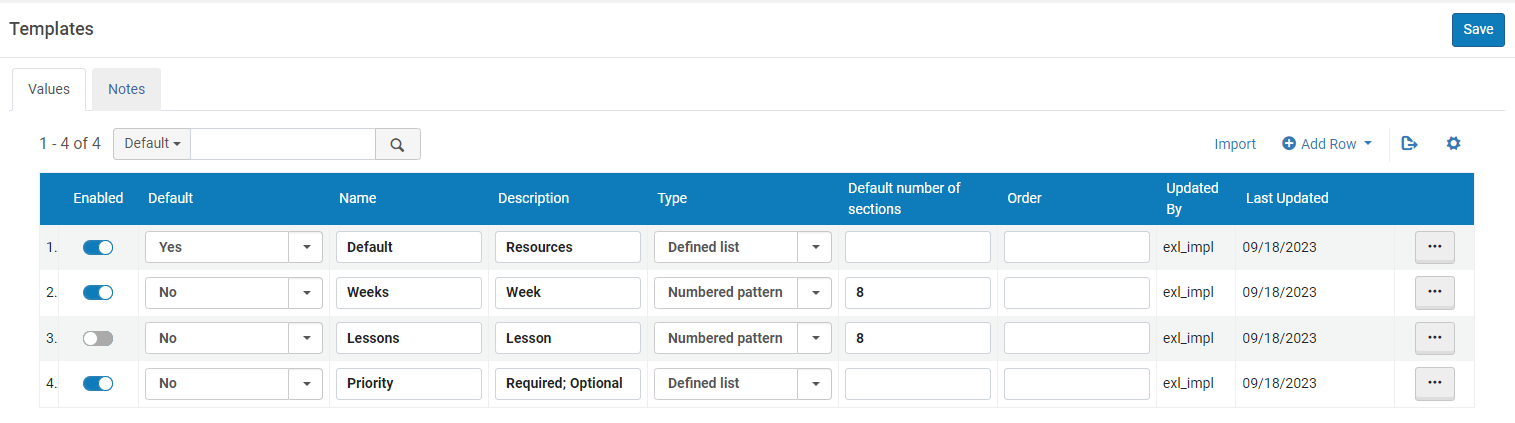
Adding Sections from a Template
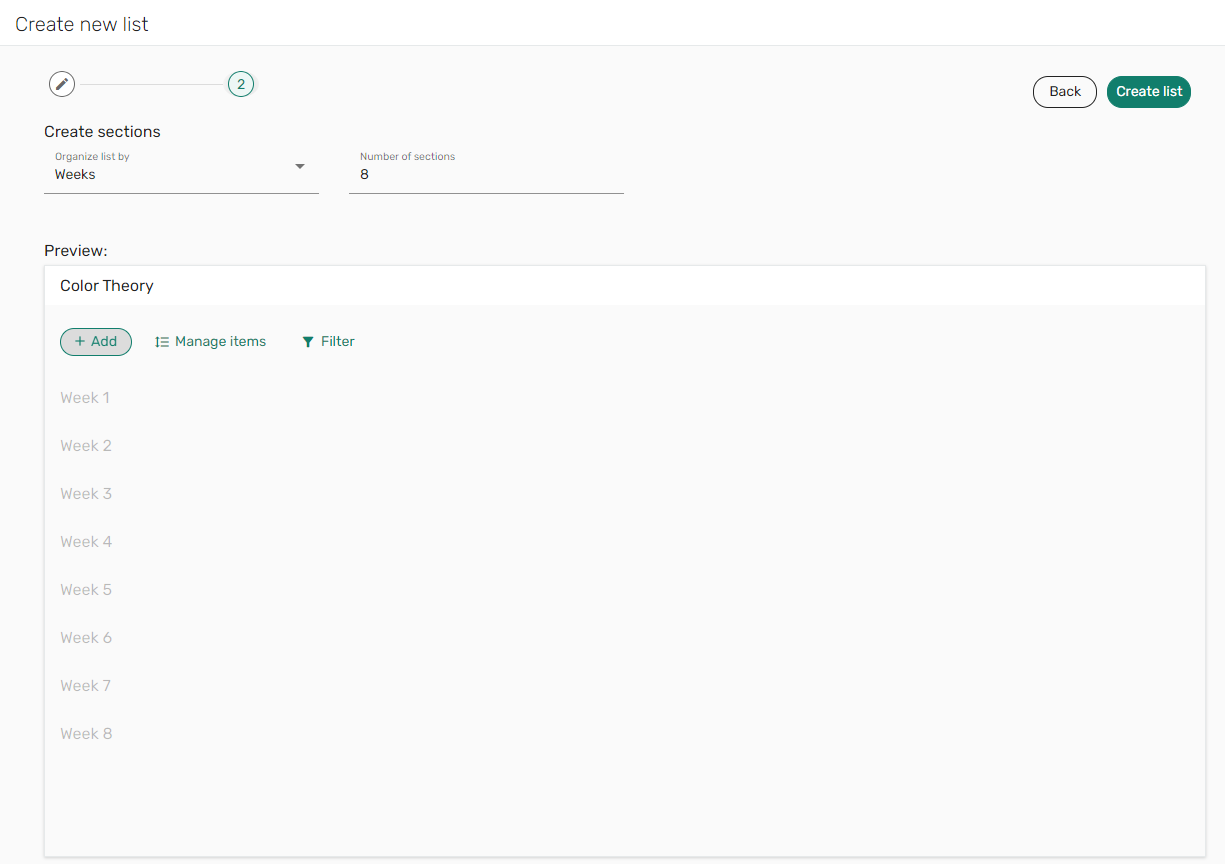
Leganto provides easy and flexible templates for creating sections when building new lists. Templates also give the library options for adding, updating, and removing or disabling templates. Leganto includes out-of-the box section templates (Configuration > Leganto > List Management > Templates). The Resources and Weeks templates are enabled by default.
Two types of templates are supported. The Numbered pattern type creates sections with the text of the Description field, followed by a number, up to the desired number of sections. For example, the out-of-the-box weekly template creates sections titled Week 1, Week 2, Week 3, etc. Alternatively, the Defined list templates create one section per section names defined in the Description field. For example, the out-of-the-box Priority template creates two sections, entitled Required and Optional.
When defining or customizing a template, you can set the Default number of sections to include for a Numbered pattern template. For a Defined list template, multiple section headings can be added to the Description field, separated by a semicolon (;). The library can disable or enable templates.
Templates are displayed in Leganto according to the order in Alma.
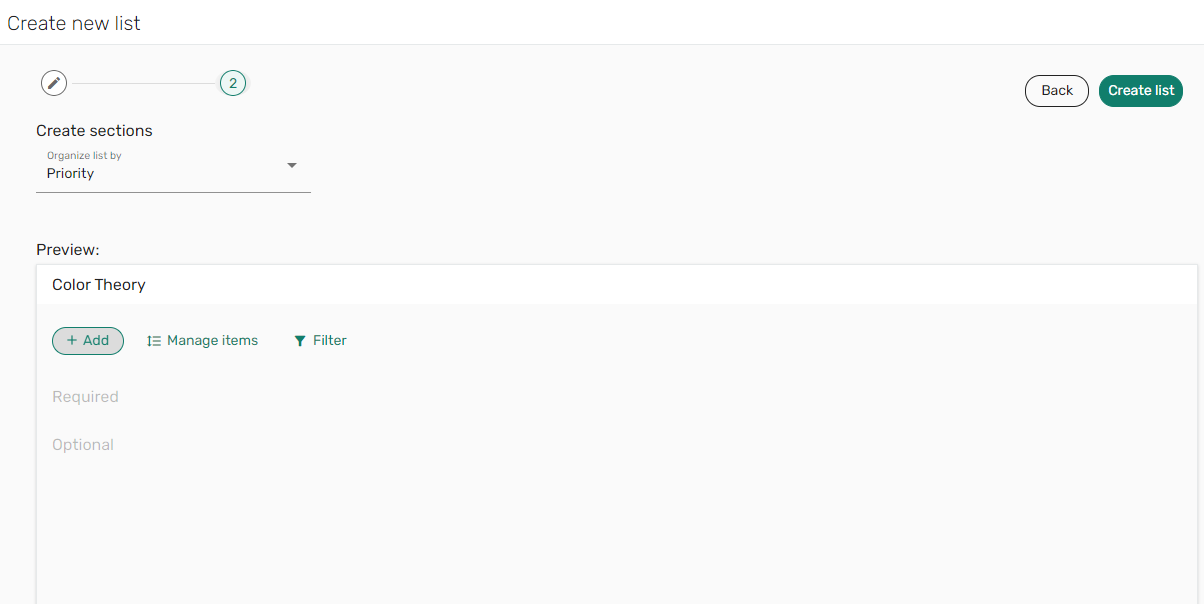
When adding sections to a new list, list creators can select a section template to help organize the list. For the Numbered pattern templates, they can adjust the number of sections if needed.
The Create new list wizard includes a Preview section to preview how the sections will be displayed on the list. The list creator can view different options before selecting Create list.
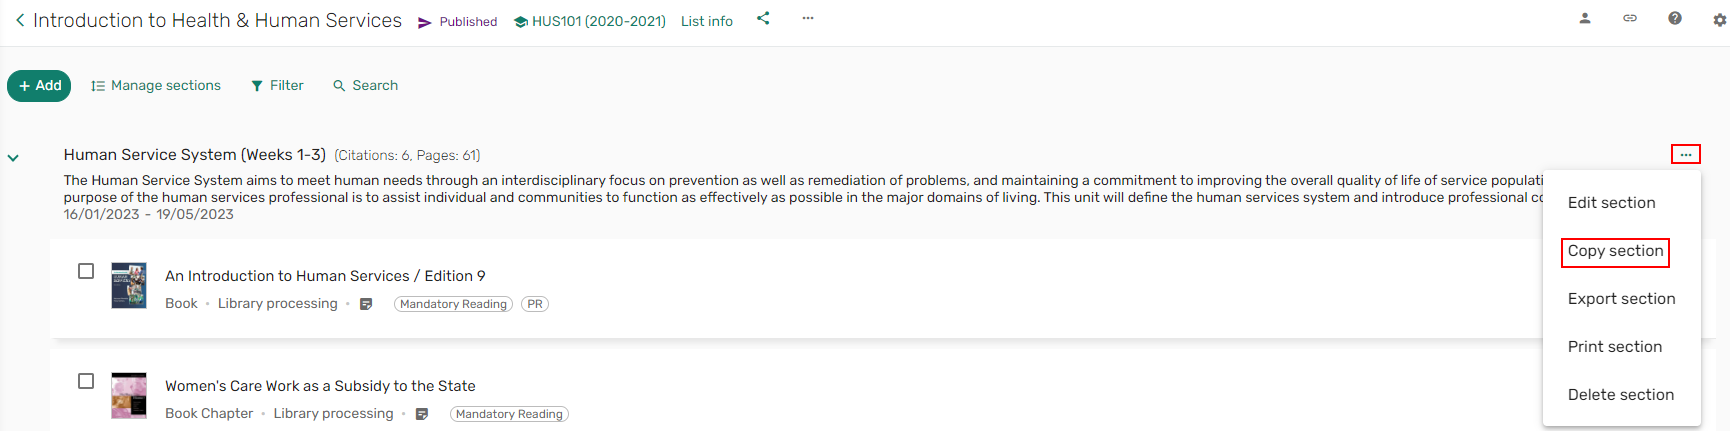
Duplicating a Section
You can create a copy of a section, including all the items in the section. Sections can be copied to the same list or to a different list.
- Select Copy section in the section menu of the section that you want to copy.
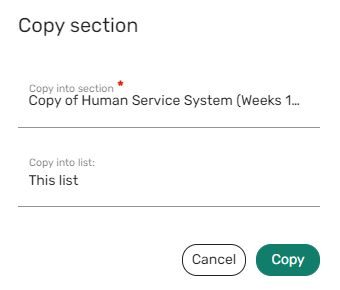
 Copy section
 - Enter the new section's name.
- Select the list into which to place the new section.
- Select Copy.
 Copy section pane
New sections created by duplicating a section always appear directly below the duplicated section.
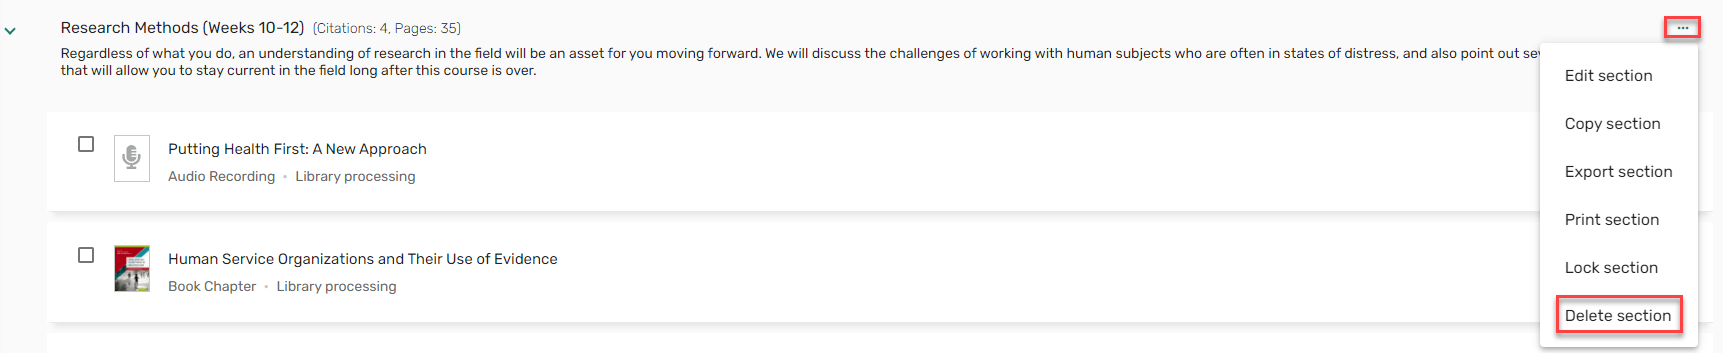
Deleting a Section
Any section that is no longer required can be deleted.
- From the section, select the section menu icon
 and select Delete section. The Delete section confirmation window appears.
 Delete section
 - Select Delete. The section and all its items are removed from the list.
 Delete section confirmation
Editing a Section
You can edit a section to make any required updates to the section.
- From the section, select the section menu icon and select Edit section. The Edit section pane opens.
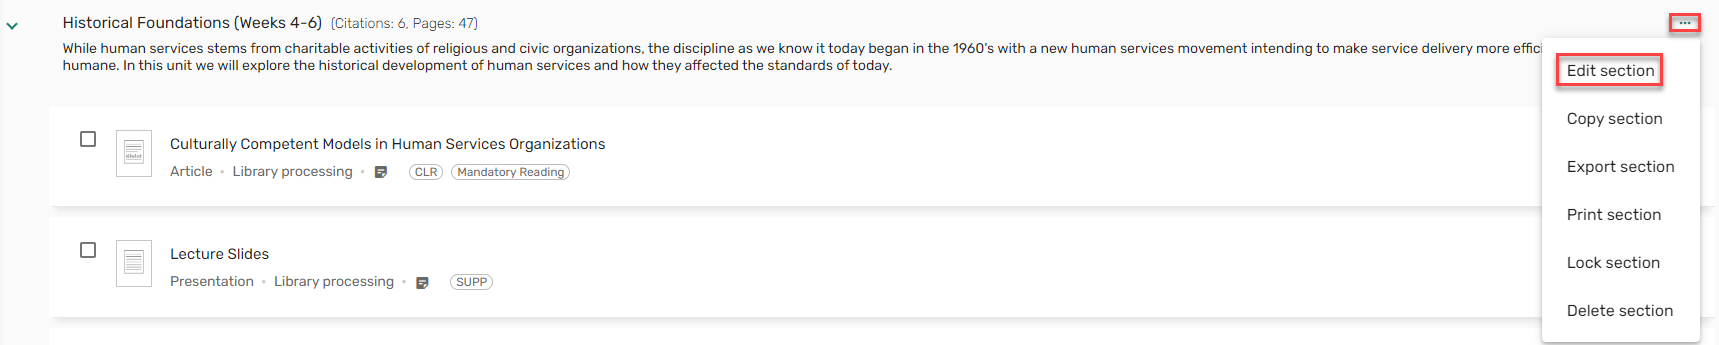 Edit section
 - Make the relevant edits and select Save. Your changes appear in the section.
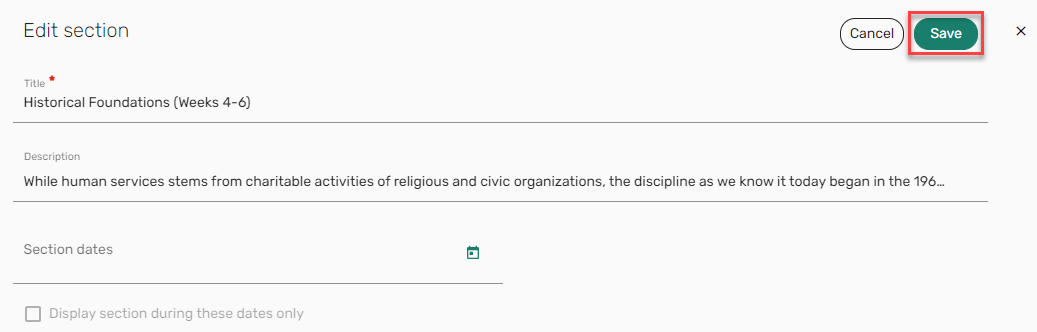 Edit section
Indenting a Section
New for July! When configured by your library, the Indent/Outdent section action is available in the section action list. When selecting Indent section, the selected section is indented one level.
Indentations can only be applied to one level.
The indentation is only preserved in copied lists and rolled over lists.

Viewing a List as a Student
You can preview the list to see a student's perspective.
- Select View list as a student in the list menu. The list is displayed only with options available to students and a banner indicating that you are viewing the list in Student View.
Viewing notifications or recent list changes in student mode displays the instructor’s notifications.
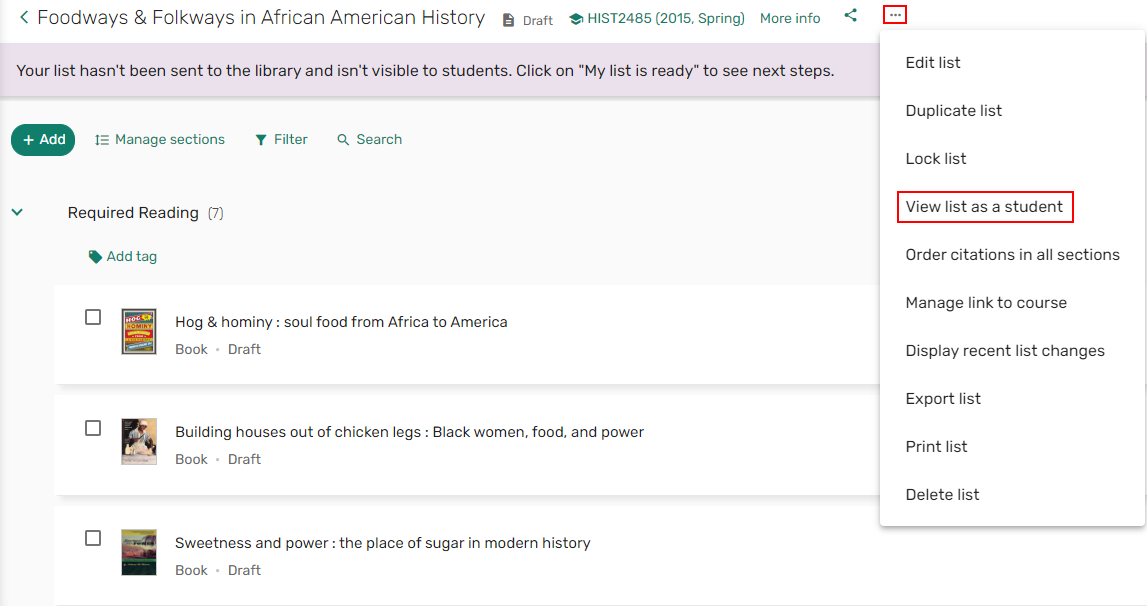 View list as a student option
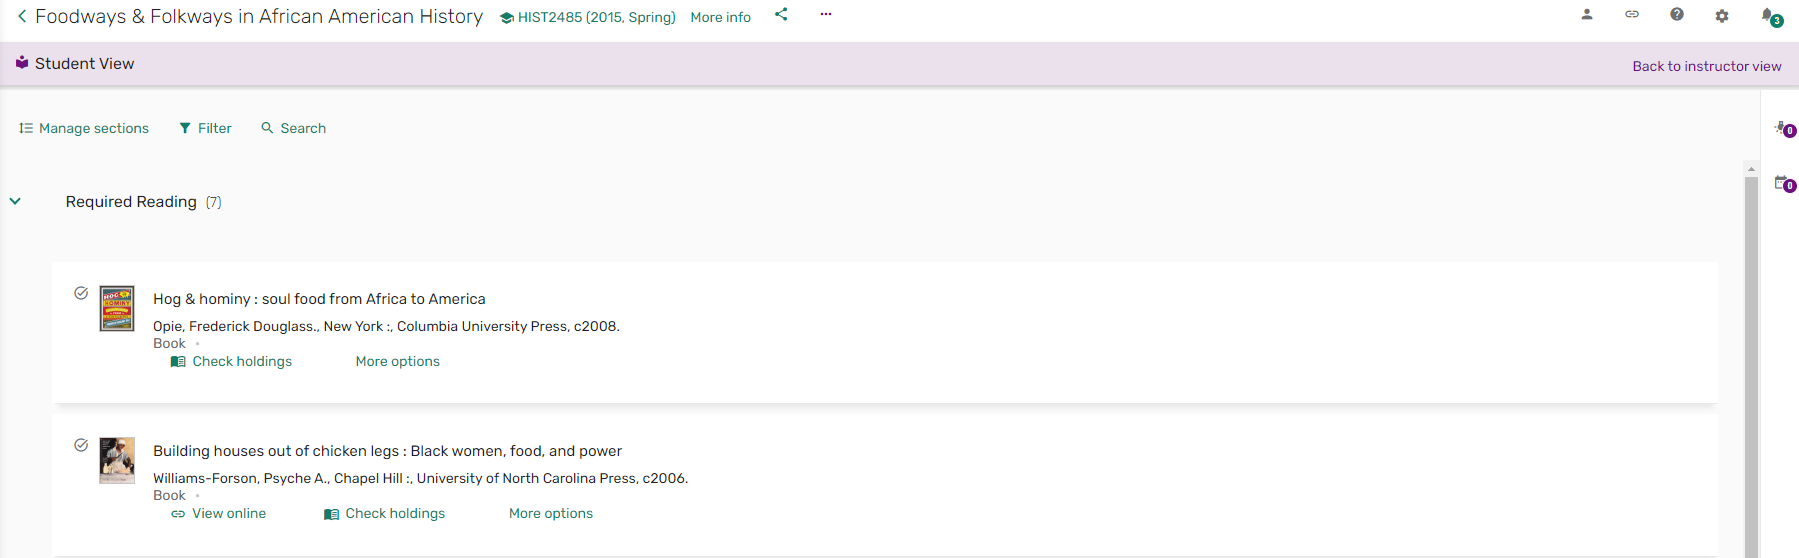 Student View