
Primo Studio for Primo VE
Introduction
Primo Studio is an integrated environment that enables you to customize and test the following aspects of your Primo views:
-
Select the colors used in various sections in the view.
-
Modify the images used for the logo, favicon, and resource types.
-
Enable add-ons that have been created and shared by the Primo community. For information on how to create and submit add-ons, see the Primo Studio Add-On Tutorial on GitHub.
-
When you open Primo Studio, it loads the default customization package as its starting configuration. If you prefer to start from your view's customization package instead of the default customization package, see Modifying a Customization Package in Primo Studio to upload it to Primo Studio.
-
To save any changes that you have made in Primo Studio, you must download the customization package to your workstation. For more information, see Creating a Customization Package in Primo Studio.
The interface enables you to select options on the left side of the page and to view the changes on the right side of the page.
Related Webinars
-
Primo VE - Become an Expert Series: Branding, CSS, and HTML - PPT, Q&A
-
Intro to Primo VE: Introduction to Primo Studio (4 min)
-
Intro to Primo VE: Primo Studio Configuration Options (6 min)
-
Primo VE Administration Certification: User Interface Customization (7 min)
Accessing Primo Studio
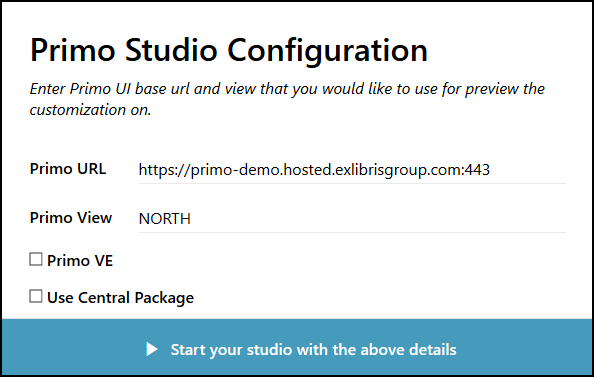
The Primo Studio Configuration dialog box enables you to open your test environment based on your UI's base URL, view code, and type of Primo environment. By default, the Primo demo URL loads.
-
Enter the following URL in a browser to open the Primo Studio login page:
http://primo-studio.exlibrisgroup.com/
If you prefer to use your configuration environment to access the above login page, see Accessing Primo Studio from the View Configuration page.
-
Enter the following information:
-
Primo URL – Specify the base URL of your Primo VE UI.
-
Primo View – Specify your view's code using the view code, which also includes your institution code: <institution_code>:<view_code>. For example: MY_INST:MyView.
-
Primo VE – Select this check box to indicate that you are configuring a Primo VE environment.
-
Use Central Package – For consortia, select this option if you want to load the Central Package for your Primo Studio session. Otherwise, you see the out-of-the-box configuration in the UI.
-
-
Select Start your studio with the above details.
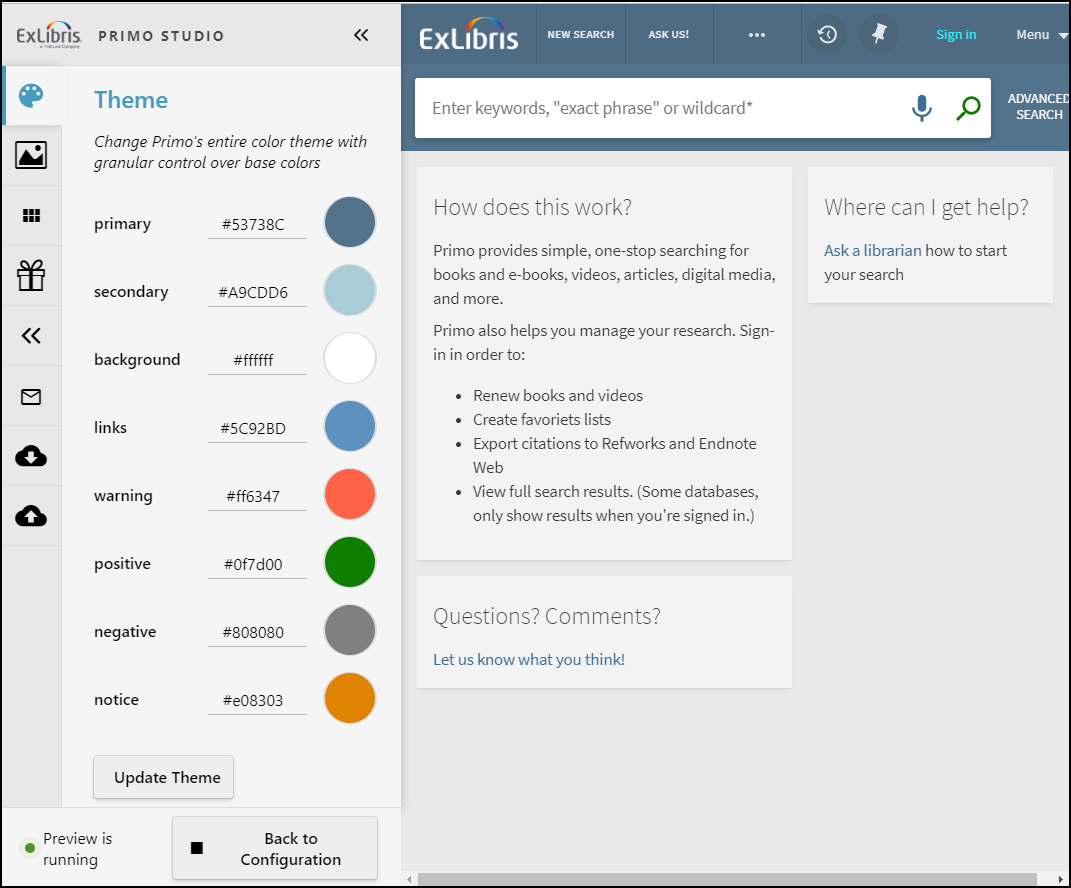
Changing a View's Colors
The Theme tab enables you to change the colors used in various areas of the UI. To change the colors, select the color blocks in the areas listed in the table to open the Color dialog box. After you have modified the colors in the various areas, select Update Theme.
| Option | Description |
|---|---|
|
Primary |
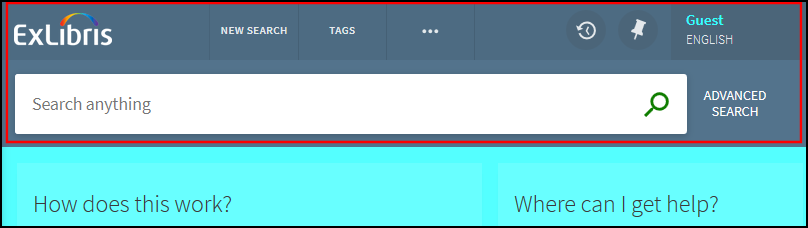
Defines the primary color of the Main Menu bar.
Main Menu Bar
|
|
Secondary |
Defines the color used for various icons and selection indicators on the Brief Display, Full Display, and My Favorites pages.
Icon Color on Brief Display Page
|
|
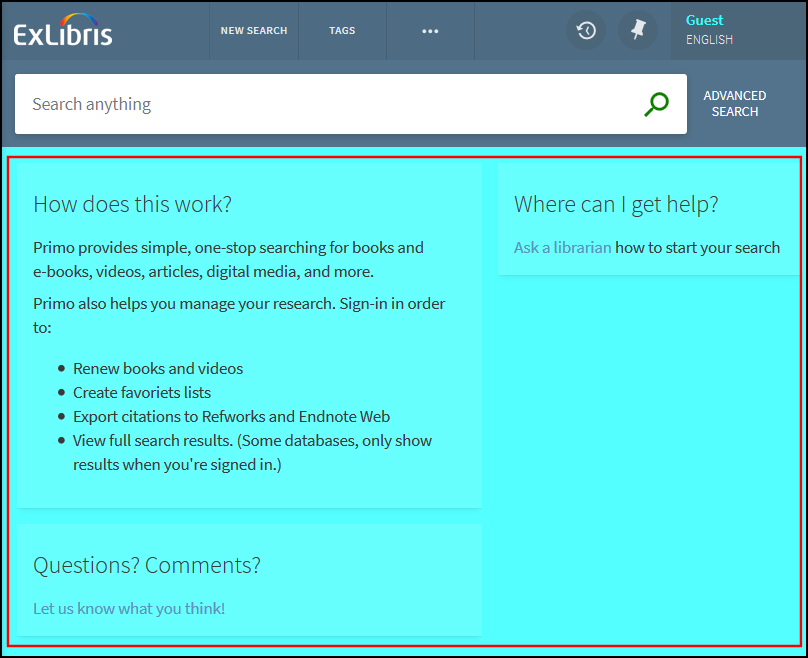
Background |
Defines the background color of the main tile on each page.
Icon Color on Full Display page
|
|
Links |
Defines the primary color of hypertext links on all pages.
Hypertext Links on Full Display Page
|
|
Warning |
Defines the color of alert icons and messages in My Library Card when a loan is due or a fine/fee has been added. |
|
Positive |
Defines the color of alert icons and messages in My Library Card when a request is ready for pickup. |
|
Negative |
Defines the primary color text in My Library Card. |
|
Notice |
Defines the color of alert icons and messages in My Library Card when a block has occurred or the librarian has sent a message. |

Changing a View's Images
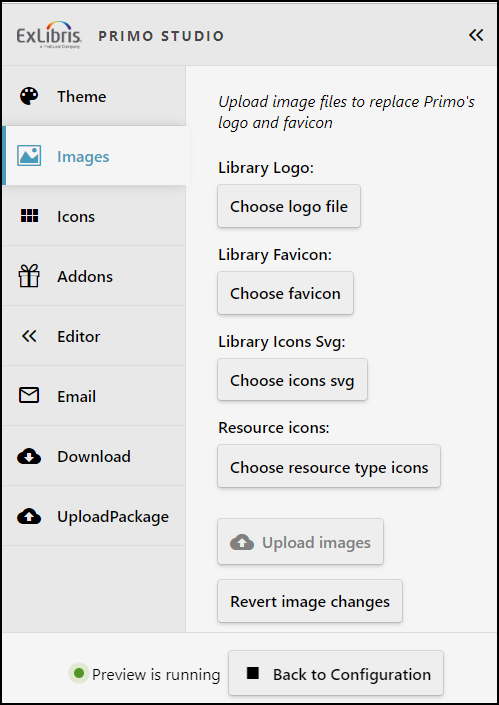
The Images tab enables you to upload image files to replace the images used for the logo, favicon, and resource types.
-
Select the following buttons as needed.
-
Library Logo – Select Choose logo file and then choose the image file to be used for the logo. The logo files must be of type PNG and use the following naming convention: <filename>.png (for example, MyLib_logo.png).
-
Library Favicon – Select Choose favicon and then choose the image file to be used for the favicon. The favicon files must be of type ICO and use the following naming convention: <filename>.ico (for example, favicon.ico).
-
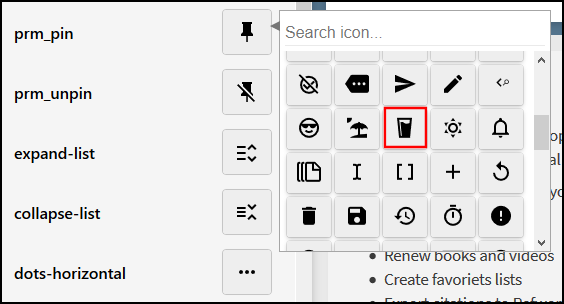
Library icons Svg – Select Choose icons svg and then choose the SVG file that contains your customized icons. Ensure that the SVG ID matches the ID used in Primo. For more information on the icons displayed in the UI, see Using the Icons Tab.
For example, the following SVG file displays a Heart icon instead of the default Pin icon, which is associated with the prm_pin ID in Primo.
<?xml version="1.0" encoding="UTF-8" ?>
<svg xmlns="http://www.w3.org/2000/svg" xmlns:xlink="http://www.w3.org/1999/xlink" width="24" height="5000" viewBox="0 0 24 5000">
<svg id="prm_pin" xmlns="http://www.w3.org/2000/svg" xmlns:xlink="http://www.w3.org/1999/xlink" x="0px" y="0px"
viewBox="0 0 50 50" style="enable-background:new 0 0 50 50;" xml:space="preserve">
<path style="fill:#D75A4A;" d="M24.85,10.126c2.018-4.783,6.628-8.125,11.99-8.125c7.223,0,12.425,6.179,13.079,13.543
c0,0,0.353,1.828-0.424,5.119c-1.058,4.482-3.545,8.464-6.898,11.503L24.85,48L7.402,32.165c-3.353-3.038-5.84-7.021-6.898-11.503
c-0.777-3.291-0.424-5.119-0.424-5.119C0.734,8.179,5.936,2,13.159,2C18.522,2,22.832,5.343,24.85,10.126z"/>
</svg>
</svg>Example SVG File -
Resource icons – Select Choose resource type icons and then choose the image files to be used for the resource types. The resource type icon files must be of type PNG and use the following naming convention: icon_<resource_type>.png (for example, icon_book.png).
-
-
Select Upload images to test all chosen images in the UI.
There is an upload limit of 1MB. If you exceed the limit, use multiple uploads to load all images.
Reverting Image Changes
The Images tab enables you to remove all images that you have uploaded in your current Primo Studio session.

To remove uploaded images, select Revert Image changes.
Using the Icons Tab
The Icons tab enables you to view all of the out-of-the-box icons in the gallery and their associated Primo IDs. From this tab, you can associate any icon in the gallery with any Primo ID for display in the UI.
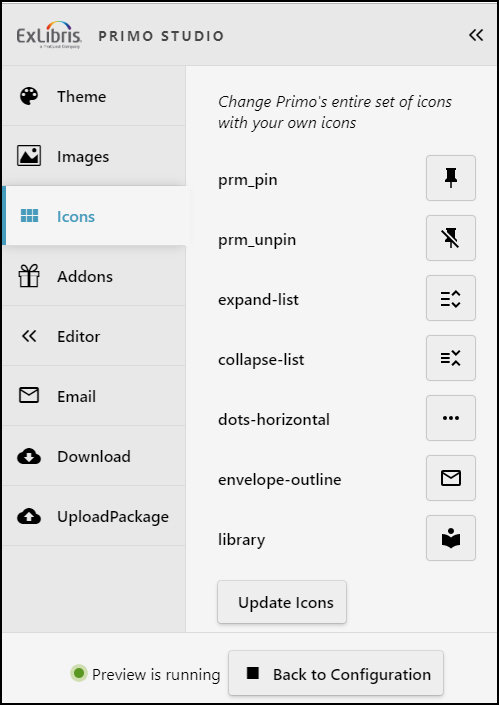
If you have customized an SVG icon in the Images tab, the new icon displays next to its associated Primo ID in the Icons tab, but it cannot be edited while it is linked to a custom icon.
-
Select the icon that you want to change.
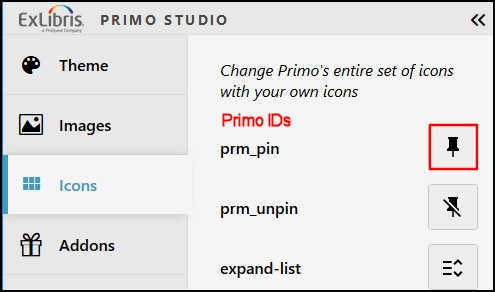 Select Icon to Change
 -
From the gallery, select the new icon that you want to use.
 Select New Icon
 -
Select Update Icons to view your changes in the UI.
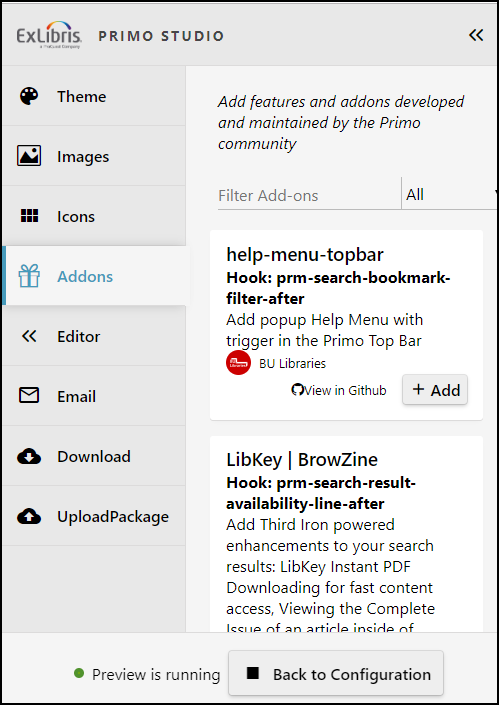
Applying Add-Ons to a View
The Addons tab allows you to apply add-ons created by users of the Primo community. For information on how to create and share add-ons with the Primo community, see the Primo Studio Add-On Tutorial on GitHub.
-
Select Add. The changes are applied instantly unless the addon requires additional information.
-
If the add-on requires additional information, specify the necessary information in the dialog box and then select Submit to apply the add-on. For example:
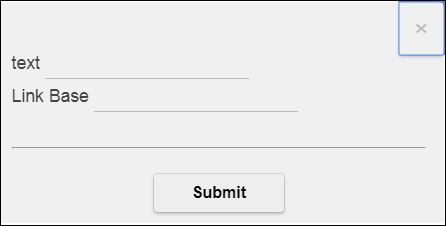 Example Add-On Dialog Box
After an add-on has been applied, you can select Remove to remove the add-on from your test package.
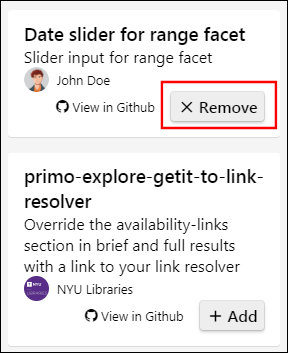 Remove Add-On from Test Package
Filtering Add-Ons
As more add-ons are shared by the Primo community, you may need to filter the list of add-ons to discover new add-ons or to view add-ons that you or other community members have shared.
-
Select one of the following criteria from the Criteria drop-down list:
-
All – Searches are based on all fields of the shared add-ons.
-
Title – Searches are based only on Title field of the shared add-ons.
-
Hook – Searches are based only on Hook field of the shared add-ons.
-
Contributor – Searches are based only on Contributor field of the shared add-ons.
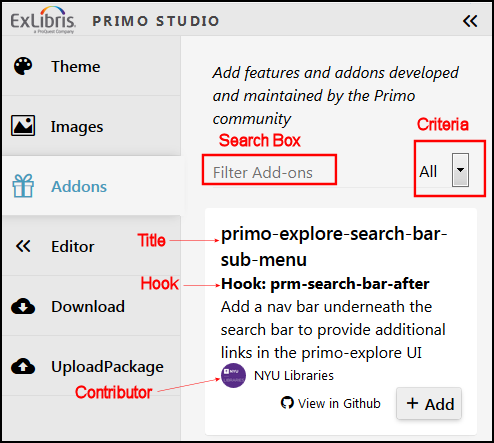 Add-On Filter Fields and Criteria
 -
-
In the search box, type relevant search terms for the selected criteria.
Using the Primo Studio Editor
The Editor tab enables you to edit all the files in your customization package.
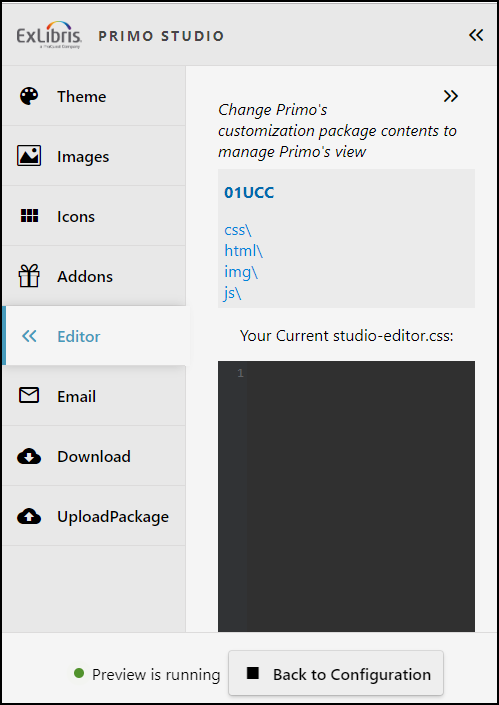
This tab includes the following areas, which enable you to customize your view:
-
Navigation Area – This area enables you to browse and edit the files under the following folders of your session's customization package:
-
css – This folder contains your CSS definitions. In Primo Studio, the custom1.css file is read-only and contains only the default CSS definitions.
If you want to modify CSS definitions in Primo Studio, edit any of the following temporary files, which contain session updates:-
customUploadedPackage.css – If you use Upload to copy a customization package from your local machine, this file is created with the CSS definitions from the custom1.css file in your customization package.
-
studio-colors.css – If you make changes to colors in the Themes tab, this file is created with the CSS definitions associated with the changes made with the Themes tab.
When you are done making changes in Primo Studio, download the updated customization package to your local machine, where changes in the above files are saved to custom1.css.
-
-
html/homepage – This folder contains the homepage_en.html file, which enables you to customize the area of the page below the search box on the Primo Home page. In addition, you can use the following format to define files for other supported UI languages: home_<2-letter_language_code>.html.
-
html/email – This folder contains the email_en.html file, which enables you to customize the default email template. In addition, you can use the following format to define templates for other supported UI languages: email_<2-letter_language_code>.html.
-
img – This folder contains all customized images for the new Primo UI. To ensure that the correct image appears in the UI, ensure that you use the same file name as the original.
-
js – This folder contains your custom scripts, which may include AngularJS directives. In Primo Studio, the custom.js file is read-only and contains only default scripts.
If you want to customize scripts in Primo Studio, edit the customUploadedPackage.js file, which is created by uploading your view's customization package. When you are done making changes in Primo Studio, download the updated customization package to your local machine, where changes in the customUploadedPackage.js file are saved to custom.js. -
node_modules – This folder appears only when you have enabled add-ons and contains files associated with each add-on package. For information on how to create and register your own add-ons, see the Primo Studio Add-On Tutorial on GitHub.
-
-
Editor Area – This area enables you to view and update a selected file in the Navigation Area. In many cases, it is simpler to use the other Primo Studio tabs to interactively customize your view.
-
Locate and select the file in the Navigation area.
-
In the editor's text box, add your customizations.
-
Select Apply Changes to see the changes in Primo Studio's preview pane.
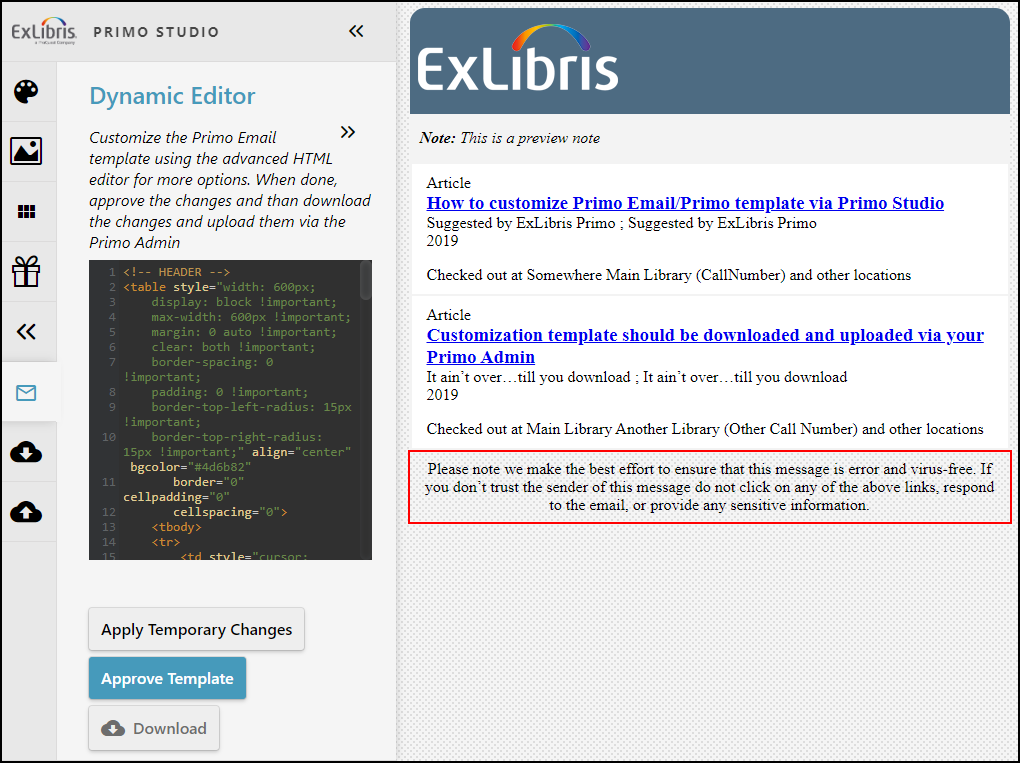
Using the Email Tab
For easier customization, the Email tab enables you to edit the default template (email_en.html), view your changes in the right panel, and download the updated template to your local workstation so that it can be uploaded with the UI Customization Package Managers in Primo or Primo VE.
In the left-hand pane, you can perform the following operations:
-
Text Box Editor – In the text box, modify the email_en.html file (default email template) as needed.
-
Apply Temporary Changes – Displays an example of your customizations to the email template in the right-hand pane.
-
Approve Template – Saves your changes to the email_en.html file.
-
Download – Downloads the updated email_en.html file to your workstation. If this template is intended to support another language, make sure that you rename it before uploading it to the UI.
Creating a Customization Package in Primo Studio
After you have made a change in Primo Studio, the Download Package tab allows you to save your modifications to a customization package on your local machine so that you can either modify the package later in Primo Studio for further changes and testing or deploy the package to the UI for live use.
Modifications in Primo Studio will be lost if you do not download the customization package to your local workstation at the end of each session in Primo Studio.
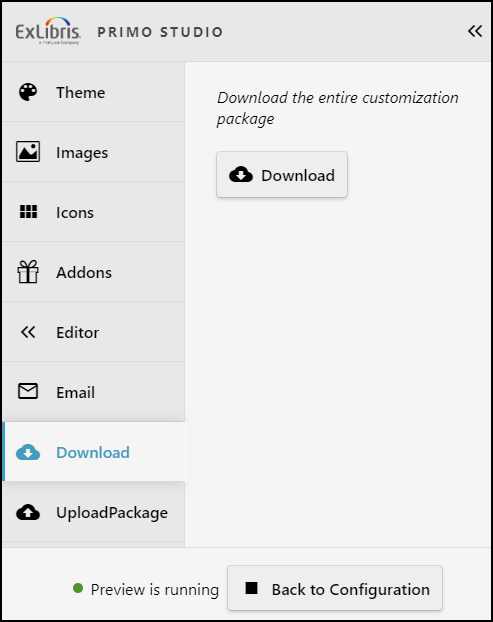
To save the customization package to your local machine, select Download.
For information on how to deploy a customization package, refer to the following documents:
-
Primo VE: Branding Your View
Modifying a Customization Package in Primo Studio
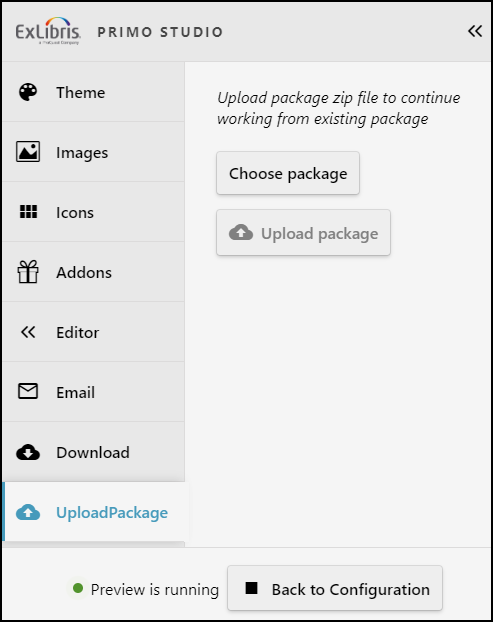
By default, Primo Studio loads the default customization package when you open Primo Studio. The Upload Package tab enables you to load a customization package that you have previously stored to your workstation. This enables you to customize either the latest version of your view's customization package or a customization package that you have saved for later customization.
If you want to save your customizations, you must download the customization package to your workstation at the end of each session in Primo Studio. For more information, see Creating a Customization Package in Primo Studio.
-
If you want to customize your view's customization package instead of the default customization package, you must first download it from Alma:
-
On the Views List page (Configuration Menu > Discovery > Display Configuration > Configure Views), edit your view.
-
Select the Manage Customization Package tab.
-
Select Download next to the name of your view's customization package.
-
-
Select Choose Package.
-
In the dialog box, search for and select a compressed package and then select Open to choose that package.
-
Select Upload package.