
Configuring Discovery Views for Primo VE
If you are configuring the Services page for an Alma-Summon environment, see Configuring the Services Page.
To configure discovery options (Configuration Menu > Discovery) for Primo VE, you must be assigned the following role: Discovery - Admin.
Introduction
Primo VE enables end users to perform searches, view online material, request materials, and view their account information. The Views List page (Configuration Menu > Discovery > Display Configuration > Configure Views) enables you to configure multiple views based on institution, library, campus, and user group. Each view can have separate settings and look-and-feel (such as search profiles and services).
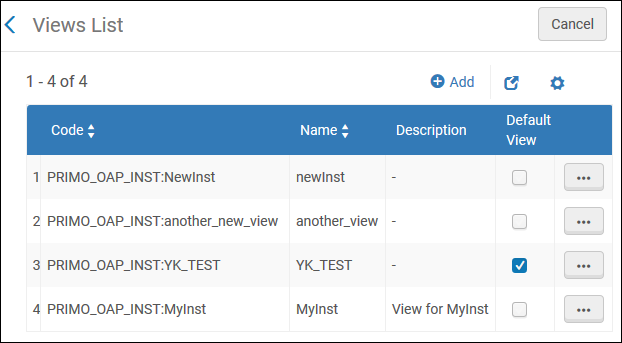
In addition to creating a new view, the Views List page enables you to perform the following actions on each view in the list:
-
Edit – This action opens the View Configuration page, which enables you to edit the various configuration tabs for the selected view. For more details on each tab, see the sections below.
-
Duplicate – This action creates a new view based on the selected view.
-
Duplicate for NDE – This action creates a new NDE view based on the selected view, copying all its view settings, including labels. Note that some functionality will be released monthly after the general release in November.
-
Override – This action replaces another view in the list (such as your main view) with the current view while retaining only the Code (not the Name) of its overriding view. This is useful if you want to test significant changes in a separate view and quickly apply those changes to your main view.
For example, if you want to override the settings of the view MAIN with the settings from the view TEST:-
Edit the view MYINST:TEST. This view's code is changed to MYINST:MAIN.
-
Select the Override action to open the dialog box.
-
Select view MYINST:MAIN. This view is archived, and its code is changed as follows: MYINST:MAIN_depracated_YYYYMMDD_HHMMSS
-
Select the Override button to override the settings in view MYINST:MAIN.
-
-
Delete – This action deletes the selected view.
-
Go to View – This option opens the UI for the selected view.
The following sections describe how to create a new view using each tab in the view configuration.
Related Training Videos
Defining a View
The View Configuration page consists of several tabs that enable you to configure the settings related to what end users see in the UI (such as search scopes, look-and-feel, and services). The initial definition of a view configures the General tab and populates the other tabs with the out-of-the-box settings. You can test your view by selecting Go to View for the view's action menu on the Views List page. You can create multiple views based on institution, library, campus, and user group.
-
Beginning with the May and November 2025 releases, you can start transitioning to the NDE UI (the replacement for the original UI). For more information, see Go NDE - Steps to Transition to NDE UI.
-
The NDE UI configuration process uses the same configuration tabs and reuses most of the configuration from the original UI with noted differences. For more details, see Overview of the NDE Interface and Configuration.
-
On the Views List page (Configuration Menu > Discovery > Display Configuration > Configure Views), select Add View to open the View Configuration page.
 View Configuration Page - General Tab
For member institutions of a consortium, the Discovery network settings section also appears on the View Configuration page:
 The Discovery Network Settings Section (View Configuration Page - General Tab)
Changes to the General tab require you to select the Save button to make the changes effective in the UI. Changes to other tabs are effective immediately.
-
Specify the following fields on the View Configuration Page:
View Configuration Page - General Tab Fields Field Description Define View:
Code
A unique code for your view. After saving the view, the system automatically prefixes the code with your institution's code.
Name
A name for your view.
NDE
Indicates whether to use the NDE UI instead of the original UI for this view. For more information, see Overview of the NDE Interface and Configuration.
- This setting cannot be changed once the view has been saved.
- Beginning with the November 2025 release, this option is selected by default.
- Eventually, the NDE UI will replace the original UI.
Description
Optional text to describe the view for internal use.
General Attributes:
Affiliate with
You can associate each view with a specific Central index so that you can provide full-text availability per campus/library. For instructions on creating Central indexes, see Configuring Central Index and Proxy Settings.
To affiliate a view with a campus/library:
-
Select either Campus or Library.
-
Depending on the type of affiliation selected, select either a campus or a library from the drop-down list.
This option is only available to customers who have configured their environment to support inventory management groups, which are based on campuses and libraries. For more details, see Configuring Inventory Management Groups.
Default Language
The default language that the system will use for Primo VE.
Time-out URL
This field is no longer in use.
The redirection URL for Primo VE after a timeout.
If this field is left empty, the default system behavior is to refresh the page and clear all personal parameters.
Timeout (in minutes) for guest users
The time in minutes when a session is timed out due to inactivity for guest users. A setting of 0 indicates that there is no timeout period.
When a session times out, the system resets all parameters and refreshes the current page, which it continues to display.
Timeout (in minutes) for signed-in users
The time in minutes when a session is timed out due to inactivity for signed-in users. A setting of 0 indicates that there is no timeout period.
When a session is about to time out, the user is prompted to extend the session. If they do not extend it, the system signs the user out and refreshes the page. It then continues to display the same page, and also displays a message informing the user that they have been signed out.
Side bar (Tweak my results) position
The position of the Tweak your results section on the Brief Results page: On the right (default position) or On the left.
Auto Complete Enabled
Indicates whether auto-complete suggestions are enabled in the Primo VE search box.
Select as Default View
This view is used when staff users select the Display in Discovery option from the Alma repository search results.
 Repository Search Results - Display in Discovery Option
Indicates whether the Personalized Results service is enabled in the UI.
If you disable this option, it will remain active only for users who previously configured at least one discipline and selected the Personalized toggle in the UI. To disable personalization, those users will have to edit and clear all selected disciplines instead of just clearing the Personalized toggle, which is no longer visible to all users.
The Personalize Your Results Disciplines code table (Configuration Menu > Discovery > Display Configuration > Labels) enables you to customize and translate the display names for the supported CDI disciplines, which are not configurable.
For information on mapping disciplines in CDI, see Personalized Ranking in CDI.
Enable Syndetics
Indicates whether Syndetics Unbound displays in the Explore section of a record's full display.
This checkbox appears only after registering for Syndetics Unbound and entering the license ID in the Syndetics_Unbound_Customer_ID parameter on the Discovery Customer Settings mapping table page (Configuration Menu > Discovery > Other > Customer Settings).
For more information regarding Syndetics Unbound, see Setting Up Syndetics Unbound in Primo VE.
Enable Collection Discovery Features
Indicates whether Collection Discovery is enabled in the UI.
Newspapers Search Filter By Availability
Indicates whether Newspaper Search returns only articles that are available to the institution. This field is selected by default.
When cleared, all records are returned in Newspaper Search regardless of whether they are available to the institution.
Display link to Newspapers Search
When selected, this option enables the Newspapers search link in the following areas in Newspaper Search results:
-
At the bottom of the search results page.
-
At the top of the Resource Type facet in the Tweak My Results section of the results.
To enable these links, you must first enable the Newspaper search feature on the Central Index and Proxy Set-Up page (Configuration Menu > Discovery > Other > Central Index and proxy set-up). For more information, see Configuring Central Index and Proxy Settings.
Highlight reference entry on top
When selected, this option displays a short topic overview derived from a reference entry for a CDI collection that has been activated in Alma at the top of the results list. For more information, see Configuring the Display of Reference Entries for Topic Overviews.
Related records display
Enables the related reading links in the Full Display. Currently, the following relationships are supported:
Supported Related Reading Relationships Relation from Relation to Usage Books (local and CDI)
Chapters of the book (CDI)
Enables users to view specific chapters from the book.
Books (local and CDI)
Reviews of the book (CDI)
Enables users to view any related book reviews.
Chapters (CDI)
Other chapters in the book (CDI)
Enables users to view other chapters from the book.
The Related Items Labels code table enables you to configure the display labels for this functionality.
Select this option to enable the Voice Search Assistant in the view. After selecting this option, select one of the following options from the drop-down list:
-
Use UI supported languages — When selected, Primo VE supports the languages configured in Alma.
When selected, the default language is given priority.
-
Use customized languages – When selected, the Supported languages field appears and enables you to select one or more enabled languages from the Voice Search Supported Languages code table.
-
The list of customized languages cannot be arranged in a customized order.
-
The default language is set to the first language under the Supported languages list, and it cannot be customized.
-
For more information, see Configuring the Voice Search Assistant.
When selected, this option displays the Edit button on the Personal Details tab in My Library Card, which enables users to modify personal details. This option is enabled by default. For related configuration options, see Configuring Personal Details Settings for Primo VE.
Display online services from other campuses/libraries
Select to display online services from other campuses/libraries.
This option is only available to customers who have configured their environment to support inventory management groups, which are based on campuses and libraries. For more details, see Configuring Inventory Management Groups.
Set focus on search box
When selected, the focus is placed in the search box by default when various pages (such as Library Search and Journal Search) are opened in Primo VE. This enables users to type their queries directly into the search box without having to select it first. Out of the box, this functionality is disabled.
Enable recent scopes search
When selected, the Scope drop-down list includes the following search capabilities:
-
Scope look-up prompt – As users begin typing characters at the prompt, matching scopes appear in the lower portion of the box for selection, enabling users to select these scopes without having to scroll through a large list.
-
Recent scopes list – The last three scopes recently used in a search appear just below the Look-up or select prompt and are indicated by the Recent icon
 . For signed-in users only, the scopes for each search tab are retained between sessions.
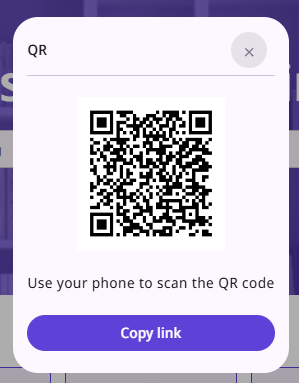
Enable QR on Top
Available only for the original UI: Select to display the QR code link in the Main Menu and each record's full details. This option is enabled by default.
For the NDE UI, the QR code is enabled in the Links tab; see Configuring the Links Menu, below.
Display Unpaywall Links
When selected, links to PDF full text in Unpaywall are embedded directly into the brief display.
-
If a record contains Quicklinks and Unpaywall links, Primo VE displays only the Quicklinks.
-
When this functionality is enabled, and the record has no additional links (such as Quicklinks, Unpaywall links, and general electronic service links), an empty Links section is displayed with the following message, which is customizable by modifying the description for the fulldisplay.unpaywall.noLinks code in the Full Display Labels code table: No links are available for this record.
Display Quick Links
When selected, links to PDF/HTML full text for CDI records are embedded directly into the brief display to provide a convenient and quick way for users to access full text with a single click. Quicklinks provides links to both free to read content and paywalled content. For more details, see Quicklinks in Primo and Primo VE.
If a record contains Quicklinks and Unpaywall links, Primo VE displays only the Quicklinks.
Display AI Insights links When selected, links to Document Insights, an AI-powered feature that provides users with additional information about resources appearing in search results, are included in CDI records when they are available. This functionality is currently available to institutions with active subscriptions to applicable ProQuest solutions. For more details, see Links to Document Insights in Primo VE. Display all links in View Online section
When selected, this option instructs CDI to return all available full text links so that they are selectable in a record's full display. If disabled, CDI returns only the preferred link. For more details, see Display All Links in Full Display for CDI.
Display Favorites Warning Message for Guests
When selected, a warning message displays when guests save records to Favorites. This functionality is enabled by default for new views.
The following table lists the codes associated with this functionality:
Code Table Description aria Labels code table (Primo Home > Advanced Configuration > All Code Tables)
For accessibility, the following code provides an indication that the warning messages was closed:
-
nui.aria.favorites.CloseMessage — Close message
Favorites Labels code table (Primo Home > Advanced Configuration > All Code Tables)
The following codes support the display of the warning and message:
-
nui.favorites.guestSaveMessage — To permanently save your items to favorites, <b>make sure to sign in</b>
-
nui.favorites.guestSaveMessageDismiss — Dismiss
Enable Barcode Search
When selected, users can search by barcode in Advanced Search to locate specific physical items on the shelves more easily.
The following table lists the codes associated with this functionality:
Code Table Description aria Labels code table (Primo Home > Advanced Configuration > All Code Tables)
The following code provides accessibility for this functionality:
-
nui.aria.search.barcodeSearch — Search by Barcode
Search Tile Labels code table (Primo Home > Advanced Configuration > All Code Tables)
The following codes support the customization and translation of labels for this functionality:
-
nui.search-barcode.barcodeSearch — Barcode Search
-
nui.search-barcode.barcodeSearchButton — Search
-
nui.search-barcode.noResults — No records found for {{searchTerm}}
-
nui.search-barcode.noResultsText — Try to refine your search term
-
nui.search-barcode.searchTerm — Enter a barcode
For consortia only, you can enable users to sign into this institution's view as well as other institution views associated with your Network Zone (NZ).
To create a list of institutions with which users can authenticate:-
Select this option to display the Edit configuration link.
-
Select Edit configuration to open the Direct login to other institutions page.
-
Select Add configuration and then specify the following fields:
-
Consortia Institution — Select the institution from the drop-down list. When defining the list of permitted institutions, you must also include your institution to enable users to log on to it from the Direct Login Menu.
-
Institution name label — Specify a display label for the institution, which appears in alphabetical order on the Login Menu.
-
Other institution domain — Specify the Primo VE domain for the institution. For example: https://myinst.primo.com
-
View code — Specify the view code for the institution, making sure not to include the institution code. For example: myview
-
-
Select Save and repeat step 3 to add another institution.
 Example Direct Login Configuration
 -
From the General tab, select Save.
In the following example, three institutions were configured to appear on the Direct Login Menu:
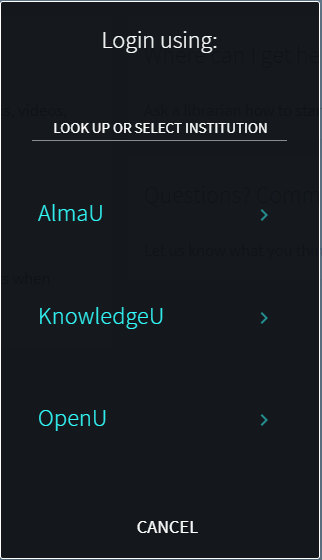 Example Direct Login Menu
If you want to retain search parameters in the URL after signing into a view, see the direct_login_transfer_all_parameters parameter in the Discovery Customer Settings mapping table (Configuration > Discovery > Other > Customer Settings).
If you want to customize/translate labels on the Direct Login Menu, update the Direct Login Labels code table (Configuration > Discovery > Display Configuration > Labels).
When selected, CDI searches will use CDI's normalized index instead of its default Subject index, which is not normalized. For more information, see Using Normalized Subject Headings from CDI.
Enable "Did You Mean"
This field appears only when the NDE checkbox is selected in the Define View section above. The Did You Mean functionality is enabled in the NDE UI when selected.
Display CDI document attributes
When selected, CDI document attributes display for CDI records. This functionality is selected by default. For more information about the document attributes, see CDI Document Attributes.
Enable Research Assistant Using Icon
When selected, the Primo Research Assistant icon appears in the Main Menu, enabling users to access the Primo Research Assistant page from any UI page.
This functionality is disabled by default. For additional information about Primo Research Assistant, see Getting Started with Primo Research Assistant.
Enable Research Assistant Using Widget
When selected, the Primo Research Assistant widget appears on the right edge of the Brief Results page. It enables users to ask a question without leaving the results. After entering the question, users are taken to the Primo Research Assistant page to view the answer.
This functionality is disabled by default. For additional information about Primo Research Assistant, see Getting Started with Primo Research Assistant.
Enable Entities Info Card
Select this option to enable the display of Info Cards on Full Display pages. This option is disabled by default.
To display this option and enable it at the view level, the enable_entity_info_card parameter must be set to false on the Discovery Customer Settings page (Configuration > Discovery > Other > Customer Settings).
For more details, see:
- Original UI – Searching Linked Open Data - Person Entity
- NDE UI – Linked Open Data in the NDE UI
Enable Entities Autocomplete
Select this option to enable autocomplete for entities. This option is disabled by default.
To display this option and enable it at the view level, the enable_entity_autocomplete parameter must be set to false on the Discovery Customer Settings page (Configuration > Discovery > Other > Customer Settings).
For more details, see:
- Original UI – Searching Linked Open Data - Person Entity
- NDE UI – Linked Open Data in the NDE UI
Enable Places Map WidgetFor the NDE UI only, this checkbox enables the Places Map Widget on a record's full display page if geographical coordinates are included in the following subfields of KORMARC/MARC21 field 034 and UNIMARC field 123:-
$d—westernmost longitude
-
$e—easternmost longitude
-
$f—northernmost latitude
-
$g—southernmost latitude
This functionality is enabled by default. Map Widget on Full Display Page
Enable Natural Search For the NDE UI, select this option to enable Natural Language Search (Ask Anything). For additional information, see Natural Language Search in the NDE UI. Logo Clickable URL
This field configures the link for the logo in the NDE UI. If no URL is defined, the Discovery home page will be displayed when the logo is clicked.
With the original UI, this functionality is configured with the Customization Package Manager tab.
Enable Similar Image BrowseFor the NDE UI, select this option to enable the Similar Image Browse section in the Full Display of digital images. When enabled, this section presents a selection of images in the institution/network holdings that are deemed similar to the current image. This feature employs the Alma Specto API to find similar images, and is only available for customers who have purchased Alma Specto. The images found are displayed in a carousel, in order of the degree of similarity between them and the current image. Selecting one of the images in the carousel opens the Full Display of that image.
Discovery Network Settings (Consortia environments only):
Display locations from member institutions
Select to display physical holdings for other member institutions in your consortium.
Display online services from member institutions
Select to display online services from other member institutions.
Include member institution physical inventory in facets
Configure the behavior of the Library and Availability facets:
-
Never — Select this option if you do not want to display physical inventory from other member institutions in your consortium.
-
Only in cross institution search — Select this option if you want to display physical inventory from other member institutions in your consortium only when the selected search profile (such as DiscoveryNetwork) includes records from other member institutions.
-
Always — Select this option if you always want to display physical inventory from other member institutions in your consortium.
Library facet
If the Institution and Availability facets have been configured to display physical inventory from member institutions, select one of the following options to configure the behavior of the Library facet:
-
Do not display member libraries — Select this option if you do not want to include physical inventory from other members' libraries.
-
Display member libraries separately — Select this option if you want to include physical inventory from other members' libraries with a separate facet below the Library facet.
-
Display member libraries with my institution libraries — Select this option if you want to include physical inventory from other members' libraries with the Library facet. This option must be specified for the union view in a consortium.
-
Select Save to save your changes to return to the Views List page.
Changes to the General tab require you to select the Save button to make the changes effective in the UI. Changes to other tabs are effective immediately.
-
You have just configured the fields on the General tab. See the following sections to configure the remaining tabs in your view:
-
Configuring the Links Menu – Defines the links that appear on the Links menu, which appears at the top of Primo VE.
-
Search Profile Slots – Defines the search scopes used in Primo VE.
-
Advanced Search Configuration – Configures the following lists of configuration values that appear in Primo VE: indexes, resource types, and languages.
-
Brief Results – Configures the facets and sort options that appear on the Brief Results page in Primo VE.
-
Brief Record Display – Configures the fields and actions that appear above each record on the Brief Results page in Primo VE.
-
Full Record Services – Configures the display of the service sections on the Full Display page in Primo VE.
-
Manage Customization Package – Manages the customization packages that you can use to modify the look of Primo VE.
-
Configuring the Links Menu
The Links Menu tab on the View Configuration page enables you to define the links on the Main menu, which appears at top of the UI. Out of the box, Primo VE provides links for the following pages in Primo VE: Journal Search, Tags, Library Search, ILL Request (Blankill), Fetch Item (citationlinker), Browse Search, Collection Discovery, and Newspaper Search, Database Search, and Purchase Request. All except for Database Search and Purchase Request are enabled by default. For additional information regarding the configuration of Purchase Request and Resource Sharing Request forms, see Configuring Request Forms for Primo VE.
For each link, you can perform the following configurations:
If you want to add a link, see Adding a Link to the Links Menu.
All the out-of-the-box links open in the same browser tab, and all customer-defined links open in a new browser tab.
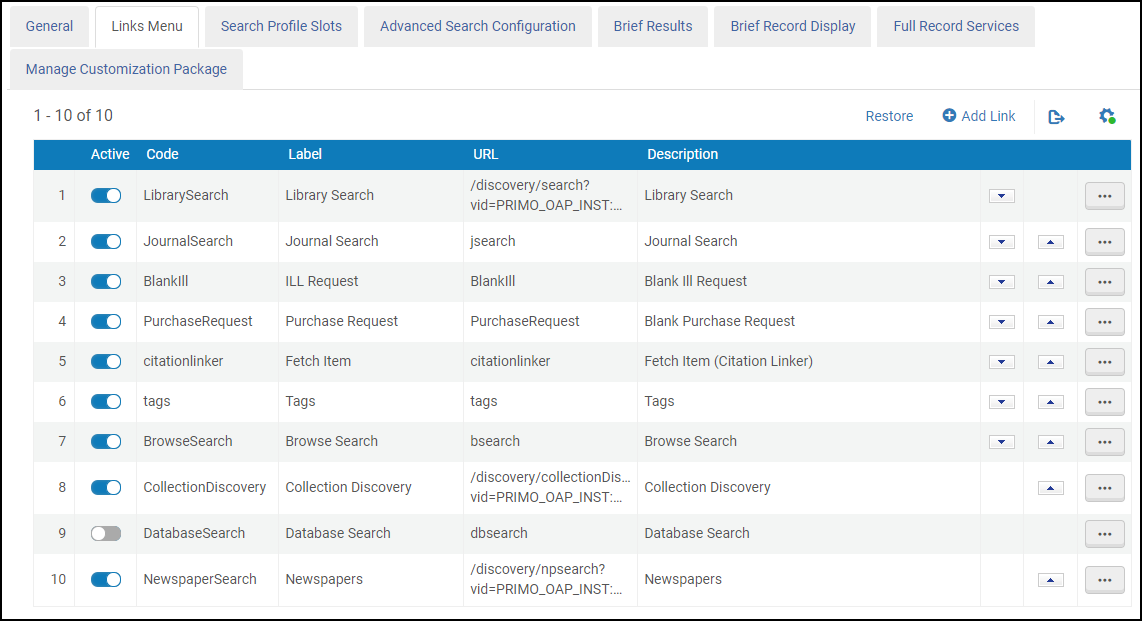
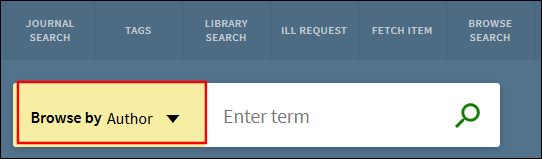
In the following example, the following links are enabled: Journal Search, Tags, Library Search, ILL Request, Fetch Item, and Browse Search:


When the user selects this link, a dialog box containing a QR code and a Copy link option opens. The user can use these options to save or share a link to the page that is currently displayed.
-
The Tags feature is not supported in consortia environments. For information on disabling the Tags link and other links, see Deleting a Link from the Links Menu.
-
Tags are not supported for CDI records and will not appear in tag results.
Adding a Link to the Links Menu
In addition to the out-of-the-box links, you can add your own links.
-
On the Views List page (Configuration Menu > Discovery > Display Configuration > Configure Views), edit your view and select the Links Menu tab.
-
If you have not already done so, you must select Customize to enable you to add and modify links.
-
Select Add Link to open the Define Menu Link Page.
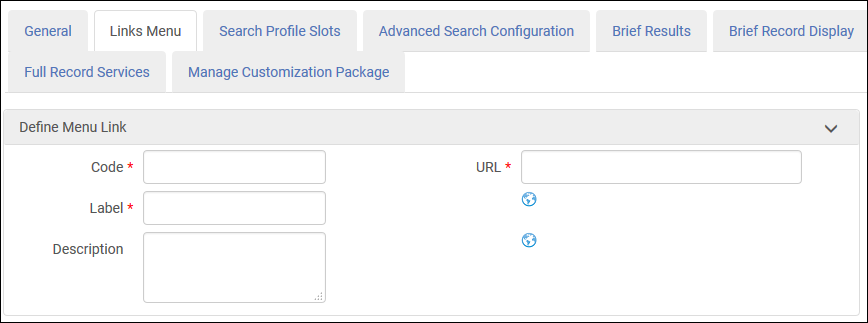 Define Menu Link Page
 -
Specify the following fields:
Fields for Define Menu Link Page Field Description Code
A unique name for this code.
Label
The default display label for this link.
Select the Globe button
 if you want to create translations for the label in the View Labels code table. For more information, see Configuring Display Labels.
URL
The page's URL.
- In the original UI – If you are adding a link to your institution's domain (such as query within your local catalog), specify a relative path and make sure that it does not start with a forward slash. For example:
discovery/search?query=any,contains,artificial%20intelligence&tab=LibraryCatalog&search_scope=MyInstitution&vid=PRIMO_OAP_INST:Alma&offset=0
All other links require a full path.
- In the NDE UI – All links require a full path, beginning with a forward slash. For example:
/nde/search?query=sea&tab=Everything&search_scope=MyInst_and_CI&searchInFulltext=true&vid=01COLSCHL_INST:TEST_NDE&lang=en
Description
The text that appears when users hover their cursors over the link. The following links are supported out of the box: Library Search, Journal Search, ILL Request, Fetch Item, Tags, Browse Search, Collection Discovery, Database Search, and Newspaper Search.
Select the Globe button
if you want to create translations for the text in the View Labels code table. For more information, see Configuring Display Labels. - In the original UI – If you are adding a link to your institution's domain (such as query within your local catalog), specify a relative path and make sure that it does not start with a forward slash. For example:
Deleting a Link from the Links Menu
The Links Menu tab enables you to delete user-defined links only. If you want to use a link at a later time, it is recommended that you deactivate it so that you do not have to reconfigure the link later. For more information, see Activating or Deactivating a Link on the Links Menu. Out of the box links (such as for Journal Search) cannot be deleted, only deactivated.
-
On the Views List page (Configuration Menu > Discovery > Display Configuration > Configure Views), edit your view and select the Links Menu tab.
-
If you have not already done so, you must select Customize to enable you to add and modify links.
-
Select Delete in the link's row actions list.
Activating or Deactivating a Link on the Links Menu
The Links Menu tab enables you to deactivate links that you are no longer using or are planning to use in the future. Deactivated links can be activated quickly without having to reconfigure the link. If you no longer need a user-defined link only, see Deleting a Link from the Links Menu.
Since Tags functionality is not supported in consortia environments, it is recommended that you deactivate the Tags code. In addition to the link in the Main Menu, the Tags Service is removed from the Full Display page.
-
On the Views List page (Configuration Menu > Discovery > Display Configuration > Configure Views), edit your view and select the Links Menu tab.
-
If you have not already done so, you must select Customize to enable you to add and modify links.
-
Toggle the slider in the row containing the link that you want to activate/deactivate.
Customizing and Translating a Link's Display Label and Tooltip
The Edit Menu Link page enables you to customize and translate a links display label and tooltip.
-
On the Views List page (Configuration Menu > Discovery > Display Configuration > Configure Views), edit your view and select the Links Menu tab.
-
If you have not already done so, you must select Customize to enable you to add and modify links.
-
Select Edit in the link's row actions list to open the Edit Menu Link Page.
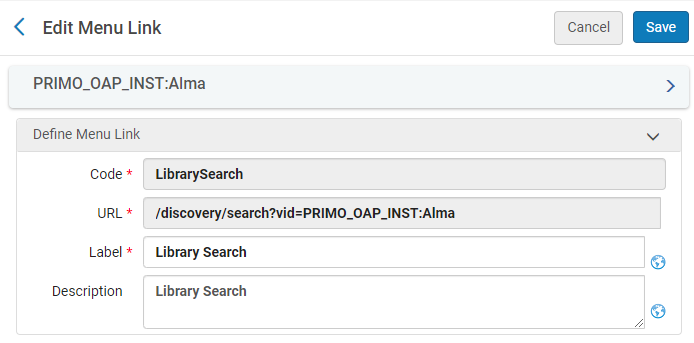 Edit Menu Link Page
 -
Specify the following fields:
Fields for Edit Menu Link Page Field Description Label
The default display label for this link.
Select the Globe button
if you want to create translations for the label in the View Labels code table. For more information, see Configuring Display Labels.Description
The text that appears when users hover their cursors over the link. The following links are supported out of the box: Library Search, Journal Search, ILL Request, Fetch Item, Tags, Browse Search, Collection Discovery, Database Search, and Newspaper Search.
Select the Globe button
if you want to create translations for the text in the View Labels code table. For more information, see Configuring Display Labels.
Ordering Links on the Links Menu
All options are performed on the Links tab of the View Configuration page: On the Views List page (Configuration Menu > Discovery > Display Configuration > Configure Views), edit your view and select the Links Menu tab. If you have not already done so, you must select Customize to enable you to add and modify links.
-
On the Views List page (Configuration Menu > Discovery > Display Configuration > Configure Views), edit your view and select the Links Menu tab.
-
If you have not already done so, you must select Customize to enable you to add and modify links.
-
Select the up/down arrows in the rows containing the slots that you want to move.
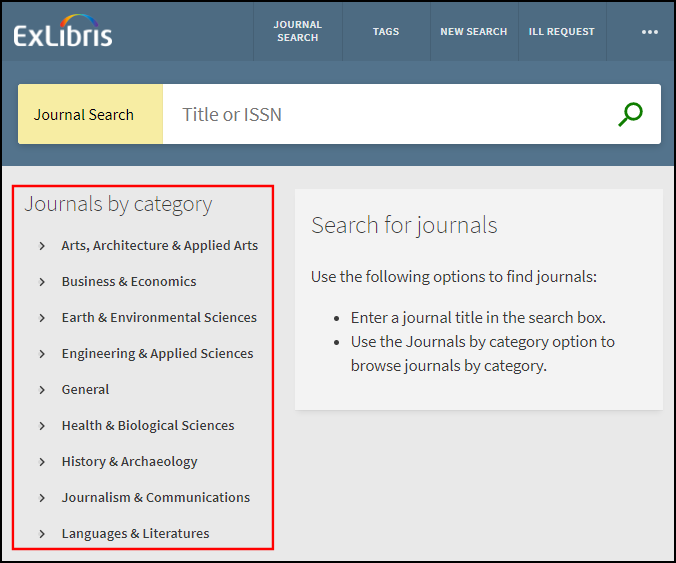
Configuring Category Browse for Journal Search
In addition to defining and activating the Journal Search link in the Links menu, you can also enable/disable Category Browse, which enables users to browse journals by category. For more details, see Configuring Journal Search for Primo VE.
-
On the Views List page (Configuration Menu > Discovery > Display Configuration > Configure Views), edit your view and select the Links Menu tab.
-
If you have not already done so, you must select Customize to enable you to add and modify links.
-
Edit the row that contains the Journal Search link to open the Edit Menu Link page.
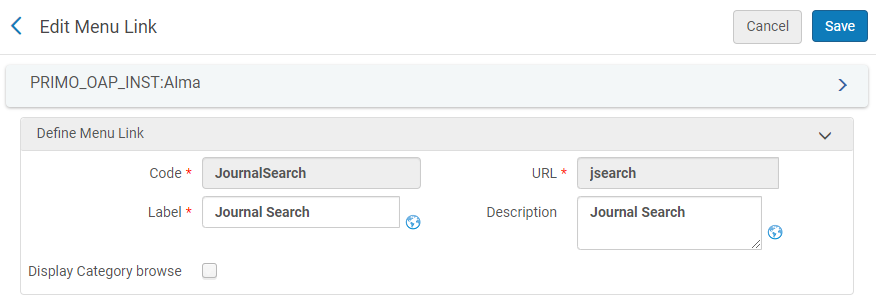 Edit Menu Link Page for Journal Search
 -
Select the Display Category browse checkbox to enable Category Browse.
When this option is enabled, the Teak your results (facets) section always appears on the left side of the page above the Journals by category section.
-
Select Save.
Configuring Browse Search
In addition to defining and activating the Browse Search link in the Links menu, you can also configure the browse search types and the order in which they appear in the Browse by drop-down list in Primo VE. Currently, the following types of browse searches are supported: Author, Title, Series, Subject, and Call Numbers of the following types: generic, Library of Congress (0), Dewey (1), and SUDOC (3). For more details, see Configuring Browse Search for Primo VE.
-
By default, Browse by Subjects utilizes Alma's Subjects (with MARC21 600 / 610 / 611 / 647) heading type mapping. If you prefer to exclude the 6XX fields, please open a ticket with Support.
-
Browse Search can return headings that contain records with suppressed or restricted holdings, but if the heading is selected, the suppressed records are omitted from the results and the following message is displayed:
Some records are not displayed since they are restricted / suppressed from display.
-
On the Views List page (Configuration Menu > Discovery > Display Configuration > Configure Views), edit your view and select the Links Menu tab.
-
If you have not already done so, you must select Customize to enable you to add and modify links.
-
Edit the row that contains the Browse Search link to open the Edit Menu Link page.
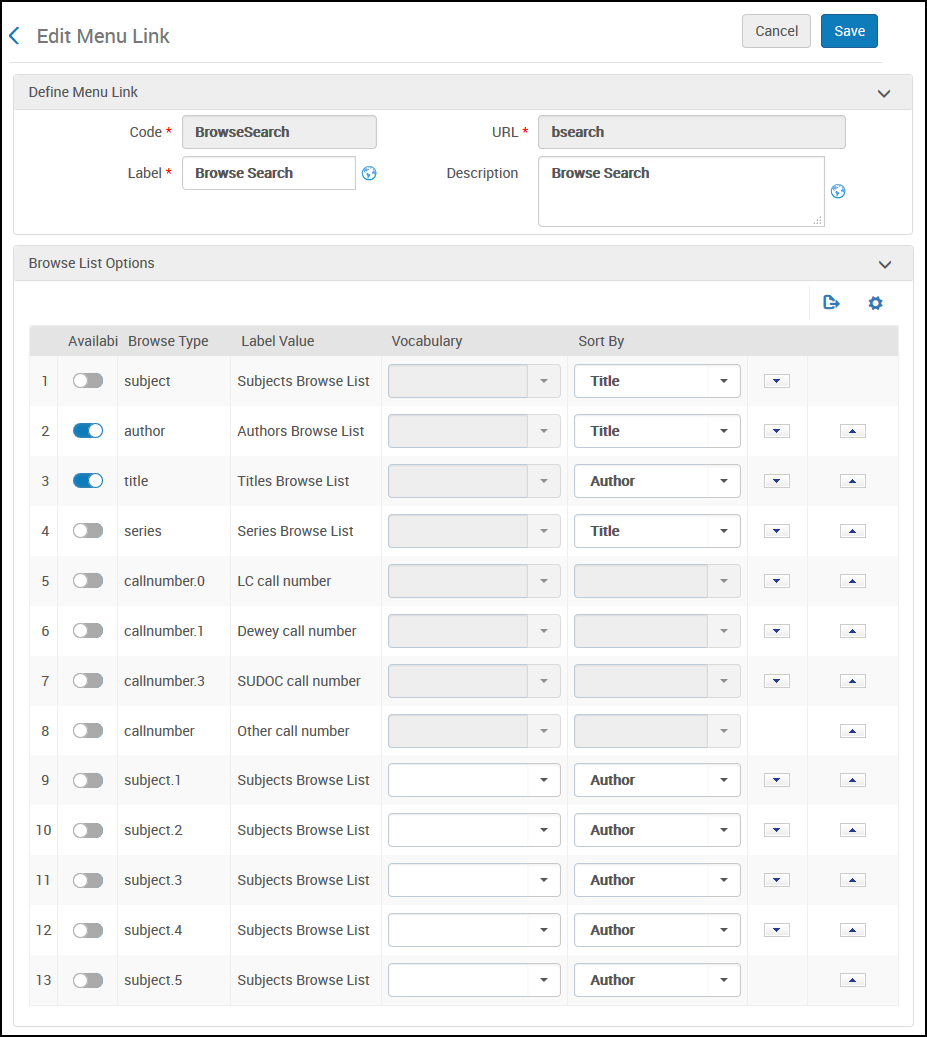 Edit Menu Link Page for Browse Search
 -
For each Browse Type that you want to display in the Sort by drop-down list, specify the following fields:
-
Availability – Select this field to activate the browse type.
-
Vocabulary – For Subject browse types only, select the vocabulary that you want to use for browse.
By default, Browse by Subjects utilizes Alma's Subjects (with MARC21 600 / 610 / 611 / 647) heading type mapping. If you prefer to exclude the 6XX fields, please open a ticket with Support. If you are looking to include missing 651 terms from the Browse Search Vocabulary LCSH results, set this field to Library of Congress name authority records for 651.
-
Sort By – Select one of the following sort options: Author, Title, Date - newest, and Date - oldest.
-
-
Select the up/down arrows as needed to order the browse types in the Browse by drop-down list.
-
Select Save.
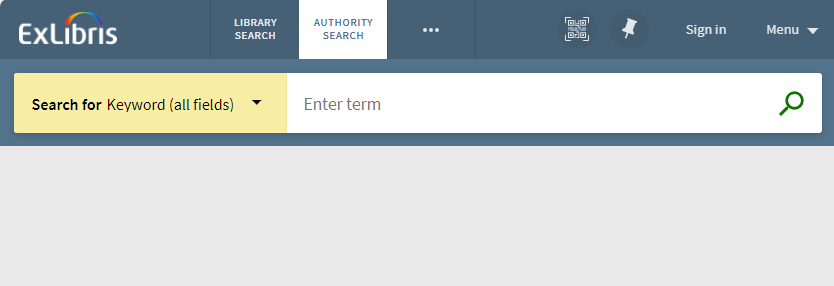
Configuring Authority Search
Primo VE's Authority Search is an enhanced user experience that is generated from the local authorities configured in the library. For this page, you can configure the search fields from which users can select in the Search for field: Keyword (any field), Personal Name, Corporate Name, Meeting Name, Name, Subject, Geographic Term, Genre/Form Term, and Uniform Title. In addition, you specify the order of these search fields. The first search field in the list is the default. For more information, see Configuring Authority Search for Primo VE.
-
On the Views List page (Configuration Menu > Discovery > Display Configuration > Configure Views), edit your view and select the Links Menu tab.
-
If you have not already done so, select Customize to add and modify links.
-
Edit the row that contains the AuthoritySearch code to open the Edit Menu Link page.
 Specify Search Fields for Authority Searches
 -
In the Availability column under the Authority List Options section, activate the search fields that you want to appear in the Search for drop-down field on the Authority Search page.
-
Using the row handle, drag and drop the rows to position the search fields in the Search for drop-down field on the Authority Search page. The first search field appears on the top of the list and is the default.
-
In the Active column under the Sort section, activate the sort types (Relevance and Title) you want to appear on the Authority Search page.
-
Using the row handle, drag and drop the rows to position the sort types on the Authority Search page. The first sort type appears on the top of the list and is the default.
-
Select Save to return to the Views List page.
-
Activate the row that contains the AuthoritySearch code.
Configuring Search Profile Slots
Search profile slots, comprised of one or more search profiles (see Configuring Search Profiles), enable users to narrow their searches to material under specific categories (such as the full catalog, journals, or items from a specific campus only). The search profile slots appear in the following areas in the UI:
-
Below search box – As users type characters in the search box, they can choose a specific active slot for their search query:
 Below Search Box while Typing
 -
Next to the search box on the Results List page – A slot drop-down list appears next to the search box to enable users to perform additional search queries with any of the active slots:
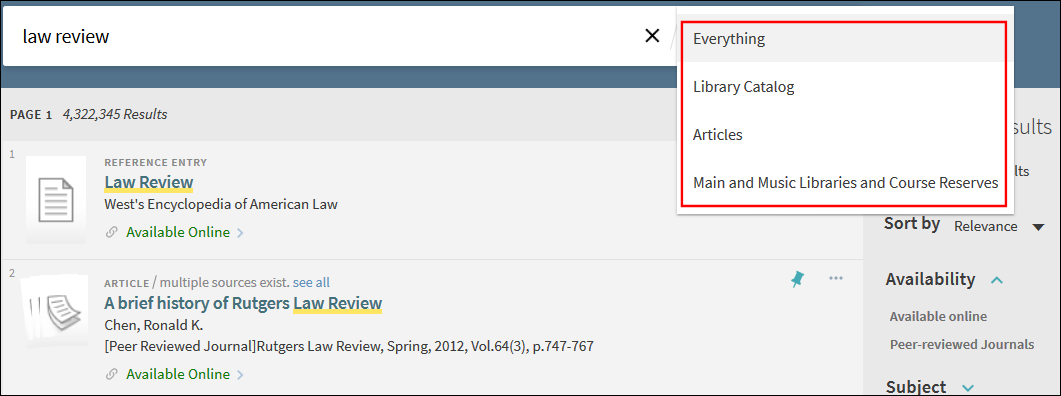 Search Box with Search Scopes
Adding a Search Profile Slot
The Search Profile Slots tab enables you to configure one or more search profile slots per view. For each search profile slot, you can specify which search profiles (see Configuring Search Profiles) to include and the order in which the slots appear in the UI.
A maximum of 8 search profile slots will appear for basic search.
-
Edit your view on the Views List page (Configuration Menu > Discovery > Display Configuration > Configure Views) to open the View Configuration page.
-
Select the Search Profile Slots tab.
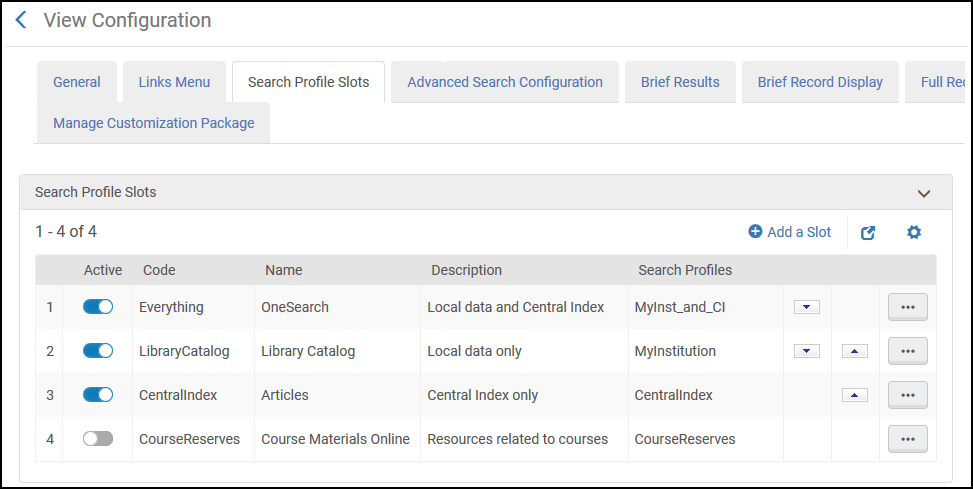 Search Profile Slots Tab
 -
Select Add a Slot to open the Define Slot Page.
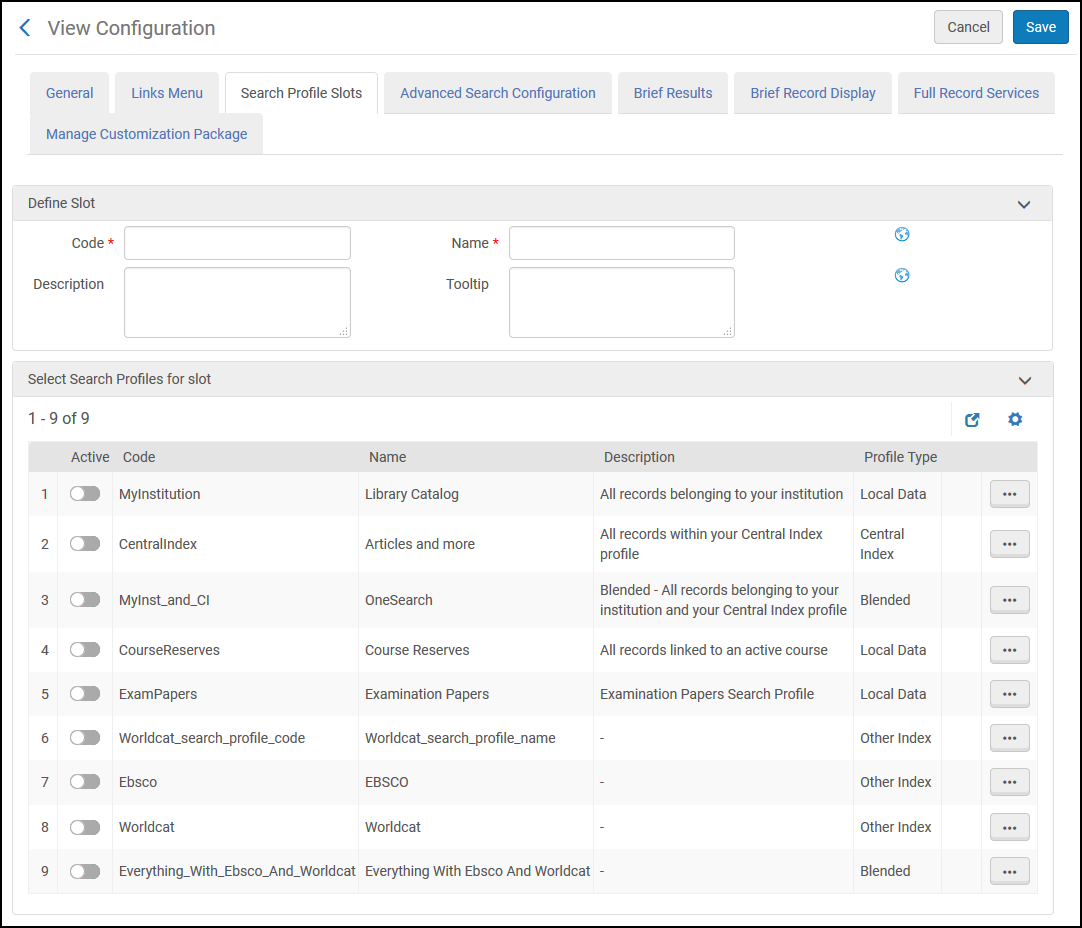 Define Slot Page
 -
In the Define Slot section, specify the following fields:
Fields for Add a Slot Page Field Description Code
Specify a unique name for this slot.
Name
Specify the display label for this slot.
Select the Globe button
if you want to create translations for the label in the View Labels code table. For more information, see Configuring Display Labels.Tooltip
Specify the tooltip for this slot, which appears only in the Advanced Search window.
Select the Globe button
if you want to create translations for the tooltip in the View Labels code table. For more information, see Configuring Display Labels.Description
Optional text to describe the slot.
-
In the Select Search Profiles for slot section, activate the search profiles you want to include with the new slot. As you activate a row, it moves to the top of the list. You can use up/down arrows to change its order.
-
Select the up/down buttons as needed to change the order of the active search profiles.
-
Select Save.
Adding Featured Results to a Search Profile in a Slot
The Featured Results Bar feature enables you to display additional relevant records not in the same scope as those returned in the selected search profile or to highlight records of a specific type in the same or different search scope. Here are some examples which are not limited to CDI search scopes:
-
You want to return featured CDI articles (Search Profile = CentralIndex) in a search profile that returns only local records (Search Profile = MyInstitution).
-
You want to include featured images in search results in which images were excluded. For greater emphasis, you can return featured images in search results in which images were already included.
-
You want to include featured collections in search results where collections do not usually appear.
When this functionality is enabled, a Featured Results Bar appears after the third record on the first page of the brief results. Within the bar, the highest-ranked records appear first. The bar does not display after selecting a facet or navigating to another page in the results. If the original query does not return results, the system does not display any featured results. For each Featured Result mapping, you can specify either of the following formats for the bar:
-
List – The Featured Results Bar displays up to 10 items that include only the title. Users can scroll left or right to see the items in the horizontal list. If the title exceeds seven rows, an ellipsis is added to the end of the seventh row to indicate that the title is incomplete.
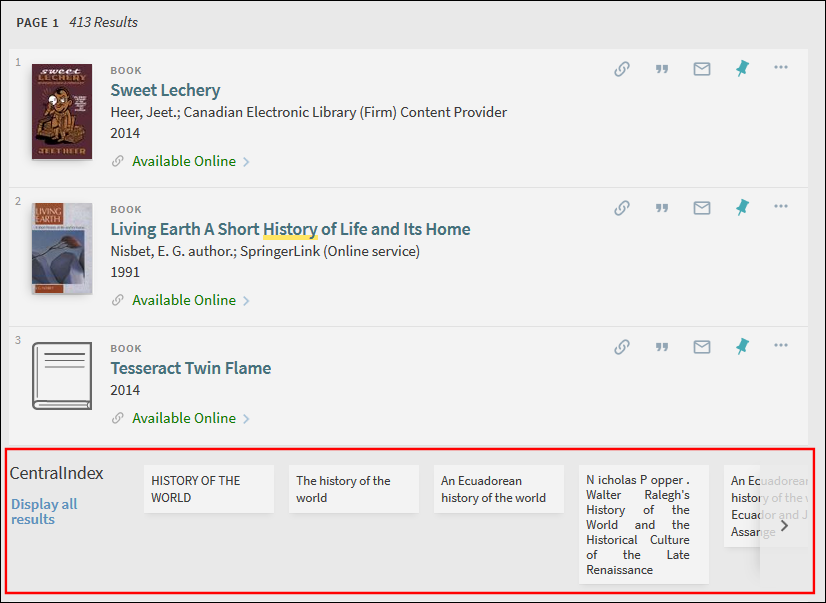 List Format
 -
Thumbnail – The Featured Results Bar displays up to 10 items that include a constant-size thumbnail with the title below it. Users can scroll left or right to see the items in the horizontal list. If the title exceeds four rows, an ellipsis is added to the end of the fourth row to indicate that the title is incomplete.
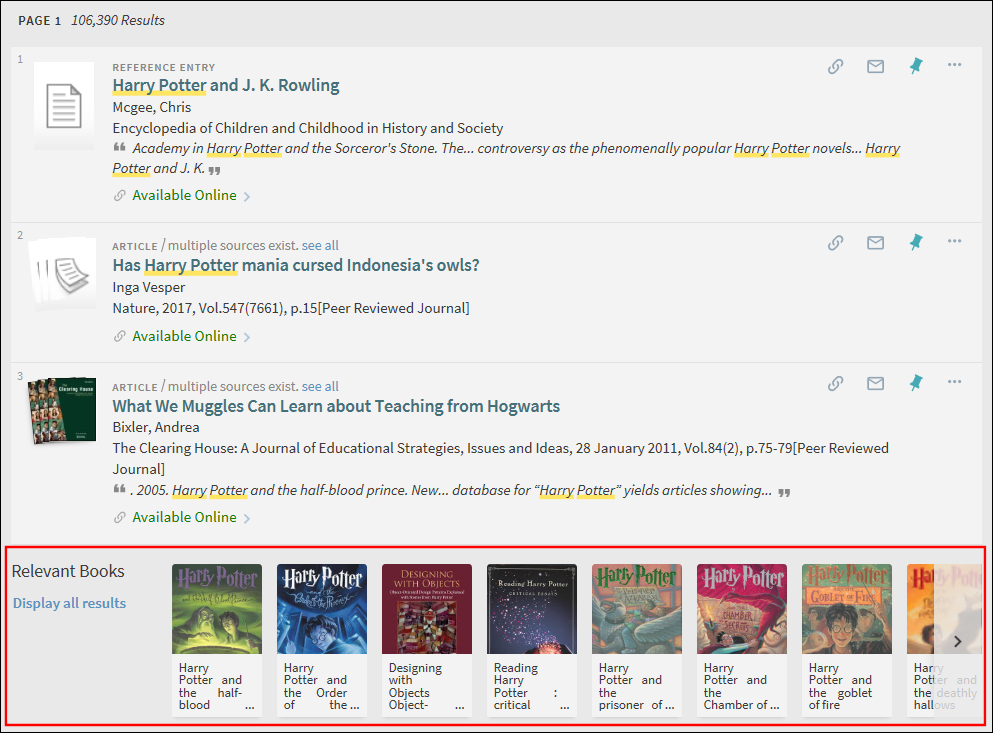 Thumbnail Format
-
On the Views List page (Configuration Menu > Discovery > Display Configuration > Configure Views), select the Search Profile Slots tab.
-
Edit the search profile slot to which you want to add the Featured Results Bar.
The Edit Profile Slot page opens.
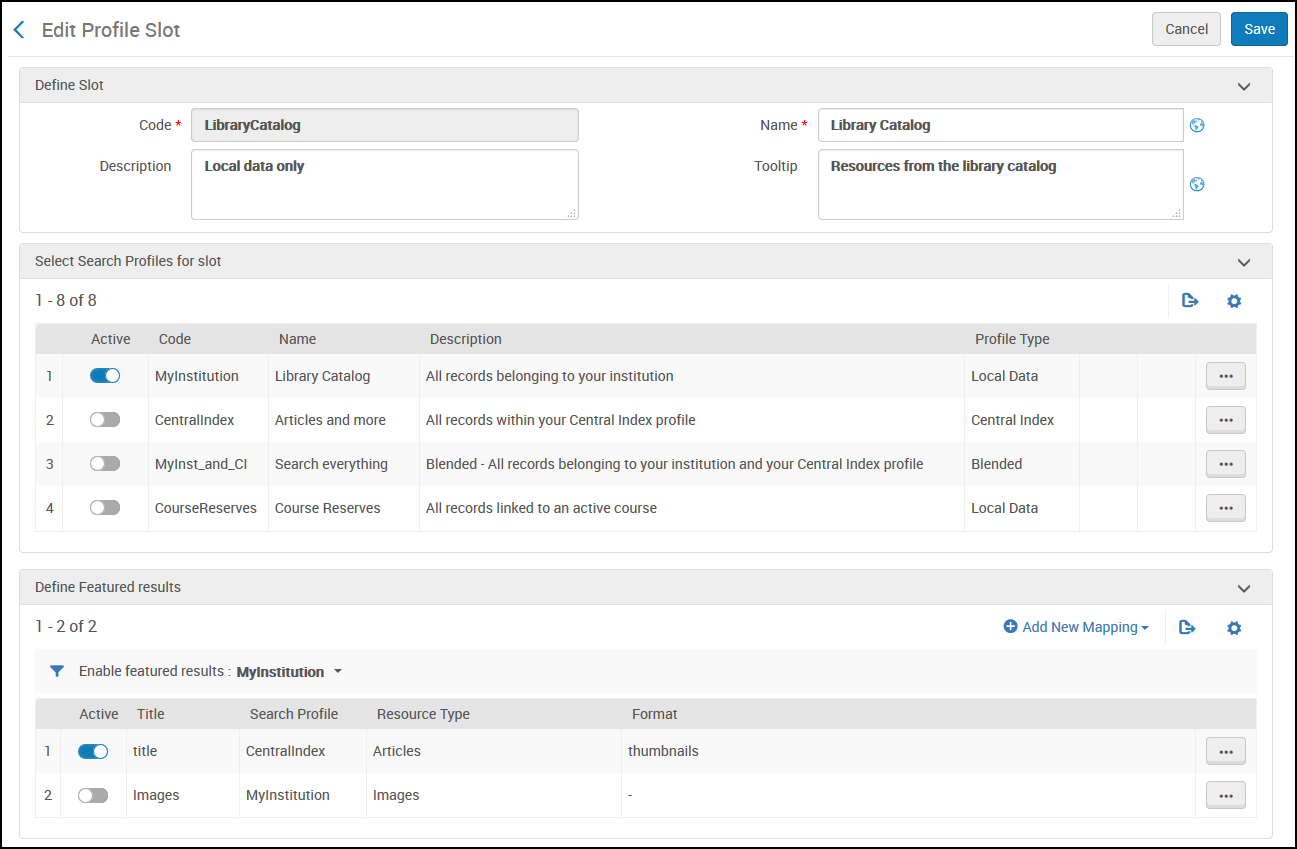 Edit Profile Slot Page
 -
If you want to see which mappings are defined for each search profile (per slot), select the profile from the Enabled feature results field in the Define Featured Results section. If a mapping has been activated, the Featured Results Bar will appear in results if users select that slot and search profile in the UI.
-
To add a new mapping to a search scope:
-
Select Add New Mapping to open the Add New Mapping dialog box.
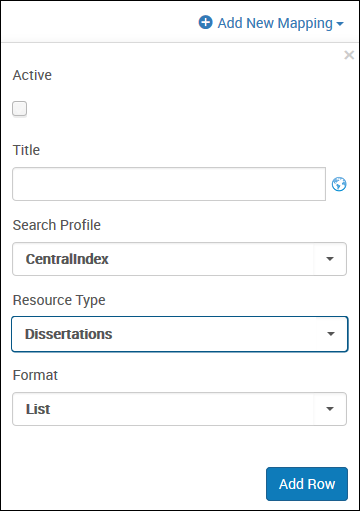 Add New Mapping Dialog Box
 -
Specify the following fields in the dialog box to select which types of records will appear in the Featured Results Bar for this search profile:
-
Active – Select this checkbox to activate the Featured Results Bar for this slot and search scope. If you already have an active mapping row for this search profile, you must activate it later from the list of mapping rows.
-
Title – Specify the display title for the Featured Results Bar.
-
Search Profile – Select the search profile used as the source of the records displayed in the Featured Results Bar.
-
Resource Type – Select All items or the resource type of the records you want displayed in the Featured Results Bar.
-
Format – Select one of the following display formats for the Featured Results Bar: List or Thumbnail.
-
-
Select Add Row to save the mapping row to the search profile's list. If a search scope is used in another slot, separate mapping lists are maintained per slot.
-
-
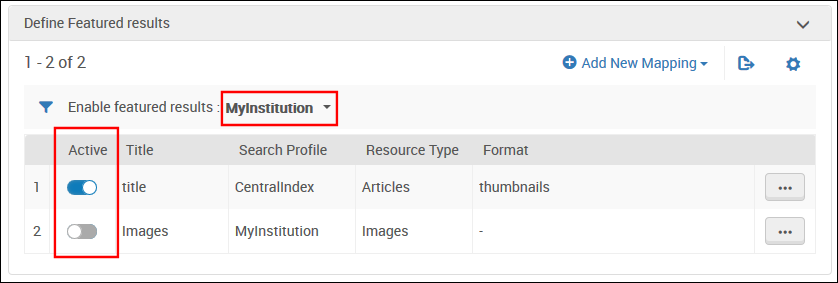
To activate the Featured Results Bar for a search profile:
 Activate a Mapping Row
-
Select the search profile from the Enabled featured results field to display its possible mappings.
-
Activate the mapping row you want to use for the scope of the Featured Results Bar.
Because only one mapping row can be active, you may need to deactivate a mapping row before activating another one.
-
-
Select Save to save the changes to your profile slot.
Deleting a Search Profile Slot
The Search Profile Slots tab enables you to delete search profile slots.
On the Search Profile Slots tab, select Delete from the row actions list.
Activating/Deactivating a Search Profile Slot
The Search Profile Slots tab enables you to activate or deactivate search profile slots.
Configuring Advanced Searches
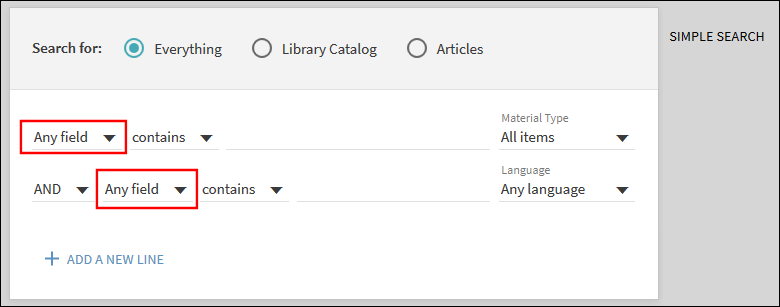
The Advanced Search Configuration tab enables you to manage the following configuration lists:
-
List of Indexes – This list defines the fields that appear in the Search Field drop-down list for advanced searches.
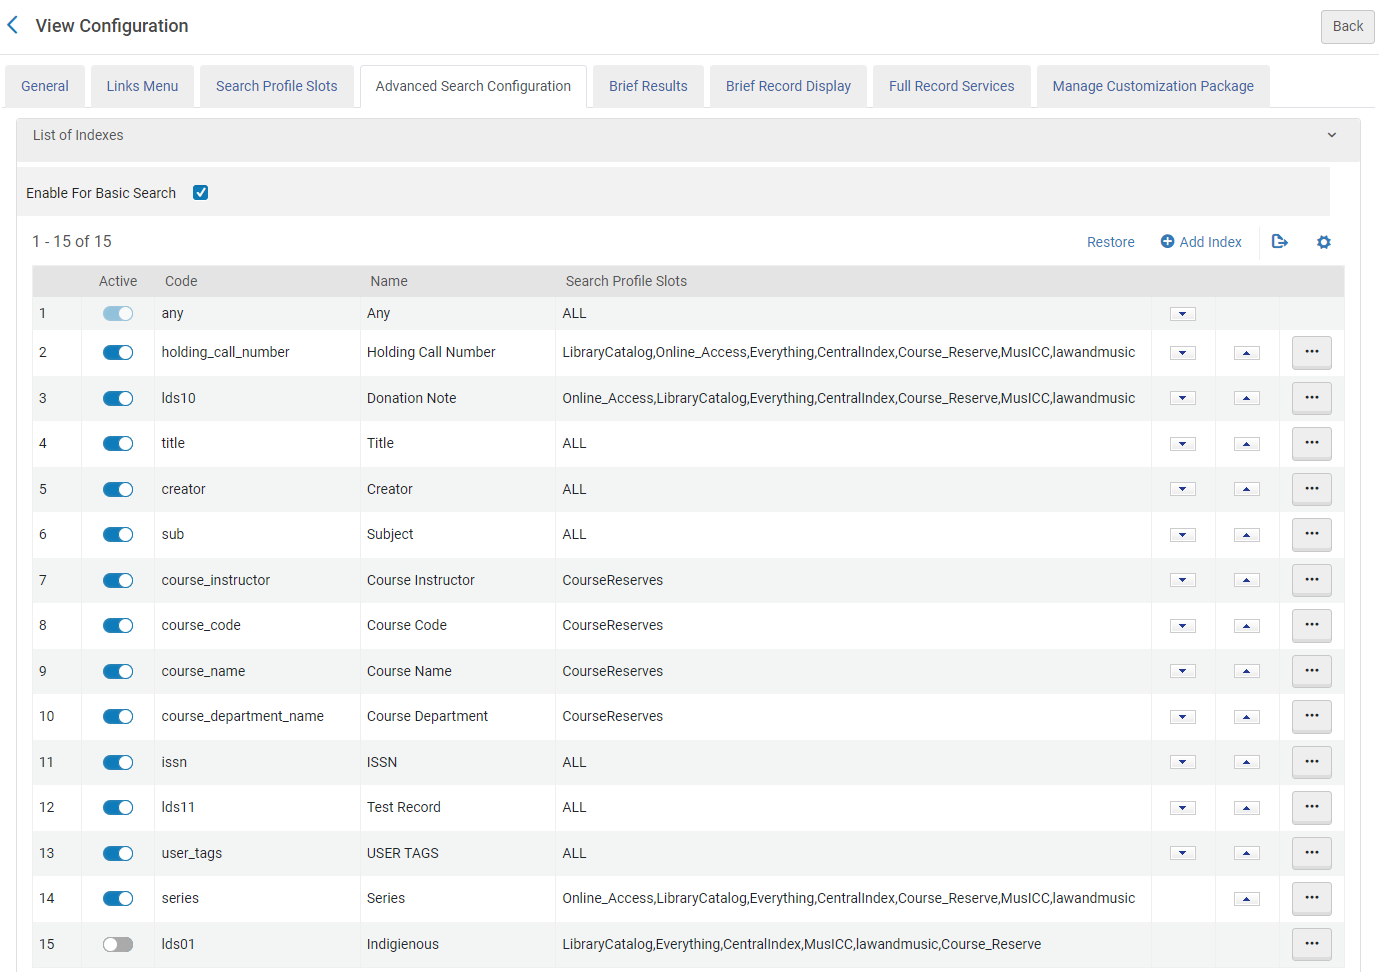 List of Indexes Section
 -
List of Resource Types – This list defines the resource types that appear in the Material Type drop-down list for advanced searches. Note that this Material Type drop-down list is filtering by Primo VE's resource types, not Alma's Material Type.
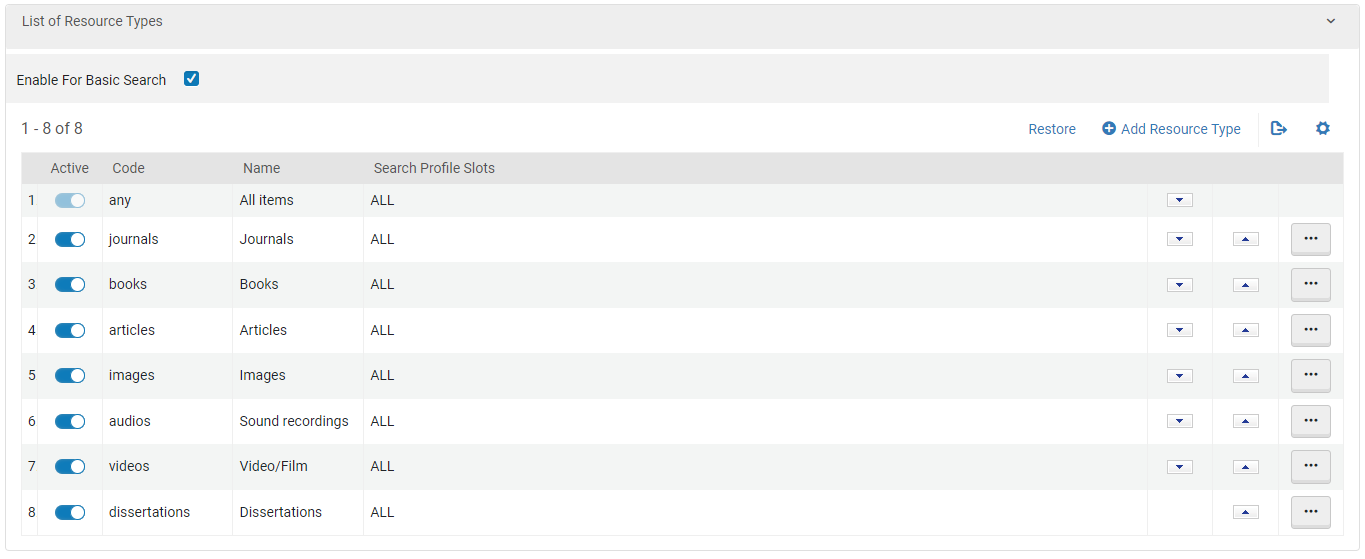 List of Resource Types Section
 -
List of Languages – This list defines the languages that appear in the Language drop-down list for advanced searches.
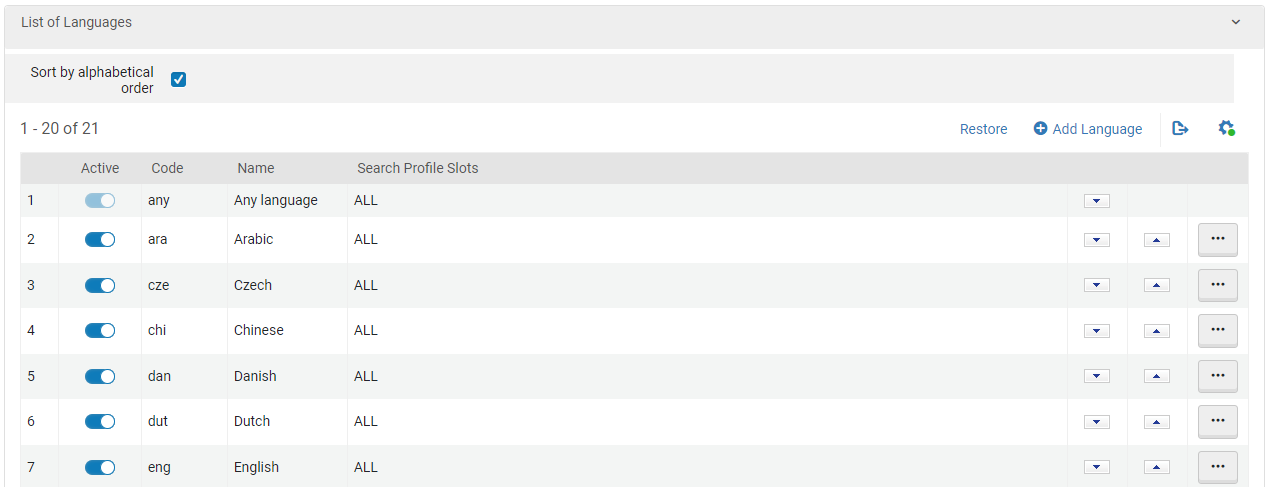 List of Languages Section
 -
Search Operators – This list configures the supported search operators on the Advanced Search page.
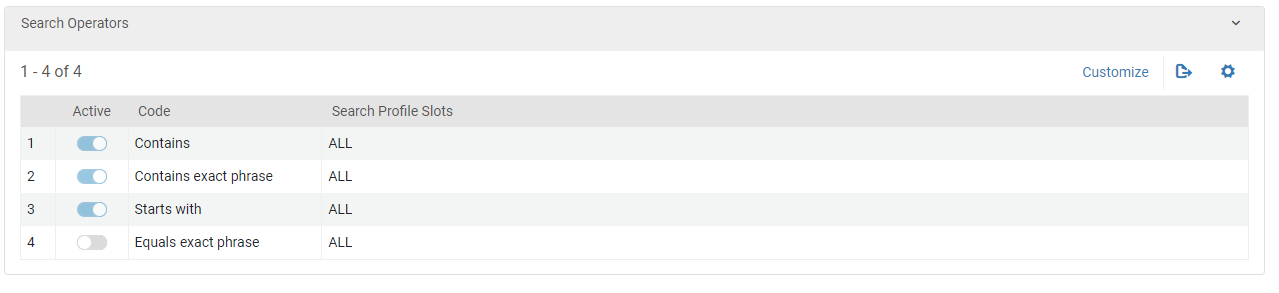 Search Operators Section
When using the Equals exact phrase search operator, note the following constraints:
- For Author/Creator searches, matches are restricted to subfield a of MARC fields 100 and 700. If you want to include additional information (such as dates or non-preferred terms) in the exact phrase, use the Contains exact phrase search operator.
- For Title searches, if the resource has both a title and a subtitle, by default, the resource is only retrieved if both the complete title and the complete subtitle are in the search string (separated by a colon). This setting can be modified, so that local resources are also retrieved if only the title is specified in the search string. When this option is turned on, local titles are retrieved if they match either MARC 245 $a$b or 245 $a. For example, when this option is turned on by the institution, if the end-user searches for the book, Water: Perspectives, Issues, Concerns, by entering the search string either as Water: Perspectives, Issues, Concerns or simply as Water, the book's record is retrieved.
To turn this option on:- In the Primo settings (Configuration menu > Discovery > Other > Customer Settings), set the value of the title_equals_exact_phrase_one_subfield parameter to true.
- Contact technical support and ask them to re-index the database.
Note that this option only applies to local records. Even when this option is turned on, if a search is initiated with the equals exact phrase operator, CDI records are only returned if the search term includes both their titles and subtitles.
For each type of list, you can add and delete items (except for Search Operators), change the order of items that appear in the Advanced Search drop-down lists (Search Index, Material Type, and Search Operators only), and indicate which search profiles can display each item.
Related documentation:
-
For details on how information is mapped from the source records to the search indexes in Primo VE, see the Search sections in Mapping to the Display, Facets, and Search Sections in the Primo VE Record.
-
For details regarding the Advanced Search page, see Performing Advanced Searches in Primo VE.
Adding a Search Index, Resource Type, or Language to Advanced Searches
The following lists on the Advanced Search Configuration tab enable you to add items to the associated drop-down lists in the UI: List of Indexes, List of Resource Types, and List of Languages.
-
To enable the Search Inside service on the Full Display page (see Configuring the Full Display Page), you must define the ISSN field as a search index for advanced searches.
-
For starts with search types, the search terms must be found at the start of the Title or holdings call number fields. For title searches, Primo VE checks the MARC21 fields 130 (journals) and 245 (other) and takes into account nonfiling characters and stop words to match records.
-
On the Views List page (Configuration Menu > Discovery > Display Configuration > Configure Views), edit your view to open the View Configuration page.
-
Select the Advanced Search Configuration tab.
-
If you have not already done so, select Customize to enable you to modify the configuration list.
-
In the relevant section, select one of the following to open its specific dialog box:
-
Add Index – Opens the Add Index dialog box. For more details about each index, see Mapping to the Display, Facets, and Search Sections in the Primo VE Record.
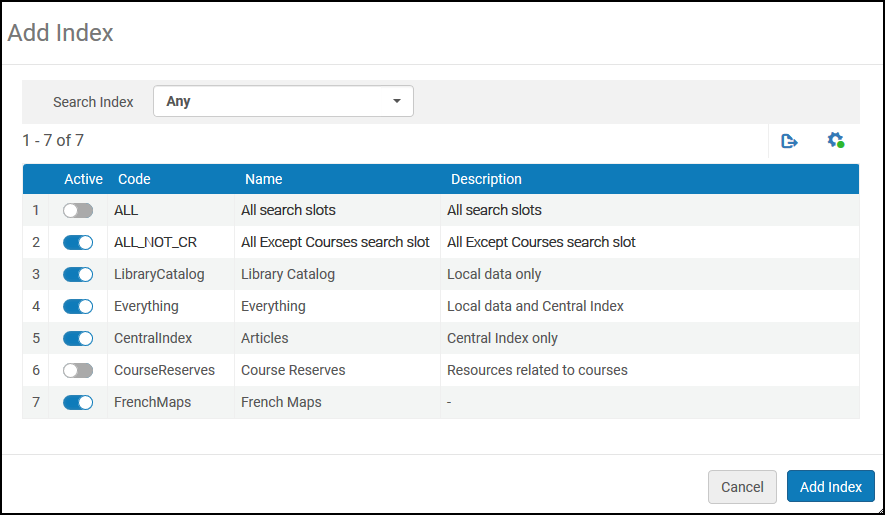 Add Index Dialog Box
 -
Add Resource Type – Opens the Add Resource Type dialog box. For more details on each resource type, see Mapping to the Display, Facets, and Search Sections in the Primo VE Record.
-
Add Language – Opens the Add Language dialog box.
-
-
Depending on the dialog box, select a search index, material type, or language from the relevant drop-down list.
-
Specify the relevant search profiles with which the new item is associated. Do this by toggling the slider of one or more search profiles to build a custom list of search profiles, or toggle the slider next to either of the following options:
-
ALL – This option selects all search profiles including custom search profiles.
-
ALL_NOT_CR – This option selects all search profiles (including custom search profiles) except for CourseReserves.
-
-
Depending on the dialog box, select Add Index, Add Resource Type or Add Language to save the new item.
-
Ensure that the new item has been activated.
Deleting a Search Index, Resource Type, or Language from Advanced Searches
The following lists on the Advanced Search Configuration tab enable you to delete items from the associated drop-down lists in the UI: List of Indexes, List of Resource Types, and List of Languages.
Activating/Deactivating a Search Index, Resource Type, Language, or Search Operator for Advanced Searches
The following lists on the Advanced Search Configuration tab enable you to activate or deactivate items from the associated drop-down lists in the UI: List of Indexes, List of Resource Types, List of Languages, and Search Operators.
Changing the Order of Search Indexes, Resource Types, Languages, or Search Operators for Advanced Searches
The following lists on the Advanced Search Configuration tab enable you to order the items in the associated drop-down lists in the UI: List of Indexes, List of Resource Types, List of Languages, and Search Operators.
The Sort by alphabetical order checkbox in the List of Languages section, overrides the ordering and instead alphabetizes the language based on the default or selected language in the UI.
Changing the Supported Search Profile Slots for Search Operators
The Search Operators list on the Advanced Search Configuration tab enables you to select which search profile slots display for each search operator.
-
Select the Advanced Search Configuration tab and scroll to the Search Operators section.
-
If this is the first customization, select Customize. Otherwise, skip this step or select Restore to return to the default settings.
 Search Operators Section
 -
For each search operator, select its Edit row action to configure the supported search profile slots.
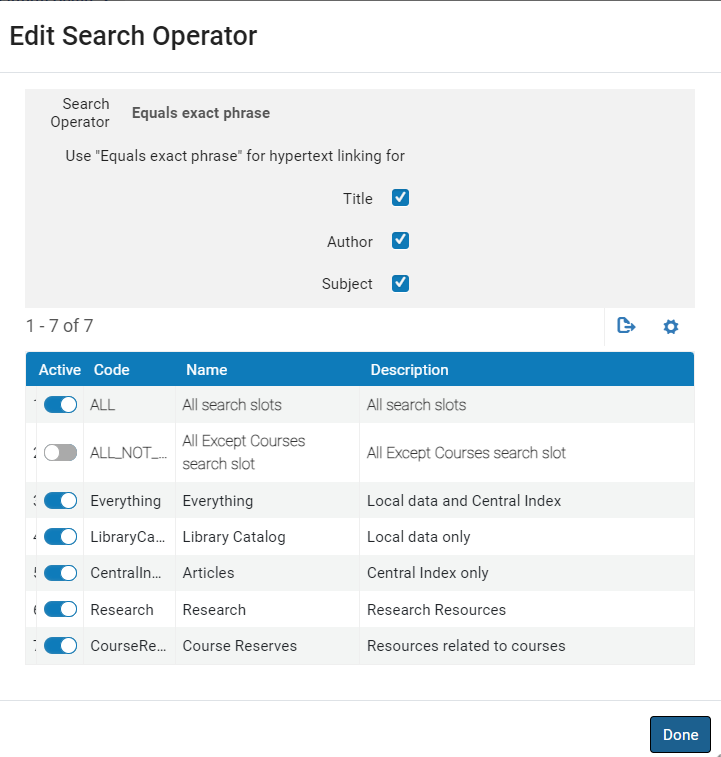 Equals Exact Phrase Option Default Settings
 -
Updated for May 2024 - For the Equals exact phrase search operator only, select the Title, Author, and Subject checkboxes under the Use "Equals exact phrase" for hypertext linking for field if you want to use this operator instead of using the hypertext linking definitions for title, author, and subject links in the Details section of each record's full display. These checkboxes are enabled by default. For more details, see Configuring Hypertext Link Definitions for Primo VE.
If this checkbox is cleared or the Equals exact phrase search operator is disabled, hypertext linking definitions are used.
-
Activate/deactivate search profile slots as needed for the search operator.
-
Select Done.
Enabling Pre-Filters for Basic Searches
For basic searches using the original UI only, you can enable users to limit their initial search results by selecting the following filters prior to executing the search:
-
Resource Type – This filter enables users to narrow their searches to a specific type of resource (such as books or journals). If disabled, searches include all resource types.
-
Search Type – If filtering by search field is enabled, this filter enables users to select from the following options:
-
that contain my query words – The search terms must be found in the selected search field.
-
with my exact phrase – The exact phrase must be found in the selected search field.
-
begins with – The search terms must be found at the start of the Title field, which is taken from the following MARC 21 fields: 130 (journals) and 245 (other).
-
-
Search Field – This filter enables users to narrow their searches to a specific search field (such as the author or title) using the operation selected in the Search Type drop-down list. If disabled, searches include all search fields in the record.
On the Advanced Search Configuration tab, select the Enable for Basic Search checkbox under the following sections:
-
List of Indexes – When selected, this option displays the Search type and Search Field drop-down lists below the basic search box.
-
List of Resource Types – When enabled, this option displays the Resource Type drop-down list below the basic search box.
When any of the above options are enabled, you cannot use the Resource Type Filter Bar. For more details, see Configuring the Brief Results Page.
Labels for the Pre-filter drop-down lists are defined in the Basic Search Pre-Filters Labels code table. For more information, see Configuring Display Labels for Primo VE.
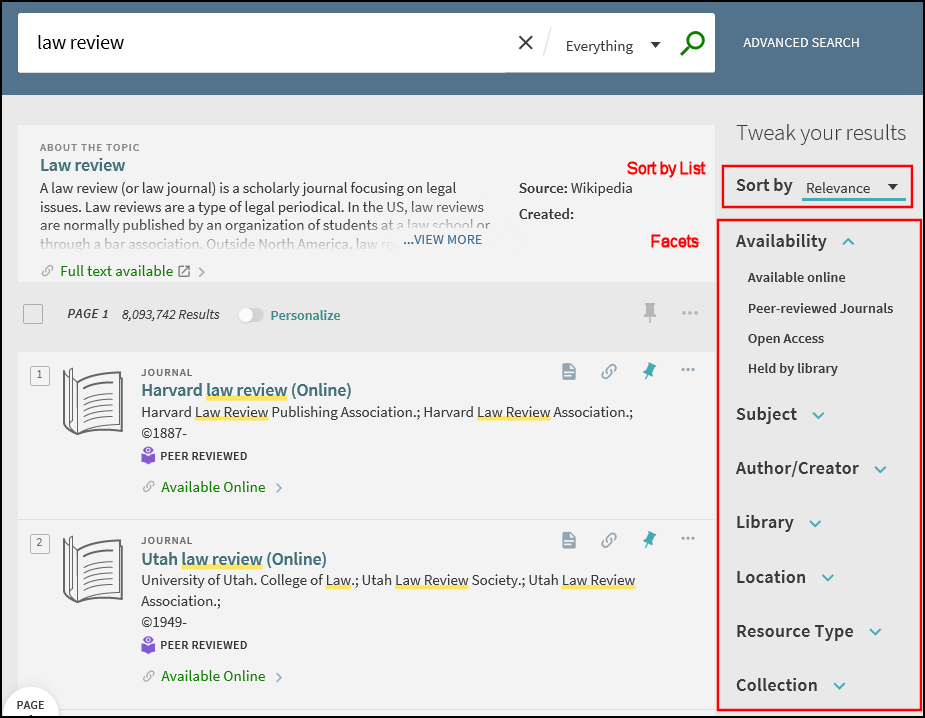
Configuring the Brief Results Page
The Brief Results page in Primo VE opens after a user performs a search. Besides the results themselves, this page includes facets and the Sort by list.

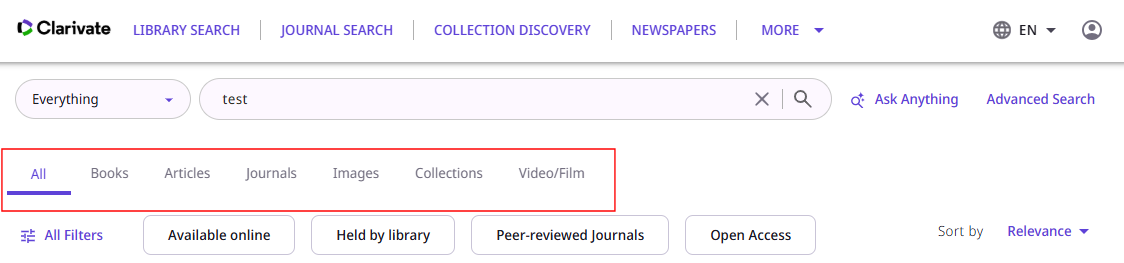
Configuring the Quick Filters (NDE UI Only)
Quick filters enable users to filter search results quickly by commonly used facets: Available On Shelf, Full Text Online, Held by library, Peer-reviewed Journals, and Open Access. For the NDE UI only, you can configure which quick filters appear and their order. Note that the Available On Shelf facet only appears when the enable_available_on_shelf_top_level_facet parameter is set to true.

This configuration is for the NDE UI only and appears only for NDE UI views.
-
Edit your view on the Views List page (Configuration > Discovery > Display Configuration > Configure Views) to open the View Configuration page.
-
Select the Brief Results tab.
 Brief Results Tab - Quick Filters Section
 -
If you have not already done so, select Customize in the Quick Filters section to enable you to modify facets.
-
In the Active column, activate the Quick Filters that you want to appear in the Brief Results. The Open Access filter is the only Quick Filter not activated by default.
-
You can modify the order of the Quick Filters by grabbing a Quick Filters handle icon and moving the row up or down to its preferred position.
Configuring the Facets of the Brief Results Page
Facets enable users to filter search results based on specific metadata (such as resource type and author). When expanded, a facet displays a list of values and the number of results found with each value. The Brief Results tab enables you to configure how facets appear in the brief results. For details on how information is mapped from the source records to facet values in Primo VE, see the Facet sections in Mapping to the Display, Facets, and Search Sections in the Primo VE Record.
Facet Panel
The facets are displayed in the Facet panel beside the search results. By default, the panel is closed. To open it, select  .
.
If the user opens or closes the Facet panel during a single session, it remains in its last state until the user opens or closes it again, even if the user initiates another search. When the session ends, the panel returns to its default state.
In the NDE UI, you can choose whether the Facet panel is open or closed at the beginning of each session.
-
Edit your view on the Views List page (Configuration Menu > Discovery > Display Configuration > Configure Views) to open the View Configuration page.
-
In the Brief Results tab, in the Facets section, select Show Filters Panel By Default.
This setting has no effect on the mobile UI.
Editing a Facet
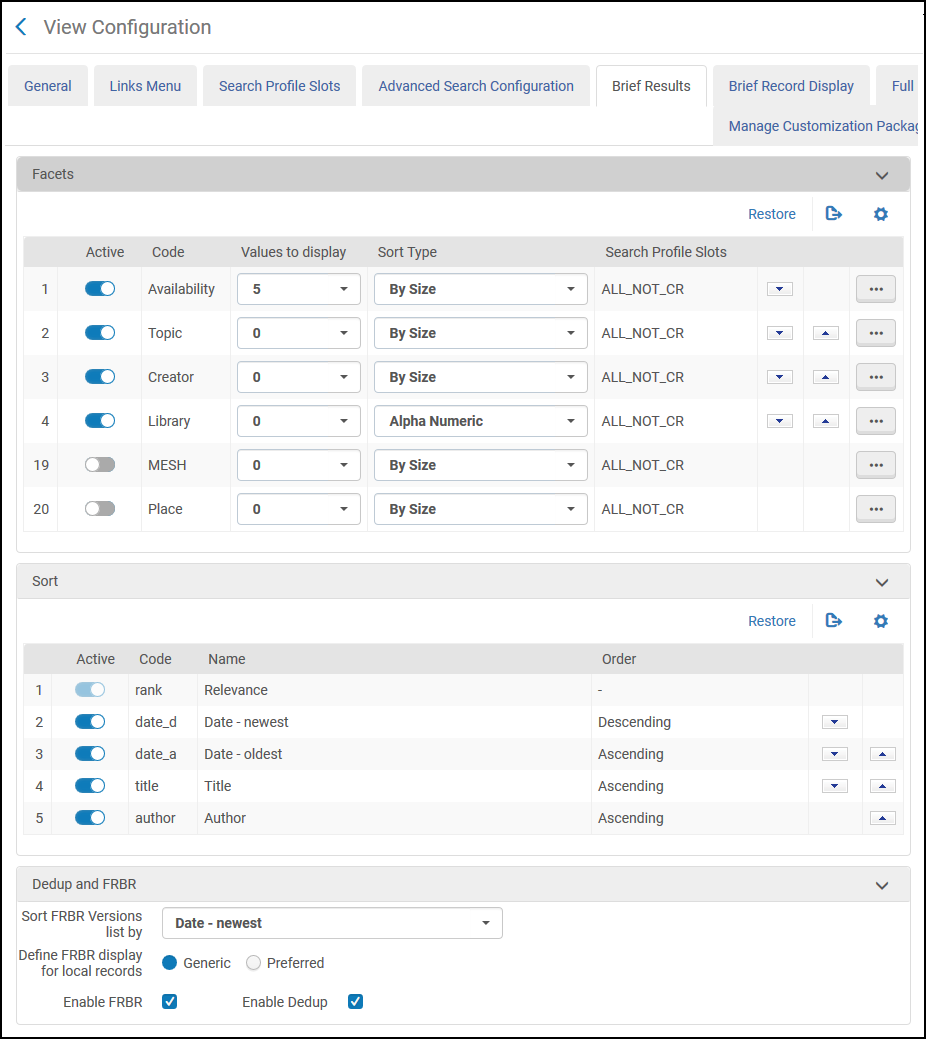
For each facet, the Brief Results tab enables you to configure the number of values to display, sort type, search profile slots, and whether it is active (see Activating/Deactivating a Facet).
For the New Records facet, users can display records created in Alma in the last week, month and three months. For consortia with a Network Zone (NZ), a record's creation date is based on the date it is added to the NZ.
Because the By Size sort option is unsupported for the New Records facet, its facet values may not appear in the expected order.
For the Digital Collection facet, users can display all titles under a top-level collection or its subcollections. Top-level collections are typically used primarily for digital records in Alma, but any type of record is supported. For more information, see Managing Collections.
For more information on facets, see Mapping to the Display, Facets, and Search Sections in the Primo VE Record.
-
Edit your view on the Views List page (Configuration Menu > Discovery > Display Configuration > Configure Views) to open the View Configuration page.
-
Select the Brief Results tab.
 Brief Results Tab
 -
If you have not already done so, in the Facets section, select Customize to enable you to modify facets.
-
In the Values to display field, specify the maximum number of facet values you want to display without expanding the facet. For example, the Library facet is set to 2, while the other facets are set to 0.
By default, the system displays the top 20 values when the facet is expanded in the UI by clicking Show More (unless you are searching in a blended search engine, the maximum number of facets could be higher). To increase the maximum number of facet values, see the discovery_facet_limit customer parameter.
-
Select one of the following values from the Sort Type drop-down list: By Size (descending order) or Alphanumeric. If None is specified, the order may appear random.
-
If you want to modify a facet's search profile slots, edit the row containing the item that you want to modify. The Edit Facet Slots dialog box opens.
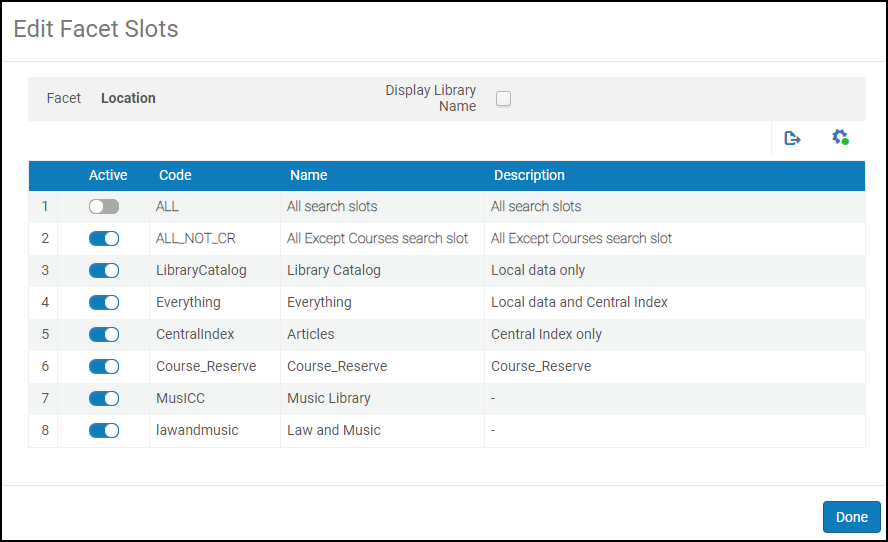 Edit Facet Slots Dialog Box for the Location Facet
 -
Toggle the slider of one or more search profiles or one of the following options:
-
ALL – This option selects all search profiles including custom search profiles.
-
ALL_NOT_CR – This option selects all search profiles (including custom search profiles) except for CourseReserves.
-
-
Select Done to return to the list of facets in the Facets section.
Displaying the Library Name with the Location Facet
Since location names in Alma are not always unique, institutions with the exact location name in multiple libraries (such as Stacks and Periodicals) will see repeated values in the Location facet, making it difficult to find items at a specific library.
-
Edit your view on the Views List page (Configuration Menu > Discovery > Display Configuration > Configure Views) to open the View Configuration page.
-
Select the Brief Results tab.
-
If you have not already done so, in the Facets section, select Customize to enable you to modify facets.
-
Edit the row containing the Location facet. The Edit Facet Slots dialog box opens.
-
Select the Display Library Name checkbox.
-
Select Done.
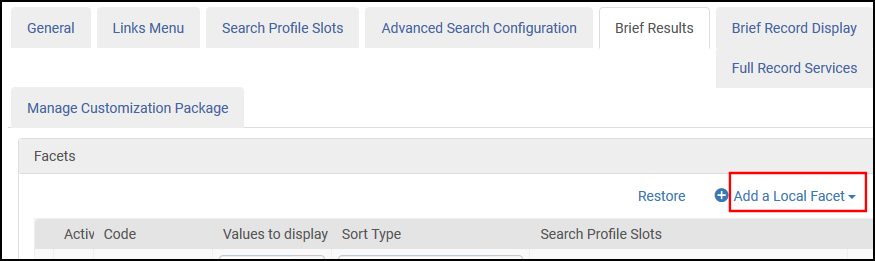
Adding a Local Facet
After you have defined a local field that can be used as a facet (see Configuring Local Display and Search Fields for Primo VE), you can specify whether it displays in the brief results.
-
On the Brief Results tab, select Add a Local Facet.
 Brief Results Tab - Add a Local Facet
 -
Select the local facet from the drop-down list.
-
Select Add Facet.
-
Edit the facet to configure its availability in the search profiles. For more information, see Editing a Facet.
Activating/Deactivating a Facet
You cannot add or delete facets, but you can decide whether they display on the Brief Results page.
Ordering Facets on the Brief Results Page
The Brief Results tab lets you specify the order in which the facets appear in the brief results.
Disabling Top-Level Facets
Top-level facets are the facet values that appear under the Availability facet. By default, all facet values are enabled.
-
Edit the Top Level Facet Labels code table (Configuration Menu > Discovery > Display Configuration > Label).
-
For each facet value you want to disable, change the contents of the Description field to NOT_DEFINED. For example, if you want to disable the Open Access facet, edit the row containing the following code: facets.facet.tlevel.open_access.
-
Select Save.
If the above procedure is not working as expected, you can also use CSS to disable the display of a top-level facet by specifying the following elements as needed in the custom1.css file of your customization package:
[data-facet-value="tlevel-open_access"] {
display:none !important;}
[data-facet-value="tlevel-peer_reviewed"] {
display:none !important;}
[data-facet-value="tlevel-online_resources"] {
display:none !important;}
[data-facet-value="tlevel-available_p"] {
display:none !important;}
Configuring the Sort By List on the Brief Results Page
The Sort by drop-down list enables users to specify the order in which results appear on the Brief Results page. You can use the Brief Results tab to configure the order in which sort types appear in the list or whether sort types appear at all in the list.
The Relevance option appears first in the Sort By list, and it cannot be modified, disabled, or reordered.
Ordering the Sort By List in the Brief Results
The Sort by drop-down list appears above the facets in the brief results. You can use the Brief Results tab to change the order in which the sort types appear in the list.
Activating/Deactivating Sort Types in the Brief Results
The Sort by drop-down list appears above the facets in the brief results. You can use the Brief Results tab to specify whether sort types appear in the list.
Configuring FRBR/Dedup Display Options
Primo VE groups records using the principles in the Functional Requirements for Bibliographic Records published by the IFLA Study Group on the Functional Requirements for Bibliographic Records. This enables users to browse the brief results quickly and access related versions by selecting the see all link.
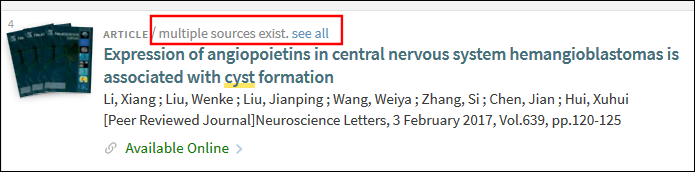
The Brief Results tab in the View Configuration enables you to specify what information displays in the brief results (preferred or generic record) and the order in which other versions appear in the FRBR group.
-
On the Views List page (Configuration Menu > Discovery > Display Configuration > Configure Views), edit your view to open the View Configuration page.
-
Select the Brief Results tab.
.png?revision=1) FRBR Display Section
FRBR Display Section -
In the FRBR Display section, configure the following display options as needed:
Dedup and FRBR Display Options Option Description Dedup and FRBR: Sort FRBR Versions list by
Select one of the following options to indicate how the system should sort the results in the List of Versions page, which is accessed by selecting the see all link in the record's brief display: Date - oldest, Date - newest, Title, and Author.Define FRBR Display for local records
Select one of the following options to determine what information displays for the FRBR group in the brief results:
-
Preferred – Primo VE dynamically selects one of the records from the group for display in the brief results list. This is the preferred record. The preferred record is the highest ranked record from the results set. From the preferred record, the system displays a link to the additional records in the group.
-
Generic – The generic record serves as a placeholder for the group and does not include the data and functionality that is relevant to a specific record (such as the availability status). It only indicates that multiple versions of the title have been found. End users can select either the title or the View versions link to display the versions for the FRBR group.
Enable FRBR
This option (which is enabled by default) enables you to disable the display of FRBR groups at the view level. Instead, the system will display the individual records in the group. This is useful because it does not require additional data processing and job execution if a library does not want to display FRBR groups at all in the results.
When FRBR is enabled to display the preferred record, the Criteria for the FRBR preferred in record is displayed.
Enable Dedup
This option (which is enabled by default) enables you to disable the display of Dedup groups at the view level. Instead, the system presents the individual records in the group. This is useful because it does not require additional data processing and job execution if a library does not want to display Dedup groups at all in the results.
Highlight the record you came from
When opening the list of FRBR versions for a record in search results, the selected record is usually not the first record in the list. When this option is selected, the selected record appears above the complete list of FRBR versions, starting with the preferred record. This option is cleared by default.
.png?revision=1) Selected Record in FRBR Preferred List
Selected Record in FRBR Preferred ListThis field appears only when both the Enable FRBR option and the Preferred display option are selected.
Criteria for the FRBR preferred record: Add criteria
This option enables you to define additional criteria for the selection of the preferred record. You can add a single row for each of the following types of criteria so that precedence is given to the highest-ranked record in the FRBR group that first matches your criteria, starting from the top of the criteria list:
-
Date - Newest – Precedence is given to the record with the newest publication date if it is among the highest ranked records in the FRBR group.
-
Resource Type – Precedence is given to a record of a specific resource type (such as book or journal) if it is among the highest ranked records in the FRBR group.
-
Availability - Digital – Precedence is given to a record that is available in digital form (ALMA-D) if it is among the highest ranked records in the FRBR group.
-
Availability - Electronic – Precedence is given to a record that is available in electronic form (ALMA-E) if it is among the highest ranked records in the FRBR group.
-
Availability - Physical – Precedence is given to a record that is available in physical form (ALMA-P) if it is among the highest ranked records in the FRBR group.
Primo VE displays the highest ranked record as the preferred record if no criteria are specified or if no criteria are matched among the highest ranked records in the FRBR group. For example, if preference is given to electronic items and the user has limited the search to physical items, the preferred record is a physical item even if the FRBR group includes electronic items.
Criteria for the DEDUP preferred record: Availability
This option enables you to define additional criteria for the selection of the preferred record and appears only when the Enable DEDUP checkbox is selected. The preferred record is taken from the 10 highest ranked records in the Dedup group that matches the specified delivery category:
ALMA-P – Precedence is given to available physical inventory.
ALMA-E – Precedence is given to available electronic inventory.
ALMA-D – Precedence is given to available digital inventory.
None – Precedence is given to the highest ranked record in the Dedup group, regardless of the inventory type.
-
Configuring the Resource Type Filter Bar
The Resource Type Filter Bar appears under the basic search box to allow users to filter their results by resource types, which are configurable. For each search profile slot, only enabled resources appear for basic searches, and their appearance is not dependent on whether the search results contain items matching that resource type.
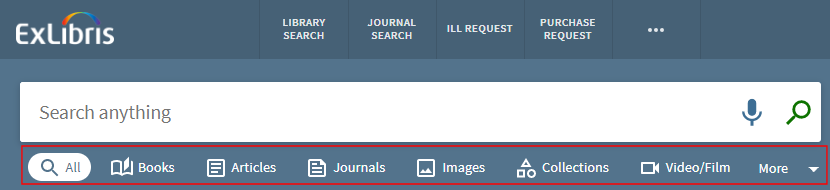
The icons used for the resource types in the filter bar must be in the SVG format. For information on how to replace these icons, see Customizing SVG Icons.
-
On the Views List page (Configuration Menu > Discovery > Display Configuration > Configure Views), edit your view to open the View Configuration page.
-
Select the Brief Results tab.
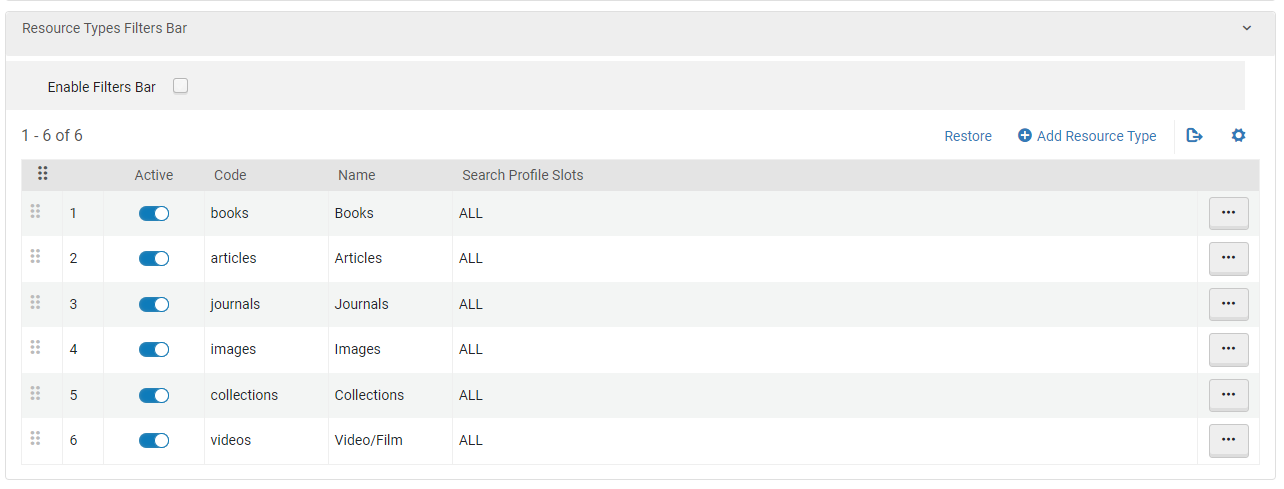 Resource Types Filters Bar Section
 -
In the Resource Types Filters Bar section, select the Enable Filters Bar checkbox to enable the filter bar for basic searches.
Both this bar and the Pre-filter Bar cannot be enabled at the same time. If you want to enable this bar, you must disable both Enable for Basic Search checkboxes on the Advanced Search Configuration tab. For more details, see Enabling Pre-Filters for Basic Searches.
-
For each resource type:
-
Use the Active slider to activate the resource type for display in the filter bar. You can activate a maximum of 10 resource types for each search profile slot. If you activate more than 6 resource types per search profile slot, the More option appears in the filter bar to enable the selection of the bottom resource types (7-10).
-
If you want to move the resource type to a different position in the filter bar, select its Handle icon
 and drag it to the desired position in the list.
 -
If you want to change the supported search profile slots, select the Edit row action:
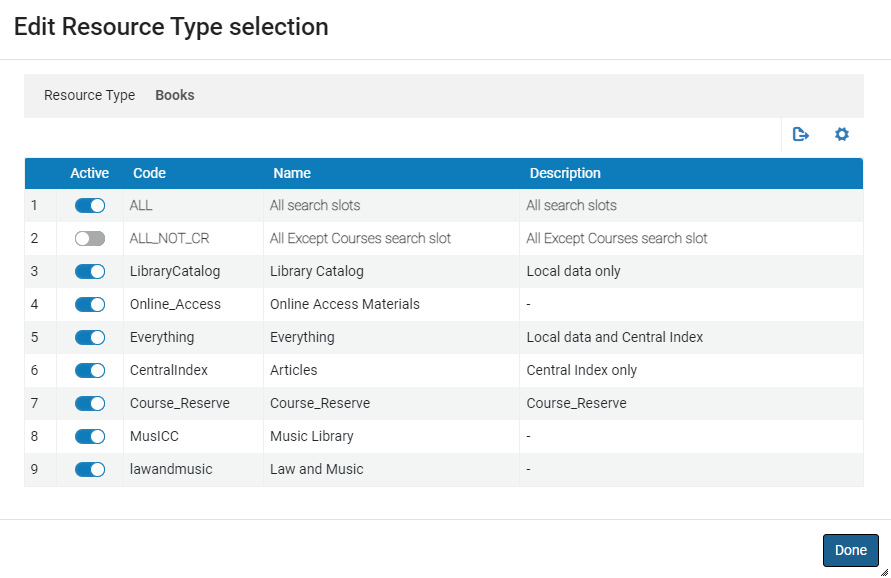 Edit Resource Type
 -
In the Edit Resource Type Selection dialog box, activate/deactivate search profile slots as needed.
-
Select the Done button.
-
-
If you want to add a resource type to the list of configured resource types:
-
Select the Add Resource Type link to open the Add Resource Type dialog box:
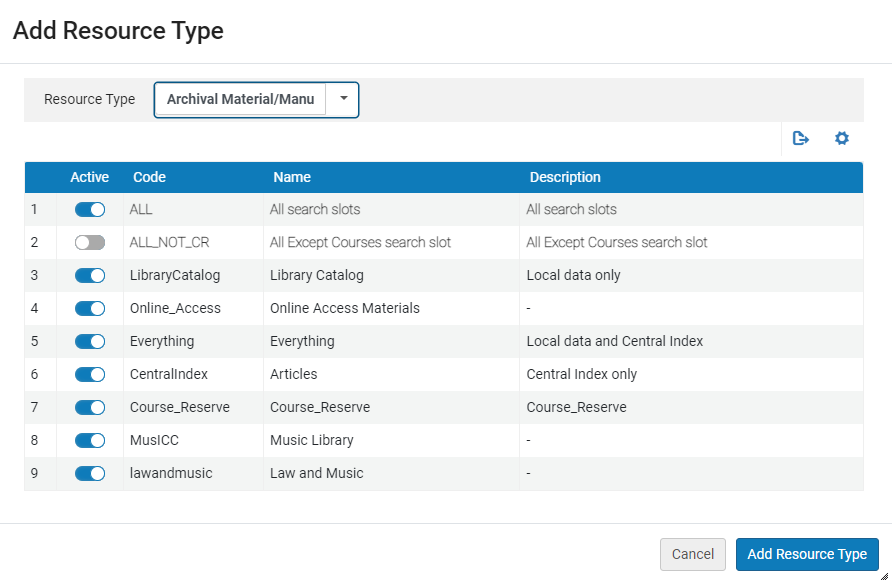 Add Resource Type
 -
Select the name of the resource type from the Resource Type drop-down list.
-
Activate/deactivate resource types as needed.
-
Select the Add Resource Type button.
-
Enabling Local Full Text for the NDE UI
With the original UI, local records were searched for full text by default, and users had no option to disable it. With the NDE UI only, you can configure whether users can search local records for full text, and if enabled, you can configure whether it is searched by default for local search scopes. Once enabled, users can enable/disable the search for local full text by toggling the Search in Full Text option.

-
On the Views List page (Configuration Menu > Discovery > Display Configuration > Configure Views), edit your view to open the View Configuration page.
-
Select the Brief Results tab.
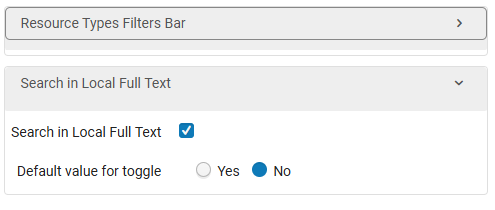 Search in Local Full Text Section
 -
In the Search in Local Full Text section, select the Search in Local Full Text checkbox to enable local full-text searches. Once selected, the Default value for toggle field appears.
-
In the Default value for toggle field, select Yes if you want this functionality enabled by default for the user. The default value is No. In the UI, users can set their preference for local searches.
Handling Searches Without Results
When a search returns no results, a No records found message is displayed. In addition, a Didn't find what you were looking for? notification appears. The notification contains a Click here to expand your search link that expands the search to include resources that are in CDI but are not available at the institution, either online or physically. Selecting this link is essentially the same as selecting Expand My Results under Refine your results, when some results were returned for a search.
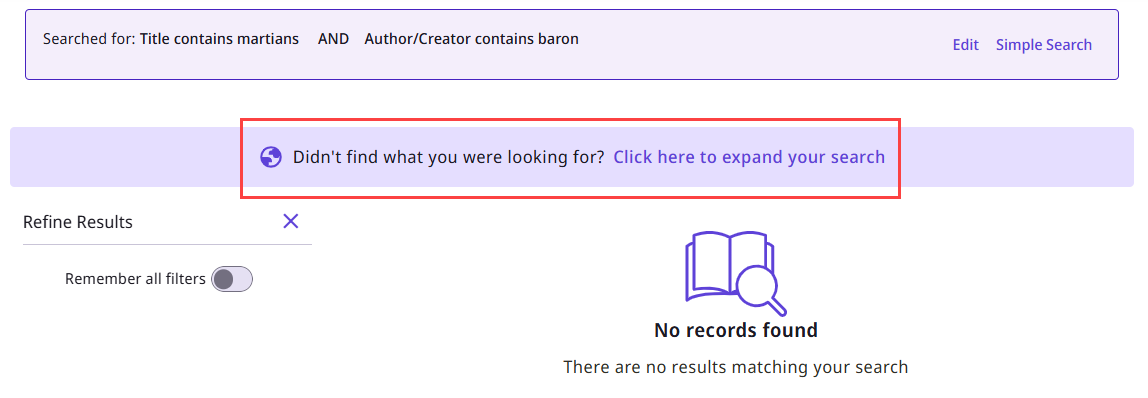
You can configure the system to automatically expand a search when no results are found within the library holdings. This means that the system automatically turns on the Expand My Results option under Refine your results. This functionality is only triggered for searches within scopes that include both the complete range of the institution's holdings and CDI. When it is triggered, the notification that appears indicates to the user that the search was automatically expanded.

To activate this option, in the Customer Settings (Configuration Menu > Discovery > Other > Customer Settings) , set the expand_my_results_when_no_results parameter to true. For additional information, see Discovery Customer Settings.
Configuring the Brief Record Display
The Brief Record Display tab configures the summary information that appears for records in the search results and on their full display pages so that users can quickly determine whether a record is helpful in their search. This summary information is configured on display lines and typically includes the title, author, and creation date.
For information on how fields from the source records are mapped to the display fields in Primo VE, see the Display sections in Mapping to the Display, Facets, and Search Sections in the Primo VE Record.
The display lines on the record's brief and full display pages share the same configuration and cannot be configured separately.
Editing a Display Line
You can configure up to four display lines. Each line can consist of multiple data fields separated by a delimiter (such as a semicolon).
-
Edit your view on the Views List page (Configuration > Discovery > Display Configuration > Configure Views) to open the View Configuration page.
-
Select the Brief Record Display tab.
-
In the Display Fields or NDE Display Fields section, select Customize to modify the display lines. The Restore option lets you restore the display lines to their default settings.
 Display Fields Section (Original UI)
 -
Edit the row containing the display line that you want to modify. The Row Fields dialog box opens.
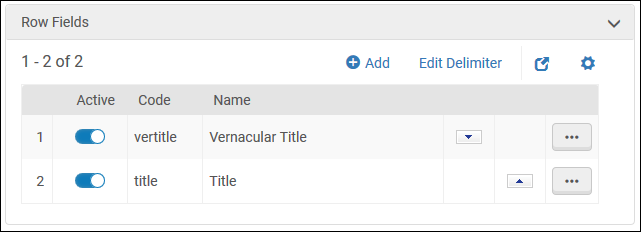 Edit Display Line Fields
 -
In the Row Fields dialog box, you can perform the following operations:
-
Add a field to the display line:
-
In the Row Fields dialog box, select Add to open the Add Field dialog box.
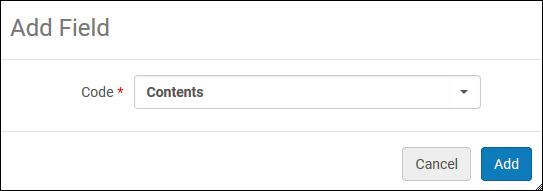 Add Field Dialog Box
 -
Select a field from the Code drop-down list. For more information, see Primo VE Display Section.
-
Select Add to save your new display field and return to the Row Fields page.
-
-
Remove a field from a display line: Select the Delete row action.
-
Reorder the fields in a display line: Select the up/down arrows to move a field.
-
Activate/deactivate fields in a display line: Toggle the slider to activate or deactivate a field.
-
Change the delimiter that separates fields in a display line:
-
In the Row Fields dialog box, select Edit Delimiter to open the Edit Delimiter dialog box.
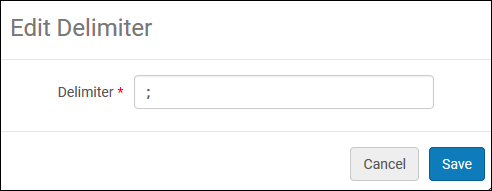 Edit Delimiter Dialog Box
 -
Select a field from the Delimiter drop-down list.
-
Select Save to change the delimiter and to return to the Row Fields page.
-
-
Deleting a Display Line
Deleting a display line in the Brief Record Display leaves an empty placeholder in case you decide to redefine it and display its data fields in the brief results.
Changing the Order of the Display Lines
The Display Fields section enables you to configure the order in which the four display lines appear in the brief results.
Configuring Additional Display Options (NDE UI Only)
On the Brief and Full Display pages, you can display additional information in the display lines: labels and snippets. For more information, see Overview of the NDE Interface and Configuration.
This functionality applies only to the NDE UI.
-
Edit your view on the Views List page (Configuration > Discovery > Display Configuration > Configure Views) to open the View Configuration page.
-
Select the Brief Record Display tab.
 Brief Record Display Tab - NDE Display Fields
 -
In the NDE Display Fields section, select the following fields as needed:
-
Display summary field – When selected, this option adds descriptive labels (such as Summary and Published on) to the associated brief display lines.
-
Display snippet – This option displays a short summary describing the record when selected.
-
Configuring the Record Actions for the Original UI
In addition to the summary information for each record, users can quickly export the record's details from the record's brief display to various formats and share them with others. The Record Actions section on the Brief Record Display tab configures the following export options:
-
e-shelf – export the record to the user's Saved Record's list. For additional information, see Exporting Records from Primo VE, Saving and Managing Alerts in Primo VE, and Improved Format of Saved Search Alert Emails.
-
E-mail – send the record's details, locations, and availability information to a specified email address. For additional information on this functionality, see Configuring reCaptcha for Primo VE and E-Mail Security Features in Primo VE.
-
BibTeXPushTo, EasyBib, EndNote, and RefWorks – export the record to a specific citation manager. For more details, see Mappings for Export Actions in Primo VE.
-
RISPushTo – export the record to the RIS format. For more details, see Mappings for Export Actions in Primo VE.
-
Permalink – create a permalink for the record.
-
Share – shares a permalink with users on social media applications. Select the Configure row action to enable/disable the supported social media apps. For app configuration information in Alma, see Social and Email Login.
-
Citation – create a citation for the record. For additional configuration information, see Managing Citation Styles for Primo VE.
-
Print – send the record's details, locations, and availability information to a specified printer.
-
Mendeley – send the record's information to the user's account on Mendeley. For related information, see Export to Mendeley for Primo VE.
-
Excel – send the record's details, locations, and availability information to an Excel file.
-
QR – display a page's QR code to enable it to be scanned by a mobile device or to enable its URL to be copied to the clipboard.
-
Leganto – send the record's citation to the user's reading list in Leganto.
-
The actions on the record's brief and full display pages share the same configuration and cannot be configured separately.
-
Records the library has suppressed from discovery are not exported with any export action (such as Export to Excel).
-
Edit your view on the Views List page (Configuration Menu > Discovery > Display Configuration > Configure Views) and select the Brief Record Display tab.
-
If you have not already done so, select Customize in the Record Actions section to modify the actions.
 Record Actions Section - Original UI
 -
Toggle the Active slider to activate/deactivate an action in the Record Actions section.
-
The up/down arrows in the Record Actions section allow you to change the order of the actions. In the UI, the items are ordered from right to left.
-
Select the Up-Front Actions checkbox to display the action in the record's brief display. By default, Primo VE displays the e-shelf, email, and citation actions in the record's brief display. You can configure up to three actions, which are listed from right to left based on the order of the enabled actions.
The e-shelf action always appears and cannot be disabled from the record's brief display.
-
The Export All Results functionality is enabled by default. To disable it, clear the Enable Export All Option checkbox. For more details, see Using the Export All Results Option in Primo VE.
When selecting a format for the export, users can choose from the following formats if active:
-
Export RIS – When the RISPushTo code is active in the Record Actions configuration, users can choose from one of the following Encodings: ISO-8859-1, US-ASCII, windows-1251, or UTF-8 (default).
-
Export BibTeX – When the BibTeXPushTo code is active in the Record Actions configuration, users can choose from one of the following Encodings: ISO-8859-1, US-ASCII, windows-1251, or UTF-8 (default).
-
Export to Excel – When the Excel code is active in the Record Actions configuration, users can choose from one of the following File Types: xlsx (default) or csv.
-
If only one of the above formats is active, it is used automatically.
-
The Export All Results option is hidden from end users if none of the above formats are active.
-
Configuring the Record Actions for the NDE UI
In addition to the summary information for each record, users can quickly export the record's details from the record's brief display to various formats and share them with others. The Record Actions section on the Brief Record Display tab groups the export options as follows: Share Actions, Citation, Export Actions, and Save to Favorites (User Area > Saved Records tab).
-
The actions on the record's brief and full display pages share the same configuration and cannot be configured separately.
-
Records the library has suppressed from discovery are not exported with any export action (such as Export to Excel).
-
Edit your view on the Views List page (Configuration Menu > Discovery > Display Configuration > Configure Views) and select the Brief Record Display tab.
-
If you have not already done so, select Customize in the NDE Record Actions section to modify the actions.
 NDE Record Actions Section
 -
Toggle the Active slider to activate/deactivate an action group in the NDE Record Actions section.
-
Select the Configure row action for the Share Actions group to open the Row Fields dialog box:
 Row Fields Dialog Box (Share Actions)
 -
If you have not already done so, select Customize to modify the supported share actions.
-
Toggle the Active slider to activate/deactivate the following share actions: Email, Permalink, Whatsapp, Facebook, Twitter, LinkedIn, and QR.
-
To order the actions, drag and drop rows to the preferred position.
-
Select Done to save your changes and return to the NDE Record Actions section.
-
Select the Configure row action for the Export Actions group to open the Row Fields dialog box:
 Row Fields Dialog Box (Export Actions)
 -
If you have not already done so, select Customize to modify the supported export actions.
-
Toggle the Active slider to activate/deactivate the following export actions: Print, RefWorks, EndNote, EasyBib, RISPushTo, BibTexPushTo, Mendeley, Excel, and Leganto.
-
To order the actions, drag and drop rows to the preferred position.
-
Select Done to save your changes and return to the NDE Record Actions section.
-
The Export All Results functionality is enabled by default. To disable it, clear the Enable Export All Option checkbox.
Configuring the Full Display Page
The Full Display page opens when a user selects an area within a record's brief display that does not contain hypertext links. Selecting the title or the availability link in the record's brief display may also take the user to the Full Display page.
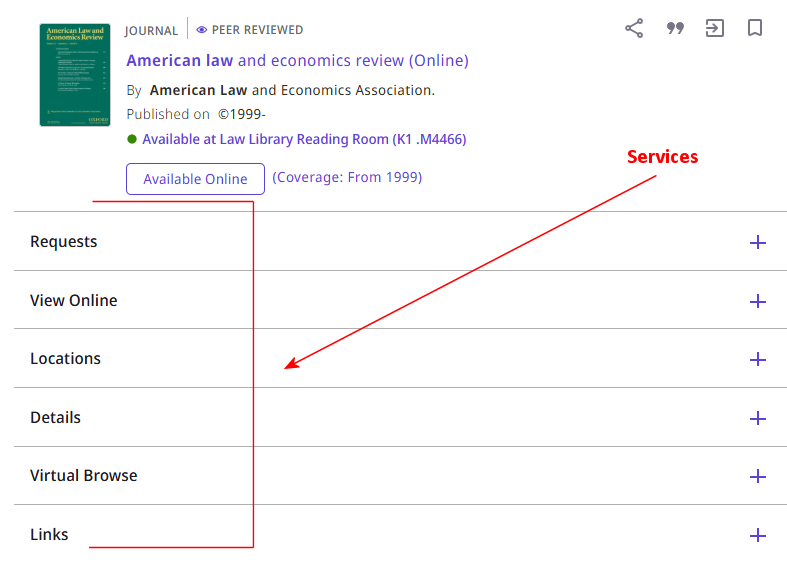
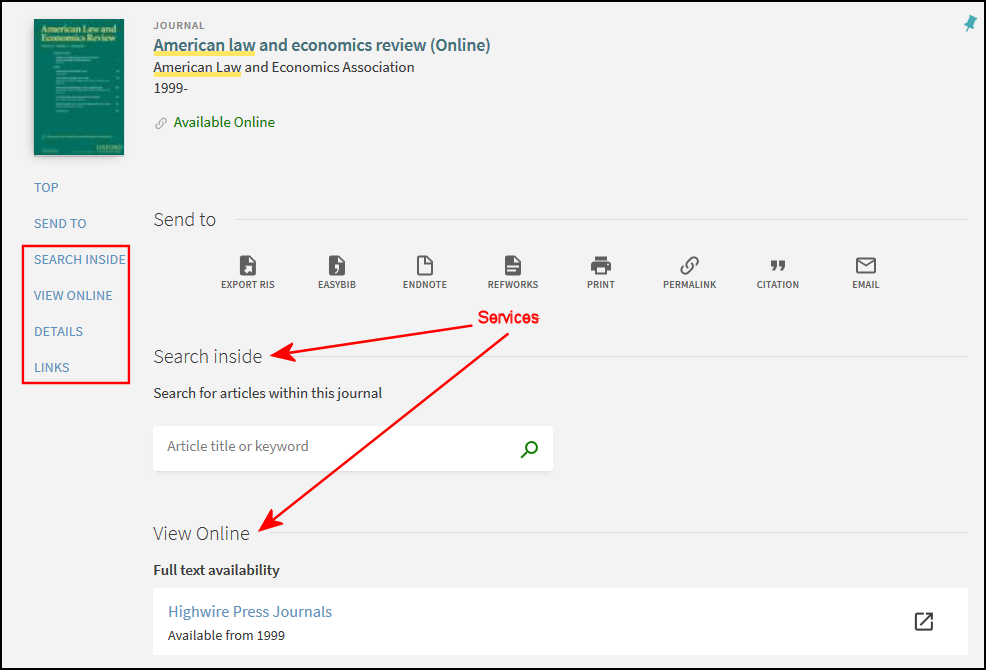
The Full Display page contains various sections called services. If a service is irrelevant to a record, it does not appear on the Full Display page. The Full Record Services tab enables you to configure the order of services, the display lines for the Details service, additional links, and whether citation trails and times cited information are displayed.
-
The Services page looks very similar to the Full Display page, but it does not allow users to perform searches and may not permit access to other pages and functionality (such as My Library Card). To support both types of pages, you need to configure only a single view in Primo VE.
-
The display lines and actions on the Full Display page are configured with the Brief Record Display tab.
Primo VE displays the following services when applicable to the record:
-
Get It, View Online, How to Get It – (Original UI only) These sections enable users to request physical items, view electronic materials, or obtain materials from other sources.
The Get It service displays when the library has physical items. For information on configuring custom location sorting, see Configuring the Get It Service.
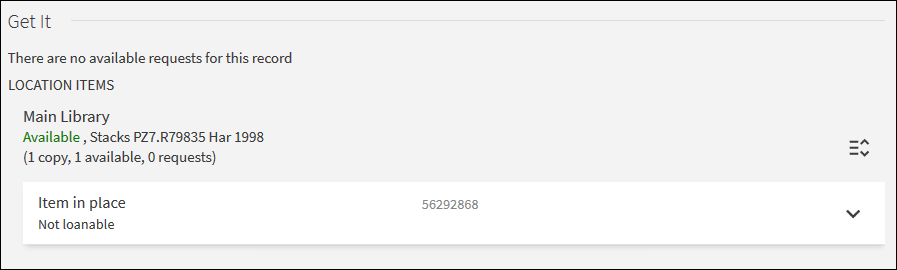 Get It Service (Original UI)
The View Online (or View It) service displays when the record is available electronically.
 View Online Service (Original UI)
The How to Get It service displays only general electronic services that are delivery-related (such as an ILL service) and appears only when the record has no holdings. For more information, see Adding a General Electronic Service.
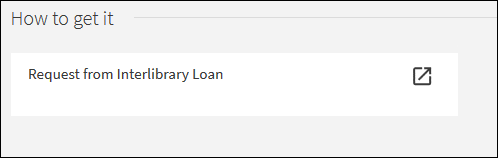 How to Get It Service (Original UI)
 -
Requests – (NDE UI only) The Requests section displays all available request options from Alma (including physical hold, booking, purchase, resource sharing, digital, and general electronic service for Get It) and Rapido. Depending on the type of request for Alma, either a Request button or a link is provided. Holdings information appears in the Locations section. For more information, see Configuring the Requests Service.
 Requests Section (NDE UI)
 -
View Online – (NDE UI only) The Requests section is displayed when the record is available electronically. When available, various subsections are displayed in the following order: Full text availability, Additional services, and Services for related titles.
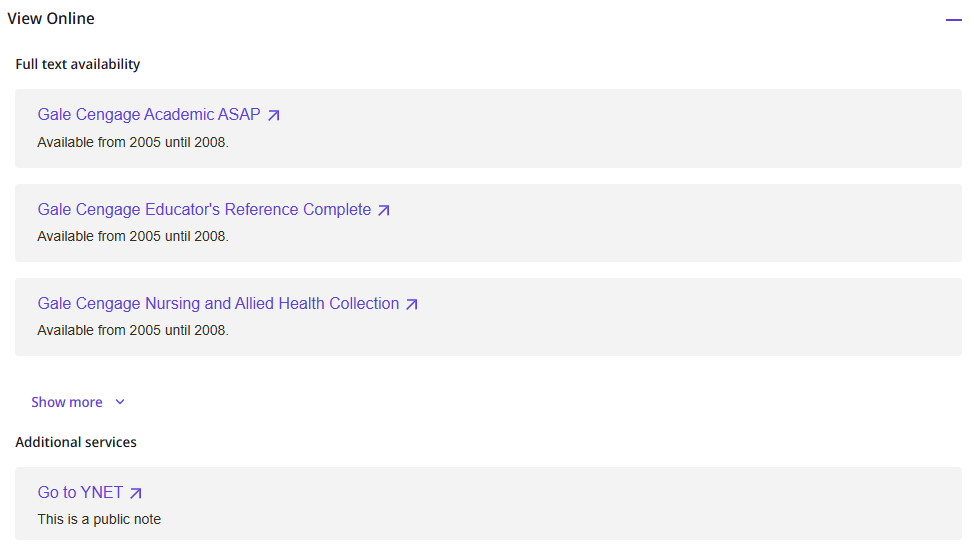 View Online Section (NDE UI)
 -
Digital Services – (NDE UI only) This section displays versions of digital content (Alma-D); selecting a version opens a viewer for that version's content.
 Digital Services Section (NDE UI)
 -
Locations – (NDE UI only) This section displays the availability of the items grouped by location or library location and provides item-level request options. For information on configuring custom location sorting, see Configuring the Get It Service.
 Locations Section (NDE UI)
 -
Availability at Consortium Libraries – (NDE UI only) In consortia, this section displays the availability of the item at other institutions in the consortium. Selecting an institution expands the section to show additional information about availability at that institution. Users can also request available items directly from the UI.
 Availability at Consortium Libraries Section (NDE UI)
 -
Links – This section displays additional links (such as Display source record) and general electronic services that are not delivery-related. For more information, see the following sections: Configuring the Links Service and Adding a General Electronic Service.
-
Search Inside – This section allows users to search for articles within a periodical (including journals, magazines and newspapers) if the record has an ISSN. For more details, see Configuring the Search Inside Service.
-
Details – This service displays more details about the record and lets you include more information than in the brief results. For more information, see Configuring the Details Service.
-
Citations – This service displays a record's citation information. For more information, see Configuring the Display of Citations (Original UI) and Configuring the Display of Citations (NDE UI).
-
Browse Shelf – This service enables users to visually browse a library shelf in relation to the selected record so that users may find other items that are related to their search. For configuration information, see Configuring the Browse Shelf Service.
-
Quick Access – (Original UI only) This service lets users visually browse a record's representation files using Alma's new digital viewer. For more information, see Configuring the Quick Access Service.
-
More from the Same Course/Collection – This service expands the current title search. It enables users to browse items in additional collections and courses containing the current title. For more details, see Displaying the More from the Same Service.
-
May Also Be Held By – This service provides links to this resource at other locations (such as non-Alma institutions). If this service is not enabled and configured for your institution, it does not appear as a service on the Full Record Services tab. For more details, see Displaying the May Also Be Held By Service.
Expanding the Display of a Service on the Full Display Page
With the NDE UI, you can decide whether to expand or collapse a service's display. When collapsed, users must select the Plus icon to expand the view of the section.

-
On the Views List page (Configuration Menu > Discovery > Display Configuration > Configure Views), edit your view.
-
Select the Full Record Services tab.
 Full Record Services Tab (NDE UI)
 -
If you have not already done so, select Customize to allow the services to be customized.
-
Select the Expand by default checkbox for each service you want expanded.
Ordering the Services on the Full Display Page
The Full Record Services tab enables you to select the order of the services (such as View It and Get It) on the Full Display page.
-
On the Views List page (Configuration Menu > Discovery > Display Configuration > Configure Views), edit your view to open the View Configuration page.
-
Select the Full Record Services tab.
 Full Record Services Tab (Original UI)
 Full Record Services Tab (NDE UI)
 -
If you have not already done so, select Customize to enable you to modify the services.
-
For the NDE UI, select the row's handle icon to drag the row to the desired position in the list. For the Original UI, select the up/down buttons as needed to change the order of the services.
Primo VE displays the Citation section last regardless of its setting on this tab. For a CSS workaround, see Display order of the full view left menu.
Configuring the Requests Service
(NDE UI only) The Requests service displays the request options for a record.
Displaying All Request Options
If there are more than three request options available for a resource, you can choose whether the Requests section is expanded to show them all, or collapsed to show only the first three options. In the latter case, users must select the View all request options link to see all request options. This setting is configured per View.
-
Open the View List page (Configuration Menu > Discovery > Display Configuration > Configure Views) and edit your view to open the View Configuration page.
-
Select the Full Record Services tab.
-
Select Configure in the row containing the requests code to open the Requests Configuration dialog box.
-
Select the Display all requests in expanded mode checkbox. The list of request options is expanded by default.
-
Select Done to save your settings.
Setting the Default Request Type for Hold/Booking Requests
By default, if both a hold option and a booking option are available for a resource, the hold option (Request) is initially selected under Request Type when the user first opens the Request form. The user can then change the selection to Booking if they wish. You can choose to make Booking the initial selection for this field instead. To do so, in the Discovery Customer Settings page (Configuration Menu > Discovery > Other > Customer Settings), change the value of the default_hold_request_type parameter to booking.

Configuring the Get It Service
For both the Original and NDE UIs, the Get It service displays the physical locations that hold an item. If there are multiple locations, the Get It section lists them in the order specified by Alma. If Alma has a custom sorting option enabled, the Custom Libraries Order mapping table allows you to override Alma's custom settings per view.
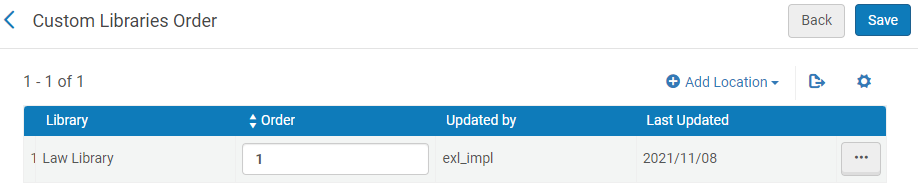
When enabled, the Custom Libraries Order mapping table allows you to assign a library priority for each library (1 = highest priority). For each library priority, Alma sorts these locations alphabetically by location priority and then by the number of available items. For more details about location priority, see Configuring Physical Locations.
In the following example, the highest priority is given to the Music (Stacks) location since it has the highest library priority (1) and location priority (Display first). The Main (Stacks) location is listed next because it has more available items than the Biology (Stacks) location. The Main (Juvenile) location is listed last in the library priority 1 group because it has the Display last location priority. The Law (Stacks) location is listed last because it has the lowest library priority.
| Sort Order | Library Priority | Location Priority | # of Available Items |
|---|---|---|---|
| 1 - Music (Stacks) | 1 | Display first | 1 |
| 2 - Main (Stacks) | 1 | Regular display | 2 |
| 3 - Biology (Stacks) | 1 | Regular display | 0 |
| 4 - Main (Juvenile) | 1 | Display last | 1 |
| 5 - Law (Stacks) | 2 | Regular display | 1 |
All unassigned library locations are given the lowest Library Priority and sorted alphabetically by their Location Priority and then by the number of available items.
-
Ensure that the Use Custom Sorting field is set to Yes on Alma's Locations Ordering Profile page (Configuration Menu > Fulfillment > Discovery Interface Display Logic > Locations Ordering Profile), and decide whether you want to override this custom sort configuration for your view. For more details, see Configuring the Order of Locations in Primo Search Results.
-
Open the View List page (Configuration Menu > Discovery > Display Configuration > Configure Views) and edit your view to open the View Configuration page.
-
Select the Full Record Services tab.
-
Select Configure in the row containing the getit_link1 code to open the Custom Locations Sorting dialog box.
 Custom Locations Sorting Dialog Box
 -
Select Set custom libraries order to open the Custom Libraries Order mapping table for your view.
-
Add a row for each library and set its library priority (1 = highest priority). All unassigned libraries are grouped together and given the lowest library priority.
-
Select Done to save your settings.
Configuring the Details Service
The Details service displays the bibliographic information for a record (such as the contributors, description, and so forth). For details on how information is mapped from the source records to the display fields in Primo VE, see the Display sections in Mapping to the Display, Facets, and Search Sections in the Primo VE Record.

Primo VE enables you to configure the display lines for the Details service. The configuration is very similar to the configuration of the display lines in the record's brief display, but you are not limited to four display lines. Each display line can consist of multiple data fields separated by a delimiter (such as a semicolon).
To update labels for the Detail Services, customize the Full Display Labels code table (Configuration > Discovery > Display Configuration > Labels).
-
On the Views List page (Configuration Menu > Discovery > Display Configuration > Configure Views), edit your view to open the View Configuration page.
-
Select the Full Record Services tab.
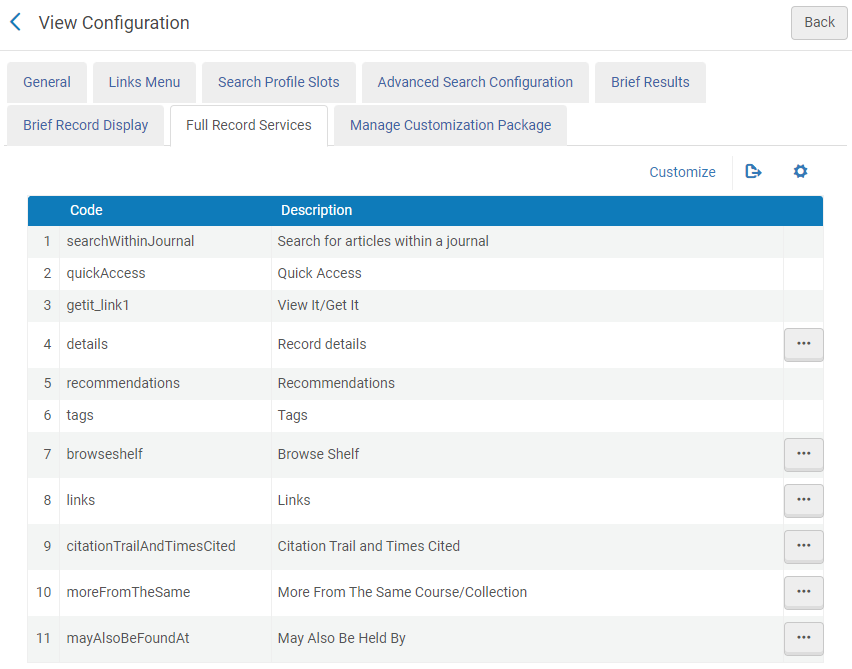 Full Record Services Tab
 -
If you have not already done so, select Customize, which appears above the list of services in the Full Record Records Services tab.
-
Select the Configure row action to modify the display fields for the Details service. The Edit Full Display Details page opens.
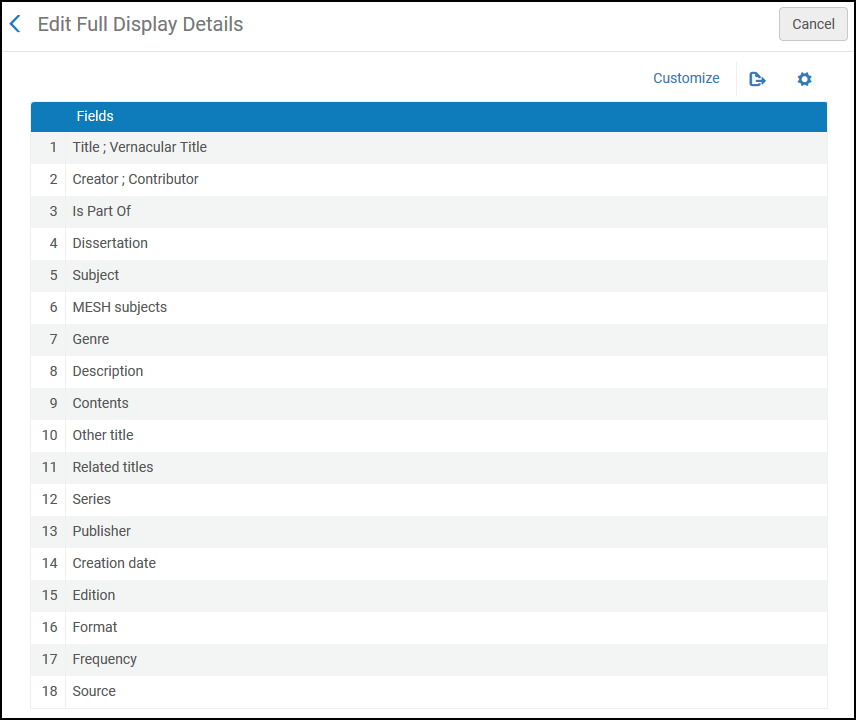 Edit Full Display Details Page
 -
If you have not already done so, select Customize, which appears above the list of fields on the Edit Full Display Details page.
-
On the Edit Full Display Details page, you can perform the following operations:
-
Add a new display line:
-
Select Add Field to open the Row Fields dialog box.
-
In the Row Fields dialog box, select Add Field.
-
Select a field from the Code drop-down list.
-
Select Add to add the new field.
-
Select Add Field to add additional fields to the display line. Otherwise, select Done to return to the Edit Full Display Details page.
-
-
Add a field to a display line:
-
Edit the row containing the display line that you want to modify. The Row Fields page opens.
-
Select Add to open the Add Field dialog box.
-
Select a field from the Code drop-down list.
-
Select Add to add the new field and to return to the Row Fields page.
-
On the Row Fields page, select Add to add additional fields to the display line.
-
Select the up/down arrows to reorder the field in the display line.
-
Select Back to return to the Display Fields page.
-
-
Delete an entire display line by deleting the row that contains the display line.
-
Delete a field from a display line:
-
Edit the row containing the display line that you want to modify. The Row Fields page opens.
-
Select the Delete row action.
-
Select Back to return to the Display Fields page.
-
-
Reorder the display lines by selecting the up/down arrows.
-
Reorder fields in a display line:
-
Edit the row containing the display line that you want to modify. The Row Fields page opens.
-
Select the up/down arrows to reorder the fields.
-
Select Back to return to the Display Fields page.
-
-
Activate/deactivate a display line by selecting the Active fields.
-
Activate/deactivate a field in a display line:
-
Edit the row containing the display line that you want to modify. The Row Fields page opens.
-
Select the Active field to activate or deactivate a field in the display line.
-
Select Back to return to the Display Fields page.
-
-
Change the delimiter that separates the fields in the display lines:
-
Select Edit Delimiter to open the Edit Delimiter dialog box.
-
In the Delimiter field, type the delimiter character.
-
Select Save to update the delimiter and to return to the Display Fields page.
-
-
When Leganto is integrated with your environment, you can configure the Course Information field to link to Leganto:
-
Edit the Course Information field.
-
In the Row Fields page, enable the Course Information field and then select a linking option from the Enable Linking to Leganto field:
-
Use a Permalink to the reading list – This option opens the Leganto My Lists page, which is pre-filtered for this reading list.
-
Use a Link to the list on the Find Lists page – This option opens the Leganto Find Lists page, which preselects this reading list.
If you do not specify an option, linking to Leganto is disabled from the record's details.
-
-
Select Done.
-
-
-
Select Back to return to the Services page.
Configuring the Links Service
The Links service displays additional links for a record (including the Display Source Record link, which displays the record's source information).

-
On the Views List page (Configuration Menu > Discovery > Display Configuration > Configure Views), edit your view to open the View Configuration page.
-
Select the Full Record Services tab.
-
If you have not already done so, select Customize, which appears above the list of services in the Full Record Records Services tab.
-
Select the Configure row action to configure the Links service options.
-
In the Enable Link in Full Display dialog box, select the Display Source Record checkbox if you want users to be able to view the item's source record.
-
Select Done to save your changes.
Configuring the Browse Shelf Service
By default, Browse Shelf displays physical items that appear together on a virtual bookshelf (local material only). If you prefer, you can also display electronic material, which is based on call numbers from bibliographic headings, not just the holdings (for physical items).

Browse Shelf's results can include records with suppressed holdings, but if these records are selected, the following message is displayed:
-
On the Views List page (Configuration Menu > Discovery > Display Configuration > Configure Views), edit your view to open the View Configuration page.
-
Select the Full Record Services tab.
-
If you have not already done so, select Customize, which appears above the list of services in the Full Record Records Services tab.
-
Select the Configure row action to configure the Browse Shelf service.
-
In the Browse Shelf Configuration dialog box, specify one of the following options and then select Done:
-
Browse Bibliographic Headings – Select this option if you want to display both physical and electronic material in Browse Shelf.
-
Browse Shelf Listing – Select this option if you want to display physical items only in Browse Shelf. This is the default option.
-
Configuring the Quick Access Service
(Original UI only) The Quick Access service embeds Alma's new digital viewer to enable users to access and view digital representations stored in Alma quickly. From the embedded viewer, users can download the file, open the file in a new tab or window, or select the right/left arrows to view additional representation files.
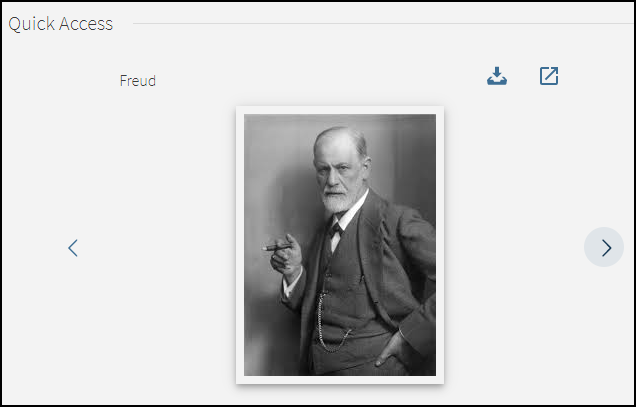
No configuration in Primo VE is needed to enable this functionality, but you must have the new Alma Viewer enabled. The following table lists other configuration options associated with this service.
| Option | Description |
|---|---|
|
Change the order of the Quick Access section on the Full Display page. |
For more information, see Ordering the Services. |
|
Modify the labels associated with the Quick Access section on the Full Display page. |
You can modify the following code in the GetIT! Tab1 Labels code table to modify or translate the service's label:
For more information, see Configuring Display Labels for Primo VE. |
|
Enable the new Alma Viewer so that it can be embedded in Primo VE. |
On the Viewer Services page (Configuration Menu > Fulfillment > Discovery Interface Display Logic > Viewer Services), edit the Alma Viewer service and select the Use New Viewer checkbox. |
|
Modify the display logic rules for quick access representations. |
On the Discovery Interface Display Logic Rules page (Configuration Menu > Fulfillment > Discovery Interface Display Logic > Display Logic Rules), check the settings of the following out-of-the-box rules:
You can create additional rules to hide the embedded viewer with the new Representation Quick Access service. If a digital title has more than one digital representation, the Quick Access section is not presented in the UI. |
Configuring the Search Inside Service
The Search Inside service allows users to search for articles in CDI within the journal described in the record. When this feature is enabled, the Search Inside option is displayed for records as follows:
-
Local records—If the record has an ISSN (contains an addata/issn or addata/eissn field) and is a journal.
To identify a journal, the display/type field must start with the word journal, or the record must contain an addata/jtitle field (not an addata/btitle or addata/atitle field).
-
CDI records—If the record has an ISSN (contains an addata/issn or addata/eissn field) and is a periodical.
To identify a periodical, the display/type field must start with the word journal, or the record must contain an addata/jtitle field (not an addata/btitle or addata/atitle field), or the addata/format and addata/genre fields must be set to journal.
If the above criteria are met for CDI records, this section may also appear for magazines and newspapers.
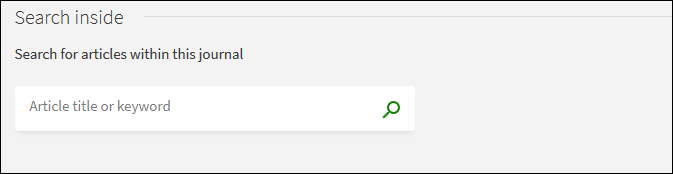
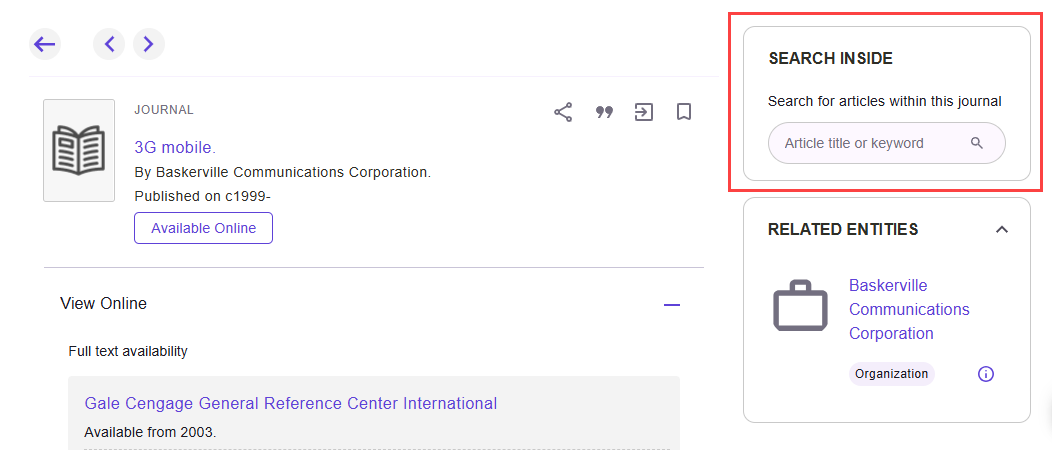
After the user enters search terms, the system performs an advanced search that returns all matching articles within the periodical. The results open in a new window/tab.
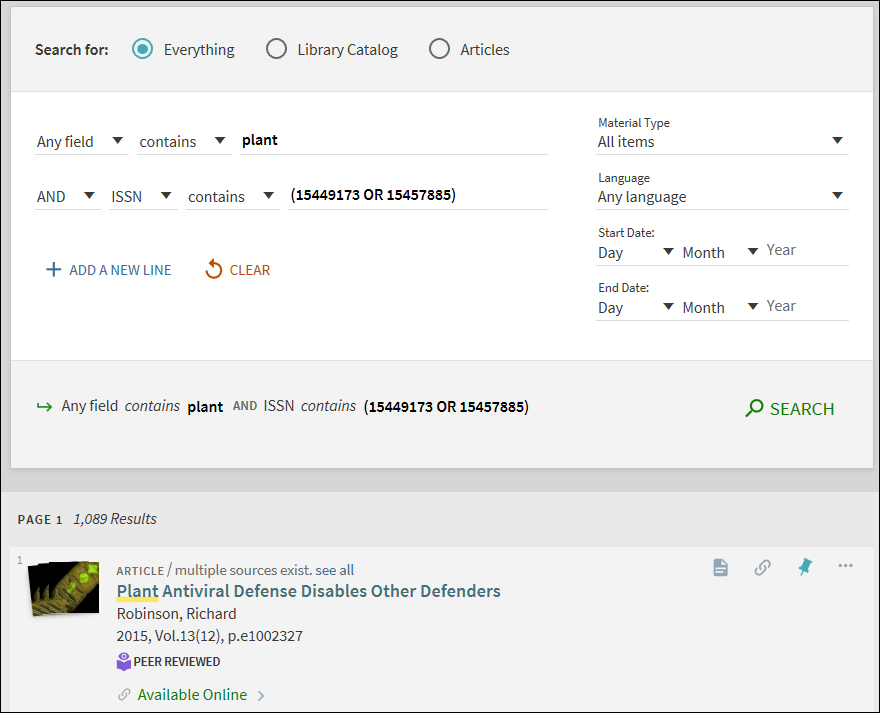

This type of search uses the view's first blended search profile slot, which includes CDI as its initial scope in Advanced Search. If there are no blended search profile slots (including CDI), the search uses the first CDI-only search profile slot. If the view has no active search profile slots that include CDI, the Search Inside section does not appear for the periodical in its full display.
-
Edit your view on the Views List page (Configuration Menu > Discovery > Display Configuration > Configure Views) to open the View Configuration page.
-
Select the Advanced Search Configuration tab. For more details, see Adding a Search Index, Resource Type, or Language to Advanced Searches.
-
If you have not already done so, select Customize, which appears above the List of Indexes section.
-
Activate the issn code. If it is not in the list, use the Add Index option to add it.
-
Select the Search Profile Slots tab. For more details, see Configuring Search Profile Slots.
-
Activate at least one search profile slot that includes the CentralIndex code.
In the NDE UI, the Search Inside option can be disabled by setting the enable_search_inside_journal customer setting to false (Configuration Menu > Discovery > Other > Customer Settings). The option cannot be disabled in the original UI.
Displaying the More from the Same Service
The More from the same service is enabled by default. However, you can hide it from users with this configuration. For more details, see Configuring the More From the Same Service in Primo VE.
-
On the Views List page (Configuration Menu > Discovery > Display Configuration > Configure Views), edit your view to open the View Configuration page.
-
Select the Full Record Services tab.
-
If you have not already done so, select Customize, which appears above the list of services in the Full Record Records Services tab.
-
Select the Configure row action to open the Edit More From The Same Service dialog box.
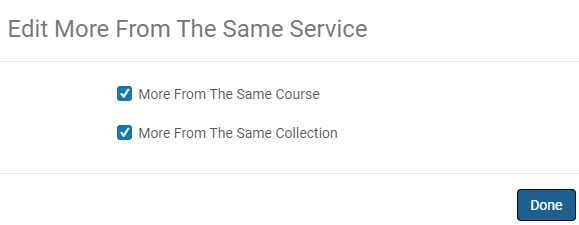 Edit More From The Same Service Dialog Box
 -
To hide the related services from appearing, clear the following checkboxes as needed and then select Done:
-
More from the same Course – When selected, the system enables the More from the same Course section in the Full Display.
-
More from the same Collection – When selected, the system enables the More from the same Collection section in the Full Display.
-
Displaying the May Also Be Held By Service
When this service is enabled and configured (see Configuring the "May Also Be Held By" Service in Primo VE), it appears by default on the record's Full Display page. With this configuration, you can hide this service from users.
-
On the Views List page (Configuration Menu > Discovery > Display Configuration > Configure Views), edit your view to open the View Configuration page.
-
Select the Full Record Services tab.
-
If you have not already done so, select Customize, which appears above the list of services in the Full Record Records Services tab.
-
Select the Configure row action to open the Enable May Also Be Held By in Full Display Service dialog box.
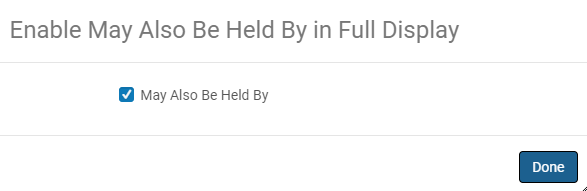 Enable May Also Be Held By in Full Display Service Dialog Box
 -
To hide the service from appearing, clear the May Also Be Held By checkbox and then select Done.
Managing Customization Packages
The Customization Package Manager (Configuration > Discovery > Display Configuration > Configure Views > Manage Customization Package tab) lets you manage your view's customization package, which allows you to brand and further customize Primo VE. If no packages are loaded, the system uses the out-of-the-box configurations. In addition, you can perform the following configurations depending on the type of view (NDE or original):
-
Select a color theme for the NDE UI only.
-
Upload a logo and a clickable logo for the original UI only.
-
Upload an Email template for the original UI only
-
Add a clickable logo for the original UI only.
Uploading/Downloading a Customization Package
A customization package is necessary to customize your view's home/landing pages, CSS, scripts, logos, icons, etc. It is unnecessary if you are using a color theme, loading an email template, or adding a URL for a clickable logo.
Downloading a Customization Package
The Customization Package Manager downloads/uploads the packages between the Primo VE server and your local machine. Before you update an existing customization package, it is recommended that you download it from the server to ensure that you are using the latest copy. If you are creating one for the first time, you are recommended to download and use the template.
-
Edit your view on the Views List page (Configuration > Discovery > Display Configuration > Configure Views).
-
Select the Manage Customization Package tab. You will see different options depending on the selected type of UI (NDE or original).
 Manage Customization Package Tab for the NDE UI
 Manage Customization Package Tab for the Original UI
 -
If this is the first time, download the template package in the Download Package section. Otherwise, download the current package to ensure you use the latest version.
If you are using the original UI, you can also use Primo Studio to create the package. To do so, 1) click the Go to Primo Studio link in the Create Customization Package section, 2) create the customization package (see Primo Studio for Primo VE), and 3) skip the rest of the steps in this procedure, and upload the package as explained under Uploading the Customization Package, below.
-
Unzip the file.
-
Ensure that the top folder of your package's zip file is the <View_Code> folder, which must have the following format: <institution_code>-<view_code>—for example, PRMO_OAP_INST-Alma.
-
Customize the configuration files and folders associated with your Landing/Home Page, images, and CSS as needed. You must retain the file structure and names of files that you are overriding. For more information, refer to the following documents for your UI type: Original UI Customization - Best Practices or NDE UI Customization - Best Practices.
Uploading the Customization Package
After you have added all your customizations and are ready to test or publish your changes to the view, zip the package and upload it to the Primo VE server.
-
Zip the <View_Code> folder.
For Windows users, we recommend using a compression tool such as 7zip or Winrar instead of Windows Send to > Compress folder to avoid upload errors.
For Mac users, use the following procedure to zip and remove any hidden .DS_Store files:
-
Open the Terminal application under Applications > Utilities.
-
Move to the parent directory of the folder that you want to compress. For example:
cd /Users/<user name>/<parent folder> -
Enter the following command to compress the file:
zip –r <target file>.zip <My_View> -x "*.DS_Store"
-
-
Specify the name of the zipped package and click Upload in the Upload Package section.
-
Select Save to deploy the changes.
-
Refresh your view in the Web browser and test your changes before uploading them to the production server.
Selecting a Color Theme (NDE UI)
You can quickly change the color theme of your view without creating a customization package. Our color schemes affect many elements in the NDE UI and adhere to the accessibility guidelines for color and contrast. If you want to make a small change to a color scheme, see Customizing a Color Theme.
-
Open the Manage Customization Package tab.
-
In the Color Theme - New UI section, select a color icon. Purple is the default color.
 Color Theme Selection
 -
Select Save.
Uploading a Logo and a Clickable Logo URL (Original UI)
Uploading an Email Template (Original UI)
Primo VE enables you to customize the format of emails sent to users after selecting the Send To Email action in Primo VE. You can customize the format with or without Primo Studio. With either method, you must upload the customized email templates with the View Configuration page. In addition, you can create separate email templates for each supported language in the UI.
-
The email template for Primo VE supports a maximum of 50 records. If a user sends more than 50 records, the system reverts to the classic email template, which was used in previous releases.
-
For security reasons, all links are removed from your email template.
The following figure shows the sample output of the out-of-the-box Email template for Primo VE.
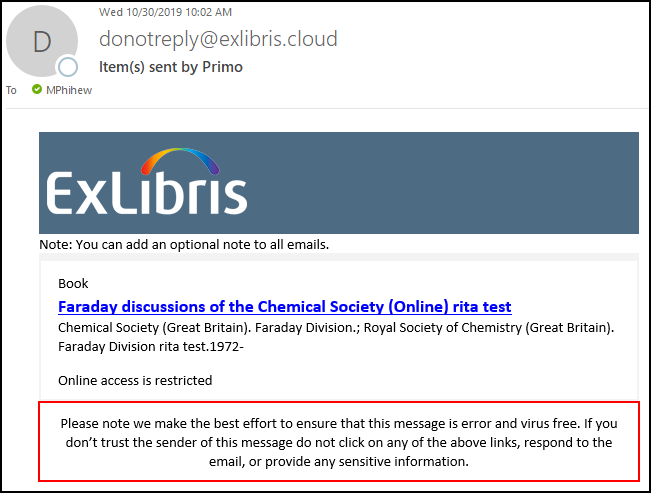
The Email template is in HTML format and includes the following sections:
-
Logo – Displays the same logo that is loaded with the Manage Customization Package tab (Configuration > Discovery > Display Configuration > Configure Views). For more details, see Adding a Clickable Logo.
-
Institution note – Displays the text configured with the following code in the Send Email and SMS code table: nui.email.institutionNote. By default, this field has no value and does not display if left empty.
-
List of records – For each record, the email displays the record's brief display and availability statement.
-
Disclaimer – Displays the text configured with the following code in the Send Email and SMS code table: nui.email.disclaimer.
Configuration Options
The email_<2-character_language_code>.html template files (such as email_en.html) enable you to configure the layout and format of the emails (per supported UI languages) that are sent when users perform the Send To Email action in Primo VE. For more details and examples of how to customize the email templates, see the following page on GitHub:
Note that the default email template file is called email_en_US.html on GitHub.
-
If you decide to customize the out-of-the-box email template and your view supports additional languages, you must create and upload a separate template file for each language (including the default email_en.html file).
-
The alignment of the email's text is based on the email client settings.
After you have created or modified any email template files, edit your view (Configuration > Discovery > Display Configuration > Configure Views), select the Manage Customization Package tab, and then use one of the following methods to upload the email template files to the UI:
-
Store the custom email template files under the html/email directory in your view's customization package and upload the entire customization package.
-
If you are not using a customization package, you can use the Upload Templates section to upload your email template files or choose to use the classic email template. By default, your view uses the new email template.
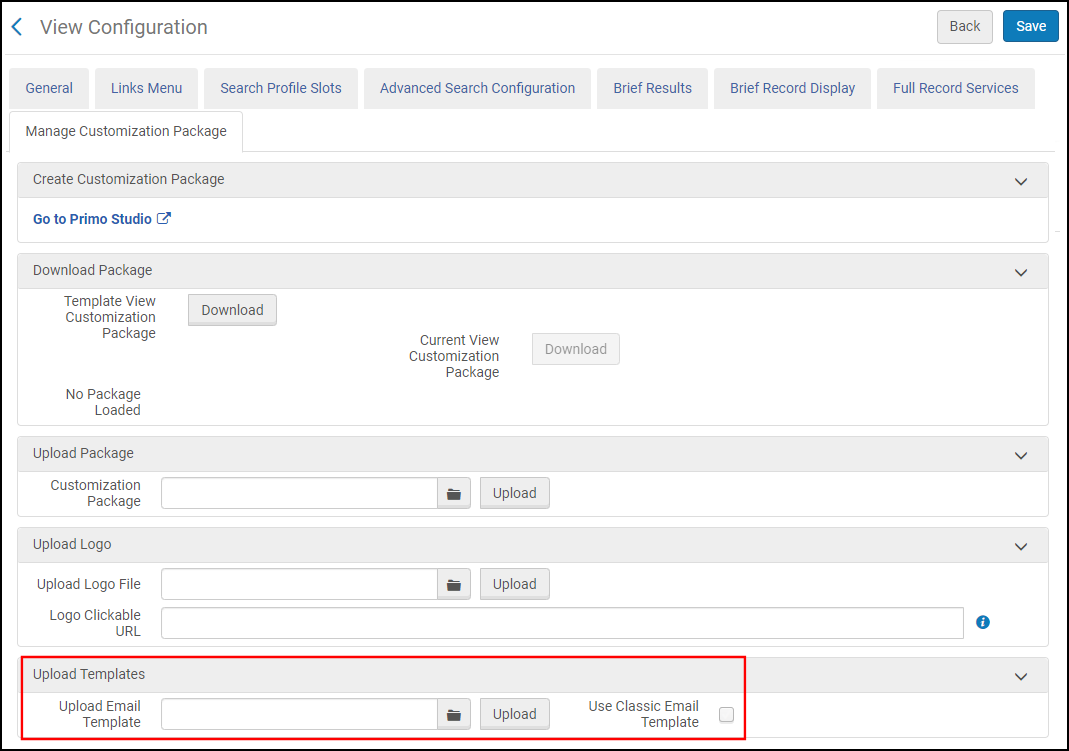 View Configuration Page - New Upload Templates Section
If you want to delete an email template file, remove the email template file under the html directory in the view's customization package and upload the modified package to the UI. If you want to revert to the out-the-box email template, remove all email templates under the html directory in the view's customization package and upload the modified package to the UI.