
Customization Best Practices
Introduction
Because every library has its own needs and brand, we have implemented a customization framework that enables customers to tap into predefined hooks for each UI component, thus allowing them to customize each element as needed.
To ensure a quality user experience and optimal system performance, we encourage customers to test every change they make for accessibility and responsiveness in their staging environments before uploading any packages to their production environments.
Branding the NDE UI
Primo VE offers many configuration options, some requiring little or no coding or development experience. The following sections describe each of these options.
Selecting a Color Theme
You can quickly change the color theme of your view without creating a customization package. Our color schemes affect many elements in the NDE UI and adhere to the accessibility guidelines for color and contrast. If you want to make a small change to a color scheme, see Customizing a Color Theme.
-
Open the Manage Customization Package tab.
-
In the Color Theme - New UI section, select a color icon. Purple is the default color.
 Color Theme Selection
 -
Select Save.
Adding a Clickable Link for the Logo
The General tab on the View Configuration page (Configuration > Discovery > Display Configuration > Configure Views) enables you to specify a link that opens a page when users click the logo. If no URL is configured, the Discovery home page is displayed when a user clicks the logo.
For information on how to customize your view's logo, see Customizing Image Files.
-
Edit your view on the View Configuration page (Configuration > Discovery > Display Configuration > Configure Views).
-
Select the General tab.
-
Specify the redirection URL in the Logo Clickable URL field.
-
Select Save to save changes to the customization package.
Updating Page Titles
The Header/Footer Tiles Labels code table (Configuration > Discovery > Display Configuration > Labels) enables you to customize the following titles in the NDE UI:
-
main.title—Discovery
-
main.description—Discovery - {{query}}
-
nui.full.display.title—Primo by Ex Libris
-
nui.brief.title—{{recordTitle}} - {{institutionName}}
Using the Customization Package Manager
The Manage Customization Package tab lets you upload and manage customization packages, enabling you to brand and customize Primo VE. If no packages are loaded, the system uses the out-of-the-box configurations. If you are transitioning a view from the original UI, the view's customization package will not carry forward to your NDE view. You must download a new customization package template and add customizations to a new package for the NDE UI.
For details on how to upload/download a customization package, see Manage Customization Package Tab.
-
Database files (.db) are not permitted in your customization package. If the following error occurs while uploading your ZIP file, remove all .db files:
Validation error: File type db is not allowed in the zip file -
Set Windows to display hidden files if you cannot see any .db files in your customization package folder.
-
The system does not use content inside <script> tags.
Understanding the File Structure of a Customization Package
Your customization package must be structured as follows to ensure that it integrates properly with Primo VE:
<View_Code> – The top folder of your customization package. Ensure that you change the name of the top folder to your institution's view code, which must be in the following format: <institution_code>-<view_code>. This folder must include the following subfolders:
-
assets – All of the NDE customization is done within the following subfolders:
-
css – This folder contains the custom.css file, which includes your formatting rules for the NDE UI (except for the Landing Page). These rules override corresponding rules in the default CSS.
-
header-footer – By adding the header.html and footer.html files, you can customize the header and footer of your view, respectively. For more information, see Adding Headers and Footers.
-
homepage – This folder enables you to customize the Landing Page by adding its HTML, CSS, and background image. By default, it includes the following templates: homepage_en.html.tmpl and homepage.css.tmpl. For more information, see Customizing the Landing Page.
-
icons – This subfolder enables you to customize various icons in the NDE UI, including the favicon.ico. By default, it includes only the custom_icons.svg file. For more information, see Customizing Icons.
-
images – This subfolder enables you to customize images for the NDE UI, such as your library logo (library-logo.png) and resource type icons (icon_<resource_type_code>.png). By default, it includes only the library-logo.png file. For more information, see Customizing Image Files.
-
js – This subfolder includes the custom.js file, which contains the JavaScript code used only to load the NDE UI. This file is used differently from the original UI and is no longer used to add custom Angular components hooked to a specific component. To implement that configuration, see Advanced Customization Capabilities and Managing Add-Ons for the NDE UI.
-
Creating and Deploying a Customization Package
The Manage Customization Package tab downloads/uploads the customization package between the Primo VE server and your local machine. Before you update an existing customization package, it is recommended that you download it from the server to ensure that you are using the latest copy. If you are creating a customization package, you are recommended to download the template.
For more information, see Managing Customization Packages.
-
Edit your view on the Views List page (Configuration > Discovery > Display Configuration > Configure Views).
-
Select the Manage Customization Package tab.
 Manage Customization Package Tab for the NDE UI
 -
If this is the first time, download the template package in the Download Package section. Otherwise, download the current package to ensure you use the latest version.
-
Unzip the file.
-
Ensure that the top folder of your package's zip file is the <View_Code> folder, which must have the following format: <institution_code>-<view_code>—for example, PRMO_OAP_INST-Alma.
-
Customize the configuration files and folders associated with your Landing Page, images, and CSS as needed. You must retain the file structure and names of files that you are overriding. For more information, refer to the remaining sections in this document.
-
Zip the <View_Code> folder.
For Windows users, we recommend using a compression tool such as 7zip or Winrar instead of Windows Send to > Compress folder to avoid upload errors.
For Mac users, use the following procedure to zip and remove any hidden .DS_Store files:
-
Open the Terminal application under Applications > Utilities.
-
Move to the parent directory of the folder that you want to compress. For example:
cd /Users/<user name>/<parent folder> -
Enter the following command to compress the file:
zip –r <target file>.zip <My_View> -x "*.DS_Store"
-
-
Specify the name of the zipped package and click Upload in the Upload Package section.
-
Select Save to deploy the changes.
-
Refresh your view in the Web browser and test your changes before uploading them to the production server.
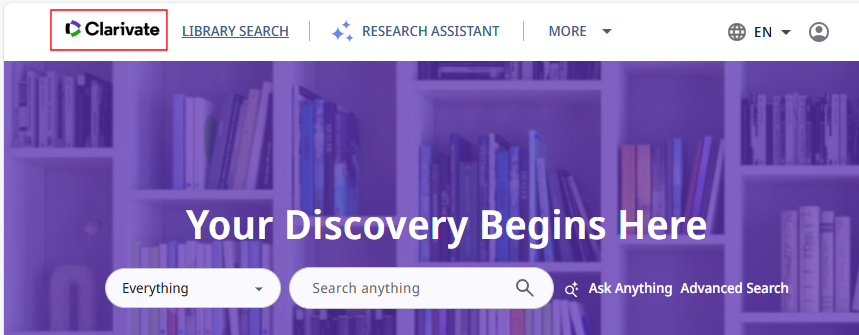
Customizing the Landing Page
The Landing Page is the entry point for library discovery and typically includes an empty search box.

Institutions are encouraged to add or customize the following information on the page:
-
Quick access links, such as library hours.
-
A welcome message and search tips.
-
An option to embed a showcase carousel will be available via configuration after the General Release in May 2025.
-
An option to customize the background image of the Landing Page.
-
Customize the title in the banner using the following code in the Search Tile Labels code table (Configuration > Discovery > Display Configuration > Labels):
nde.landing.header – Your Discovery Begins Here
The homepage folder in your customization package includes the following files to customize the content and styles for the Landing page:
-
homepage_en.html.tmpl – This is the template for the Landing page's HTML file. By editing it and removing its .tmpl suffix, you can customize the area below the search box on the Landing Page. To support other languages, you can create and upload new HTML files with the relevant language code—for example, homepage_fr.html.
-
homepage.css.tmpl – This is the template for the Landing Page's CSS file. By editing it and removing its .tmpl suffix, you can customize the formatting for the Landing Page.
-
homepage_background.svg – This SVG file configures the Landing page's background image. The package does not include a template.
In the following example, the background image and the text in the "About the Library" section were updated:
-
Create the homepage_en.html file with the changes to the "About the Library" section (see attached HTML file):
<!DOCTYPE html>
<html lang="en">
<head>
<base href="/">
<meta charset="UTF-8">
<meta content="width=device-width, initial-scale=1.0" name="viewport">
<title>Library Page</title>
<link href="./homepage.css" rel="stylesheet">
</head>
<body>
<main class="main-landing-page display-flex flex-column flex-layout-center-center">
<div class="menu-container width-100">
<ul role="list" class="menu width-100">
<li role="listitem">
<a id="Opening_hours_link" href="https://clarivate.com/" aria-label="Opening hours" role="link">
<div class="icon display-flex">
<img alt="" src="assets/images/homePageImages/clock.svg">
</div>
<span>Opening hours</span>
</a>
</li>
<li role="listitem">
<a id="FAQ_link" aria-label="FAQ" role="link">
<div class="icon display-flex">
<img alt="" src="assets/images/homePageImages/search.svg">
</div>
<span>FAQ</span>
</a>
</li>
<li role="listitem">
<a id="Ask_a_librarian_link" aria-label="Ask a librarian" role="link">
<div class="icon display-flex">
<img alt="" src="assets/images/homePageImages/book.svg">
</div>
<span>Ask a librarian</span>
</a>
</li>
<li role="listitem">
<a id="Search_tips_link" aria-label="Search tips" role="link">
<div class="icon display-flex">
<img alt="" src="assets/images/homePageImages/comp_search.svg">
</div>
<span>Search tips</span>
</a>
</li>
<li role="listitem">
<a id="Study_room_link" aria-label="Study room" role="link">
<div class="icon display-flex">
<img alt="" src="assets/images/homePageImages/book.svg">
</div>
<span>Study room</span>
</a>
</li>
</ul>
</div><div class="flex-row flex-layout-space-between width-100 welcome-announcements-container">
<div class="welcome display-flex flex-column flex-layout-start">
<h2 aria-level="2" role="heading" class="welcome-title mat-headline-medium ">Welcome to the library</h2>
<span class="welcome-content">Access your account by signing in and enabling more capabilities</span>
<a id="myLibraryCard" tabindex="0" aria-label="Go to my library card" role="link">Go to my library card</a>
</div>
<div class="announcements display-flex flex-column">
<header class="flex-column gap-1">
<h2 class="mat-title-medium" role="heading" aria-level="2">Announcements:</h2>
<h3 role="heading" aria-level="3" class="announcements-item-title mat-headline-medium">New library resources</h3>
</header>
<article>
<p class="mat-body-large">Lorem ipsum dolor sit amet consectetur. Varius ipsum amet elit convallis. Egestas arcu volutpat morbi urna
cursus amet.</p>
</article></div>
</div><div class="about display-flex width-100">
<div class="about-content flex-row">
<div class="about-text flex-column flex-space-between ">
<h2 role="heading" aria-level="2" class="about-text-title mat-headline-large">Customized Landing Page </h2>
<p class="about-text-description">
Please make sure to custom your text here as this is a demo customization example .</p>
<div class="help-sign-in-container flex-column gap-05">
<span>Primo also helps you manage your research. Sign in to:</span>
<ul role="list">
<li role="listitem">
<img alt="Library image" src="assets/images/homePageImages/success.svg">
<span> Reserve and renew books</span>
</li>
<li role="listitem">
<img alt="Library image" src="assets/images/homePageImages/success.svg">
<span> Create favorites lists</span></li>
<li role="listitem">
<img alt="Library image" src="assets/images/homePageImages/success.svg">
<span> Reserve and renew books</span></li>
<li role="listitem">
<img alt="Library image" src="assets/images/homePageImages/success.svg">
<span> View full search results</span></li>
</ul>
</div>
</div>
<div class="about-image flex-layout-center-center">
<img alt="" src="assets/images/homePageImages/about_image.svg">
</div>
</div>
</div>
</main>
</main>
</body>
</html> -
Create the homepage_background.svg Landing page's background file with the new background image (see attached SVG file).
-
Since no CSS was added for this example, the default formatting for the Landing Page is used.
-
Zip and upload your updated customization package in the Manage Customization Package tab for your view.
If you choose to use our home‑page HTML structure, be sure to give each Quick Access link an href attribute pointing to your own resources
After the deployment, the Landing page appears as follows:

Adding Headers and Footers
Headers and footers are areas at the top and bottom of the NDE UI. You can display common information on all pages in the UI in these areas if added to the following files in your customization package: header.html and footer.html. If you support languages other than English, use the following format to include the language's two-digit code in the file name: header_<language_code>.html and footer_<language_code>.html.
This functionality will be available with the June 2025 release.
For example, add the following code to the footer.html file to display links for your institution's privacy policy, accessibility statement, and Terms of Use:
<!DOCTYPE html>
<footer style="text-align: center; padding: 1em; background-color: #f2f2f2; font-size: 0.9em;">
<p>
<a href="/privacy-policy.html" target="_blank">Privacy Policy</a> |
<a href="/accessibility-statement.html" target="_blank">Accessibility Statement</a> |
<a href="/terms-of-use.html" target="_blank">Terms of Use</a>
</p>
<p>© 2025 Your Library Name</p>
</footer>
When deployed, the footer appears at the bottom of the UI:

Customizing a Color Theme
If you have selected one of our out-of-the-box color themes but require minor changes to match your brand, you can modify specific variables (such as --sys-primary) with your customization package.
The NDE UI uses a theme palette defined by the standards in Angular Material to help ensure accessibility through proper color contrast, visible focus indicators, and consistent styling. Based on Material Design and WCAG guidelines, the palette uses semantic roles like primary and accent, making the interface more usable and compliant by default. Altering these attributes is not recommended. Instead, it is recommended that you create a custom color theme. For more information, see Creating Your Own Color Theme on Github.
-
Determine which attribute you want to change. To see a list of currently used attributes, inspect the nde-color-theme-*.css source file using the browser's Development Tools (F12).
 Inspect Color Variables in Browser
 -
Edit the variable in your customization package's custom.css file. For example:
:root {
--sys-primary: #b51a57;
} -
Zip and upload your customization package. For more information, see Creating and Deploying a Customization Package.
Customizing Image Files
The images folder contains the images used to customize the library logo and resource type thumbnails. To add the image files, use the PNG format and ensure that you adhere to the guidelines and the following naming formats:
-
library-logo.png – When added to the images folder, it overrides the default image for the library logo that appears in the Main Menu:
 Library Logo in NDE UI
 -
icon_<resource_type_code>.png – When added to the images folder, it overrides the default thumbnail for a resource when there is no cover for the image. For example: icon_audio.png.
Customizing Icons
The icons folder contains the icons used to customize the favicon and various icons used in the NDE UI (such as the search icon  ). To customize the icons, use the SVG format and the following files:
-
favicon.ico – When added to the icons folder, it overrides the default favicon for your view. This functionality is available with the June 2025 release.
 Favicon in NDE UI Tab
 -
custom_icons.svg – Add the icons (based on the ID of the default icon) to this file using the SVG format. You can add as many icons as needed using the <symbol> element for each.
 Search Icon in the NDE UI
To determine the ID of an icon, use a browser's Development Tools to inspect the icon you want to customize. After selecting Inspect Element option and the icon, the ID of the icon appears in the data-mat-icon-name field:
 Inspecting the Icon for the ID
For example, the custom_icons.svg file may appear as follows with a single icon:
<?xml version="1.0" encoding="UTF-8"?>
<svg xmlns="http://www.w3.org/2000/svg" xmlns:xlink="http://www.w3.org/1999/xlink" width="0" height="0">
<symbol id="Search" height="24px" viewBox="0 -960 960 960" width="24px" fill="">
<path d="M440-240q116 0 198-81.5T720-520q0-116-82-198t-198-82q-117 0-198.5 82T160-520q0 117 81.5 198.5T440-240Zm0-280Zm0 160q-83 0-147.5-44.5T200-520q28-70 92.5-115T440-680q82 0 146.5 45T680-520q-29 71-93.5 115.5T440-360Zm0-60q55 0 101-26.5t72-73.5q-26-46-72-73t-101-27q-56 0-102 27t-72 73q26 47 72 73.5T440-420Zm0-40q25 0 42.5-17t17.5-43q0-25-17.5-42.5T440-580q-26 0-43 17.5T380-520q0 26 17 43t43 17Zm0 300q-75 0-140.5-28.5t-114-77q-48.5-48.5-77-114T80-520q0-74 28.5-139.5t77-114.5q48.5-49 114-77.5T440-880q74 0 139.5 28.5T694-774q49 49 77.5 114.5T800-520q0 64-21 121t-58 104l159 159-57 56-159-158q-47 37-104 57.5T440-160Z"/>
</symbol>
</svg>
Example of custom_icons.svg File
Adding Custom HTML and Other Files
In addition, you can add your own HTML files and, in fact, most other static file types (excluding database-related files) to your customization package. This allows you to host additional resources such as help pages, instructional content, or reusable components, all accessible with a direct link without altering core system behavior.
Once the files are added to the package, they can be referenced using the following URL structure:
Example:
-
Download the customization package for your NDE view.
-
Unzip the package.
-
Add your custom files to the assets folder.
-
Zip the package.
-
Upload the package to the server.
For more complete details, see Creating and Deploying a Customization Package.
Guidelines for Logos and Thumbnails
Using the NDE Customization Framework, you can brand your institution's UI according to your needs by replacing the logo and thumbnails for resource types. Download the template and add your logo and custom thumbnails to a dedicated images folder.
Follow these guidelines to ensure optimal display and prevent distortion of images:
-
File Format: Must be PNG ( with .png suffix).
-
Maximum Dimensions:
-
Height: Up to 100 px.
-
Width: Up to 300 px.
-
-
File Size: Cannot exceed 30 KB.
-
Aspect Ratio: Maintain the original aspect ratio to avoid distortion.
Follow these guidelines to ensure optimal display and prevent distortion for resource type thumbnails:
-
Width: Fixed at 68 px.
-
Height: Adjusts according to proportions, with alignment to the top.
-
Border Stroke Color: #DFDFDF (applied to all thumbnails and placeholder images, especially for white backgrounds).
-
Corner Radius: 2 px for both thumbnails and placeholders.
Follow these guidelines to ensure optimal display and prevent distortion for BX Recommendation thumbnails (Desktop and Mobile)
-
Width: Fixed at 34 px.
-
Height: Adjusts according to proportions, with alignment to the top.
-
Border Stroke Color: #DFDFDF (applied to all thumbnails and placeholder images, especially for white backgrounds).
-
Corner Radius: 2 px for both thumbnails and placeholders.
Advanced Customization Capabilities
For deeper modifications beyond standard branding, you can use the NDE UI Customization Package on GitHub, which enables developers to build and develop the following:
-
A custom module tailored to specific institutional needs. You can create and map your components to designated NDE UI selectors, with the flexibility to place them on the top, bottom, before, or after existing elements or even replace them entirely. For more information, see on GitHub. For more information, see CustomModule on GitHub.
-
A custom color theme. For more details, see Creating Your Own Color Theme on Github.
-
An add-on. For more details, see Developing an Add-On for the NDE UI on GitHub.
Customizing the NDE UI – Live Demo (70 min.)
Managing Add-Ons for the NDE UI
In addition to loading a custom module, the NDE UI provides infrastructure to support the dynamic loading of add-ons developed by other stakeholders such as vendors, consortia, or community members. This allows institutions to integrate external functionality seamlessly and manage it through the Add-On Configuration page.
This infrastructure was developed to enable seamless integration with various stakeholders (such as Third Iron, StackMap, SpringShare and more), while allowing the community to share commonly used components. For more information, see NDE UI Customization - Best Practices.
To develop an add-on or guide a vendor in creating one, see Developing an Add-On for the NDE UI.
-
Open the Add-on Configuration page (Configuration > Discovery > Other > Add-on Configuration).
-
Select Add Row.
 Add Row Dialog Box
 -
Specify the following fields to integrate an add-on with the NDE UI. Contact the add-on provider for help filling in the following information.
-
Add-on Name – The identifier of this add-on as specified in the custom module.
-
Add-on URL—The location where the add-on is hosted (a static folder to load the add-on at runtime). While saving the information, the URL is checked for access.
-
Configuration Parameters – JSON-based configuration parameters to be referenced at runtime by the add-on.
This configuration file has a 5 KB limitation, which is approximately 20 parameters.
-
View – Specify All or select a view on which to use the add-on.
-
-
Select Save and return to the list of configured add-ons.
-
Activate the add-on.