
Localization
User Interface Languages
Rosetta uses an English (American) language default interface. Customers can change the interface language by adding a language to the User Language code table, then adding a translation for all interface objects (such as pages, labels, and values).
Users can add as many languages as they need to Rosetta, then choose among those they have entered.
Add a New Language
To access the code table for languages, follow this path: Advanced Configuration > General > All Code Tables. Click the text link User Language from the list of code tables.
The code table page opens to the User Language table.

User Language Code Table
To add a new language, enter the language’s code and description (for example, code = “fr” and description = “French”) in the fields below the Create a New Code Table Row heading. Then click the Create text link.
The data you entered appears as the next row in the User Language code table.
Click the Save button.
The system saves the new language information and returns you to the List of Code Tables page.
Adding New Language Values to the Code Table
In order for the new language to appear on the UI, new values must be added to the code tables that store UI text. This can be done in one of two ways:
For large code tables such as UILabels (over 6,000 rows), the XLS file method should be used to translate the language.
Updating an .XLS File (Export/Import)
The export/import method involves
- exporting the code table content into an .xls file (Excel spreadsheet or another spreadsheet application that reads .xls files)
- modifying the data in the spreadsheet application, and
- importing the spreadsheet back into Rosetta.
You can perform these manual translations one table at a time, from the Code Tables page, or you can export all code tables in a single export and into a single file.
To download the tables one by one, use the Export text link in the Code Table Rows section of the Code Tables page (see Exporting All Code Tables).
To download all code tables that require translating, follow the path Home > Advanced Configuration > Multi-Language Setting > Export Code Tables, then select your language and click the Export button.
Exporting All Code Tables
When exporting, save the file to the directory of your choice, then open the file and enter translations. When you are finished translating, import the edited spreadsheet using the import function from the Multi-Language Setting page or the Code Tables page.
Make sure you select the language you translated into when making this selection for importing. If you change the selected language, the system reloads the UI and sends you back to the Home page.
When the language is loaded, the user can select it for viewing.
Updating in the UI
The UI method involves entering information directly into the code tables as they are displayed on the UI.
Key Fields for Translating Code Tables
From the General > Code Tables page, the user selects the following:
- a UI language from the Languages drop-down menu
- the code table from the Table Name drop-down menu.
The page refreshes with each selection. The Description column displays the text that should be translated into the language selected.
Clicking Save returns you to the previous page.
Translation Fields on the Code Table UI
UI Customization
Users can change Rosetta’s login page image, logo, and color scheme, on the UI Customization page (Administration module > Localization > UI Customization).
Use the following links to see relevant topics:
- Customizing the Login Page Image
- Customizing the Rosetta Logo and Color
- UI Customization Per Institution
Customizing the Login Page Image
You can customize the login page image in the default IU customization for the consortium.
To perform the customization:
- From the UI Customization page (Administration module > Localization > UI Customization), click Edit for the default UI customization. The following appears:
Login Page Customization
- From the Background Image File field, click Browse.
- Click Save. The background image you selected appears in the login page.
Customizing the Rosetta Logo and Color
You can customize the default logo that appears on the top right if the Rosetta header and the color of the interface by creating a customization profile with the logo and color you want. An administrator can then assign the profile to an institution so that the logo and color appear in the Rosetta interface of the institution.
There is no automatic restore-default function on the UI Customization page. It is recommended to save a copy of the current logo, so that you can later restore it.
To perform the customization:
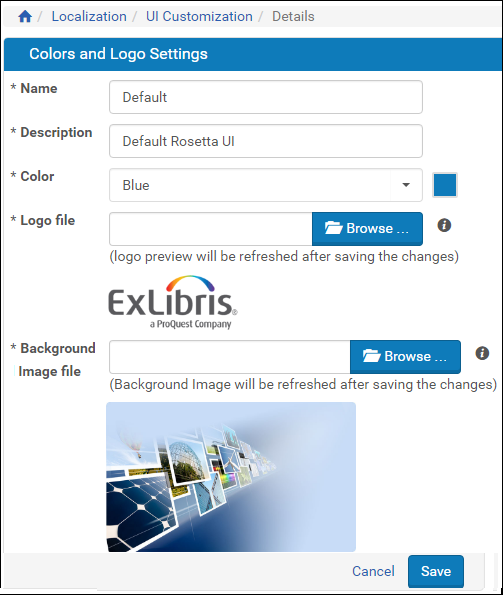
- From the Administration module, click Localization > UI Customization and click the Add UI Customization button. The following appears:
UI Customization
- Enter a Name and Description. These will be helpful when you or another user assign the customization to a particular institution.
- From the Color drop-down list, select a color.
- To set a new logo, click Browse and select a logo.
Logos must be in jpg or png format. The recommended dimensions are 100 X 43.
- Click Save. The changes are displayed.
You have to assign the new customization to an institution and log on as a user of that institution to see the changes in color and logo. For more information, see UI Customization Per Institution.
UI Customization Per Institution
The System Administrator can define different UI customizations for different institutions. Users who log on to a customized institution see the logo and colors that the Administrator has specified (see Customizing the Rosetta Logo and Color) for that institution.
The Delivery of an IE takes on the customization of the institution to which the IE belongs.
To assign a UI customization to an institution:
- Access the List of institutions page (Administration module > Administrative Structure).
- Select the name or Edit link of the institution you want to customize.
The institution’s information and list of departments open.
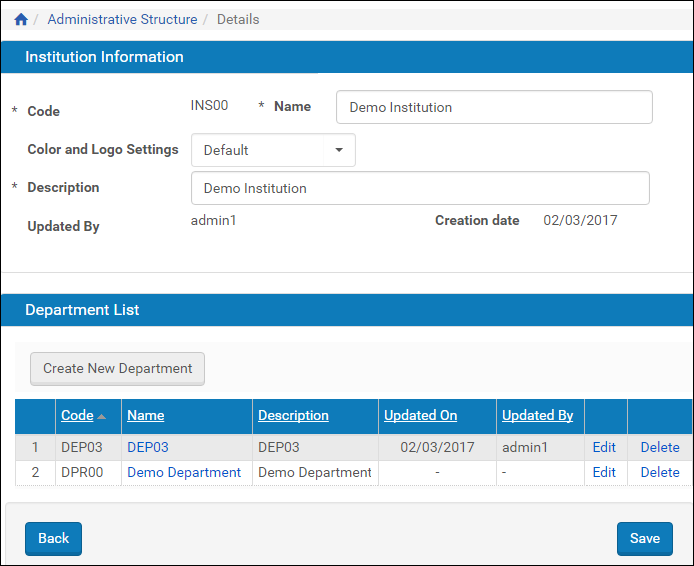
Assigning Color and Logo to an Institution
- In the institution Information section of the page, from the Color and Logo Settings drop-down list, select the name of one of the defined UI customizations.
- Click the Save button.
Changes may not be immediately viewable. You must be logged on to the institution whose UI you are changing to see the changes. If you are already logged on, refresh the page through your browser.