
Configuring General Settings
Working with Configuration Files
Configuration files enable Administrators to configure advanced settings at the consortial level (such as metadata standards and e-mail configurations that all of the institutions in a consortium must conform to). The configuration files can be stored in various formats, including XML and XSL.
Configuration files are divided into functional groups, known as file groups, which can be further divided into sub-groups. Table describes the organization of configuration files in the Rosetta system.
| File Group | Files Define... |
|---|---|
| External Interfaces | Interaction with external systems |
| Metadata Editing Configuration | Web Editor configuration files |
| XSL Transformation | Manage various XSL files used to transform IEs throughout the system |
| User Emails Group | XSL files for Email formatting |
| General | Miscellaneous files |
After you make changes to a configuration file, you can click View Previous to display the configuration file from the last time it was saved. To restore the previous version, click Save.
Adding XSL Configuration Files
You can add XSL configuration files to Rosetta that are used to convert XML documents to user friendly HTML. You can configure file delivery rules that determine when a specific XSL file is used. For more information, see Delivery Rules.
To add an XSL configuration file:
- From the Administration interface, select General > Configuration Files.

XSL Configuration Files
- Click Add File.

Add XSL Configuration File
- Enter the filename, description, and the XSL configuration file.
- Click Save.
The XSL configuration file is available when creating file delivery rules.
Working with General Parameters
Administrators can configure general parameters to control how the Rosetta system functions. General parameters are divided into functional groups known as modules, some of which are described in the following table.
CAUTION: Avoid accessing general parameters unless you have in depth knowledge of the Rosetta system and you have contacted Ex Libris to discuss changing your settings. Performing an error on a general parameter can cause the system to malfunction.
| Module | Description |
|---|---|
| Authentication | Authentication settings, such as the name of the calling system. |
| Background jobs | Background job execution settings - for example, how many times per minute the system executes the metadata indexer program. |
| Backoffice | Back office configuration settings, such as default page size and password size. |
| Delivery | Delivery settings, such as the number of collections to be displayed in a collection viewer page and the maximum file size for delivery. |
| Deposit | Deposit process settings, such as default page size and event logging. |
| Format Library | Format Library settings, such as setting a GitHub username and password, to allow you to install the draft of the format library version. |
| General | General settings, such as system time format. |
| Menu | Menu settings, such as the directory in which graphs used in reports are stored |
| Network | Network settings, such as inactivity connection time-out. |
| Repository | Permanent Repository settings, such as the file storage system. |
| Search | Search settings, such as the bulk size of the export to Excel functionality and the number of columns displayed in the search UI. |
| SMTP Email | SMTP email settings, such as the SMTP email port and password. |
Administrators who do work with the general parameters use advanced configuration and the General Parameters mapping table. (For more information on accessing the List of General Parameters page, see Administration Components. For a description of the General Parameters, see the General Parameters section of the Rosetta System Administration Guide.)
Working with Code Tables
Code tables contain options that staff and Administrators select when configuring the Rosetta system. For example, the Producer group code table contains groups for a Negotiator to choose from when creating a Producer account.
The Rosetta system assembles code tables into the following groups, known as subsystems:
- Common
- Data Model
- Deposit
- Events
- Infra
- Material Flow Management
- Menu
- Metadata Editor
- Metadata Forms
- Persistent Identifiers
- Preservation
- Process Management
- Producer Management
- Staging
- User Management
For a description of all available code tables, see Rosetta Code Tables.
Administrators can access the catalog of all code tables stored in the Rosetta system using the All Code Tables page. (For information on accessing the All Code Tables page, see Administration.).
In addition, this page enables Administrators to open individual code tables for editing. (For more information on working with individual code tables, see Editing Code Tables.)
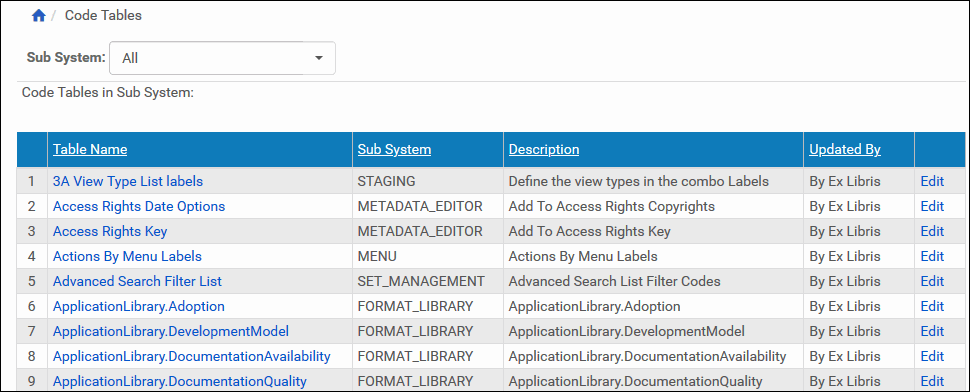
All Code Tables Page
Editing Code Tables
The All Code Tables page enables Administrators to open code tables for editing.
To open a code table for editing:
On the All Code Tables page, locate the code table to which you want to add an option and click Edit. The page containing available options of the selected code table opens.
The following actions can be performed from the code table page:
- Adding an Option to the Code Table
- Activating and Deactivating an Option
- Changing the Display Order
- Deleting an Option
Adding an Option to the Code Table
Administrators can add options to a code table.
To add an option:
- On the Advanced Configuration > General >All Code Tables page, locate the code table to which you want to add an option and click Edit. The page containing available options of the selected code table is displayed.
- Under Create a New Code Table Row, provide the requested information.
- Click Save. The new option is displayed in the code table.
The new option is now available to Staff and Administrators who configure the Rosetta system.
Activating and Deactivating an Option
Administrators can temporarily deactivate an option in a code table when they want to make this option unavailable to staff users without deleting it.
On the code table page, the status of the option is indicated by the check mark in the Active column:
- Yellow = active
- Grey = inactive
To activate or deactivate an option in the code table:
- On the code table page, locate the option that you want to activate or deactivate.
- In the Active column, click the check mark. The check mark in the Active column indicates the new status.
The option status is changed from active to inactive, or from inactive to active.
Changing the Display Order
Administrators can change the order in which options are displayed to staff users on configuration pages.
To change the display order:
- On the code table page, in the Display Order column, use the up and down arrows to change the display order.
- Click Save.
The options are now displayed in the newly defined order.
Deleting an Option
Administrators can delete options from a code table. After deleting an option, it is no longer available on configuration pages.
To delete an option:
- On the code table page, locate the option you want to delete and click Delete. The confirmation window is displayed.
- Click OK.
The option is removed from the code table and is no longer displayed on configuration pages.
Working with Mapping Tables
Mapping tables enable Administrators to control the connections between entities in the Rosetta system. Like code tables, mapping tables are grouped into subsystems, as described in Working with Code Tables. Mapping tables can be edited (see Editing Mapping Tables).
Administrators can access the list of all mapping tables stored in the Rosetta system during advanced configuration, using the All Mapping Tables page. In addition, this page enables Administrators to access specific mapping tables.
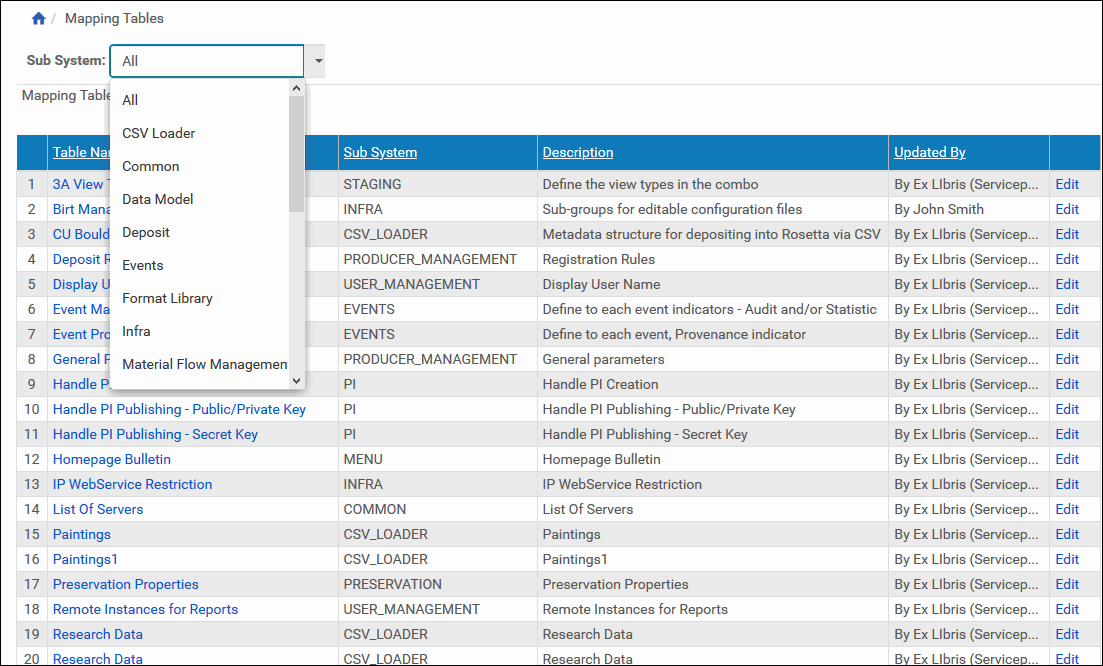
All Mapping Tables Page
Editing Mapping Tables
To open a mapping table for editing:
On the All Mapping Tables page, locate the mapping table you want to edit and click Edit. The page containing entries of the selected mapping table is displayed.
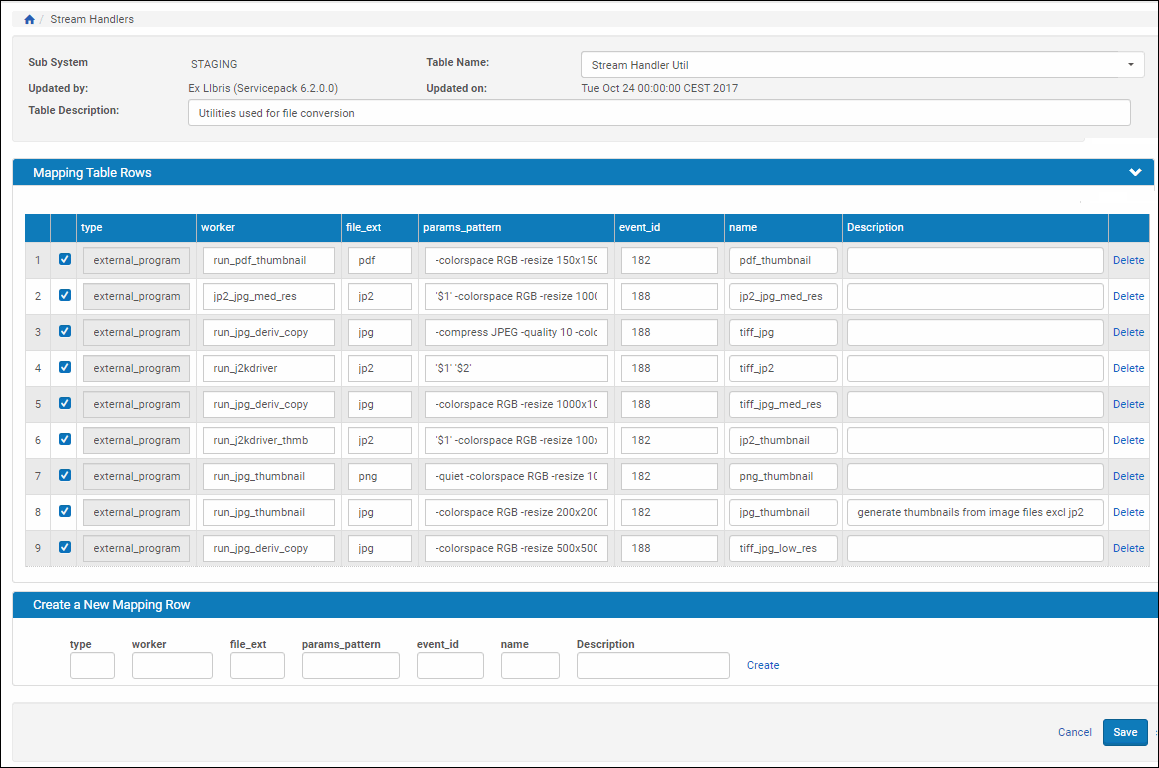
Mapping Table Example - Stream Handlers Mapping Table
Parameters to be provided can vary depending on the mapping table. However, the process of adding and deleting entries is identical for all mapping tables. The following actions can be performed from any mapping table:
Adding an Entry to a Mapping Table
Administrators can add a new entry to a mapping table in order to define the connection between entities in the Rosetta system.
To add an entry to a mapping table:
- On the All Mapping Tables page, locate the mapping table to which you want to add an entry and click Edit. The page containing entries of the selected mapping table is displayed.
- Under Create a New Mapping Row, provide the requested information.
- Click Save. The new entry is added to the table.
The Rosetta system can now use the new entry as defined.
Deleting an Entry from a Mapping Table
Administrators can delete an entry from a mapping table when the connection between entities is no longer required.
To delete an entry from a mapping table:
- On the All Mapping Tables page, locate the mapping table from which you want to delete an entry and click Edit.
The page containing the entries of the selected mapping table opens.
- Locate the entry you want to delete and click Delete.
The entry is removed from the mapping table. The Rosetta system can no longer use the deleted entities.
System Checks
Rosetta performs the following system checks on start-up:
- Web services – Operability of Deposit, Delivery, Repository, and Permanent Web services in this environment
- PDS – Communication with PDS
- Plug-ins – Access to the plug-ins directory (to make sure that Rosetta has access to all plug-ins)
- Shared folders – Access to and available space in the operational_shared and delivery_shared folders
- Storage – Access to and available space in operational and permanent storage.
- Tablespace – the Oracle Tablespace Utilization Checker startup plugin checks that there is enough tablespace in the database
Rosetta may also perform these checks during ongoing sessions. See the System Administration Guide for details about their configuration.)
A serious failure for any of these checks results in a red error bar when the user logs on to the system.
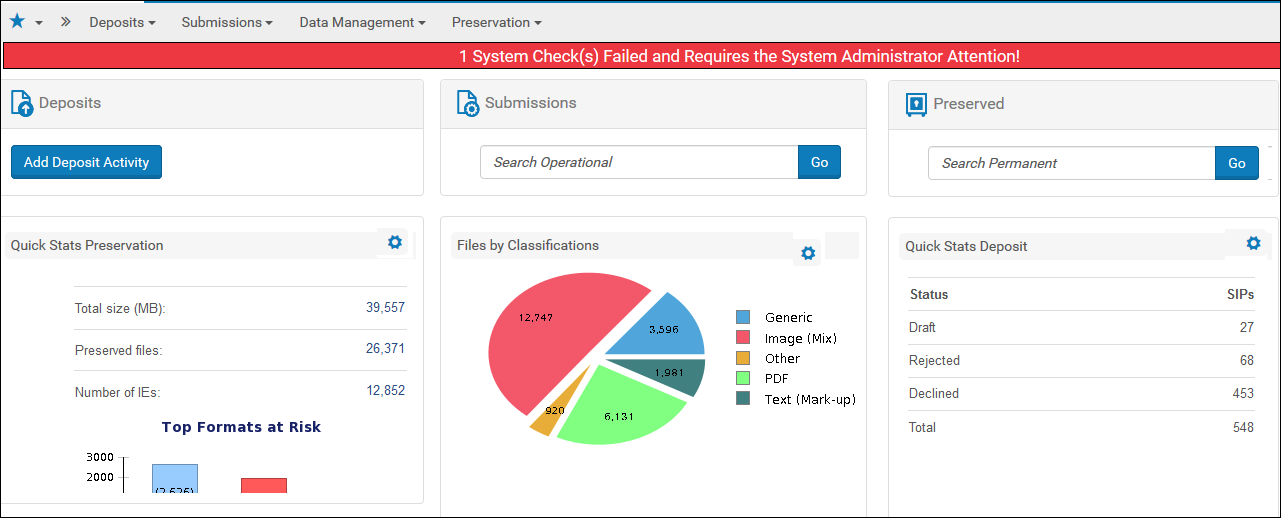
To view the details of the errors, from the Advanced Configuration page, go to General > System Checks.
The System Checks page displays all of the errors identified by the system during start-up.

The following information is included in the error table: name of the system check, host, role, a message about the error(s), the error’s severity, and the time the error occurred.
Errors with the severity of FATAL cause the initial red bar at login. Other errors may allow you to carry out your work, although it is advisable to fix them.
Actions that can be taken from the System Checks page are:
- Run – Perform the check again
- Ignore Once – The problem is ignored once (entry is deleted from the database)
- Ignore Permanently – The check is removed from the list of checks
For more information on the configuration of the checks job, see the System Administration Guide.