
Preservation Plan Execution
Executing a Preservation Plan
- Open the Preservation page of the system. Under Preservation Executions, click Signed-off Plans.
The List of Signed-off Plans page opens.
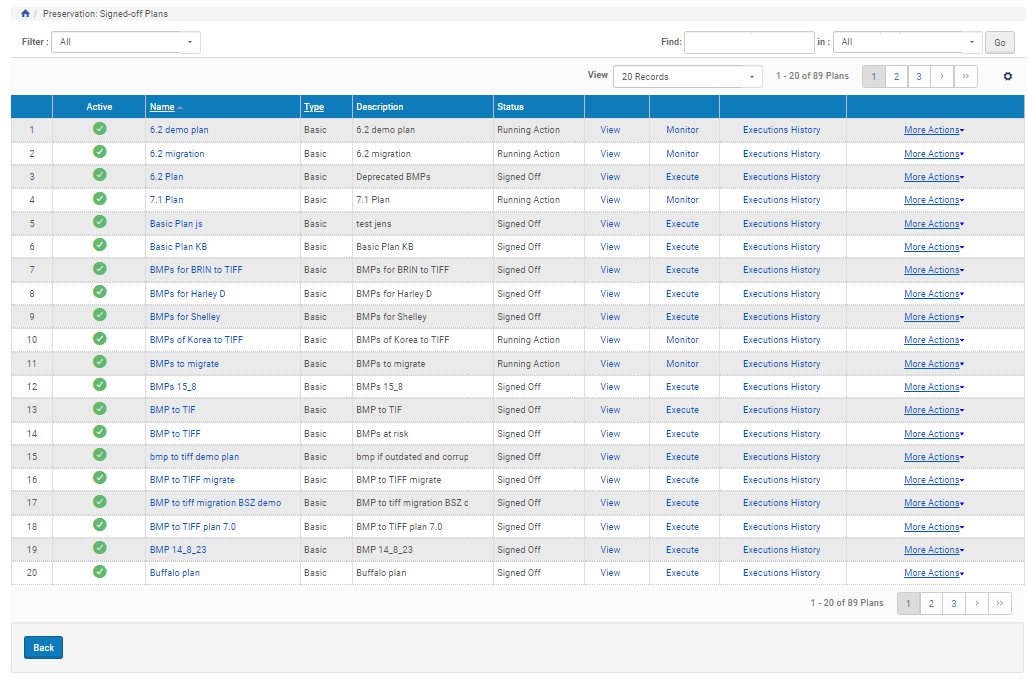
Signed-off Preservation Plans
This page lists all Preservation plans in the system that are signed off.
For each plan, its life cycle stage is indicated (Signed Off or Running Action when the plan is being executed) and the following options are available:
- View - Shows the details of the plan in view mode
- Execute/Monitor - Starts executing the plan. When the plan’s Life Cycle is Running Action, the Execute option changes to Monitor.
- Execution History - Shows previous executions of the plan if there were any
- Plan Summary - Shows the report of the Preservation planning tests
- View Selected Alternative - Shows the details of the plan’s alternative that was chosen
- More Actions (available after plan has been executed):
- View Execution Form - Shows the details of the plan’s execution, such as block size and date scheduled.
- Abort: Stops the execution of the plan.
- Find the plan you want to execute and click Execute. The Plan Execution Form page opens:
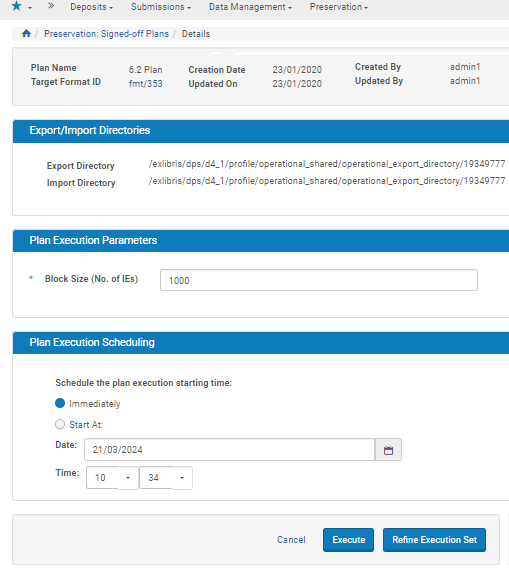
Plan Execution Form Page
- Choose when you want to run the execution. If you want to start it immediately, select the Immediately radio button. If you want to delay the execution, select the Start At radio button and type the required date and time in the appropriate fields. The Unschedule action is also available if Plan execution is scheduled to start at a future date and time.
- (Optional) To split the Preservation set of the plan into blocks and process them separately, type the required size of the blocks in the Block Size field.
- (Optional) If you choose not to process the entire Preservation set at the same time, you can reduce the set by introducing an additional condition.
To reduce the set, do the following:-
Click the Refine Execution Set button. The Refine Execution Set page opens.
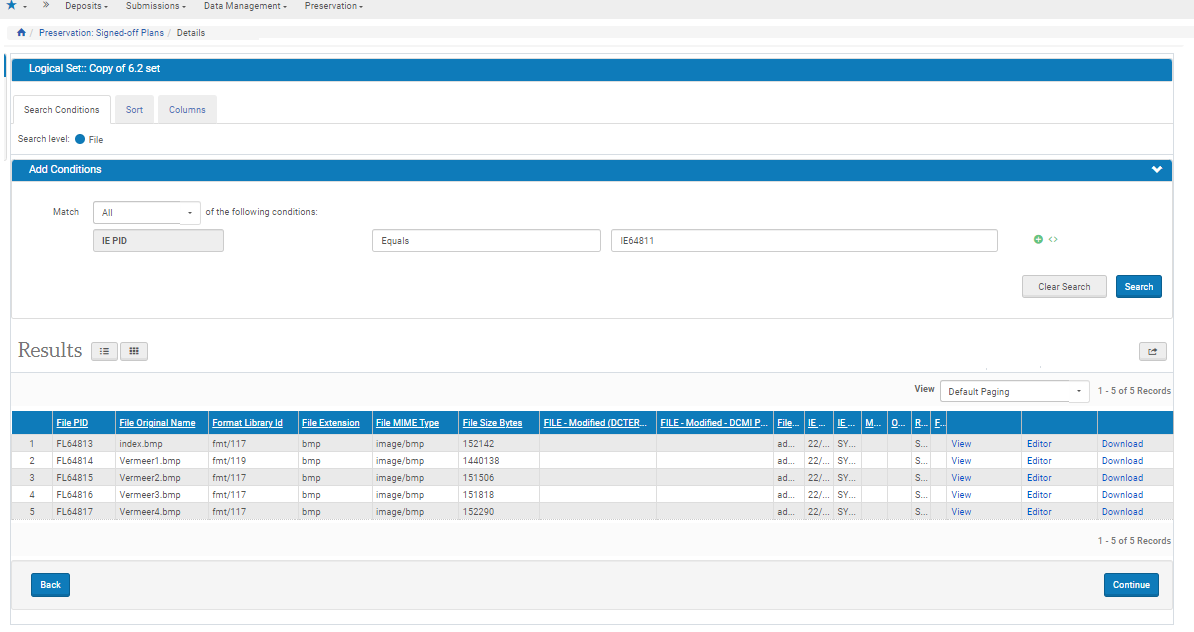 Refine Execution Set Page
This page displays a list of all members of the Preservation set. The list is sortable.
- Click the Add Conditions button.
Fields for adding conditions open beside the button. - Type the search field you want to use.
Rosetta automatically drops down a list of matching fields as you type. - To add multiple conditions, select the plus icon. Select Any or All to determine how the conditions are connected.
- Select the field from the drop-down selection and enter values in the operator and search term fields.
- Type in the required value for the condition that has been added and click Search.
The list of the set now includes only those entries that meet the additional condition. Note that this action only reduces the set for one specific execution but does not affect the saved Preservation set. - Click Continue to return to the Plan Execution Form page.
-
- Click the Execute button.
The Signed-off Plans List Page opens again. The plan that is being executed now has the Monitor option instead of Execute. - Click the Monitor link of the plan. The Monitor Plan Execution page opens.
This page shows the progress of the plan execution.
- Click the Refresh button to update the page.
When the stage changes to Ready for Evaluation, an additional option appears in the list - Evaluate Results. Alternatively, the stage may change to Errors.
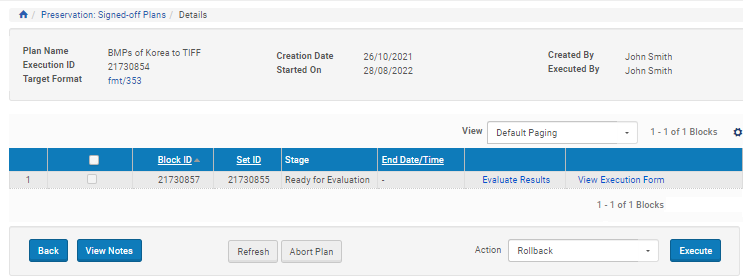
Monitor Plan Execution Page - Ready for Evaluation
When the stage changes to Ready for Import, an additional option appears in the list - Import.
- Click Import. The system validates the descriptor CSV that comes with the converted files (automatic validation). If the validation failed, an error message is displayed. If the validation is successful, the Execution Form page opens. This page allows you to schedule the loading of the imported files. Note that it is impossible to change the block size or to narrow the set.
- Choose when you want to start the loading. If you want to start it immediately, select the Immediately radio button. If you want to delay the loading, select the Start At radio button and type the required date and time in the appropriate fields.
- Click the Execute button.
The Monitor Plan Execution page opens. - If the stage of the execution is Ready for Evaluation, see Evaluating Execution Results to proceed.
If the stage of the execution is Errors, see Resolving Technical Issues to proceed. - (Optional) To view objects that were skipped in the course of execution for technical reasons, click the View Skipped Objects button (available only if objects were skipped).
Evaluating Execution Results
- On the Monitor Plan Execution page, click Evaluate Results.
The Execution Evaluation page opens.
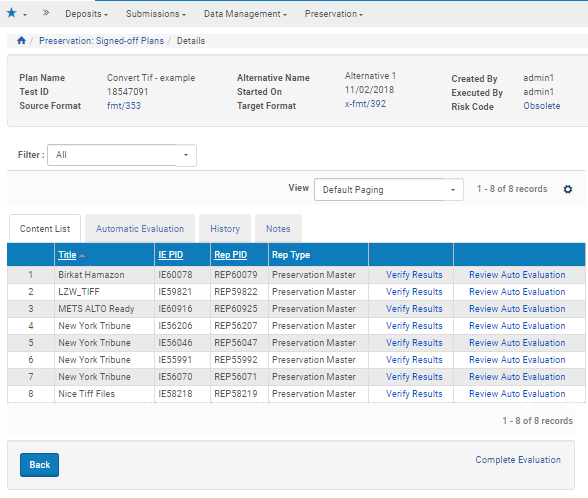
Execution Evaluation Page
- To review the results of the automatic evaluation performed by the system, click Review Auto Evaluation.
- To evaluate the execution results manually, click Verify Results.
The Manual Evaluation page opens.
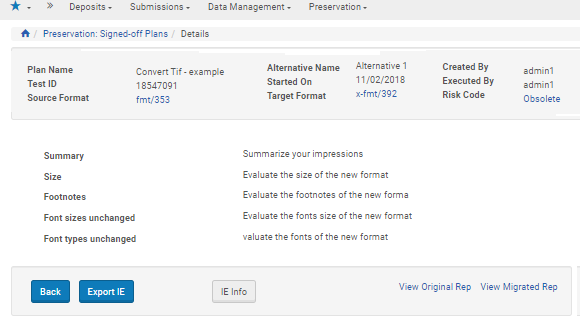
Manual Evaluation Page
This page displays the criteria for manual evaluation set in the given Preservation plan. To verify the execution results, you have to open the source IE (by clicking View Original Rep) and the converted IE (by clicking View Migrated Rep) and to check them manually. Note that no record of the results of this manual evaluation remains in the system.
- Click Back to return to the Execution Evaluation page.
- Click Complete Evaluation.
The Monitor Plan Execution page opens again. Repeat step 1 for all entries in the list.
After evaluation is completed, new options appear in each line of the list - Commit and Rollback. The same options appear in the drop-down Action list in the lower right corner of the page.
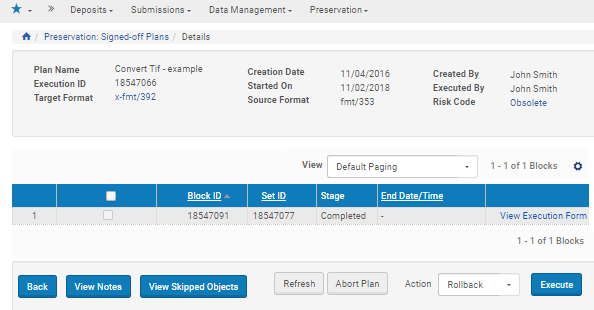
Monitor Plan Execution Page - Evaluation Completed
-
Select the check boxes of the entries you want to commit or rollback:
- To make the conversion permanent, select Commit the Action drop-down list, and click Execute.
- To delete the converted files and keep the source files, select Rollback the Action drop-down list and click Execute.
- To view the history of executions for any Preservation plan, on the List of Signed-off Plans page, click its Executions History link.
The List of Execution History page opens.
List of Execution History Page
The following options are available:
- View Notes – displays any notes added to the plan
- View Report – displays the Preservation Executions History report that shows the history of migrated IEs of executed signed off plans.
- Blocks History – displays the history of preservation plan blocks