
Working with SIPs
About Working with SIPs
Metadata Submission Methods per Content Structure
The following table describes the metadata submission methods per content structure. For more information, see Configuring Content Structures.
| Content Structure | Metadata Submission Method |
|---|---|
| METS | Dublin Core record as dc.xml file in SIP root directory |
| Dublin Core | Dublin Core record as dc.xml file in SIP root directory |
| CSV | In a CSV file |
| BagIt | In a Bag |
| XSL, Set of Files | N/A (same metadata as Intellectual Entity) |
Searching for SIPs
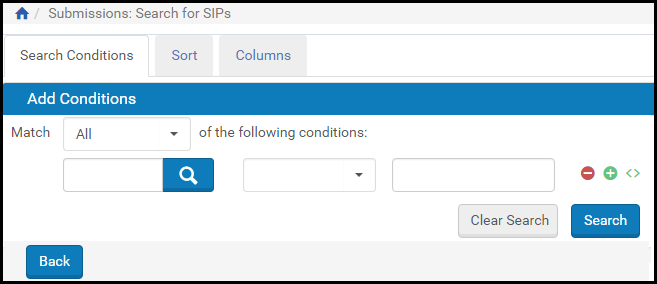
Search for SIPs
For more information on searching for SIPs, see Advanced Search.
The table below describes the search types available when searching for SIPs:
| Search By | Description |
|---|---|
| ID | When a user enters a numeric string into the quick search Find box and clicks the Go button, Rosetta searches for all content with that SIP ID or Deposit ID. The Advanced Search page opens with the quick search criteria transformed to advanced search criteria (SIP ID = xxxx or Depsoit ID = xxxx) and results displayed on the bottom half of the page (under the Results heading). |
| Text | When a user enters a text string and clicks Go, Rosetta searches for all IEs that match the fields dc:identifier, dc:title, dc:description, or dc:creator. The entered text must include a minimum of three characters and may employ an asterisk as a wildcard. |
Viewing SIPs to Be Reviewed
The Rosetta system enables Assessors, Arrangers, and Approvers to view a list of SIPs that require review. Each reviewer can view only those SIPs that are assigned to their approval group by a Back Office Administrator. (For more information, see Understanding Assessors, Arrangers, and Approvers.)
To view SIPs to be reviewed:
If you are working as an Arranger or Assessor, you may be able to access the SIPs page by clicking a text link in the Quick Launch section in the upper right header. (If you do this, you do not need to follow the steps below.)
- From the Rosetta menu, select from the Submissions tab the link that corresponds to your role or task. The SIPs List for your selected role or task opens.
Assessor SIPs List
The page contains the following columns:
| Column | Description |
|---|---|
| SIP check boxes | Selecting these enables |
| SIP ID | Displays the unique ID number assigned to the SIP. |
| Alert | Displays an icon when a Technical Analyst has marked the SIP to draw the attention of an Assessor, Arranger, or Approver. A red warning icon indicates that action is required before the SIP can be processed, while a blue information icon indicates that no action is required. |
| Title | Displays the SIP’s title. |
| Issue # | Links to the bibliographic citation. |
| Producer | Displays the SIP’s Producer. |
| Type | Displays the SIP’s type. |
| Submitted On | Displays the SIP’s submission date. |
| Assigned To | Displays the staff user who is exclusively assigned to work on the SIP. If the SIP is assigned to a specific staff user, other staff users can only view the SIP but not review it. |
Accessing the SIP Content List Page
The SIP Content List page enables Assessors, Arrangers, and Approvers to view SIP objects that make up the SIP and to perform various actions, including approving, rejecting, or declining SIPs, as well as merging and splitting IEs.
To access the SIP Content List page:
- From the Rosetta drop-down menu, click Submissions, then click the link corresponding to your role’s SIP list (below the Approval heading).
- From the SIP list, locate the SIP with which you want to work and, under Actions, click Work On. The SIP Content List page opens.
SIP Content List Page - List View
The page contains the following columns:
| Column | Description |
|---|---|
| Title | Displays the name of the SIP object. |
| PID | Displays the permanent unique identifier of the intellectual entityIE). |
| Status | Displays the status of the IE. |
| CMS ID | Displays the identifier of the IE in the collection management system(CMS). |
| Various actions | Various actions that can be performed on the item, for example, View, Export, and assigning CMSIDs and access rights. |
Arrangers and Assessors can view the IEs in a list view (as shown above) or as a Gallery (or thumbnail) display (see below). Thumbnails are generated on demand. If the system is unable to generate a thumbnail for a specific object, it uses a default image set up in the administrative module of Rosetta. (See Generic Thumbnail Creation in the Rosetta Configuration Guide for instructions/details.)
Gallery View for IEs in SIP
The Gallery view provides a count of the IEs and the option for sorting on one field, ascending or descending.
Viewing SIP Information
The Rosetta system enables Assessors, Arrangers, and Approvers to view information about SIPs. Assessors, Arrangers, and Approvers can view the following items:
SIP History
To view SIP history:
- Access the SIP Content List page by using a Quick Launch text link or clicking Submissions from the Home page and selecting a role/task from the Approval section. (See Accessing the SIP Content List Page for details.)
- Click the History tab. The SIP History page opens
SIP History Page
The page contains the following columns:
| Column | Description |
|---|---|
| Event Type | Displays the SIP’s event type. |
| Description | Displays a description of the event. |
| Module | Displays the module in which the event took place. For example, Deposit Server or Staging Server. |
| Submitted On | Displays the date on which the SIP was submitted. |
- Locate the event you want to view and click its event type. The Event Details page opens
Event Details Page
The Event Details page displays several fields that contain information about the selected event.
SIP Problem Notes
To view the SIP notes:
On the SIP Content List page (see Accessing the SIP Content List Page), click the Notes tab. The SIP Notes page opens.
SIP Notes Page
Notes display below the tabs.
Users can add their own notes by typing information in the Add Internal Note field and clicking the Add Note button.
An IE in a SIP
To view a SIP’s IE:
On the SIP Content List page (see Accessing the SIP Content List Page), locate the SIP object you want to view and click View. The selected IE opens in a separate browser window.
IE Structure and Metadata
- Descriptive metadata, which contains information provided by Producer Agents, such as content creator, title, category, and subject. Specific information that Producer Agents must provide is defined by Deposit Managers, Negotiators, and Administrators.
- Administrative metadata, which contains information that is automatically generated by the Rosetta system. This information includes technical (such as file size, format, location, and unique identifier), provenance (such as Producer and Producer Agent’s name), and access rights metadata. Specific information that the Rosetta system generates is defined by an Administrator during the configuration of the DNX profile.
Assessors, Arrangers, and Approvers can view IE metadata using the Web Editor.
To view IE metadata:
- On the SIP Content List page (see Accessing the SIP Content List Page), locate the IE for which you want to view the metadata and click Edit IE.
The IE opens in the Web Editor.
Web Editor
For more information on the Web Editor, see About the Web Editor.
Approving a SIP
To approve a SIP:
- On the SIP Content List page (see Accessing the SIP Content List Page), in the Action drop-down list, select Move to Next Stage.
- Click Execute.
The SIP is moved to the next stage, as defined by a Back Office Administrator.
Declining or Rejecting a SIP
When the content is rejected, the Producer Agent receives a notification of the rejection and the reason for the rejection as specified by theAssessor, Arranger, or Approver. The Producer Agent must repair the issues and resubmit the content.
When the content is declined, the Producer Agent who deposited it cannot resubmit the content.
To decline or reject a SIP:
- On the SIP Content List page (see Accessing the SIP Content List Page), do one of the following:
- To decline or reject specific IEs, select their check boxes and, from the drop-down list in the bottom right of the page, select Decline IEs or Reject IEs. Declining or rejecting specific IEs is not possible when the SIP includes relationships between IEs.
- To decline or reject the entire SIP, from the drop-down list, select Decline SIP or Reject SIP.
- Click the Execute button. The Reason page opens.
Action Reason Form for Declining an IE
- In the Reason drop-down list, select the reason why you are declining or rejecting the content.
- In the Optional Note field, enter notes for the Producer Agent, if necessary.
- Click OK. The SIP or IEs are removed from the page.
The Rosetta system sends an e-mail notification to the Producer Agent that the content was rejected or declined.
Aborting a SIP
You can abort a SIP that has not yet been processed. To abort a SIP, click Abort in the row of the SIP you want to abort. You can abort multiple SIPS by selecting them and selecting the Abort action from the drop-down list.
The SIP appears in the TA deposit list.

Aborting a SIP
Forwarding a SIP or an IE
To forward a SIP or an IE to another staff user:
- On the SIP Content List page (see Accessing the SIP Content List Page), do one of the following:
- To forward specific IEs, select their check boxes and, in the Action drop-down list, select either Move to Specific Assessor (when you want to move the SIP to a specific
Assessor ) or Move to Assessor (when you want to move the SIP to a group of Assessors, Arrangers, or Approvers). - To forward the entire SIP or multiple SIPs, in the Action drop-down list, select either Assign To to assign a SIP to a specific user within the same work area, or Move SIP(s) to Assessor /Arranger/Approver Pool when you want to move the SIP between 3A work areas.
You cannot move SIPs that are assigned to another user.
- To forward specific IEs, select their check boxes and, in the Action drop-down list, select either Move to Specific Assessor (when you want to move the SIP to a specific
- Click Execute.
The SIP or IEs are forwarded to staff users, as specified.
Organizing IEs
Both Arrangers and Assessors have privileges to:
Rearrange the Structure Map of an IE
To make changes to the IE’s structure map, do the following:
- On the Submissions page, click the Arrange SIPs link.
The SIPs List page opens. - Click the Work On link of the SIP that contains the IE you want to rearrange.
The SIP Content List page opens. - Click the Edit IE link of the IE.
The Intellectual Entity page opens in the Web Editor. - In the left column of Web Editor, click the Representation line below the IE.
- Click the Metadata tab.
- Click the Edit link of the row whose type equals Structure Map.
The Edit Structure Map page opens.
Edit Structure Map Page
- Do the following, as required:
- To re-order the files that comprise the IE, use the arrow buttons in the Order column.
- To assign a label to the root of the structure, type it in the Root - Label field.
- To assign labels to the files, type them in the Label column.
- Click the Save button.
The system commits the rearrangement of the structure map to memory.
Merge Single IEs
To merge a number of single IEs into one IE
- Click the Submissions > Arrange SIPs link.
The SIPs List page opens. - Click the Work On link of the SIP you want to change.
The SIP Content List page opens
SIP Content List Page
- Select the check boxes of the IEs that you want to merge.
Only IEs that contain one file can be merged. The number of files in each IE is indicated in the # of Files column of the SIP Content list.
- In the drop-down list in the lower right corner of the page, select Merge Selected IEs and click the Execute button.
A warning page explains that the existing logical structure maps will be lost as a result of the merge, and any access copies of the IEs will be lost. - Click Cancel to stop the merging process, click Merge to proceed.
The following page opens.
Merge IEs - Select the Main IE
Merge IEs - Select the Main IE
- Choose a main IE of the group (to which other IEs will be added and which will determine the template of the merged IE). Select the radio button of this IE and click Next.
The following page opens.
Merge IEs - Merged IE’s Title
Merge IEs - Merged IE’s Title
- Enter a title for the merged IE and click Finish.
The Edit Structure Map page opens.

Edit Structure Map Page
Edit Structure Map Page
- If required, edit the structure map of the merged IE as described in Rearrange the Structure Map of an IE.
- Click Save.
The SIP Content List page opens again. The new IE appears in the list instead of the IEs that were merged. Note that its PID is that of the main IE selected in Step 6.
Split an IE
To split complex IEs into single IEs:
- On the Submissions page, click the Arrange SIPs link.
The SIPs List page opens. - Click the Work On link of the SIP you want to rearrange.
The SIP Content List page opens.
SIP Content List Page
If more than one file exists in the IE, the option to Split appears. Click this link. A confirmation form opens. - Click Cancel to stop the splitting process, click Split to proceed.
- The SIP Content List page opens again. New one-file IEs appear in the list

SIP Content List
SIP Content List
Tree View
You can view the IEs in a SIP in a hierarchical tree view if you have Arranger or Assessor privileges. To view the IEs in a tree view, select Tree View from the View drop-down list. The tree view opens in the left pane while the list view opens in the right pane. The figure below shows these views.
Unstructured Tree View
The tree view option will be available only when the system is able to reconstruct the original tree structure.
There are three ways in which information about the original path to the files can be passed to the server when a user deposits material.
- From the Deposit API, given a directory structure and multiple IE.xml files.
- From the Web interface, loading multiple files through the applet.
- From a submitter application (for example, Indigo), if the original path is provided as part of the METS file.
Selecting a node of the tree applies a filter to the IE list. Only IEs that have files in the selected node are displayed.
Rosetta displays only Master Copy files in the tree. If any of the IEs contain Access Copies, Rosetta does not display the files in the tree.
Selecting a file from the tree displays the IE containing the file.
Clicking the Display all IEs button when the list is filtered restores the whole list of IEs for the SIP.
Selecting the View sub-folders check box displays all IEs in the selected folder plus all IEs in the inclusive sub-folders. De-selecting the box removes the IEs in the sub-folders from view.
The list of IEs can be filtered using the regular filter drop-down list. The filter through the tree nodes takes precedence. Choosing a node in the tree resets any existing filter and creates a new list of IEs for the selected node.
If you select a filter from the drop-down list, it is applied to the already filtered list of IEs that are displayed as a result of the selection in the tree node. Changing the filter in the drop-down list does not affect the selection in the tree node.
Note that filtering can lead to empty results due to the combination of the two filters (the tree and the drop-down list). These empty results may not always be intuitive.
If the tree cannot be reconstructed the tree view contains a non-hierarchical list of the IEs.