
Working with Processes
About Working with Processes
Data Managers can view processes that are executed in the Rosetta system. Processes consist of:
- Tasks, which are programs that perform operations on an object in the system. For example, a task may create a thumbnail of an image file. Similarly, a task may extract metadata from a file. Tasks are the basic building blocks of operations in the system.
- Task chains, which are ordered lists of tasks. For example, a task chain may contain the following tasks:
- Creating thumbnails
- Adding metadata from the collection management system (CMS)
- Adding Oracle text (used for better indexing in the Permanent Repository)
Viewing All Existing Processes
Data Managers can view a list of all existing processes.
To view all existing processes:
From the Data Management main menu, select Manage Sets and Processes > Processes. The Process List page opens.
List of Processes Page
The page contains the following columns:
| Column | Description |
|---|---|
| Check Box | Select to perform actions on single or multiple processes |
| Active | Indicates the process status:
|
| ID | The process ID generated by the Rosetta system. |
| Name | The name of the process. |
| Task Chain Name | The associated task chain. |
| Task Chain Groups | The name(s) of the group that can access the process. |
| Scheduling | Displays the day, date, and/or frequency of the running of the process. |
| Status Date | Displays the last date on which the process status was changed. |
Actions available for the process list items appear to the right of the information columns and expand when you click the More text with the down arrow. These actions include:
- Duplicate: Duplicates the values for this or any other process listed in the task chain. Sends you through the process creation wizard.
- Update Schedule: Allows you to change the values for the scheduling of this process. (Takes you to the scheduling page.)
- Update Set: Opens the set selection page, where you can choose a different set for this process.
- Update Parameters: Takes you to the Complete Parameters page, where you can change parameter values for this process.
- History: Takes you to the Monitor Process History > Summary page, where you can view information such as status and run-time for the process.
- Delete: Deletes the process from the system and the table. Deleting the process also deletes the process history by the General Cleanup Job.
The Delete, Activate, and Deactivate actions are available from the Action drop-down list. Select the processes on which to run the action, and select the action you want to run from the list.
Viewing Process Information
Data Managers can view various details about the processes, including a list of processes that are currently running and a summary of completed processes. Data Managers view process information by Accessing the Process Execution History Page. The following activities can be performed from this page:
- Viewing Completed Processes
- Viewing Process Executions
- Viewing Summarized Execution History for a Process
- Viewing the History of Execution Exceptions for a Process
Accessing the Process Execution History Page
The Process Execution History page enables Data Managers to view the list of processes that have been executed in the Rosetta system.
To access the Process Execution History page:
On the List of Processes page (see Viewing All Existing Processes), locate the process you want to view and click History. The Process Execution History page opens.

Execution History page
The Execution History page contains the following columns:
| Column | Description |
|---|---|
| ID | The process ID |
| Name | The name of the process |
| Status | The status of the last execution |
| Started On | The start date of the last execution |
| Finished On | The end date of the last execution |
| Successes | The count of successful executions of the process |
| Failures | The count of failed executions of the process |
| Failure Note | Displays a description of the last failure |
| Exceptions | Enables viewing the execution history exceptions. |
| Summary | Enables viewing asummarized execution history of a process. |
Viewing Completed Processes
Data Managers can view whether a process completed normally, or experienced a problem during execution.
To view completed processes:
On the History Execution page (see Accessing the Process Execution History Page), in the Filter drop-down list, select Completed. Only completed processes are displayed.
Viewing Process Executions
Data Managers can view a list of all processes that are currently executing.
To view process executions:
On the History Execution page (see Accessing the Process Execution History Page), in the Filter drop-down list, select Running. Only those processes currently executing are displayed.
Viewing Summarized Execution History for a Process
Data Managers can view a summarized execution history of a process. This enables them to see a summary snapshot of the process’s last execution.
To view a summarized execution history for a process:
On the History Execution page (see Accessing the Process Execution History Page), locate the process you want to view and click Summary. The Execution History Summary page opens.
Execution History Summary Page
The Execution History Summary page displays the following fields:
| Field | Description |
|---|---|
| ID | The process ID |
| Name | The name of the process |
| Task Chain | The name of the task chain |
| Set ID | The ID of the set that is using the process |
| Created On | The creation date of the process |
| Created By | The name of the user who created the process |
| Started On | The start date and time of the execution |
| Finished On | The end date and time of the execution |
| Status | The status of the execution |
| Status Date | The date and time of the Status field’s last update |
| Total Run Time | The total run time of the execution. This is based on the Started On and Finished On fields. |
| Total Records Processed | The total number of objects processed |
| Total Records with Exceptions | The total number of processed objects with exceptions |
| Total committed records | The actual number of records committed to the database over the course of this procedire’ |
| Total records sent to commit | The total number of records sent to be committed to the database. |
Click Back to return to the previous page.
Viewing the History of Execution Exceptions for a Process
Data Managers can view the history of exceptions for a process.
To view the history of execution exceptions for a process:
On the History Execution page (see Accessing the Process Execution History Page), locate the process for which you want to view exceptions and click Exceptions. The Execution History Exceptions page opens.
Execution History Exceptions Page
The Execution History Exceptions page contains the following columns:
| Column | Description |
|---|---|
| PID | Displays the ID of the SIP to which the object belongs. |
| Title | Displays the SIP name. |
| Exception | Displays a description of the exception. |
| View | Displays the IE that failed during the initial delivery process. |
| Info | Opens the object in the Web editor. |
You can rerun the process on the items in the exception list by clicking the Rerun Process button.
You can create a set for further use of the exceptions by clicking the Create Set button.
Running a Process
Data Managers can run jobs based on processes and task chains that have been set up in the system. The processes are applied to IEs, representations, or files, as specified in the Level column of the Choose Task Chain page (see below).
To set up a process:
- From the Process List page (Data Management > Manage Sets and Processes > Manage Processes), click the Add Process button.
The first step of the Add Process wizard opens, Choose Task Chain.
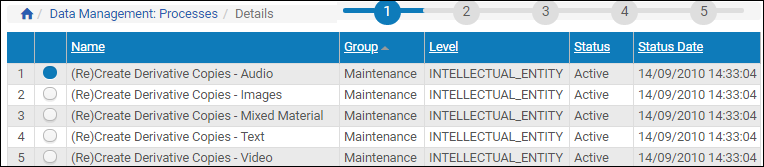
Choose Task Chain
- From the list of task chains, select the one that suits your purpose.
The Status should be Active and the Level should match the level of object (IE, representation, or file) that you want the process to encompass.
- Click Next.
Step two of the wizard, entering parameters, opens.
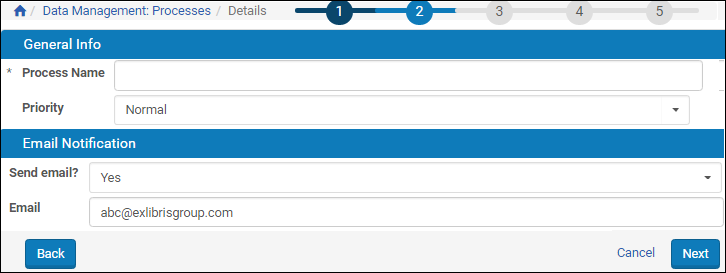
Parameters Page for Process
- Enter a name for this particular process. The name will be used to identify this process in a list of all processes.
- Select the priority for this process.
Fasttrack processes (processes initiated via the Web Editor) are set to high priority by default.
- Enter any required parameters and enter optional ones, as needed. (Some processes require no parameter specifications, others require several.)
- Set the email notification level to receive an email notification when the process completes, only when it fails, or never. (Your registered email address will be added automatically; recipient addresses can be added, separated by semicolons.) When you are finished, click Next.
Step three of the wizard, defining the set, opens.Only objects of the type specified in your initial process selection appear in this list. For example, this process acts on files, so the available sets are limited to those with an Object Type of File.
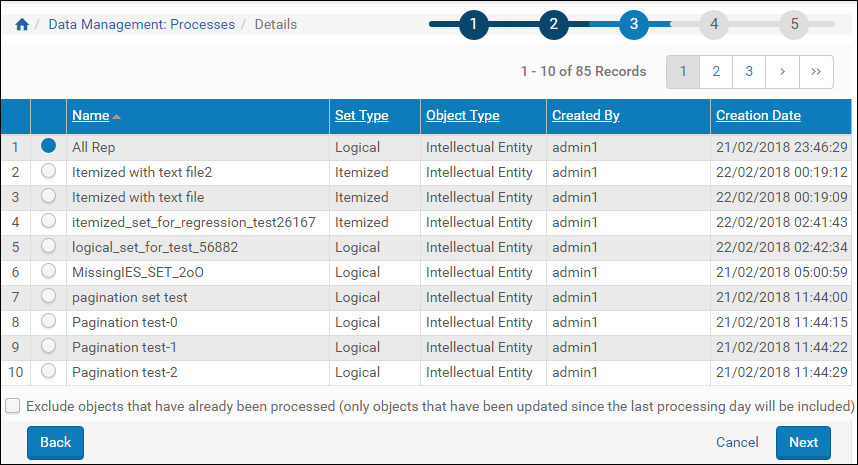
Define Set for Process
- Select the set to which you want to apply the process. Select the check box below the list if you want to apply the process only to new objects. When you are finished, click Next. The scheduling step of the wizard opens.
- Select the type of schedule you want the process to follow from the left side of the page, then enter details on the main part of the page. When you are finished, click Next. The Review and Confirm step of the process wizard opens.
- Review the information regarding the process you just created. If there are errors, click the Back link until you arrive on the page containing the error, and make any necessary changes. When the process is completed to your satisfaction, click the Submit button.
The process is set to run as you specified in this procedure.\
Aborting a Process
To abort a running process, click Abort. Rosetta removes all waiting bulks of IEs from the process queue and the process ends after the current bulk of IEs is completed.