
Running and Viewing Reports
Running and Viewing Reports
Staff users can run reports needed by their various positions and roles. Every module in the system has a list of available reports accessed by clicking a link from the module’s main page.
Rosetta uses BIRT for its reporting. To view reports within Rosetta, users should have Office 2003 or higher installed on their machines. If they do not, reports will appear in XML format.
This topic includes:
Accessing Reports
On the main menus for Deposits, Submissions, and Data Management, there is an Advanced Tools heading and, below it, a Run Reports link that takes the user to a page of predefined reports related to the module. Staff users can also access reports through specific related areas on the interface, such as by following the path Deposits > Producers and Agents > Producers and clicking the History link for the Producer Agent whose uploads they want to view.
Rosetta integrates its reporting capabilities with those of the Business Intelligence and Reporting Tools project (BIRT). When users select a report to view, Rosetta opens a new window that is populated with the BIRT Report Viewer interface and the contents of the report. Users can print, export, or re-run the report from this page.
Running a Report: Uploads
To run a report on the upload activity of depositors, click through the Submissions menu to the Advanced Tools/Run Reports link to open the list of available reports.
You can also access this report from the following paths: Deposits > Producers and Agents > Producers > History > Uploads Report or Administration Home > Monitoring and Reports > Submissions > Uploads Report.
From the list of reports page, click Uploads Report. A form opens in the BIRT interface with fields for entering parameters for the report.
The following table describes each field in the Uploads report and how it is used.
| Parameter | Description |
|---|---|
| Start Date | The date the reporting period starts. This is required. |
| End Date | The date the reporting period ends. This is required. |
| Producer Name (not pictured) | The Producer name. This field will be a drop-down menu that lists all existing Producers. |
| Producer ID | The Producer ID. This parameter is optional. By default, the report is generated for all Producers. |
| Deposit activity ID | The ID of one deposit activity. This field is optional. By default, the report will be generated for all the deposit activities in the period. |
| SIP ID | The ID of one SIP. This field is optional. By default, the report will be generated for all the SIPs that were deposited within the report period. |
After you enter parameters and run the report, BIRT displays the report results.
The report contains two sections:
- The Summary Information section includes the total number of deposit activities and the number that succeeded (were moved to the permanent repository), how many are still being processed, and how many failed.
- The detail of deposits will be headed by the current reporting period. For each deposit activity, the list includes the date and time of the deposit activity, the deposit activity ID, SIP reference ID, name of the Depositor, name of the Producer, and status of the deposit activity.
Possible status values are "Draft," "Submitted," "Rejected," "Declined," and "Approved." A deposit that has been partially approved and partially declined will have status Approved. A deposit that has been partially rejected will have the status Rejected.
If the status of a deposit activity is Rejected or Declined, the reason will be displayed adjacent to the status.
Scheduling Reports
You can schedule a job to email reports. This job is available under each lobby for the reports of that lobby.
Reports with parameters are not supported.
Managing Scheduling Report Jobs
The Manage Scheduled Jobs page enables you to schedule report jobs. To access this page, follow the Rosetta drop-down menu path from any lobby, for example: Deposits > Producers and Agents > Advanced Tools > Schedule Reports.
The Manage Scheduled Jobs page opens to existing scheduled report jobs:
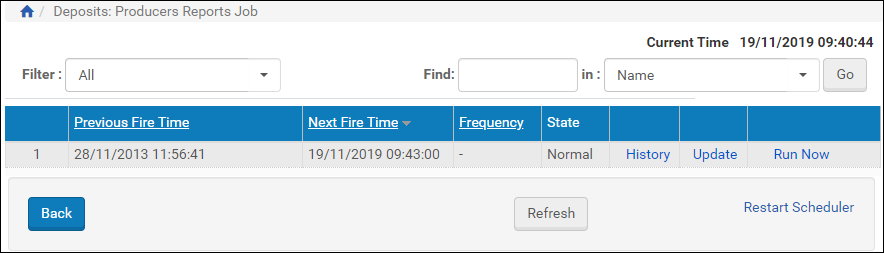
Manage Scheduled Jobs (Scheduled Report Jobs List)
This page enables you to monitor the status of each scheduled report job and perform the following tasks:
- Add a new job – For more information, see Adding a Scheduled Report Job.
- View a job’s details – Click the View link next to the job you want to view.
- Modify a job – For more information, see Modifying a Scheduled Report Job.
- Execute a job – Click the Run Now link to run a job manually.
In addition, you can cancel a job. For more information, see Cancelling a Scheduled Report Job.
Adding a Scheduled Report Job
This task allows you to create a new scheduled report job.
To add a Scheduled Report job:
- Click the Add job button on the Manage Scheduled Jobs page.
The Job Details page opens.

Job Details
- Enter a name for the scheduled Report job in the Name field.
- Select the interval at which to execute the job: No Scheduling, Hourly, Daily, Weekly, Monthly, and Advanced.
- To configure hourly, daily, weekly, and monthly intervals:
- Use the following table to configure the common interval fields:
Common Interval Fields Section Field Description Start At Time Select the hour and minutes from the drop-down fields to specify the time at which to run the job. Date Use the calendar tool or select the month, day, and year from the drop-down fields to select the date at which to start running the job. Repeat Indefinitely Select this option to run the job indefinitely. Until Select the month, day, and year from the drop-down fields to specify the date at which to stop running the job. After this date, the state of the job will change from Normal to Not Running. - Use the following table to configure the interval-specific fields:
For information on how to configure advanced intervals, see Configuring Advanced Job Schedules.Interval-Specific Fields Type of Interval Perform this task: Description Hourly Every Select the hourly interval from the Hours drop-down field. Weekly Week days Select which days of the week to run this job. Monthly Monthly At Select the day of the month to run this job.
- Use the following table to configure the common interval fields:
- Complete the required fields in the Job Parameters pane.
- Click the Apply button to add the job to the list of scheduled report jobs.
Modifying a Scheduled Report Job
This task allows you to modify the details for an existing scheduled report job.
To modify a Scheduled Report job:
- On the Manage Scheduled Jobs page, click the Edit link next to the job that Select the interval at which to execute the job: No Scheduling, Hourly, Daily, Weekly, Monthly, and Advanced.
- To configure hourly, daily, weekly, and monthly intervals:
- Use the following table to configure the common interval fields:
Common Interval Fields Section Field Description Start At Time Select the hour and minutes from the drop-down fields to specify the time at which to run the job. Date Use the calendar tool or select the month, day, and year from the drop-down fields to select the date at which to start running the job. Repeat Indefinitely Select this option to run the job indefinitely. Until Select the month, day, and year from the drop-down fields to specify the date at which to stop running the job. After this date, the state of the job will change from Normal to Not Running. - Use the following table to configure the interval-specific fields:
Interval-Specific Fields Type of Interval Perform this task: Description Hourly Every Select the hourly interval from the Hours drop-down field. Weekly Week days Select which days of the week to run this job. Monthly Monthly At Select the day of the month to run this job.
- Use the following table to configure the common interval fields:
For information on how to configure advanced intervals, see Configuring Advanced Job Schedules.
- Complete the required fields in the Job Parameters pane.
- Click the Apply button to add the job to the list of scheduled report jobs.
Cancelling a Scheduled Report Job
Cancelling a job allows you to postpone the execution of job indefinitely without deleting it from the system.
The Unschedule option will not be available when the state of the job is Not Running.
To cancel a Scheduled Report job:
- On the Manage Scheduled Jobs page, click the Edit link next to the job that you want to modify.
The Job Details page opens. - Click the Unschedule button.
The state of the job should change to Not Running.