
Summon: Administration Console: Custom Panel Sections
- Product: Summon
How do we configure custom panel sections to display in Summon?
This is part of a larger set of documentation about using the Administration Console to configure your Summon service.
Custom panels are not supported on mobile devices. For a workaround, see Display Custom Panels on Mobile Summon Site.
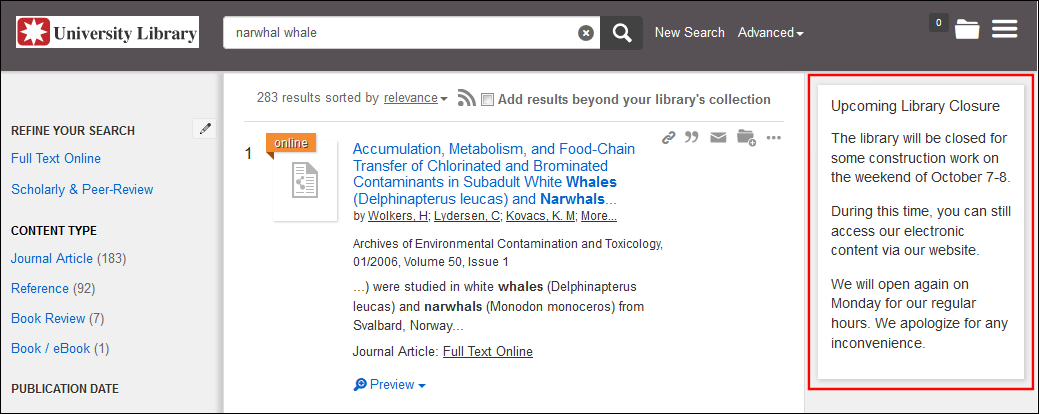
Custom panels can be tagged to appear when a user's query matches tag words that are defined by the library for each item, or they can be configured to display by default.
Custom panels appear below Topic Explorer Content when Topic Explorer items are returned in the results.
-
Log on to the Client Center.
-
Select Summon Administration Console.
-
Select the Pages tab.
-
Select the Custom Panel Sections tab.
Create a Custom Panel Section
-
Click the Custom Panel Sections tab under the Pages tab to open the Custom Panel Sections page.
-
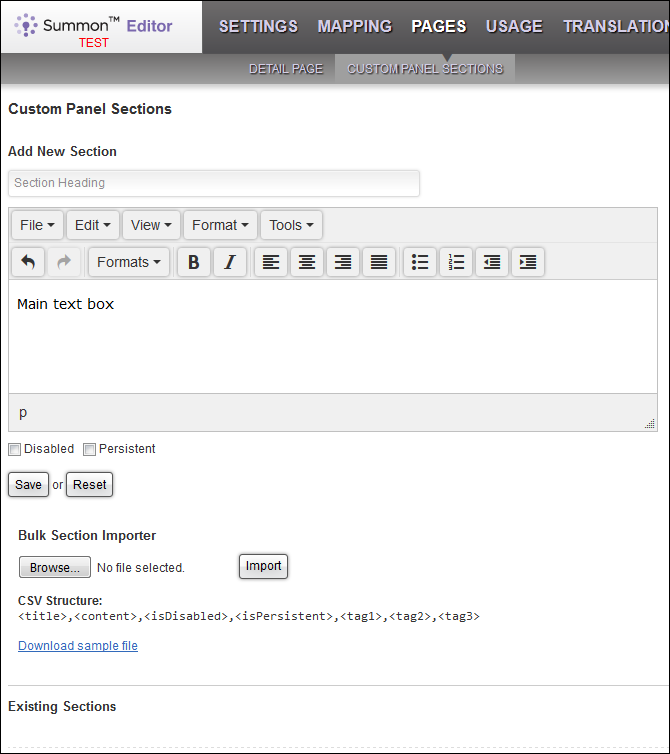
In the Add New Section area, specify the following information in the new panel section:
-
In the Section Heading box, enter a display title for the custom panel. The title can contain up to 80 characters, which must be text only.
It is not recommended to use the same title for panels.
-
In the main text box, enter the text (maximum of 1000 characters) that you want to display in the panel. This field does not support HTML, but you can use the tool bar above the main text box to apply character formats (such as bold and italics), paragraph formats (such as headings, paragraphs, and alignment settings). In addition, the tool bar allows you to perform editing functions such as cut, copy, and paste.
-
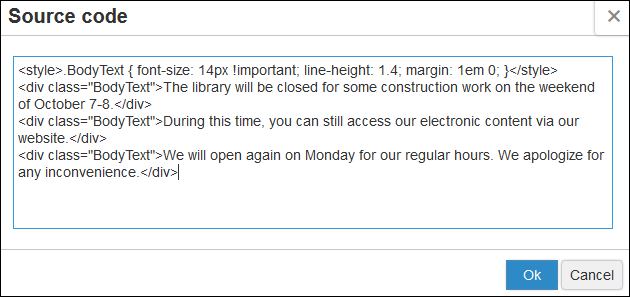
If you want to add HTML, CSS, or JavaScript to your panel, select Tools > Source code. The Source Code dialog box opens with the text that has already been entered in the main text box. There is a 2048 maximum character limit for content in the body of a custom panel section. The following example includes HTML and CSS to format the three paragraphs:
Consider the following when adding JavaScript:
-
jQuery is readily available for use within the Summon UI and does NOT need to be pulled in.
-
DOM elements within a custom section may not be rendered before JavaScript is run. Clients should use the setTimeout function when referencing DOM elements within a custom section.
-
Because the Summon UI heavily utilizes the $ alias for jQuery throughout the application, do not call jquery.noConflict() since it will render the $ alias for jQuery useless.
-
External scripts will delay user interactions with the UI.
-
-
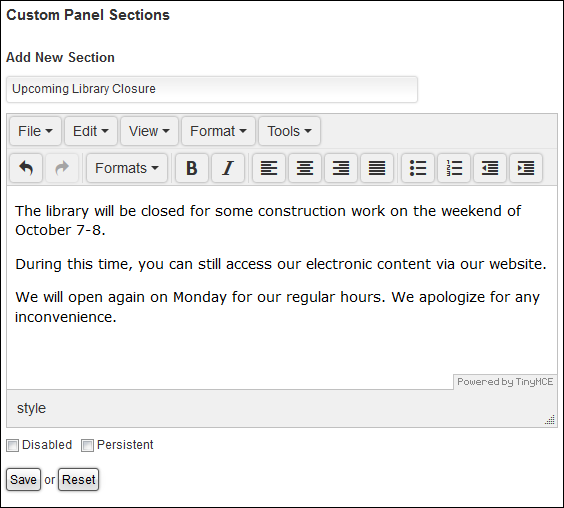
Click OK to save your changes and to display the output of the source in the main text box.
-
-
Select the Persistent check box to display the panel by default in Summon.
-
Select the Disable check box if you want to disable the display of the panel in Summon.
After a panel has been enabled and saved, it will appear in the Summon UI in 5 to 10 minutes.
-
Click Save to save your new panel. The new panel will immediately appear in the Existing Sections view at the bottom of the page.
-
If you want to add tags, see Edit a Custom Panel Section.
Import Multiple Panels at Once
The Bulk Section Importer allows you to import a CSV file (UTF-8 encoding) that contains one or more custom panel definitions. The importer will not delete or modify any existing panels.
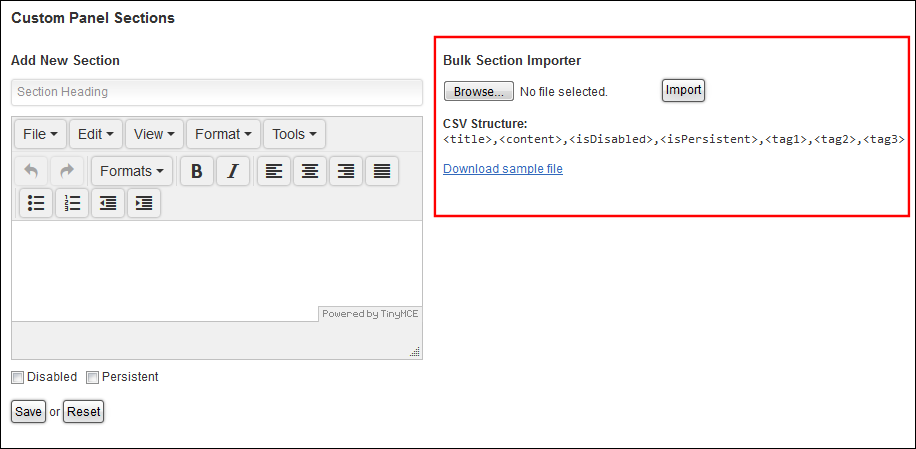
Each panel definition must use the following structure, and each field must be entered in order:
<title>,<content>,<isDisabled>,<isPersistent>,<tag_1>,<tag_2>,<tag_n>, ...
| Field | Description |
|
title |
The panel's title, which cannot exceed 80 characters. It is not recommended to use the same title for panels. |
|
content |
The entire contents of the main text box, which may include HTML, CSS, and JavaScript elements. If the content includes a comma, enclose the entire content in double quotes to prevent import errors. For example: "<p>This basket contains apples, oranges, bananas and pears.</p>" If the content includes a quote ("), place another quote next to it. For example: <span id=""bulk-demo""> |
|
isDisabled |
Indicates whether the panel is disabled in Summon. The valid values are true (disabled) or false (enabled). |
|
isPersistent |
Indicates whether the panel displays in all Summon search results, regardless of the defined tags. The valid values are true (persistent) or false (not persistent). |
|
tag_1 - tag_n (optional) |
Tags are search terms that you want to associate with a panel to ensure that the panel displays for particular searches. The following rules apply to tags:
|
-
Add your panel definitions to a CSV file.
In the following example, the file contains two panel definitions, which contain HTML and JavaScript:

-
Click Browse to select the CSV file on your computer.
-
Click Import to add the new panels.
At the top of the screen, a message will indicate whether the import was successful. After a successful import, the page will automatically refresh and display the newly added panels.
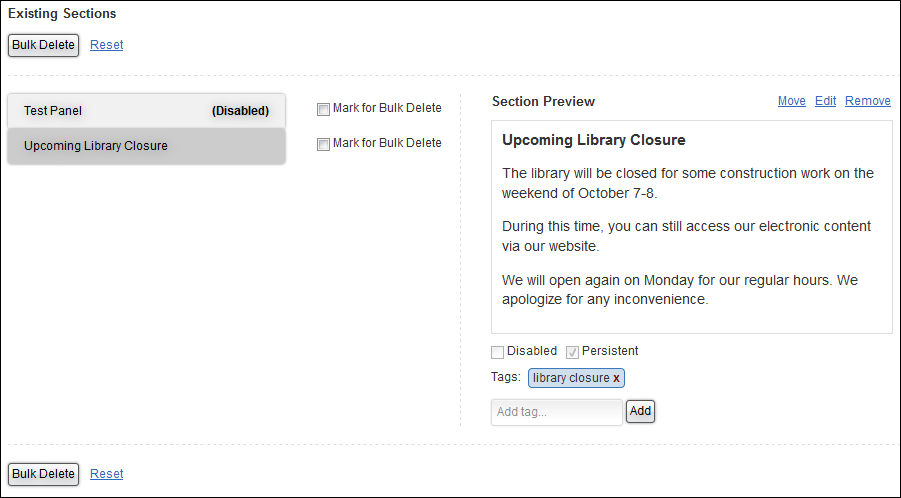
Edit a Custom Panel Section
-
In the Existing Sections area, click the panel that you want to edit. The panel will open in the Section Preview area.
-
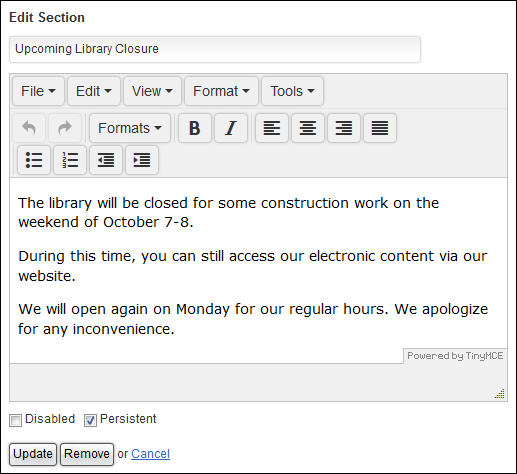
Click Edit to open the editor.
-
If you want to edit the description's source code, select Tools > Source code.
-
Update the Disabled and Persistent check boxes as needed.
-
Click Update.
-
Add tags as needed. It is not necessary to edit the panel to add or remove tags. The tags are limited to 80 characters.
A tag is added automatically for the panel's title.
Reorder Custom Panel Sections
To reorder custom panel sections, you can use either of the following methods:
-
In the Existing Sections area drag and drop panels in the list to arrange the panels in the correct order.
-
Select a panel and then click Move > Top or Bottom in the Section Preview area to move the panel to the top or the bottom of the list, respectively.
-
Once you are done, click on the Update Order button to save your changes.
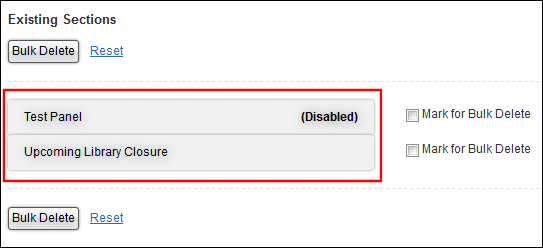
Delete Custom Panel Sections
To delete custom panel sections, you can use either of the following methods:
-
In the Existing Sections area, mark a panel or panels for deletion and then click Bulk Delete to remove all selected panels.
-
Select a panel and then click Remove in the Section Preview area to remove the panel.