Summon: Administration Console: Chat Widgets
- Product: Summon
How do I configure the Chat Widget settings within the Summon service?
This is part of a larger set of documentation about using the Administration Console to configure your Summon service.
Chat Widgets
The Summon service allows subscribing libraries to embed chat widgets from either LibraryH3lp, Springshare's LibAnswers, OCLC's QuestionPoint, or WhatsApp. When library staff is available and the user requests a chat session, the user is presented with a widget in the Summon interface, in the lower right corner of the screen:
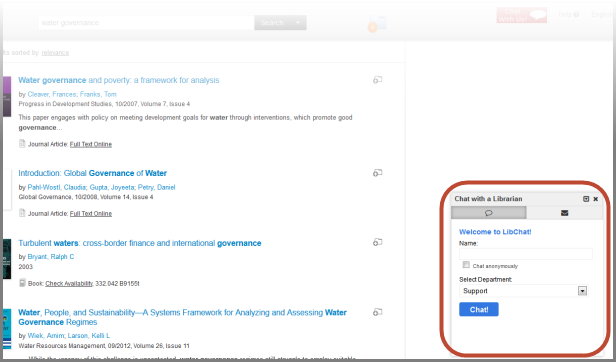
The chat window can be moved around the Summon screen by clicking on the header and dragging.
When staff is not available, you can choose to provide the Email window:
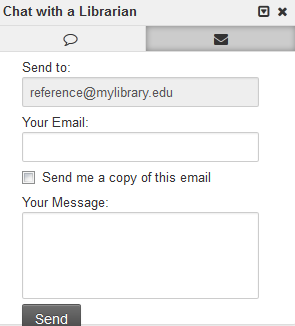
Or you can choose to not offer an email option, and instead provide a chat screen indicating that chat is currently not available.
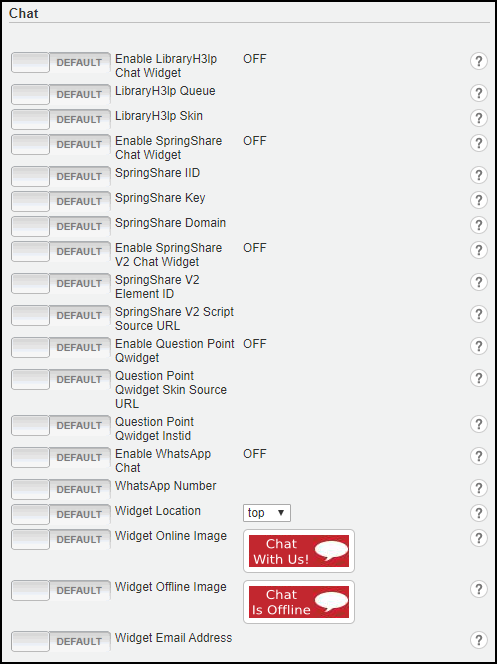
The Chat section of the Settings page in the Summon Administration Console is where you set up a widget for LibraryH3lp, LibAnswers v1, LibAnswers v2 QuestionPoint, or WhatsApp. See the following sections for more details.
Enable LibraryH3lp Widget
-
Slide the control for Enable LibraryH3lp Chat Widget to Custom and select the radio button for On.
-
Slide the control for Enable LibraryH3lp Queue to Custom and enter your library's full queue name in the field provided. This is the name of a queue from the LibraryH3lp administration site (see LibraryH3lp documentation for more details.
-
The queue name must be entered in full, like this: yourlibraryqueuename@chat.libraryh3lp.com.
-
LibraryH3lp allows your library to set up multiple queues, but the Summon Administration Console will accept only one.
-
-
If your library's Chat widget is customized and you would like the custom widget to display in Summon (as opposed to the default display shown above), enter your Widget Skin ID in the LibraryH3lp Skin field. Typically the ID from LibraryH3lp consists of five numbers.
-
Select the Save Settings button at the bottom of the page.
If you have entered a Widget Skin ID in Step 3 above and Summon has previously been providing your end users with Summon's default Chat display, you will likely need to clear your browser's cache in order for the custom widget to display.
-
If you want to change the position or the appearance of the chat box, see Placement and Appearance.
Enable LibAnswers v1 Widget
LibChat's Button-Style Widget and Slide-Out Side Button Widget are supported, but the In-Page Widget is not supported. If you are using LibAnswer v2, see Enable LibAnswer v2 Widget.
-
Slide the control for Enable SpringShare Chat Widget to Custom and check the radio button for On.
-
Slide the control for SpringShare IID to Custom and enter it in the field provided. The Springshare IID is the LibAnswers System ID and is unique to each installation of LibAnswers.
-
Slide the control for SpringShare Key to Custom and enter it in the field provided. The SpringShare Key is the chat widget's security token and is unique to each installation of LibAnswers.
-
Slide the control for SpringShare Domain to Custom and enter it in the field provided. The Springshare Domain is the full domain name for your library's LibAnswers installation.
-
If you want to change the position or the appearance of the chat box, see Placement and Appearance.
-
Navigate to AdminStuff > LibChat.
-
From the LibChat page, navigate to the System Chat Widgets tab and scroll to the bottom.
-
In the Chat Widget Code box, you will find the IID, Key, and Domain.
Enable LibAnswers v2 Widget
Please note that Summon only supports the slide-out widget and does not support the button or embedded widgets.
Systems & Services Management widgets are supported for Button and Tab types only.
-
Slide the control for Enable SpringShare V2 Chat Widget to Custom and check the radio button for On.
-
Slide the control for SpringShare V2 Element ID to Custom and enter it in the field provided. See the below steps for identifying your ID within Springshare's admin system.
-
Slide the control for SpringShare V2 Script Source URL to Custom and enter it in the field provided. See the below steps for identifying your URL within SpringShare's admin system.
-
Log on to your SpringShare administration site:
-
From your LibApps Dashboard page, use the LibApps drop-down menu to select LibAnswers and LibChat.
-
From the LibChat drop-down menu, select Chat Widgets.
-
In the Action column, select the View Widget Code icon next to the chat widget you want to integrate into Summon.
-
If your widget code includes "div id=xxxxxxxxxx" (for example, <divScreenElement">libchat_123456789abc123456789abc123">), the ID (highlighted in RED) is your SpringShareV2 Element ID. In the example provided, you would enter libchat_123456789abc123456789abc123 into the Summon administration console setting.
If your widget code does not include an ID, leave the SpringShare V2 Element ID field blank.
-
Your SpringShare V2 Script Source URL is found within the "script src=" portion of the widget code. For example, if you have this html code <script src="//v2.libanswers.com/load_chat.php?hash=123456789abc123456789abc123"></script>, the URL (highlighted in RED) is the SpringShare V2 Script Source URL you would enter into the Summon administration console setting.
-
If you want to change the position or the appearance of the chat box, see Placement and Appearance.
Enable QuestionPoint Qwidget
-
Slide the control for Enable QuestionPointQwidget to Custom and select the ON radio button.
-
If your library's Qwidget is customized and you would like the custom widget to display in Summon (as opposed to the default display shown above), enter your Qwidget Skin Source URL in the field provided. The URL is the path to your externally facing CSS folder (example: http://wilson.edu/css). If need be you can identify the URL in your Qwidget code, the URL is the customSkin URL (see example in Step 7 of QuestionPoint's Qwidget Custom Color Skin Instructions).
If you copy the customSkin URL in your Qwidget code, you will need to decode it before entering it. To decode, use the URL Decoder/Encoder at http://meyerweb.com/eric/tools/dencoder/. Paste the customSkin URL into the URL Decoder/Encoder box, click Decode and copy the output into the Qwidget Skin Source URL field in the Summon Admin Console.
-
Slide the control for QuestionPoint Qwidget Instid to Custom and enter your QuestionPoint Institution ID.
-
If you want to change the position or the appearance of the chat box, see Placement and Appearance.
Enable WhatsApp Widget
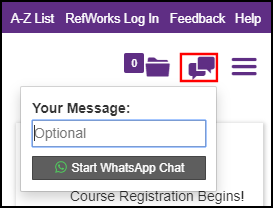
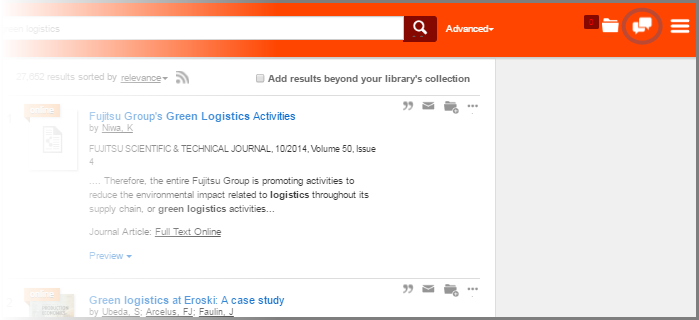
When enabled, users can select the Chat icon, which appears at the top of Summon by default. From the Chat box, users can then enter an optional message and then select Start WhatsApp Chat to start a chat with a staff member. Users will have the option to use either the browser or the WhatsApp app if it has been installed on the user's device.
-
Slide the control for Enable WhatsApp Chat to Custom and select the ON radio button.
-
Slide the control for WhatsApp Number to Custom, select the ON radio button, and then specify the telephone number that will be used for chats with the staff members.
-
If you want to change the position or the appearance of the chat box, see Placement and Appearance.
Placement and Appearance
The placement and appearance of your chat widget link can be customized using the following settings.
-
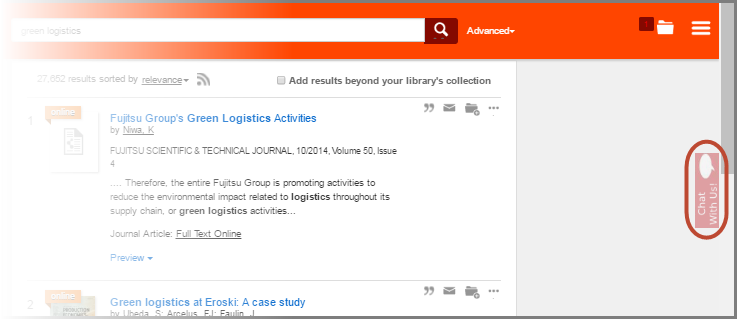
Use the Widget Location setting in the Chat section of the administration console to place the link to your chat widget at either the top of the Summon interface:
Or on the right side:
You can provide a custom Widget Online Image (to display when staff is available for questions) and Widget Offline Image (to display when staff is not available). When you slide the control to Custom, use the Select File button to identify the image to upload.

Custom images can be in JPG, GIF, or PNG format. Image dimensions are scaled so that the width is no greater than 100 pixels and the height is no greater than 32 pixels. Note that the administration console will display the full image, the scaled image will display on your Summon site.
Use the Widget Email Address setting if you want to provide the email window (shown towards the top of this document) when staff are not available for chat. If you choose to not provide a Widget Email Address:
-
Libraries using LibraryH3lp: the chat window opens with an "unavailable" display.
-
Libraries using LibAnswers: the chat window opens with a message to the user. The default message is "Please use the email tab to send us your question"; you can customize the message by using the Translations page in the administration console.
Remember to click the Save Settings button at the bottom of the page. Administration Console Settings such as these chat widget settings take effect in five minutes after clicking the save button.
- Date Created: 9-Feb-2014
- Last Edited Date: 23-July-2020
- Old Article Number: 8752

