
Import an External Table using an Excel File into Voyager Prepackaged Access Reports
- Product: Voyager
- Relevant for Installation Type: Multi-Tenant Direct, Dedicated-Direct, Local, TotalCare
Question
How to manually import an Excel file into a new table in Prepackaged Access Reports?
Answer
These steps describe the process (basic steps) to manually import an Excel file into a new table in Access in order to use the Excel data as part of an Access query.
These instructions are informational and software changes in Access need to be taken into account when using them; the locations and options of the menu items may vary, but the general concepts provided here should be applicable.
These instructions presume you have an Excel file ready for import.
- Open your Reports.MDB file (note it is important to make frequent backups of this file).
- Go to External Data > New Data Source > From File > Excel
- Navigate to your Excel file.
- Make sure the "Import the source data into a new table in the current database" option is selected and click OK (this is the default).
- The Import Spreadsheet Wizard will open.
- Click the box that says: "First Row Contains Column Headings" and click the Next button.
- If it appears, make sure the following screen has "In a New Table" selected and click the Next button (this is the default).
- Specify the information for each of the fields you are importing in the "Field Options" area. Typically you will want to set your Field Name correctly (e.g., "BIB_ID") and set the Data Type for record IDs to "Short Text". See first screenshot below.
- Make sure you have "Let Access add primary key" selected for your new table and click the Next button (this is the default).
- For "Import to Table" enter your table name (this is case sensitive, do not use blanks).
- Click the Finish button.
- Close the Wizard dialog box.
- Your new Table should now be available for use in queries using the (for example) "BIB_ID" field that you created. See second screenshot below.
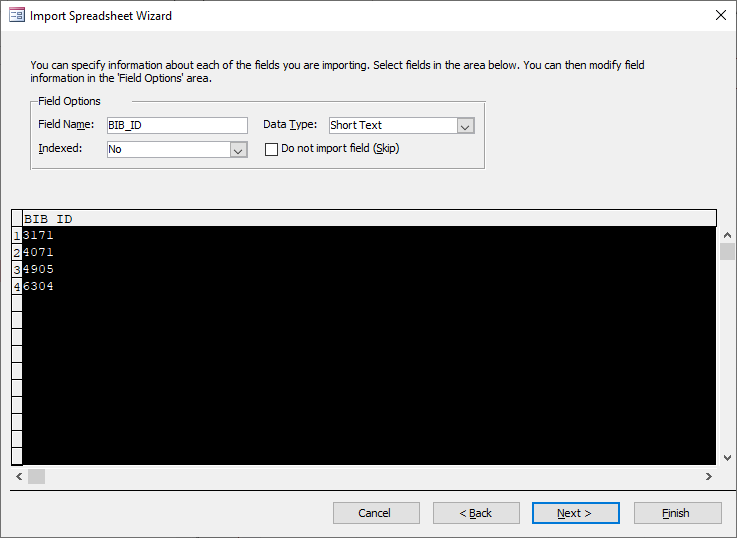
Step 8: Specify field information for the record ID column. If you receive a "Type mismatch" error see: Receive the "Type mismatch in expression" error when running a query in Voyager Prepackaged Access Reports
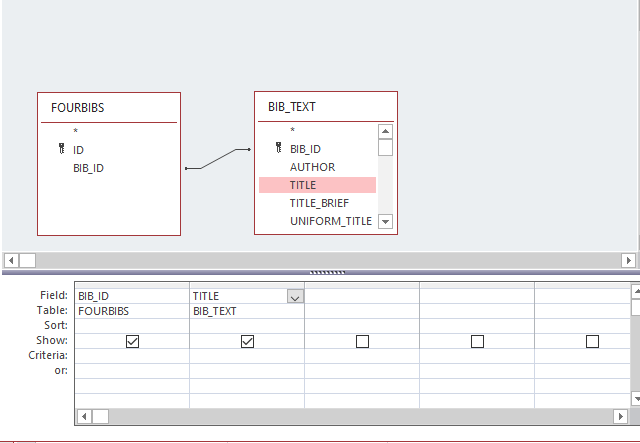
Step 13: Incorporate your new table in a query.
Additional Information
Constructing custom SQL queries by request and troubleshooting unexpected results from customer-created SQL queries falls outside the scope of Support. The above has been posted for informational purposes. Voyager-L and Developer Network are useful resources for finding helpful custom SQL or obtaining assistance from peers in troubleshooting custom queries.
- Article last edited: 21-Nov-2020