RFID Support
- General System Administrator
Supported RFID Devices
For information for other vendors on how they can integrate with Alma (development may be needed on the vendor’s side), see https://developers.exlibrisgroup.com/alma/integrations/rfid/information_for_rfid_vendor/
Using RFID to Read an Item Barcode

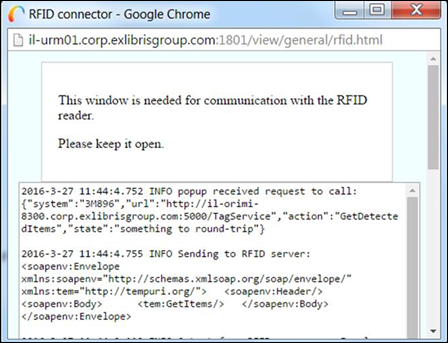
- Select the connection icon to open an RFID communication pop-up window. This enables the communication with the reader and must be left open in order to read from or write to the reader.
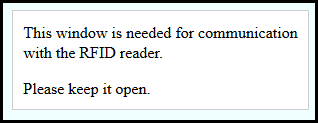
The connection icon on the menu bar changes to activated to show that the connection has been made. The active connection is maintained for each user and desk/department. When switching to a new desk, you must activate the connection again by selecting the connection icon.
 - Select the Read RFID icon (
 ) next to the search bar to activate the RFID reader to read the barcode of the item that is currently at the counter, and display the item.
All input boxes that accept a barcode show this icon as long as the RFID connection is active. These boxes are found in the following locations: Scan In, Return Items, Patron Services, Repository Search, Receive New Material, Physical Item Editor, Quick Cataloging, and Persistent Search (throughout Alma).
Additionally, while on a screen that has the icon to read a barcode, the keyboard shortcut Alt+A, activates the reader to display the listing.
When searching for physical items, the search result will display the RFID Security Status.
When scanning a multi-part item using RFID, if some of the resources have not been scanned, a message will be displayed indicating that not all of the item resources were scanned.
Using the RFID reader to scan and loan an item disables the security bit on the RFID tag. Returning the item re-enables the security tag.
Configuring the RFID Integration Profile
- On the Integration Profiles List page (Configuration Menu > General > External Systems > Integration Profiles), select Add Integration Profile. The first page of the Integration Profile wizard opens.
- Enter a Code and a Name for the profile.
- From the Integration Type drop down list, select RFID.
 Integration Profile – Step 1 with RFID Selected
 - From the System dropdown list, select the RFID system that you are using. Supported systems are (see RFID Support):
- Bibliotecha - Liber8Connect Link
- 3M - 896
- Seret
- Nedap
- Other
If you select Other from the list of systems, the System Description field appears; add further system details there.
- Optionally, under Description, add a description for the profile.
The Default field is not currently functional.
- Select Next. The second page of the wizard opens.
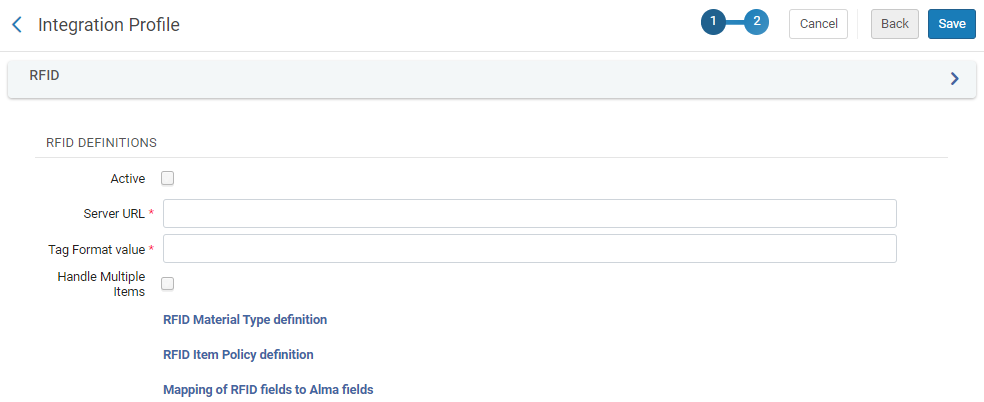 Integration Profile – Step 2
 - Select the Active checkbox to make this an active RFID definition. Note: the profile is inactive by default.
- Under Server URL, enter the URL for the RFID system to which your RFID device is attached, as follows:
- For 3M™ RFID Staff Workstation (Model 896): http://localhost:5000/TagService
- For Bibliotheca: http://localhost:5000/BibliothecaRFIDPadService.svc
- For Nedap and Seret: If NGINX isn’t needed, you can link directly to the RFID driver, e.g. http://localhost:1801
- For Nedap with NGINX: http://localhost:5000/NedapRfidWebService.asmx (and the NGINX on localhost should proxy to the main server)
- For MK Solutions: http://localhost:4039/mkStaffStation_Alma
- For other integrations that support one central server which then proxies the requests to the readers: https://server-address:port/path (must be https)
For additional information, see Alma – RFID Integration in the Developers Network.
- For 3M - 896 only, the Tag Format value field appears. Contact your RFID supplier for the relevant tag format for the device and enter it in this field.
- Select Handle Multiple Items to accept multiple items on the RFID reader.
- If the System (field on the previous page) is Other, the Item Information Update option appears. Select this option to enable Alma to update item information on RFID tags when they are updated in Alma.
- Configure and/or review the following definitions:
- The Nedap system is used only for check in and check out and does not allow updating the tag itself. Therefore, the mapping definitions are unavailable for Nedap RFID profiles.
- When Other is selected in the System field on page 1 of the integration profile, the Item Information Update field appears. In this case, the definitions appear only after selecting the check box.
- If IPs need to be configured for the RFID readers, the reader IPs need to be configured on the circulation desk configuration as well, for example when working with Nedap, or with some RFID vendors that integrate with the Alma Other RFID Integration profile type. See Adding a Circulation Desk.
- RFID Material Type Definition (see the Configuring the RFID Material Type Definition section below)
- RFID Item Policy Definition (see the Configuring the RFID Item Policy Definition section below)
- Mapping of RFID Fields to Alma Fields (see the Mapping the RFID Fields to Alma Fields section below)
- Select Save.
Configuring the RFID Material Type Definition
- On the Integration Profiles List page (Configuration Menu > General > External Systems > Integration Profiles), open your RFID Integration Profile and select the RFID Material Type Definition link. The RFID Material Type code table page appears.
In a Network environment, the Manage Table in Network options appear.
 RFID Material Type Code Table Configuration in the Network - Manage Table in Network Button
 RFID Material Type Code Table Configuration in the Network - Save and Distribute/Stop Network Management
 - In the Create a New Code Table Row section, select one of the existing material type codes from the Code drop-down list, enter the vendor's RFID code for the Description (mandatory), and select Add Row. Continue adding rows for each Alma material type to which you want to assign a vendor value for the RFID reader.
 RFID Material Type Rows AddedIf you need to create a new material type in addition to what is provided in the drop-down list, use the Physical Material Type Code Table configuration options. See Configuring Physical Item Material Type Descriptions for more information.
 - Select Customize (or Save if you have previously edited this code table).
Configuring the RFID Item Policy Definition
- On the Integration Profiles List page (Configuration Menu > General > External Systems > Integration Profiles), open your RFID Integration Profile and select the RFID Item Policy Definition link. The RFID Item Policy code table page appears.
In a Network environment, the Manage Table in Network options appear.
 RFID Item Policy Code Table Configuration in the Network - Manage Table in Network Button
 RFID Item Policy Code Table Configuration in the Network - Save and Distribute/Stop Network Management
 - In the Create a New Code Table Row section, select one of the existing item policy codes from the Code drop-down list, enter the vendor's RFID code for the Description (mandatory), and select Add Row. Continue adding rows for each Alma item policy to which you want to assign a vendor value for the RFID reader.
 RFID Item Policy Rows Added
 - Select Customize (or Save if you have previously edited this code table).
Mapping the RFID Fields to Alma Fields
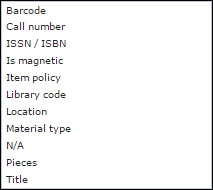
If you need to configure RFID Item Update so that the Library and Location are not sent, put value N/A.
Configuring Library Codes for RFID
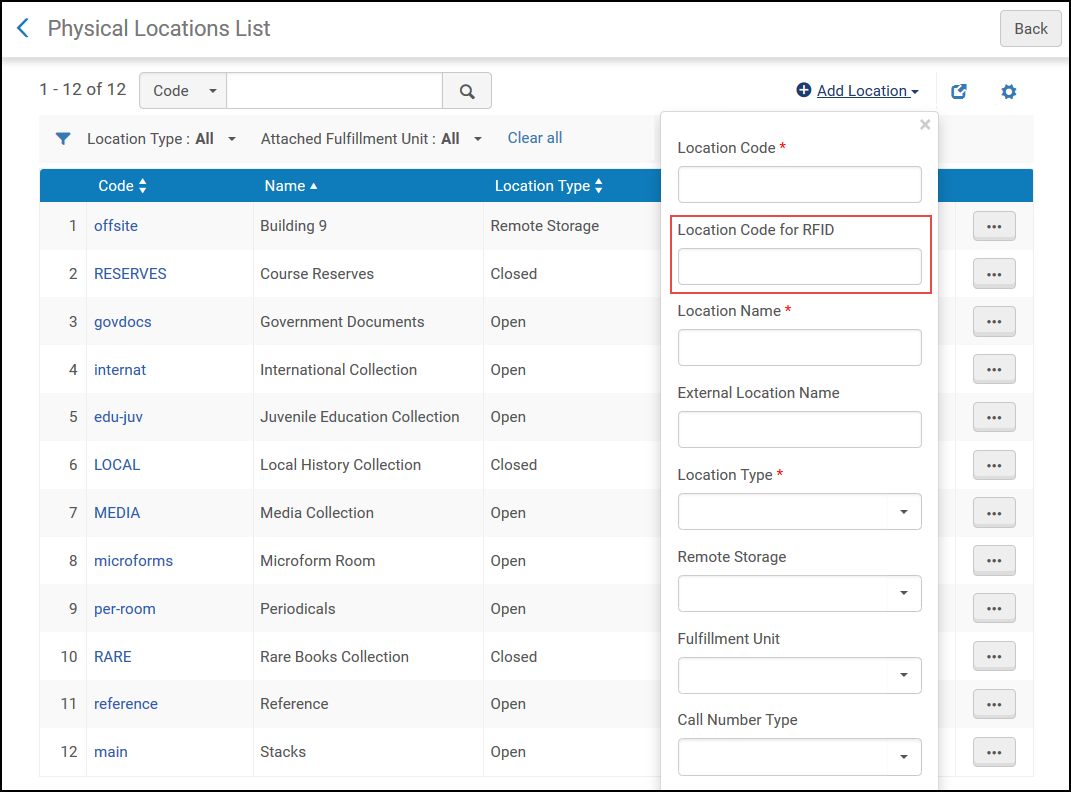
- The Code for RFID field needs to be configured in order to write RFID content.
- This field is only visible when the RFID connection is active as described in Using RFID to Read an Item Barcode.

Configuring Location Codes for RFID
Transaction Log
Scanning Multiple Items
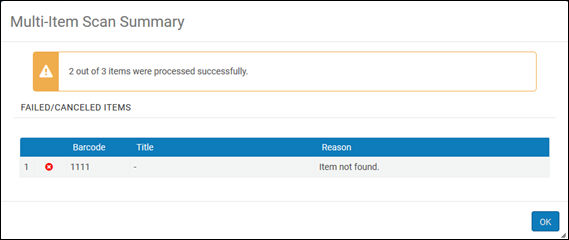
When the RFID button is pressed, the items on the RFID pad will be processed. When processing is complete, a summary confirmation popup will appear, detailing how many items were handled successfully, and presenting any alerts that came up during the scan. If all items are successfully processed, a success message is displayed. If an item requires action, the process is paused until you select Confirm or Cancel. Selecting Cancel only stops processing for the specific item. When multi-scan processing is completed, a summary of the processing is provided. Items that require an action appear under Failed/Canceled Items. Items that do not need action appear under Items Requiring Attention.
You can use the RFID button on the following pages when there is either a single item or multiple items on the RFID pad:
- Scan in items
- Scan in items > change item information - On this tab, multiple items can be processed as stated above with the exception of the following circumstances;
- When a new barcode is created.
- When the RFID integration profile is configured to update items and Update RFID is selected on the tab.
- Manage patron services > Loans tab
- Manage patron services > Returns tab
- Return Items
For Bibliotecha, this is only supported when using staffConnect Link (using the Other type in the integration profile) or D-Tech. For additional assistance with StaffConnect link, contact support-ch@bibliotheca.com.For a list of supported RFID vendors, see Alma - RFID Integration on the Developer Network.

