
Configuring Physical Locations
This page covers the basic configuration of physical locations.
For links to all the main fulfillment documentation pages, see Fulfillment.
- General System Administrator
- Fulfillment Administrator

- Duplicate a physical location (Duplicate in the row actions list and edit the relevant fields)
Modifying a physical location may have implications for several functional areas in Alma. Ensure that you properly coordinate any changes that you make.
Adding a Physical Location
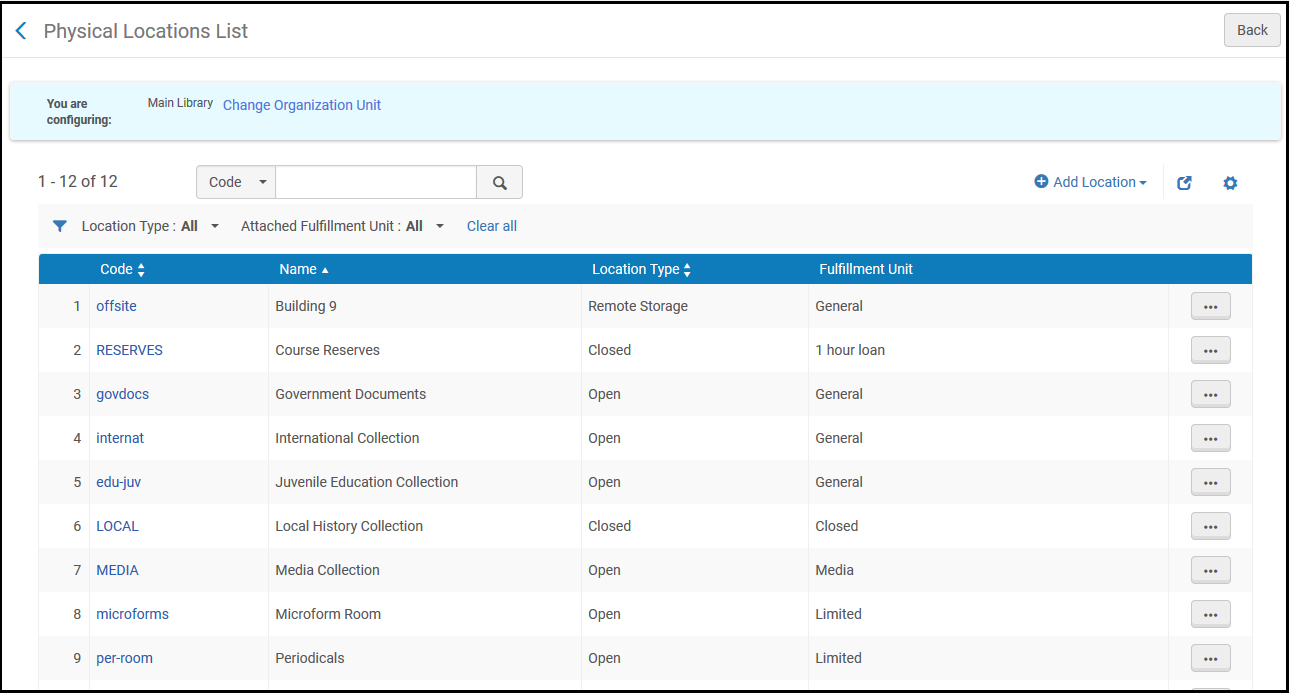
- On the Physical Locations List page (Configuration Menu > Fulfillment > Locations > Physical Locations), select Add Location. A dialog box appears.
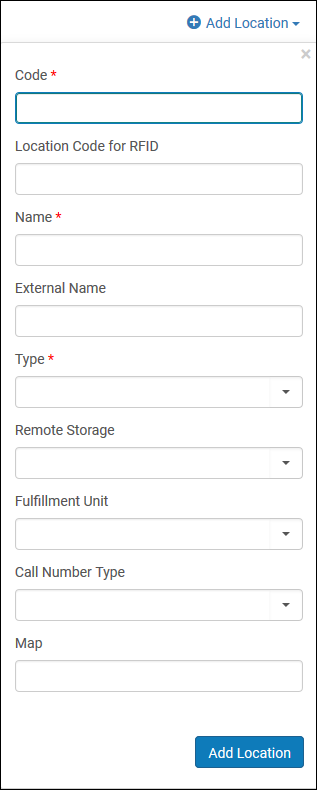 Add Location Dialog Box
 - Enter the location code (up to 10 characters, no commas allowed) and name, which are both required fields, as well as the external location name, if applicable. External Name is the name to be displayed to patrons in Get It for holdings in the location. If empty, the name field will be displayed.
A location cannot have special characters, such as quotes ('), in the name. Use alphanumeric characters, hyphens, and underscores.
- From the Type list, select the type of the location. Distinguishing between different types of locations enables you to filter by location type on the Physical Locations List page.
The Remote Storage field only needs to be populated when the Type field is marked as Remote Storage. If you do enter an option into the Remote Storage field, this will change the Workflow steps into Awaiting Remote Storage instead of Pickup from Shelf.
- Open – A location that can be accessed by patrons, who can remove an item from the location and then check out the item.
- Closed – A location that is accessible by library personnel only and is not accessible to patrons.
- Remote Storage – A remote storage location, which is similar to a closed location, except that it is located off-site. Retrieving of an item from a remote storage location may take longer than retrieving an item from a regular closed location.
- Unavailable – A location from which items are considered unavailable for calculating the general electronic services in Primo. Note that this field has no other functional significance. For an understanding of how this selection works in conjunction with general electronic services and an example, see the options described for the Disable service field in the Service Details dialog box (under Configuring General Electronic Services).
- Not in Library – This location indicates that a copy belonging to the instructor is currently in that instructor's possession. It will be brought to the library at a later time.
- If the location has a remote storage facility, from the Remote storage list, select a remote storage option for the location. Note that a location of any type may be associated with a remote storage facility.
- From the Fulfillment unit list, select a fulfillment unit for the location. The fulfillment unit defines the policy rule to be applied when circulating items from this location. For details, see Physical Fulfillment.
- From the Call number type list, select the type of call number used for holdings in this location, such as the Library of Congress classification, the Dewey Decimal classification, or the National Library of Medicine classification.
The type of call number selected here becomes the default for holdings records attached to this location. If this field is left blank, the value of the call_number_type parameter is used as the default. When a new holding record is attached to the location, if the call-number type is not specified in the record or in the record template, the default type is used. If an item that already has a call-number type defined in its holding record is moved to this location, whether the call-number type is changed depends on the value of the update_call_number_type_upon_item_move parameter. See also, use_space_as_call_number_type; Working with Holdings Records.
- Specify the URL of a map that can assist patrons in finding the location.
- Select Add Location to add the location.
It is recommended to attach the new location to a circulation desk, to allow for handling items (e.g., picking from the shelf, checking in and out, reshelving). This is done by editing the location (see below), or by editing the relevant circulation desk, and then attaching the location to it.
Editing a Physical Location
- On the Physical Locations List page (Configuration Menu > Fulfillment > Locations > Physical Locations), select Edit in the row actions list for a location.
- On the Edit Physical Location page, in the Physical Location Details section, edit the location information as required. For information on this page, see Adding a Physical Location:.
- In the Physical Location Circulation Desks List section:
- To create a new circulation desk and associate it with the physical location, select Attach New Circulation Desk. For additional information, see Adding a Circulation Desk.
- To associate an existing circulation desk with the physical location, select the circulation desk from the drop down list, select the services provided by the circulation desk to the physical location, and select Attach Existing Circulation Desk. For additional information, see Adding a Circulation Desk.
- In the Holdings Configurations section:
-
In Accession placement, select the MARC subfield that you want to use for the accession number. When you do this, you make the Accession Number field mandatory when creating a holdings record and cause this subfield to be indexed, and thereby searchable in the repository. Your options are:
- Piece designation (852 $$p)
- Call number (852 $$h)
- Shelving location (852 $$j)
- None (the default option)
- In the Call number type, select the method in which the call number is generated.
- Select Suppress from discovery to suppress the publishing of items in this location to the discovery interface (Primo and Libraries Australia). Note that if the suppressed item is the only item linked to the title, the title will be suppressed provided the suppressBibWithSuppressedHol parameter (see Configuring Other Settings (Resource Management)) is set to true.
- If a record has only one item that is suppressed on the location level, it is still published from the Network institution as New/Updated, but without the AVA field. To make the records not retrievable in Primo, suppress the records manually.
- If the Locations Ordering Profile has been defined to use the Use Custom Sorting option, (see 'Configuring the Order of Locations in Primo Search Results'), the priority of each location within the library can be determined by configuring the 'Discovery Priority' attribute of the location. All 'Display First' locations of the same library will be sorted before other locations of the same library, and all 'Regular Display' locations of the same library will be sorted before 'Display last' locations of the same library. Locations within the same Discovery Priority will be sorted alphabetically.
-
- The Host Location Configurations section is available only for the Network Zone and its members that work in Network Zone topology. Stand-alone institutions do not have this section enabled.
Select this checkbox if you want to configure joint use of inventory in a Consortia, where one institution can order for another institution in the Network Zone. For details, see Joint User of Inventory in Consortia.
If you are not interested in configuring this workflow, leave the checkbox clear. - Select Save to store the changes you made to the physical location.
If the external location name or Suppress from discovery status has been changed, for Primo a set of physical titles related to this location must be republished. For Primo VE, you need to run indexing on the set of records using the Recalculate Local Resource Types Job (see Manual Jobs).
Duplicating a Physical Location
- On the Physical Locations List page (Configuration Menu > Fulfillment > Locations > Physical Locations), select the row actions menu for the physical location to duplicate.
- Select Duplicate in the row actions menu.
Deleting a Physical Location
- On the Physical Locations List page (Configuration Menu > Fulfillment > Locations > Physical Locations), select the row actions menu for the physical location to delete.
- Select Delete in the row actions menu.
A location cannot be deleted if it has inventory associated with it (i.e., items with that location code). You must move all items to another location before you can delete the location.